Each year I like to do some annual maintenance tasks on my guns and gear to start the season off with everything ready to go.
Batteries
Replace batteries in optics, flashlights, smoke detectors, and anything else that uses batteries. It’s easier to do all of them in one pass instead of being surprised by a dead or dying battery later. That includes emergency gear that uses batteries in the car get-home bag, and batteries in other devices like outdoor security cameras, motion activated lights, weather stations and other sensors.
Full Pistol Cleaning and Inspection
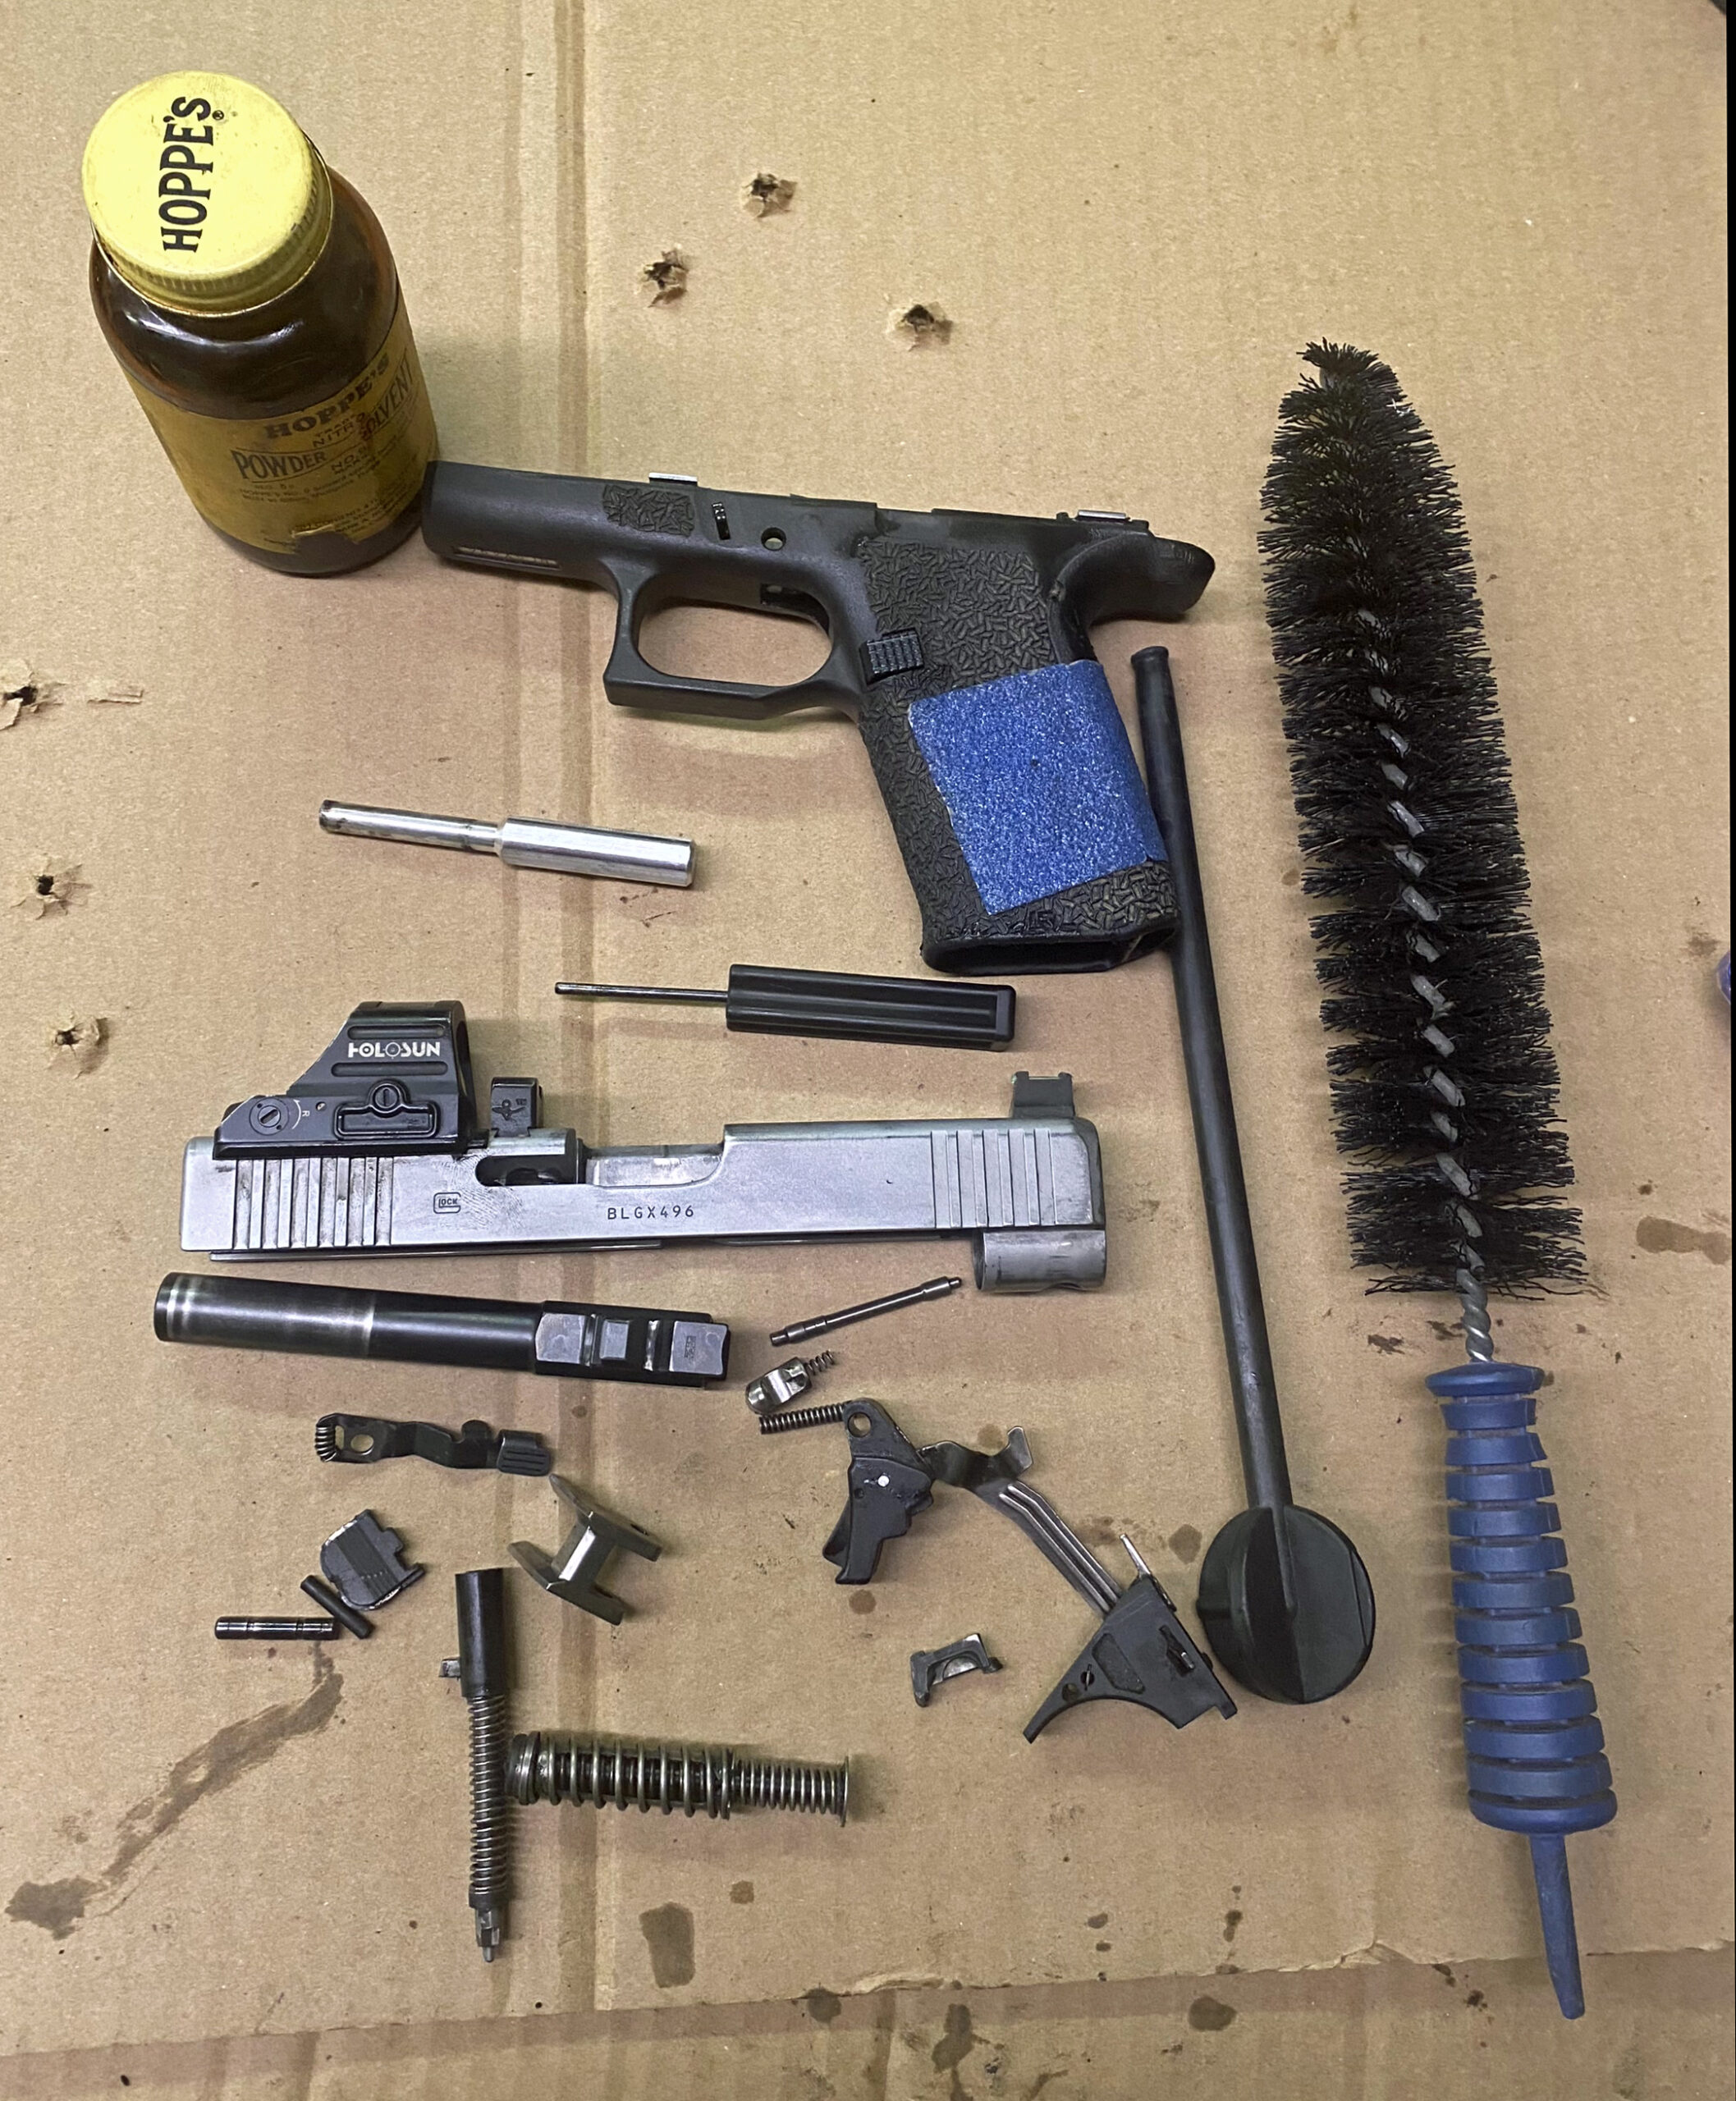
Take the gun as far down as you know how, or spend some time learning how to take it down beyond simple field cleaning. Extractors and strikers need particular attention. If you don’t have a spare striker string or whole spare striker assembly and a spare extractor on hand, this is a good time to order them to have in your range bag. Also shown in the pic is a magazine cleaning brush and a squib rod – two more items that should be in every shooter’s range bag.
Magazine Maintenance
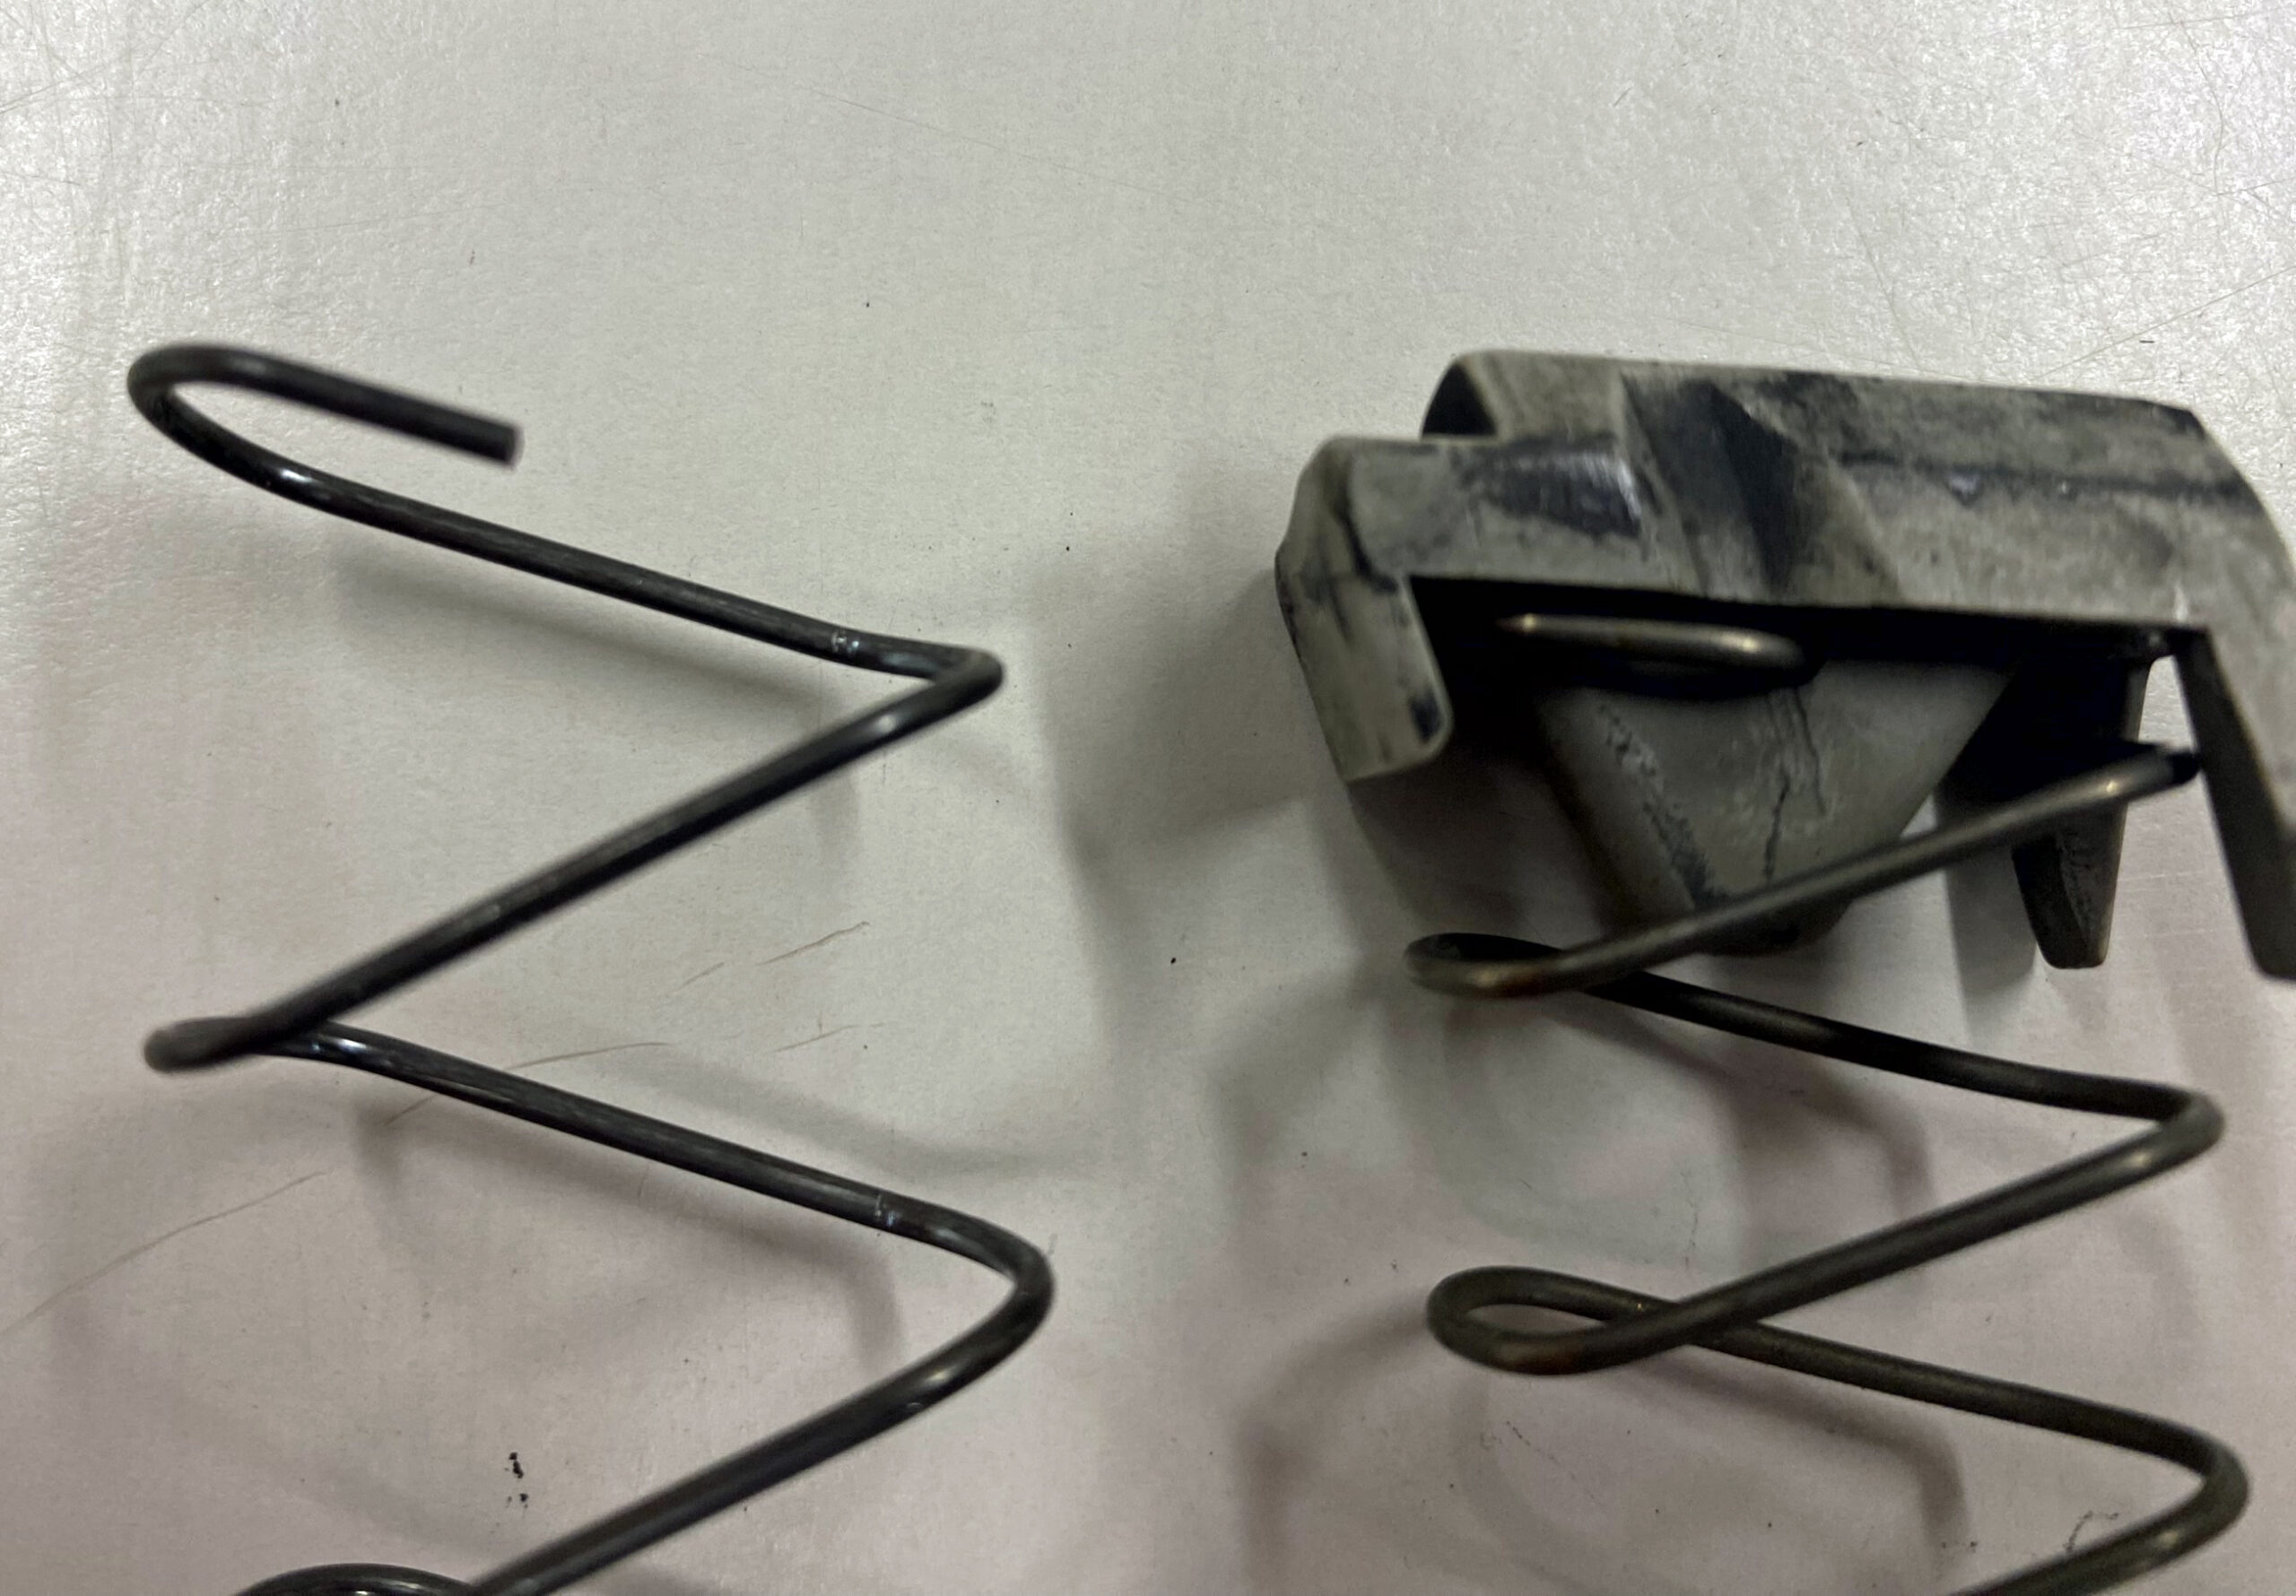
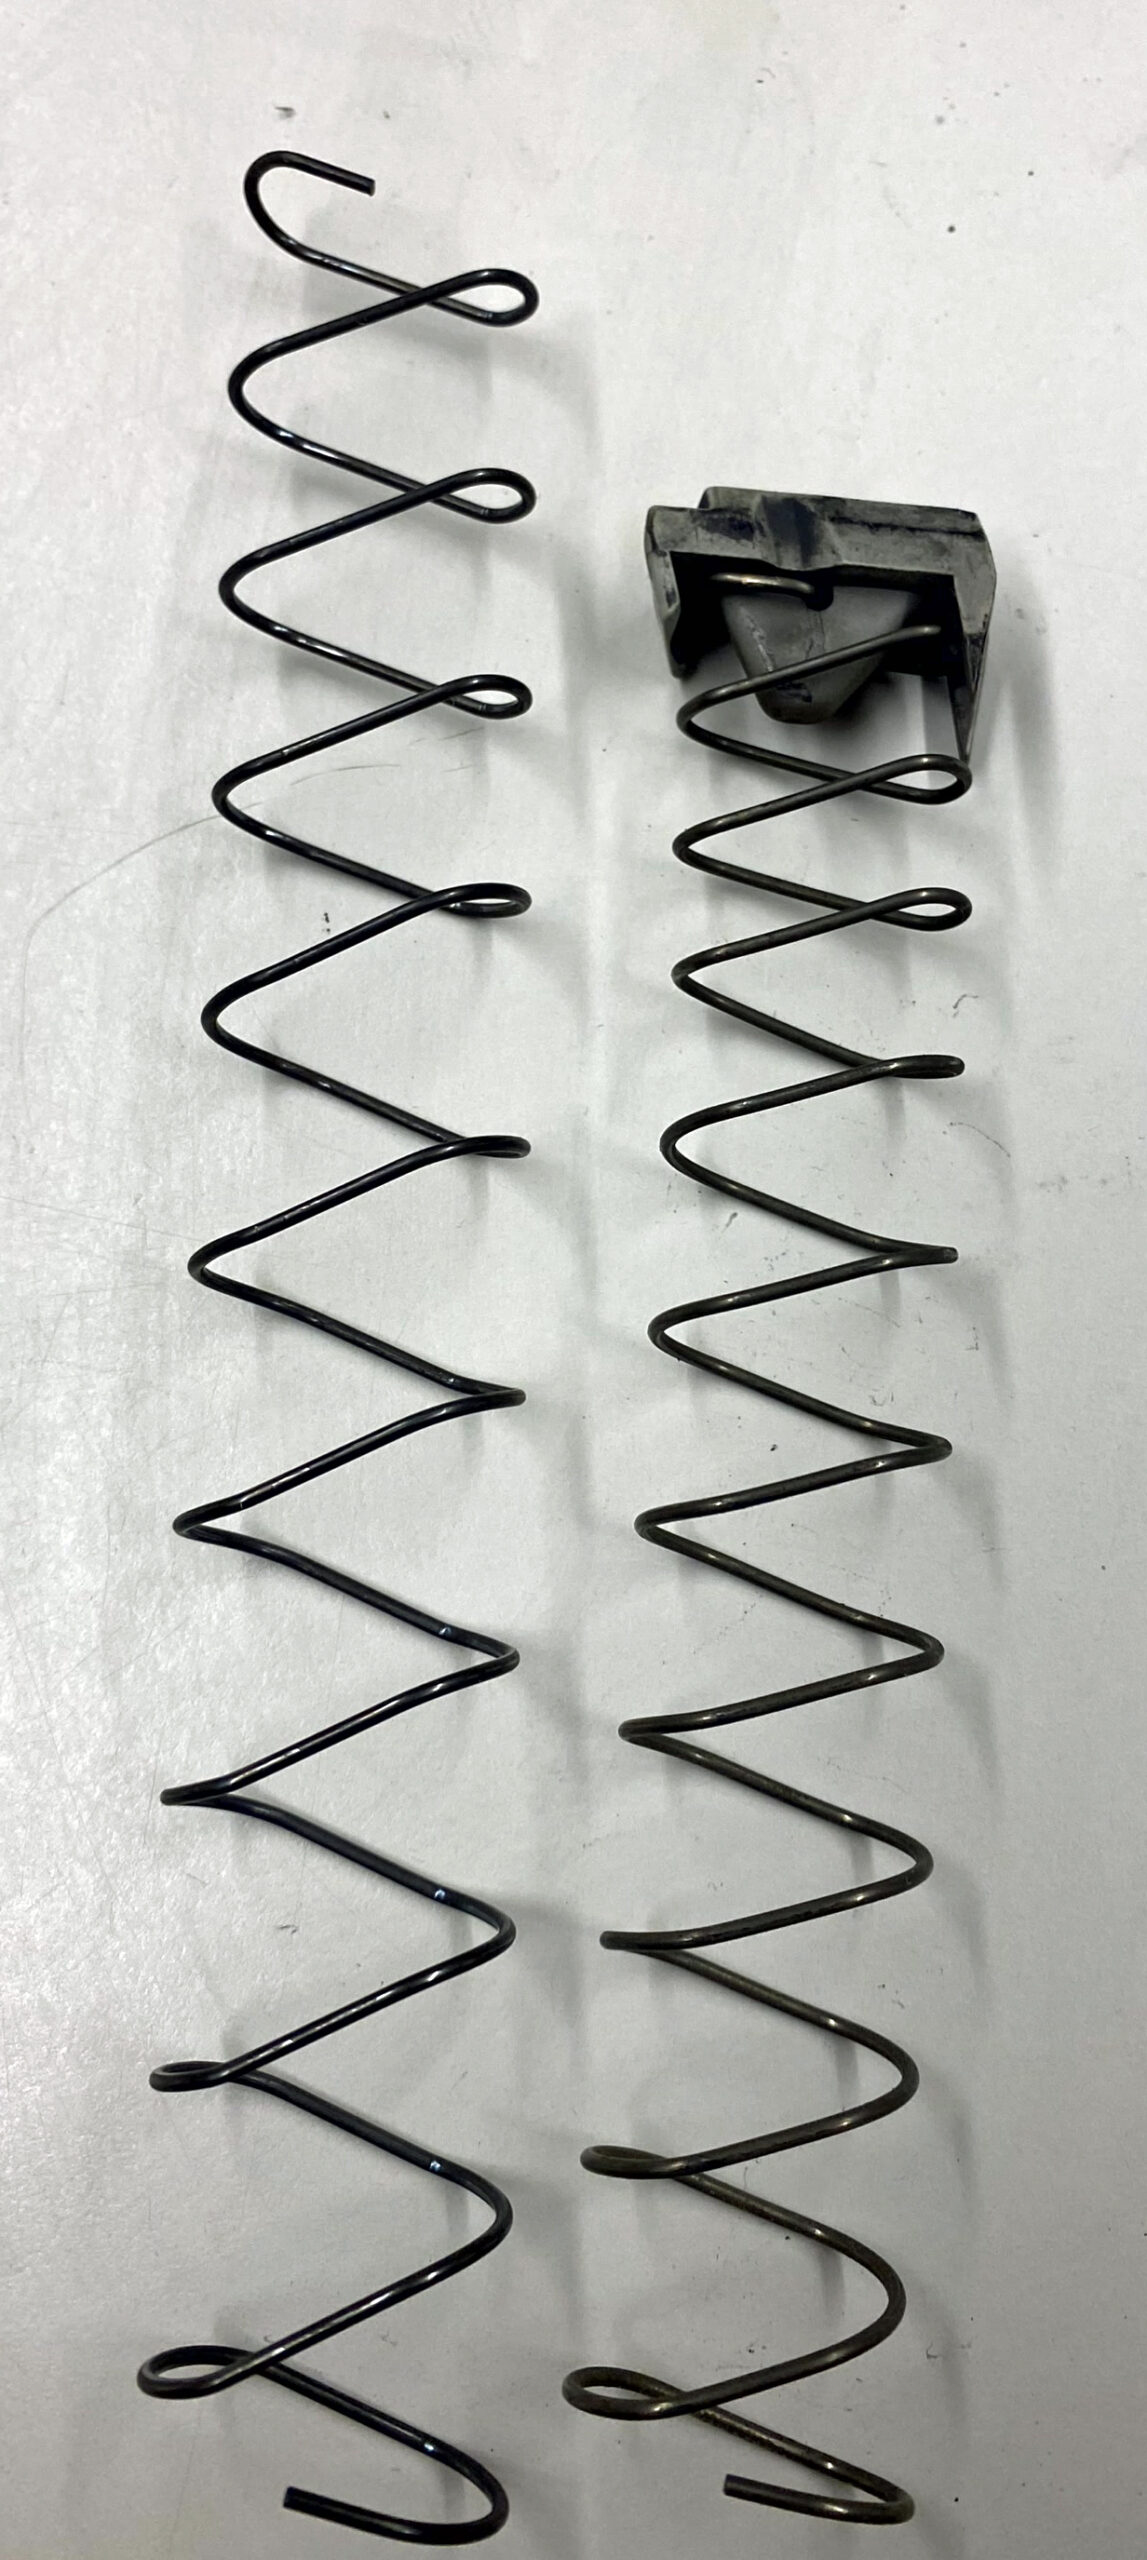
Find all the magazines you have for that particular handgun. Take them apart. Inspect the followers for wear. Followers are plastic and the features of the follower, for example the shelf that causes the slide lock lever to work properly, can wear out from use. In some cases, the manufacturer may make modifications to the spring and follower design to solve problems in older version of that model. What’s shown below is the difference between an older M&P spring and a newer one. Note one variant of the spring has an additional hook at the top that engages with the new follower design. Last year I ended up replacing all the springs and followers in all of my M&P magazines to bring them up to current specs.

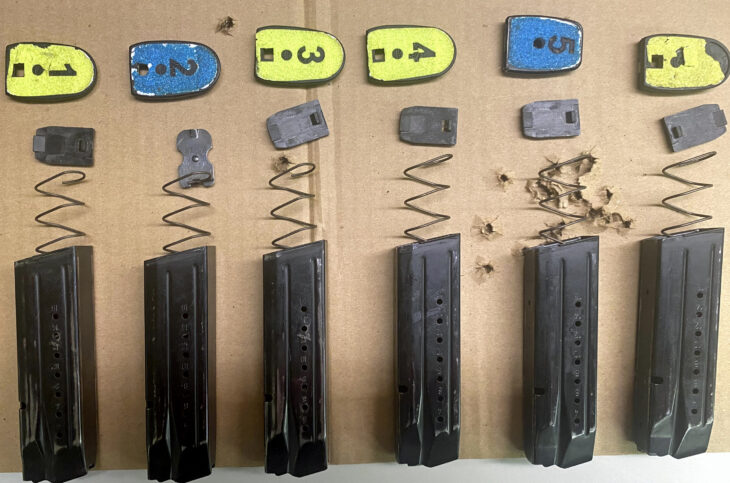
I mark and number all my pistol magazines so I can tell them apart. Otherwise, if you start having malfunctions, particularly with feeding and slide locking and magazines ejecting properly, it’s difficult to troubleshoot whether the problem is gun or magazine related. What I did for the picture above is check all 6 magazines, looking for springs that were short (3 coils should be sticking out).

If you run +1 or +2 base pads on your magazines (for example, to give your magazines the maximum length allowed for a particular competition division), the factory springs may not be long enough or strong enough for the additional capacity.
Magazines springs do wear out, not from being compressed for an extended period (if the mag is left loaded) but from being cycled as rounds are loaded and unloaded during normal use. If you have mag springs that have fewer than 3 coils sticking out, those should probably be replaced.
I prefer to load magazines that hold more than 10 rounds down 1 from the factory “marketed” capacity. When mags are loaded to maximum capacity, that last round often causes the magazine to have no “give” at the top. The rounds don’t push down easily from the top. This can lead to feeding problems, and most commonly, difficulty getting the mag to insert and lock in. This can catastrophic when doing a speed reload, changing magazines with a round chambered (gun not at slide lock). I’ve seen people at matches and in classes insert the mag, using the same force they would for a slide-lock reload, fail to get the mag fully seated, and have the mag fall out of the gun under the recoil of firing the first shot after the reload. And I’ve seen guns fail to feed the first round out of the ‘overloaded’ magazine.
Particularly when new magazine springs are used, I’ve seen far fewer problems running a 17 round mag with 16, or a 15 round mag with 14, and I lose no sleep over trading one less round in the gun for better reliability and reduced risk of the problems that I’ve seen occur with overfull magazines. Very specifically, everyone that I’ve heard malign the Shield Arms S15 Glock 48 magazines as ‘unreliable’ has admitted to running them jammed full with 15, and no one that has taken my advice to run them with 14 has reported any feeding or reliability issues with them.
Checking Zero After Reassembly
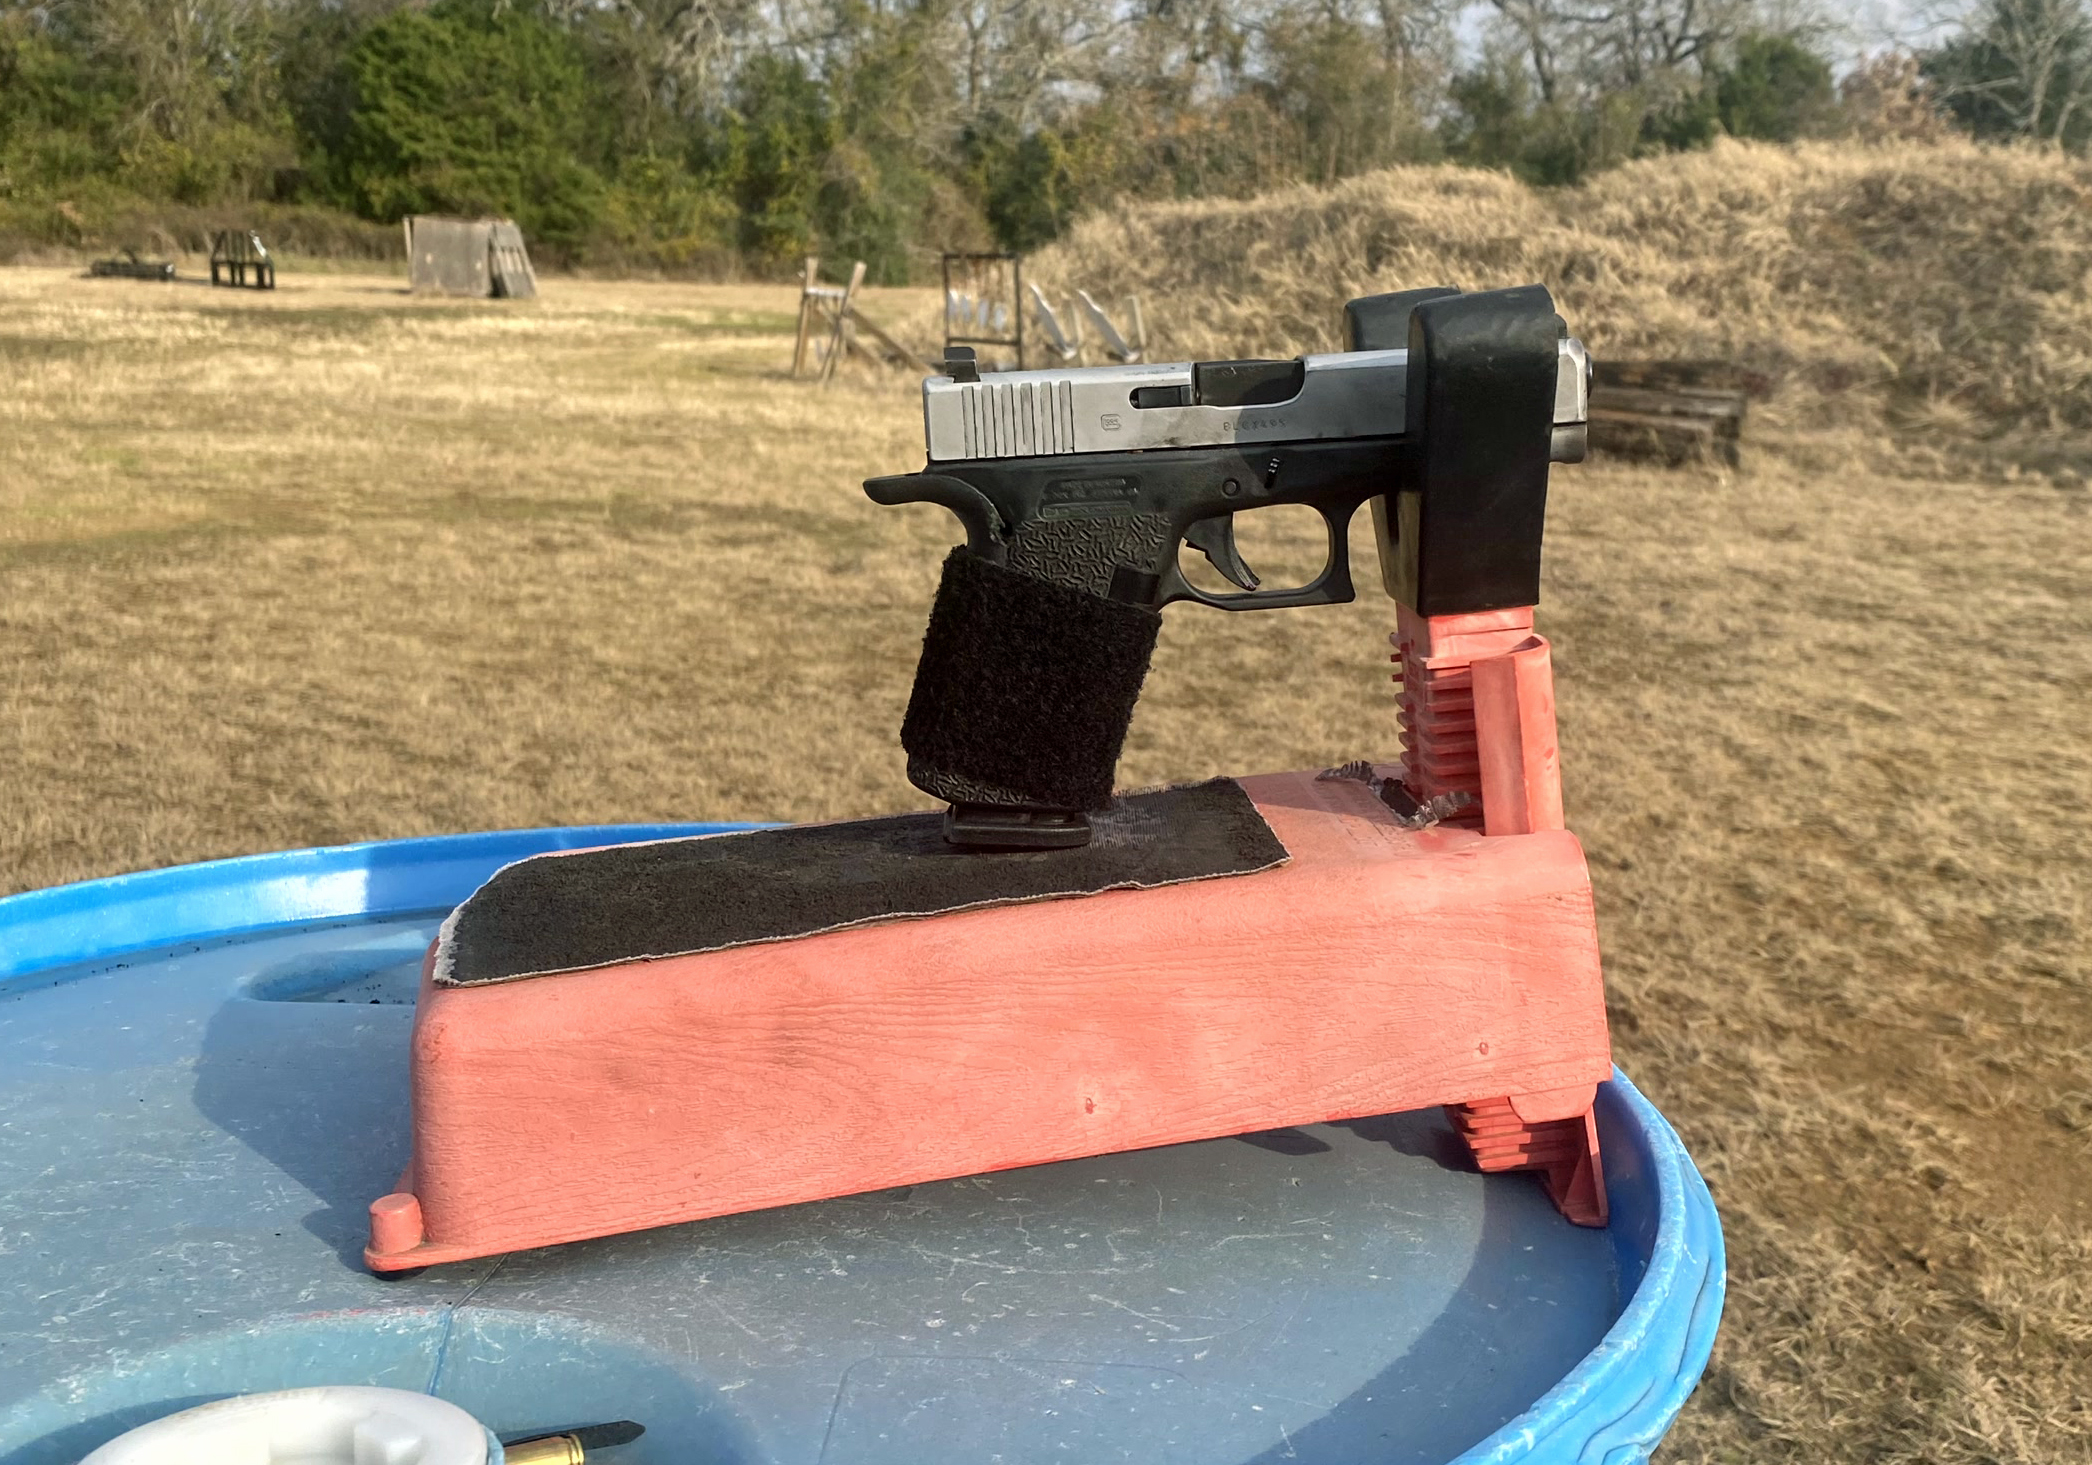
After the gun is cleaned and resassembled, particularly if optic screws are tightened, it’s a good idea to reverify the gun’s zero, with carry ammo or match ammo or whatever ammo is going to be used for the gun’s most important application. Most people attempt to “zero” their pistol from a two handed standing position, which introduces every possible user-induced error. I prefer to use an MTM pistol perch that supports the muzzle end of the gun. This provides the most stable platform and eliminates almost all user errors from the zeroing process. Resting the butt of the gun or your arms or hands on sandbags is not as good, if the muzzle end is left free to dip and move.
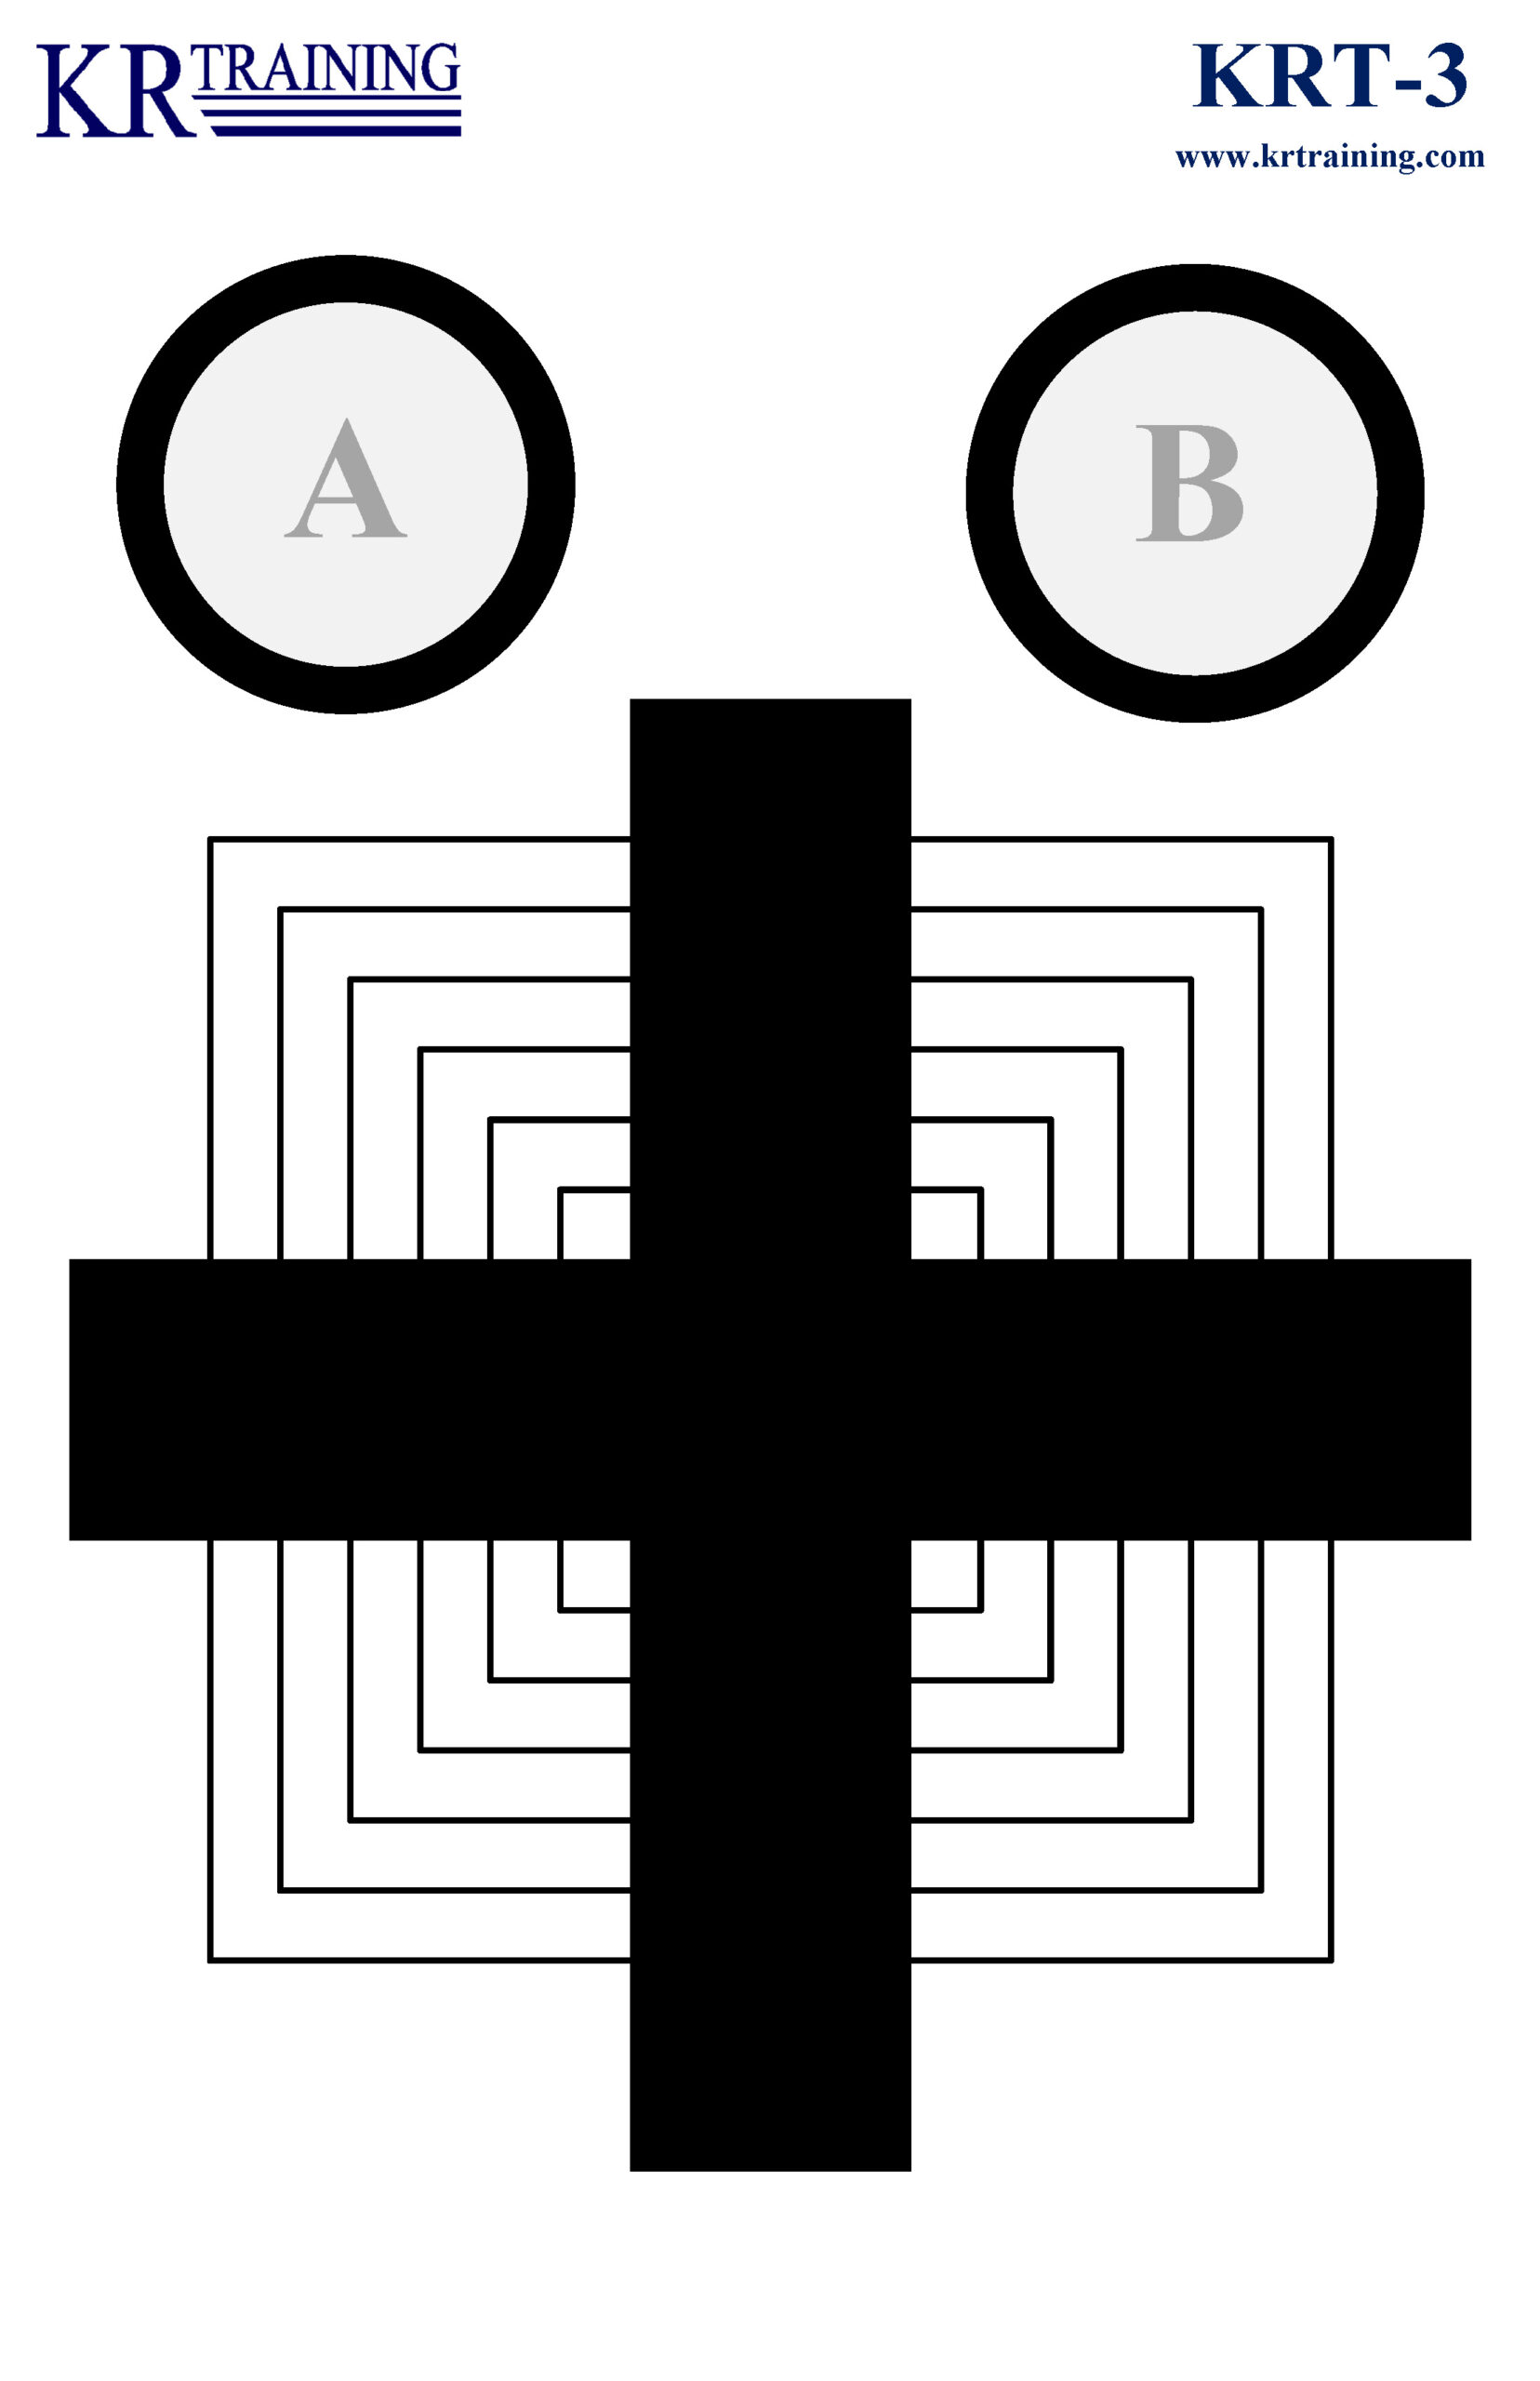
I prefer to use targets with lines or other features that give me a way to very precisely aim the gun at the same spot for each shot. The 5.5″ black blob of the B8 bullseye target works fine for red dot zeroing, for for irons, it’s easier to align vertical and horizontal edges of rear and front sights with a big plus sign, like we designed into the KRT-3 target (print on 11×17 paper)
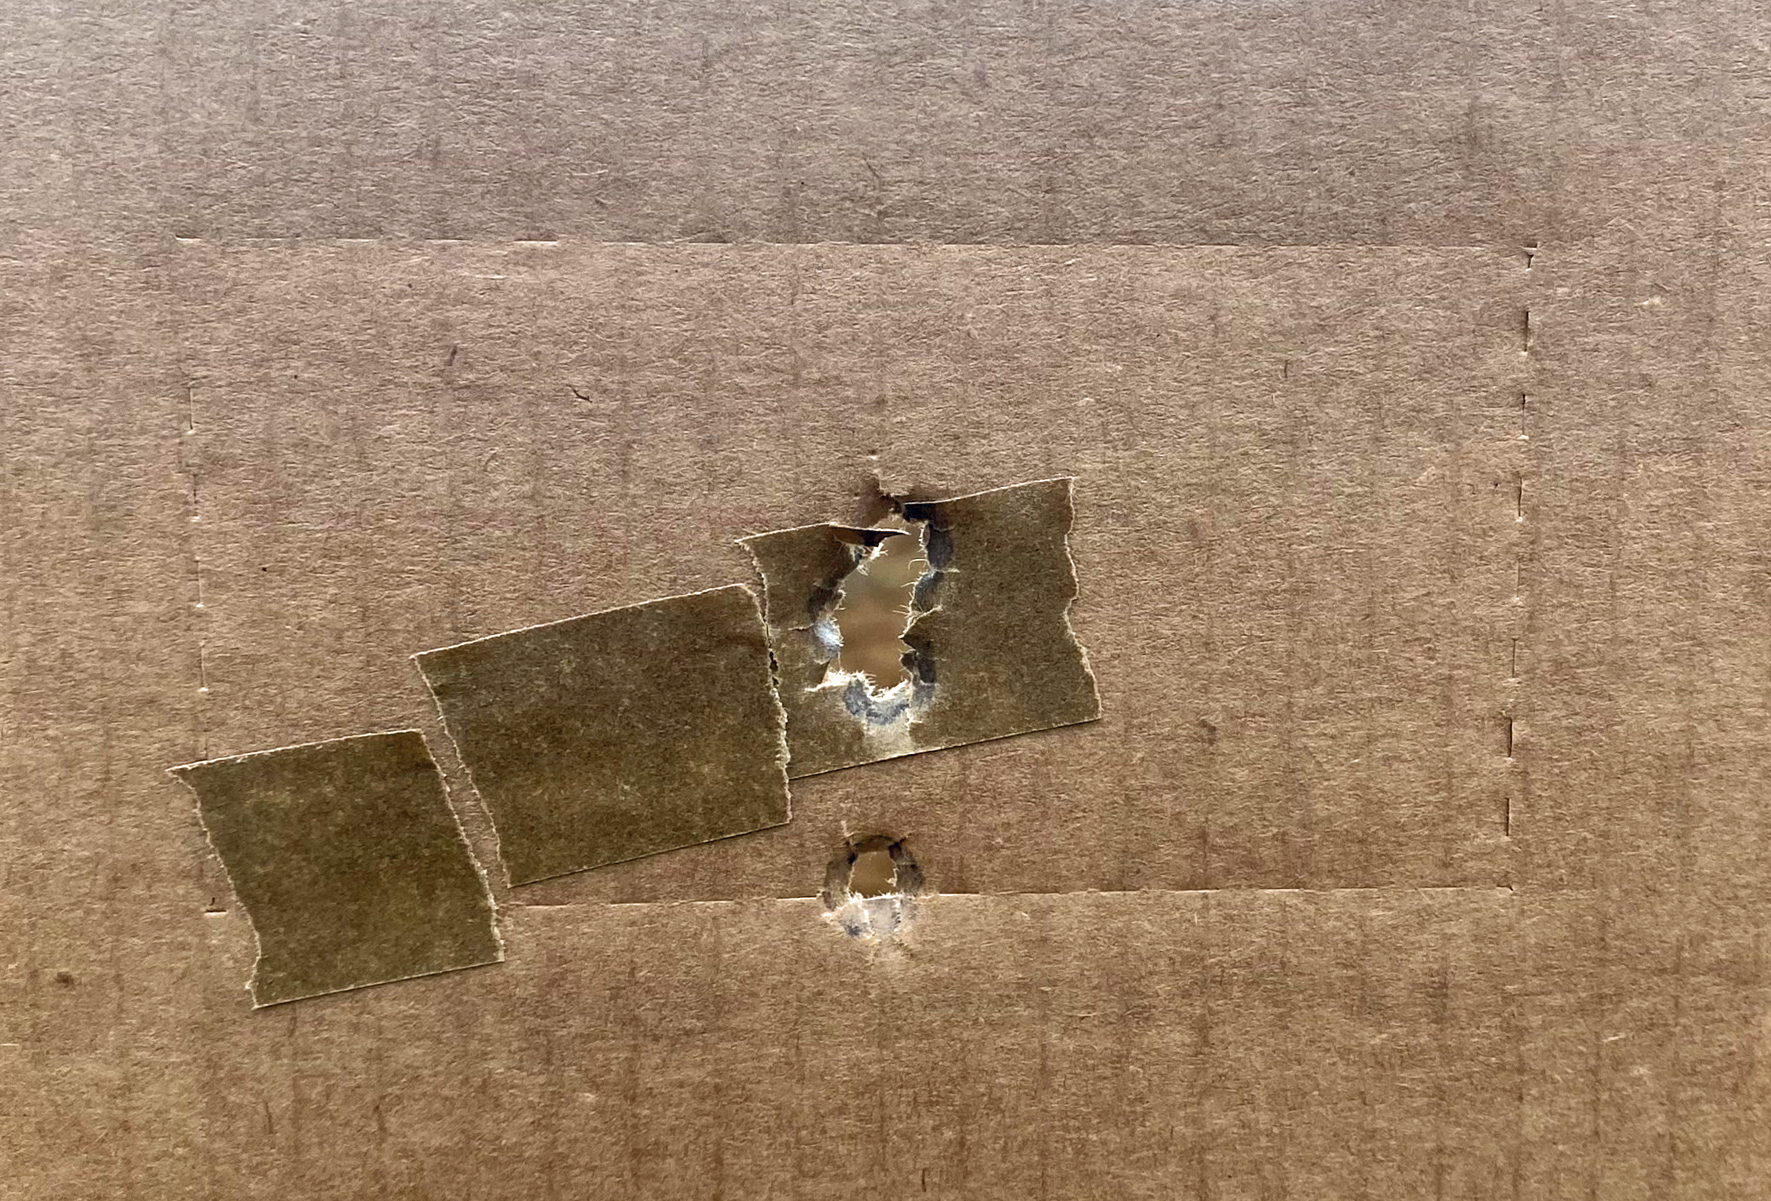
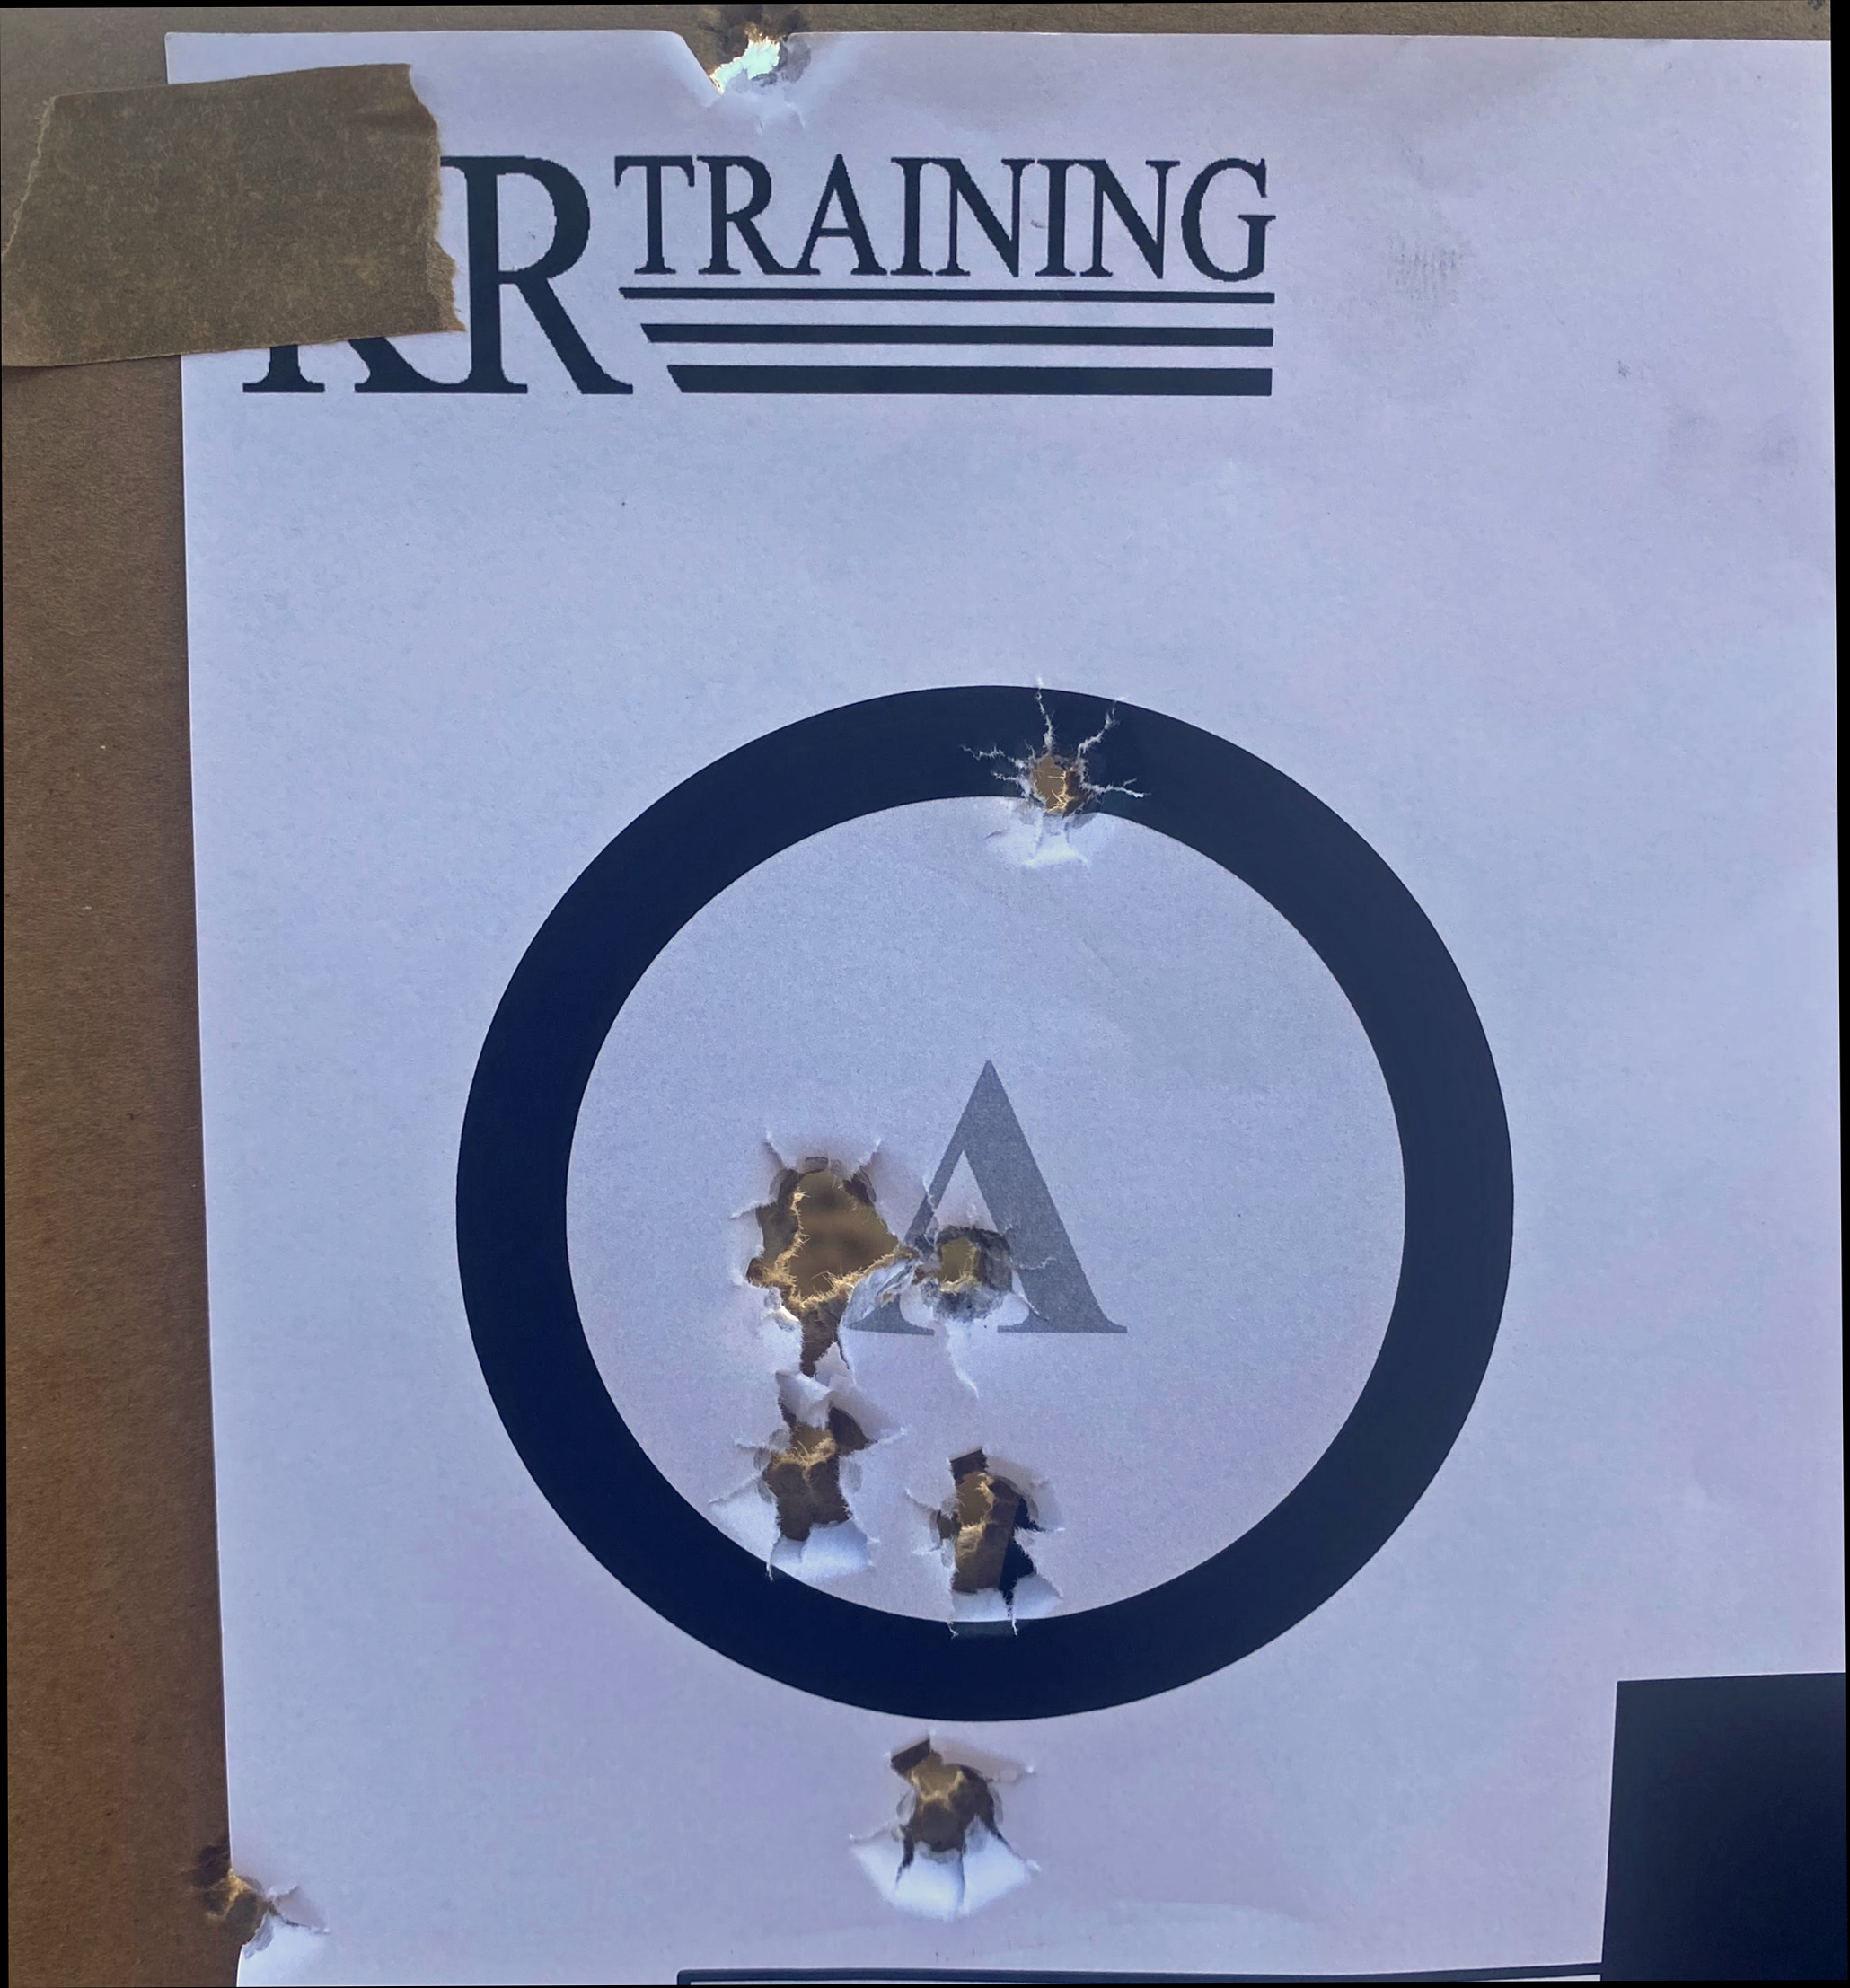
The group below was shot with the dot covering the letter “A”. I find it helps to turn dot intensity down when shooting groups. For this group, the dot was turned down so the “A” was visible through the dot. In this case the group showed that the gun was zeroed low and right after it was resassembled and tested with carry ammo.

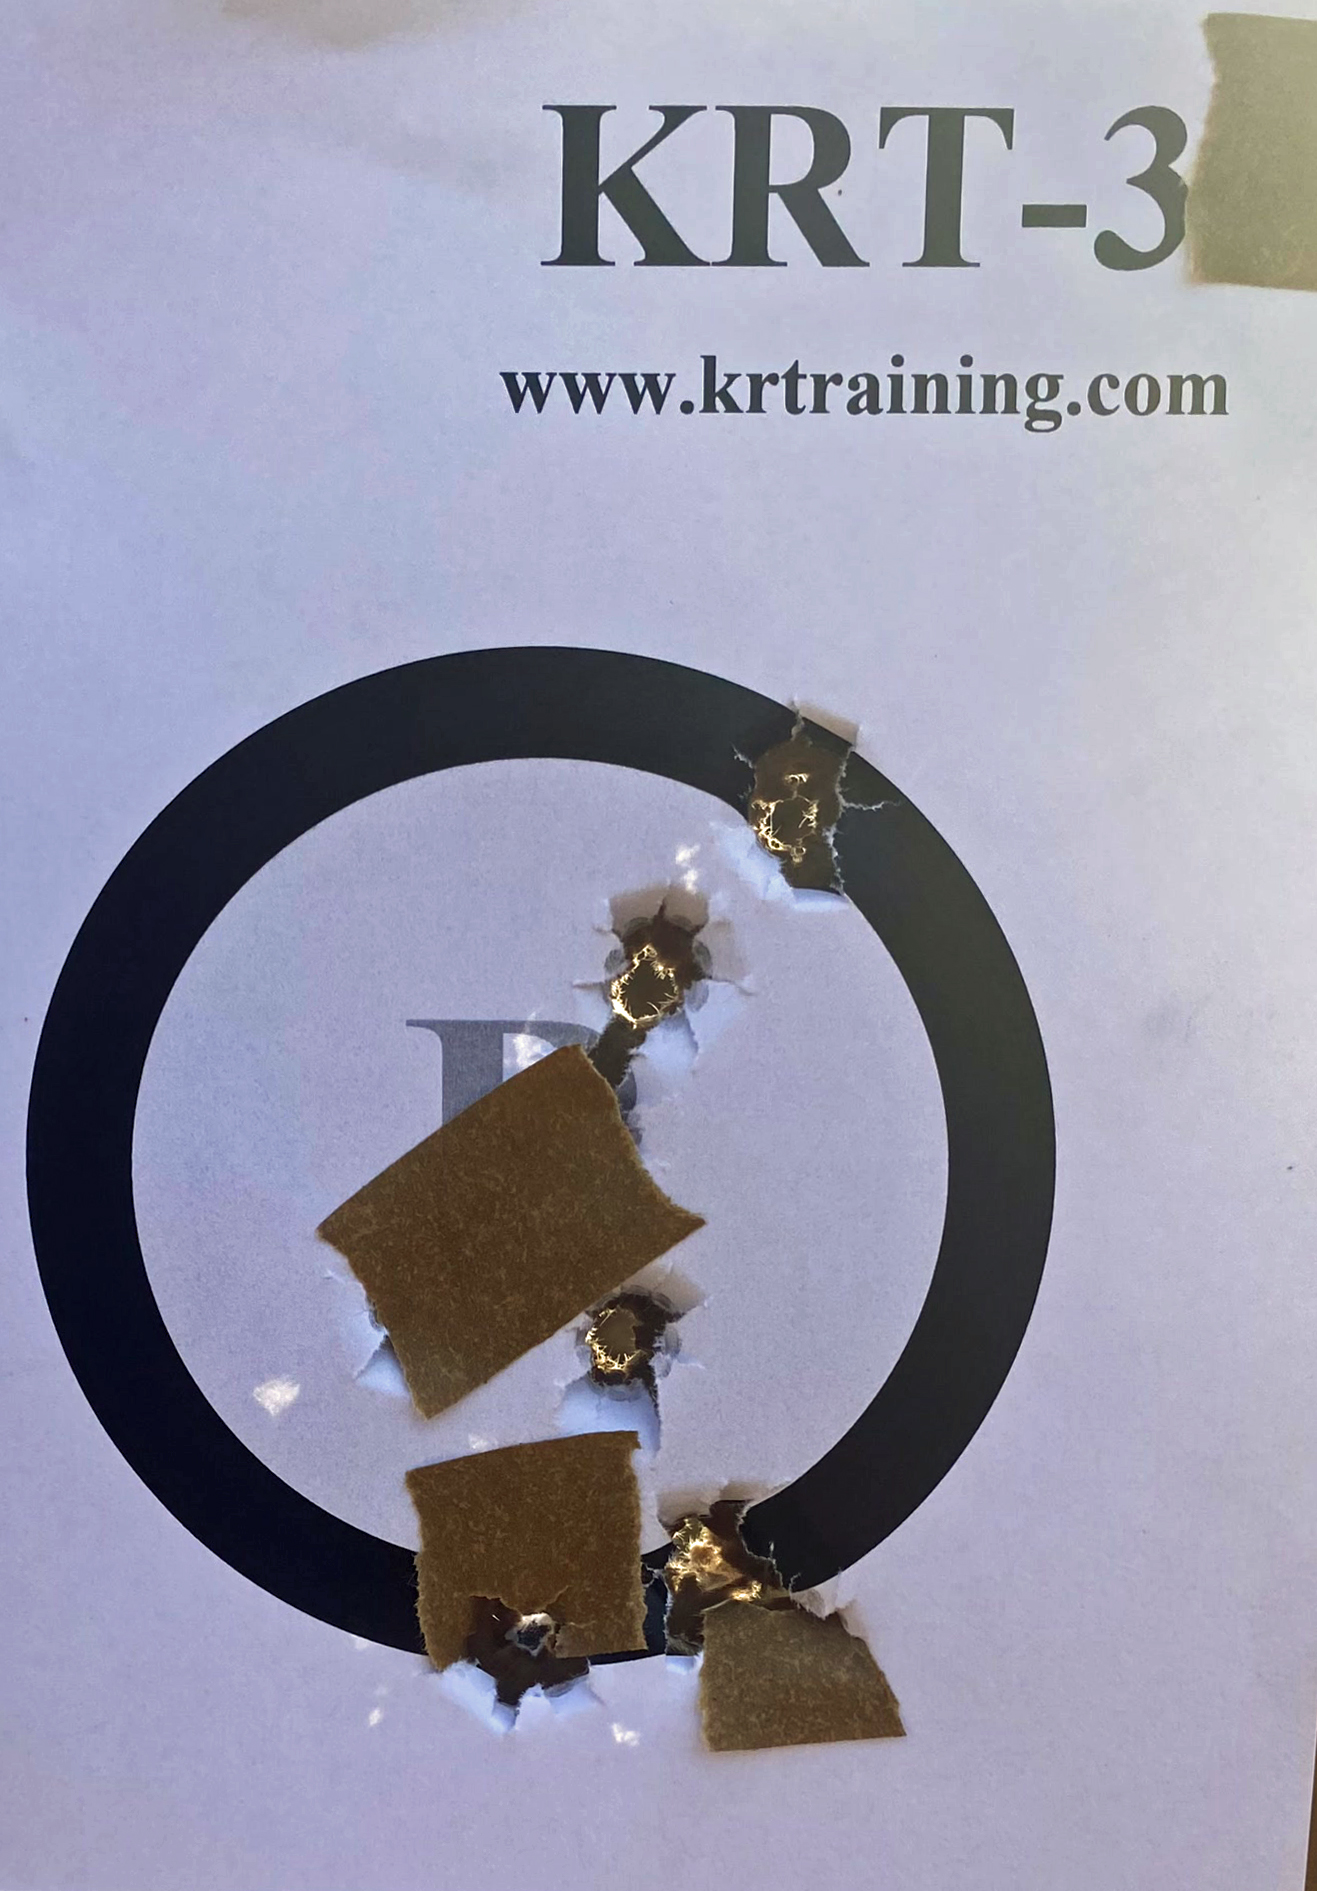
This was the final verification at 25 yards, using the small circle on the KRT-3. I prefer to zero my guns at 25 yards, using 10 shot groups, rather than the 10 yard zero favored by some red dot trainers. The 10 yard zero is easier and faster to run for a large firing line (or multiple relay class), and hides user errors from two handed standing better than a 25 yard zero. 10 yards is a good place to start but a high-confidence zero comes from properly benchresting the gun and shooting 10 shots from 25 yards.
Those that want more math and science related to group shooting should read this article.
Replace Your Carry Ammo
Using the ammo that’s been in your carry magazines for zeroing not only verifies that the gun is dialed in with that load, it also verifies that your gun runs reliably with it. After you shoot up the old carry ammo, it needs to be replaced with the same brand and exact load, otherwise anything you learned from shooting the old ammo and zeroing with it is no longer relevant. There are non credentialed “experts” online and a gun shops that will recommend bad ideas like mixing brands and bullet weights, and ball and hollowpoint rounds in your carry magazines for a variety of unproven, untested reasons. What professional gun carriers have done for decades is use one load in all their magazines.
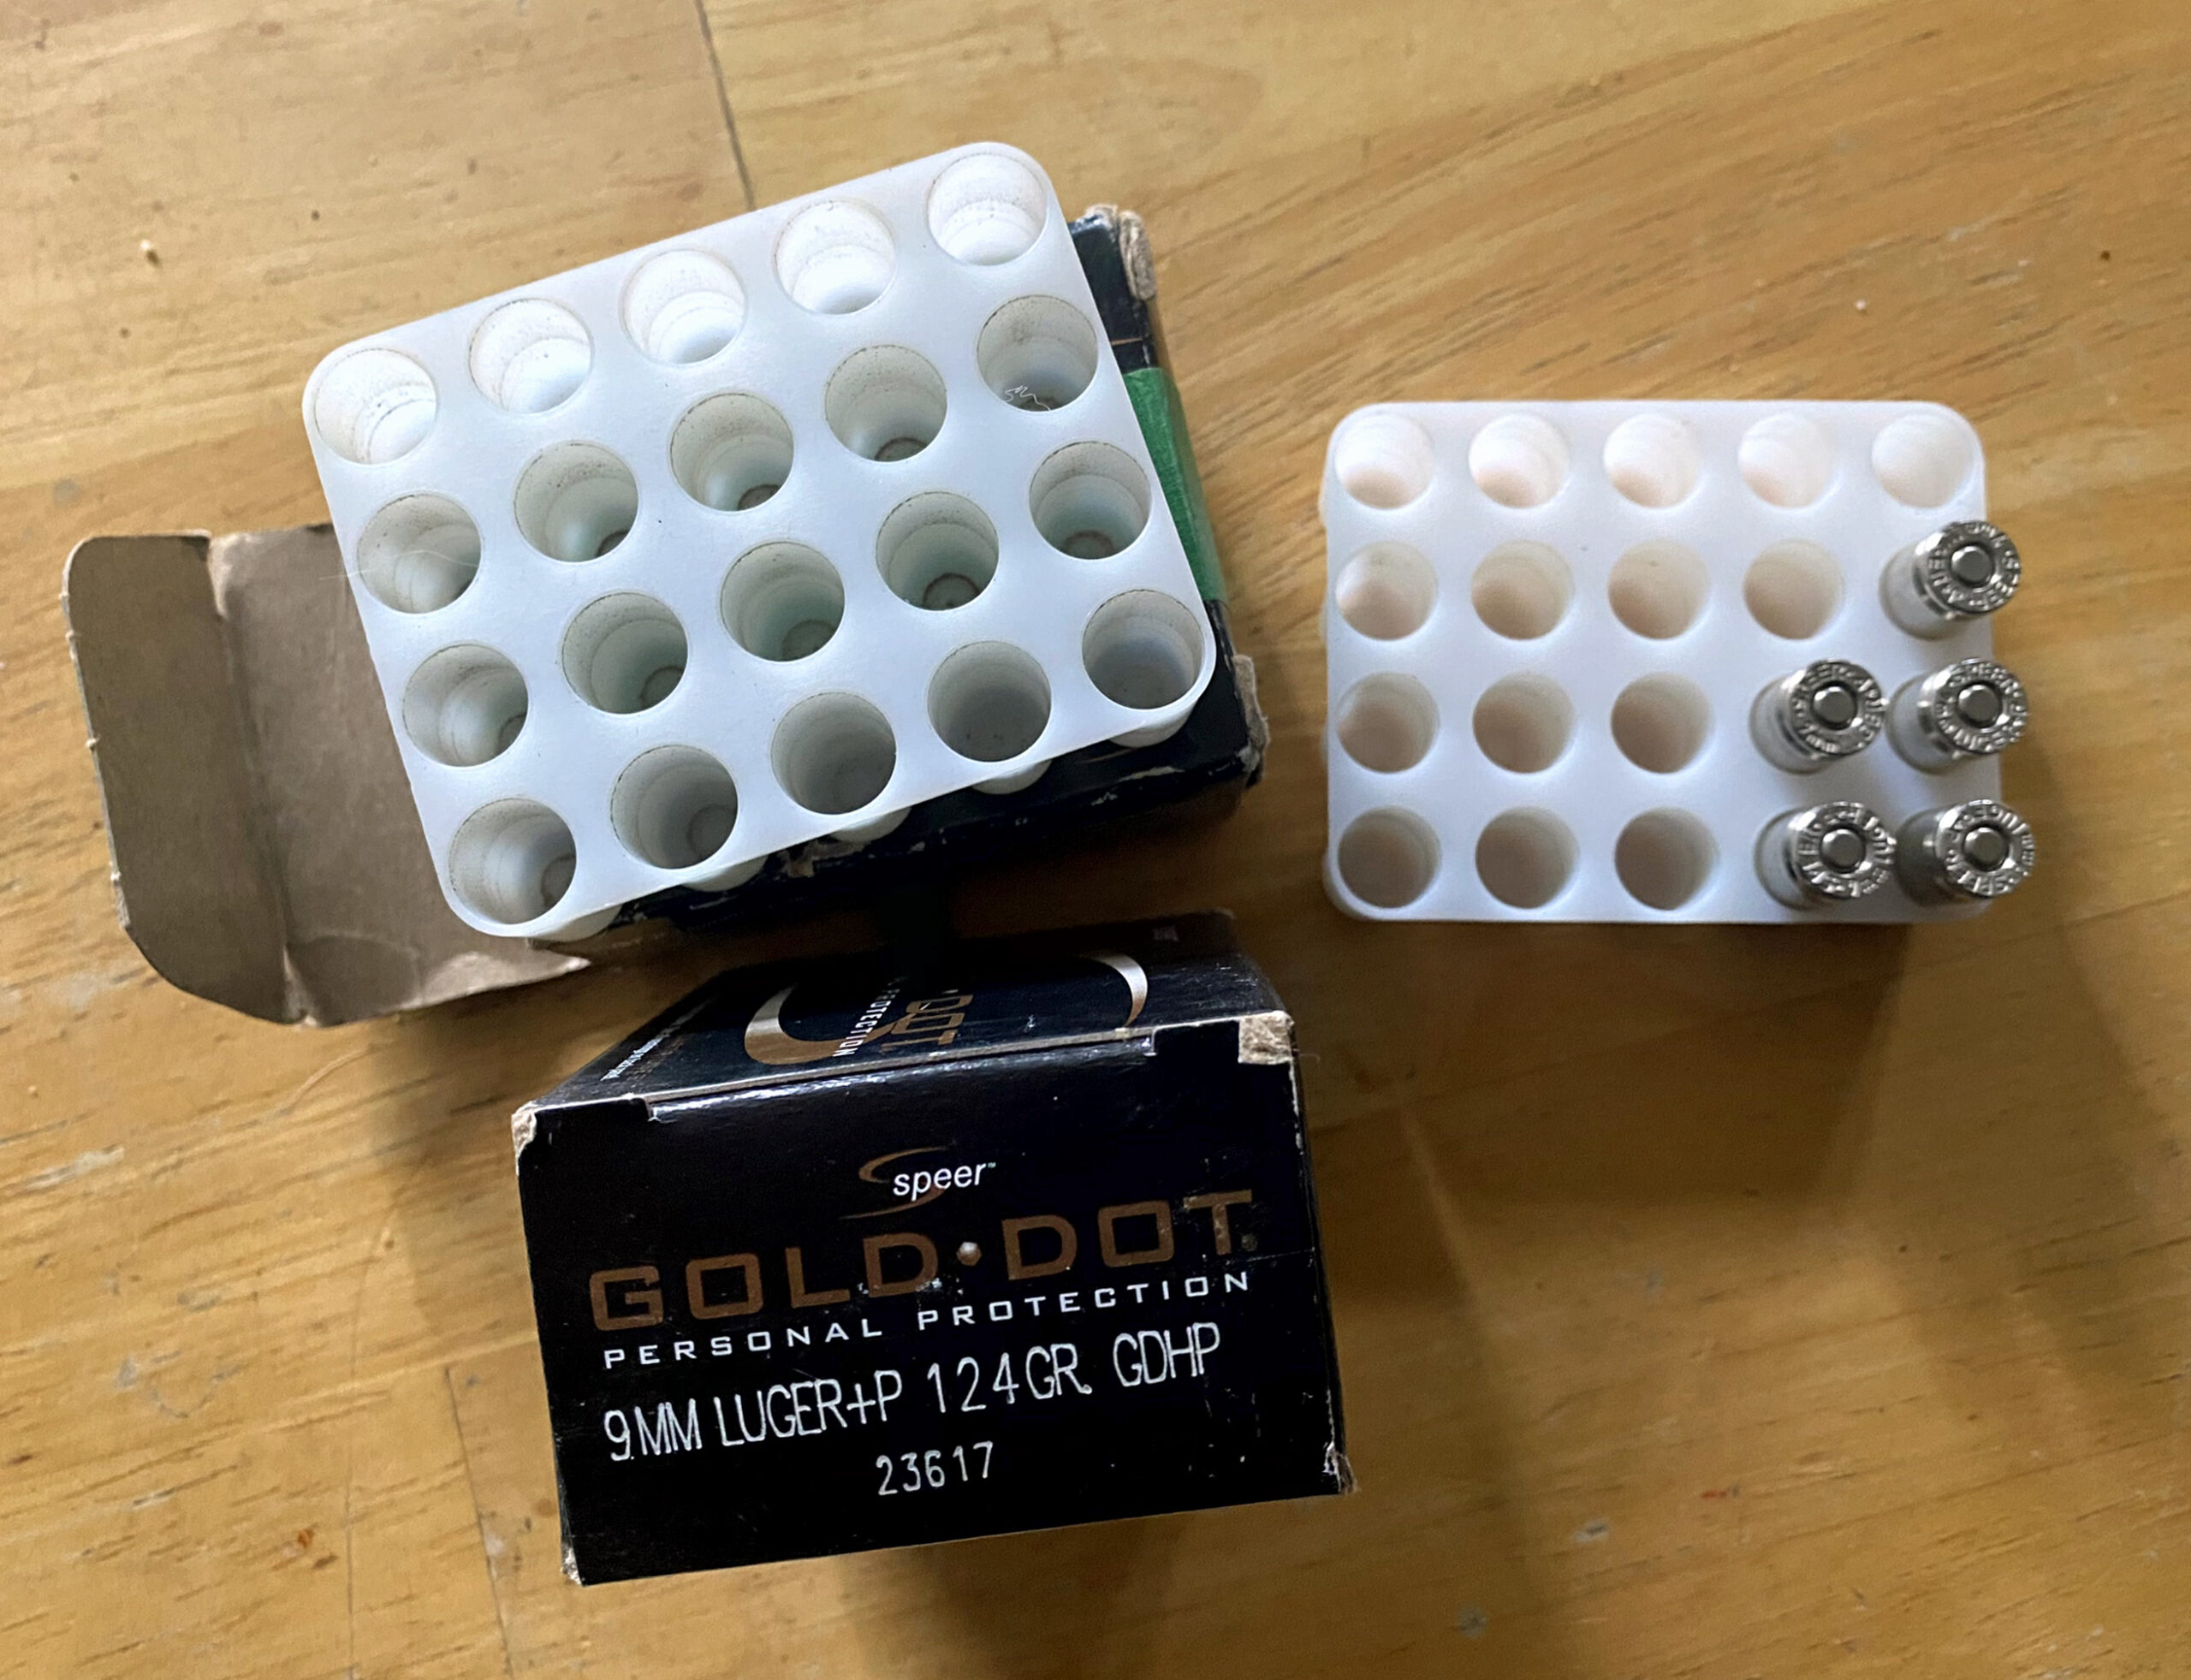
Before the zeroing process is complete, another group or two should be fired using the practice load you intend to use most often. Because I carry 124 gr carry ammo, I prefer to run 124 gr practice ammo.
Matching your practice ammo to your carry ammo (or match ammo) gives you the best odds of actually hitting what you aim at, for longer distance or higher precision shots.
Digital Maintenance
Backups matter. Annual maintenance for your digital devices should include full backups of hard drives and phone contents. Do these before you run any updates for apps or operating systems that might fail and corrupt your data or ability to back the device up. Laptop batteries and phone batteries also need replacement from time to time.
Documentation
Most serious shooters keep a range notebook where they log changes to gear. In the digital world, that may be as simple as taking pictures as you do the tasks, since the pictures will be tagged with time and date in your phone. These can serve as documentation of when you zeroed and when you did the other tasks. Luck favors the well prepared.
Pingback: Weekend Knowledge Dump- January 19, 2024 | Active Response Training
Pingback: Weekend Knowledge Dump- January 19, 2024 | tacticalusa.net
Pingback: KR Training January 2024 Newsletter - Notes from KR