Tracy Thronburg will be offering two short courses on August 1: Double Action Revolver Skills and Off Body Carry. We have loaner wheelguns, loaner carry packs. More about off body carry in this blog article about the Vicki Farnam instructor class Tracy and I attended this winter.
Karl will be on the road at the end of July teaching Force on Force Instructor, Tactical Scenarios and Advanced Handgun at the Crescent City facility north of New Orleans.
Karl will also be traveling to Beaumont in August to get certified as a 4H Shooting Coach, to assist with Lee County 4H Shooting practice sessions held at the A-Zone this fall.
Karl, OLJ3 and Ed Vinyard attended Dustin Salomon’s NURO class that we hosted at the A-Zone in June. We will be incorporated the NURO into some of our fall courses.
Karl, Dustin and Steve Vecchi will offer a special block of range instruction in Round Rock on the day before the Force Science Conference in September.
Several instructors from the KR Training team will be attending the Cougar Mountain Solutions (Erick Gelhaus) Pistol Mounted Optic instructor class coming up in Denton, TX later this month.
GREG ELLIFRITZ CLASSES
Greg is returning to the A-Zone on Sunday, September 20 to teach a one day Close Quarters Shooting live fire course. Uncle Zo wrote an in-depth review of Greg’s close quarter instructor class, and the article shows many of the techniques you will learn from Greg in this course.
In September Penny and I will be presenting the results of our old “red dot vs irons vs lasers” study, where we measured performance of 120+ shooters at 5 and 10 yards using four different sighting systems. We are collecting additional data this summer on shooter performance at 10 and 20 yards, and allowing people to self-report their data. The instructions are here.
We are accepting user-submitted data from now until August 15, 2026. All you need is a pistol with an optic and usable backup irons, four B-8 target centers, 20 rounds of ammo and a timer or stopwatch (you can use a phone timer) to give you 10 and 20 second par times. No holster is required. The data collection can be done at any indoor or outdoor range.
DISCOUNT CODES
I have collected up all the discount codes we have set up with vendors we recommend. Alumni of KR Training classes will find them in the monthly e-news email. You’ll have to open the email and scroll to the bottom to find them. It’s a reward for actually opening and reading the email!
REFRESHER DEALS
Re-take any class you’ve taken before for half price! Contact me to get the alumni discount code. Firearms skills deteriorate without practice. Most ranges don’t allow drawing from a holster, shooting quickly, moving or shooting from cover. If you don’t practice the skills you learned in class, they won’t be there when you need them.
My band the Black Cat Choir was just voted “Best band in Fayette County” in the annual “Best Of Fayette” competition. On July 4th, we performed on a float in the annual Round Top Parade, and that night we performed on the steps of the La Grange courthouse as part of a patriotic celebration. This video is from the La Grange show – parts of “Tennessee Whiskey” and “La Grange”.
I’m also in a Chicago (and 70’s horn rock) tribute band. We played a sold out show at the Palace Theatre in downtown Bryan, Texas in June. Here’s our version of Average White Band’s “Pick Up the Pieces”.
Big shows coming up: I’ll be with the Round Top Rockers (a Black Cat Choir side band) as the headliner for the Thursday Sept 3 night at the Fayette County Fair, the full Black Cat Choir will perform at the Washington County Fair on Sept 12, and Changes will do a full show at Deep Roots in Plantersville October 3.
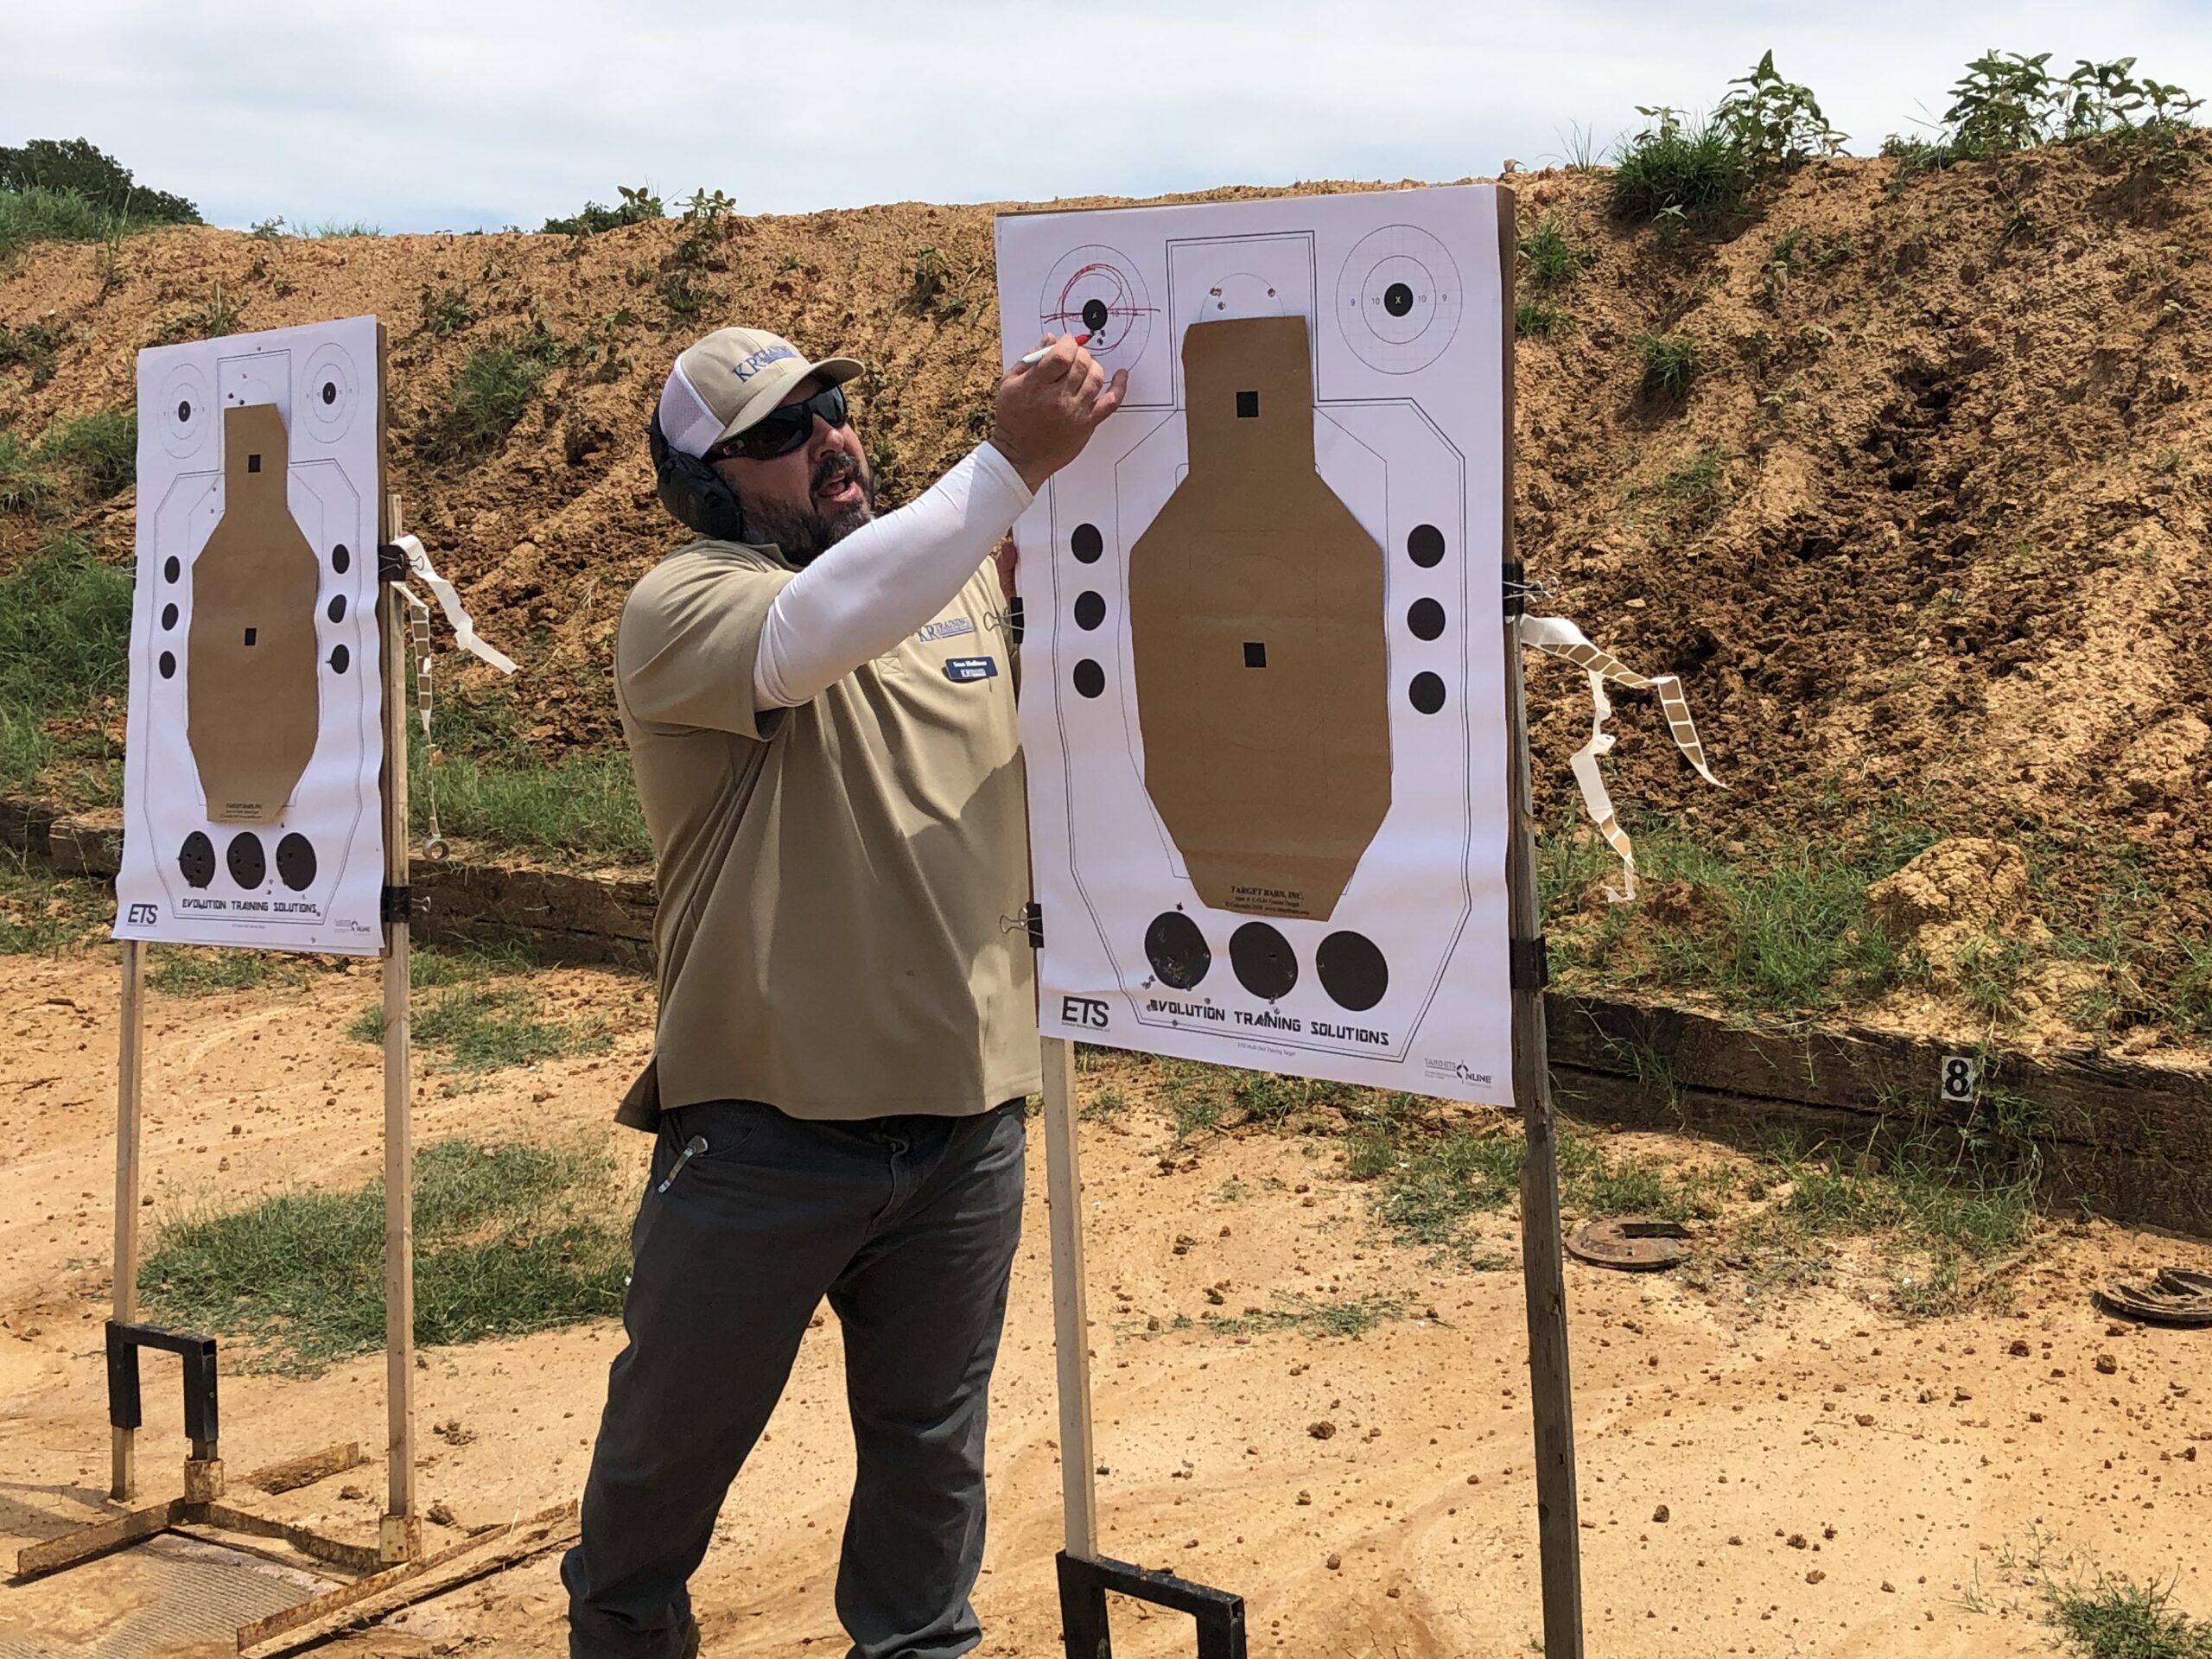
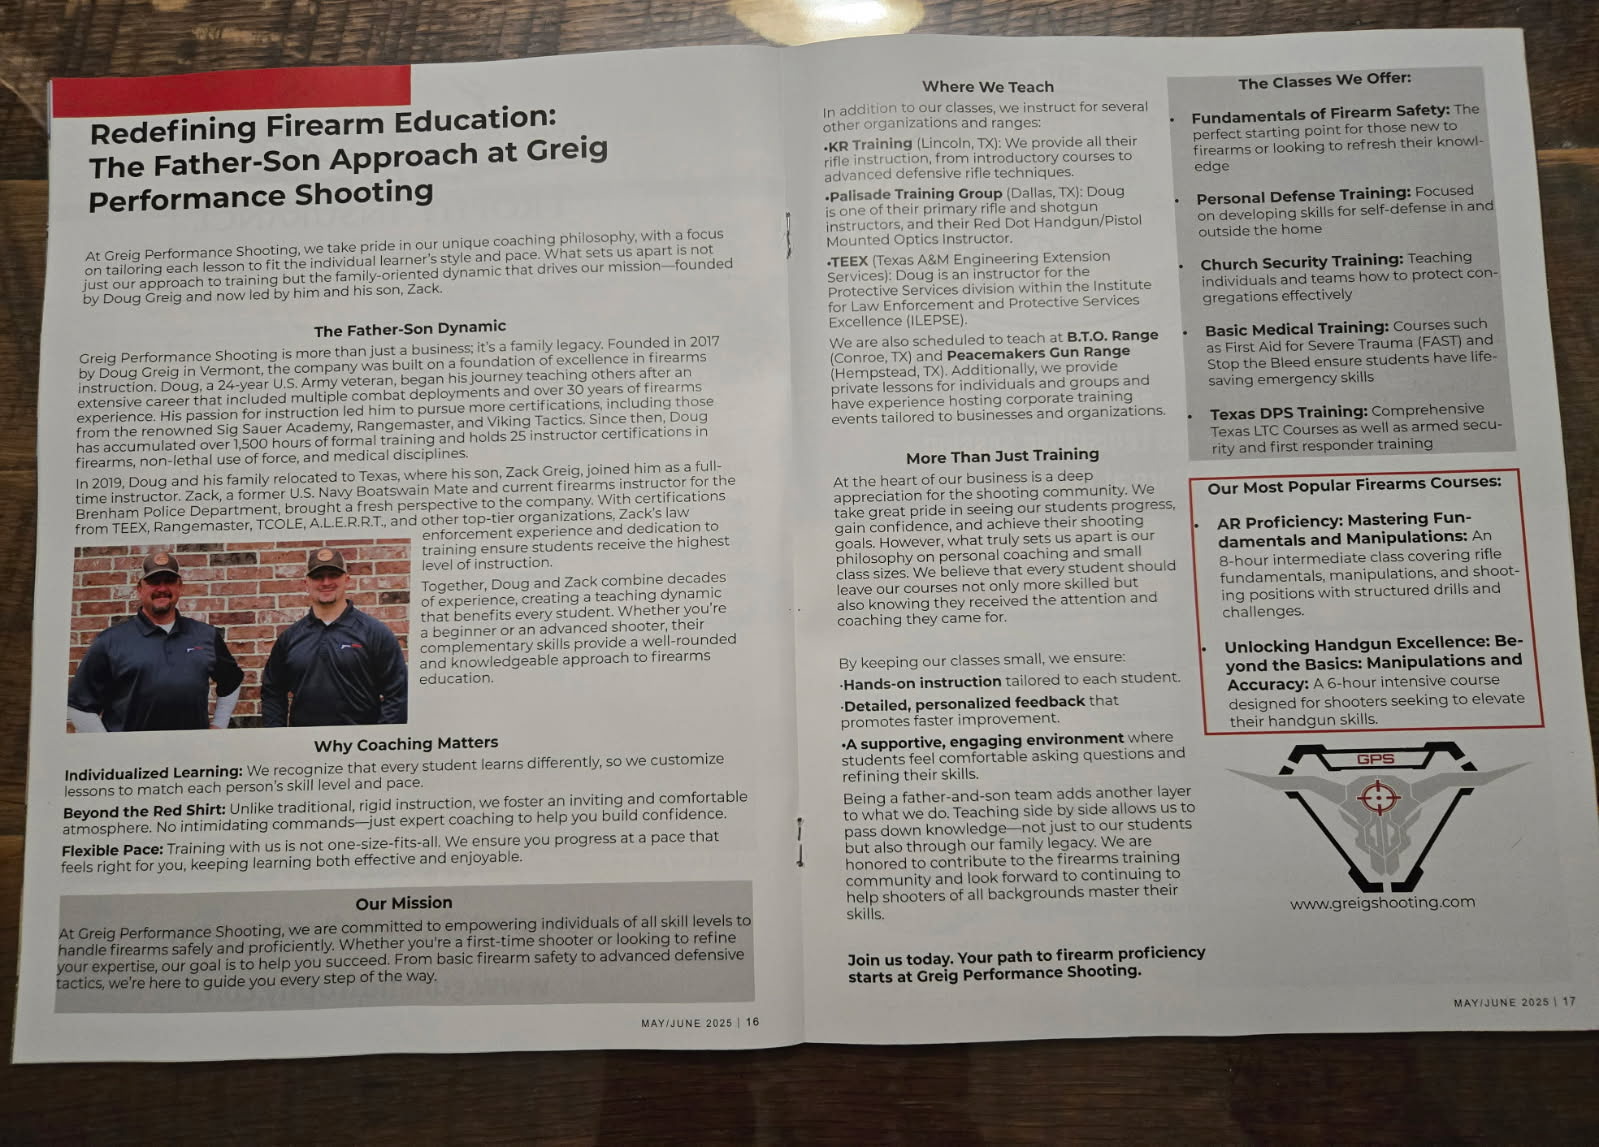
On July 18, 2026 Doug Greig taught a session of his “Gunfighting in Crowds” class at KR Training’s A Zone Range.
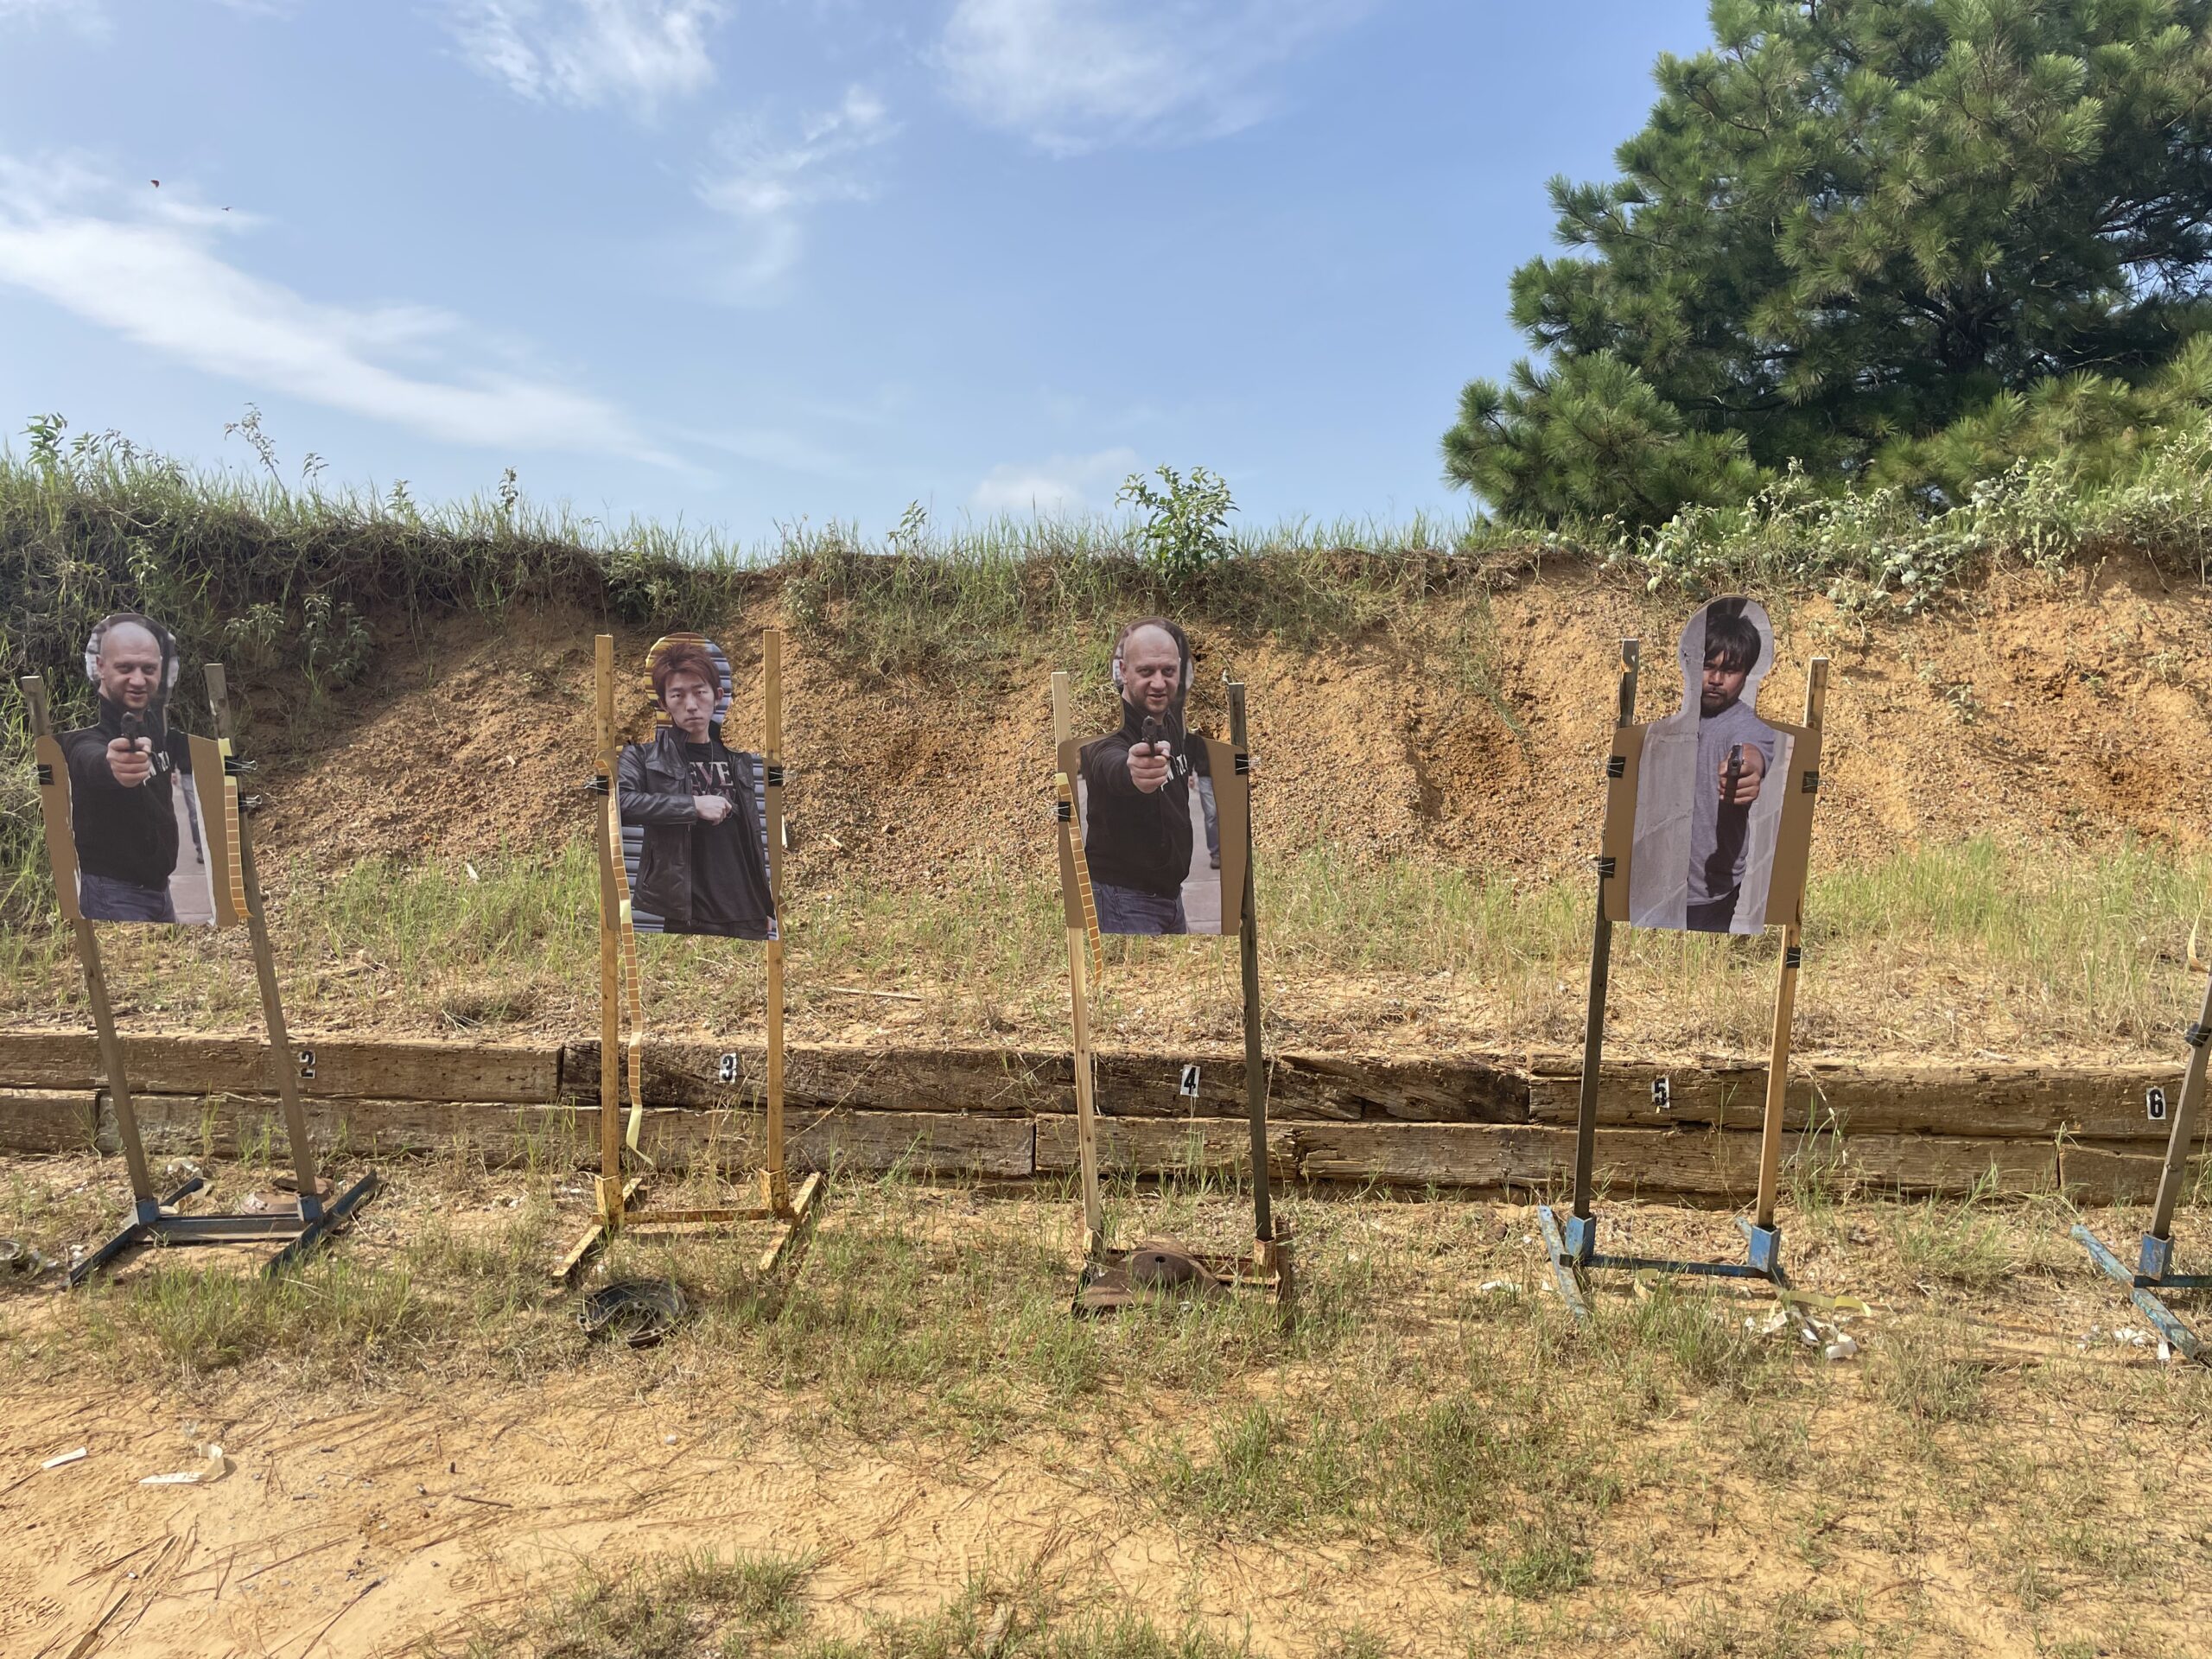
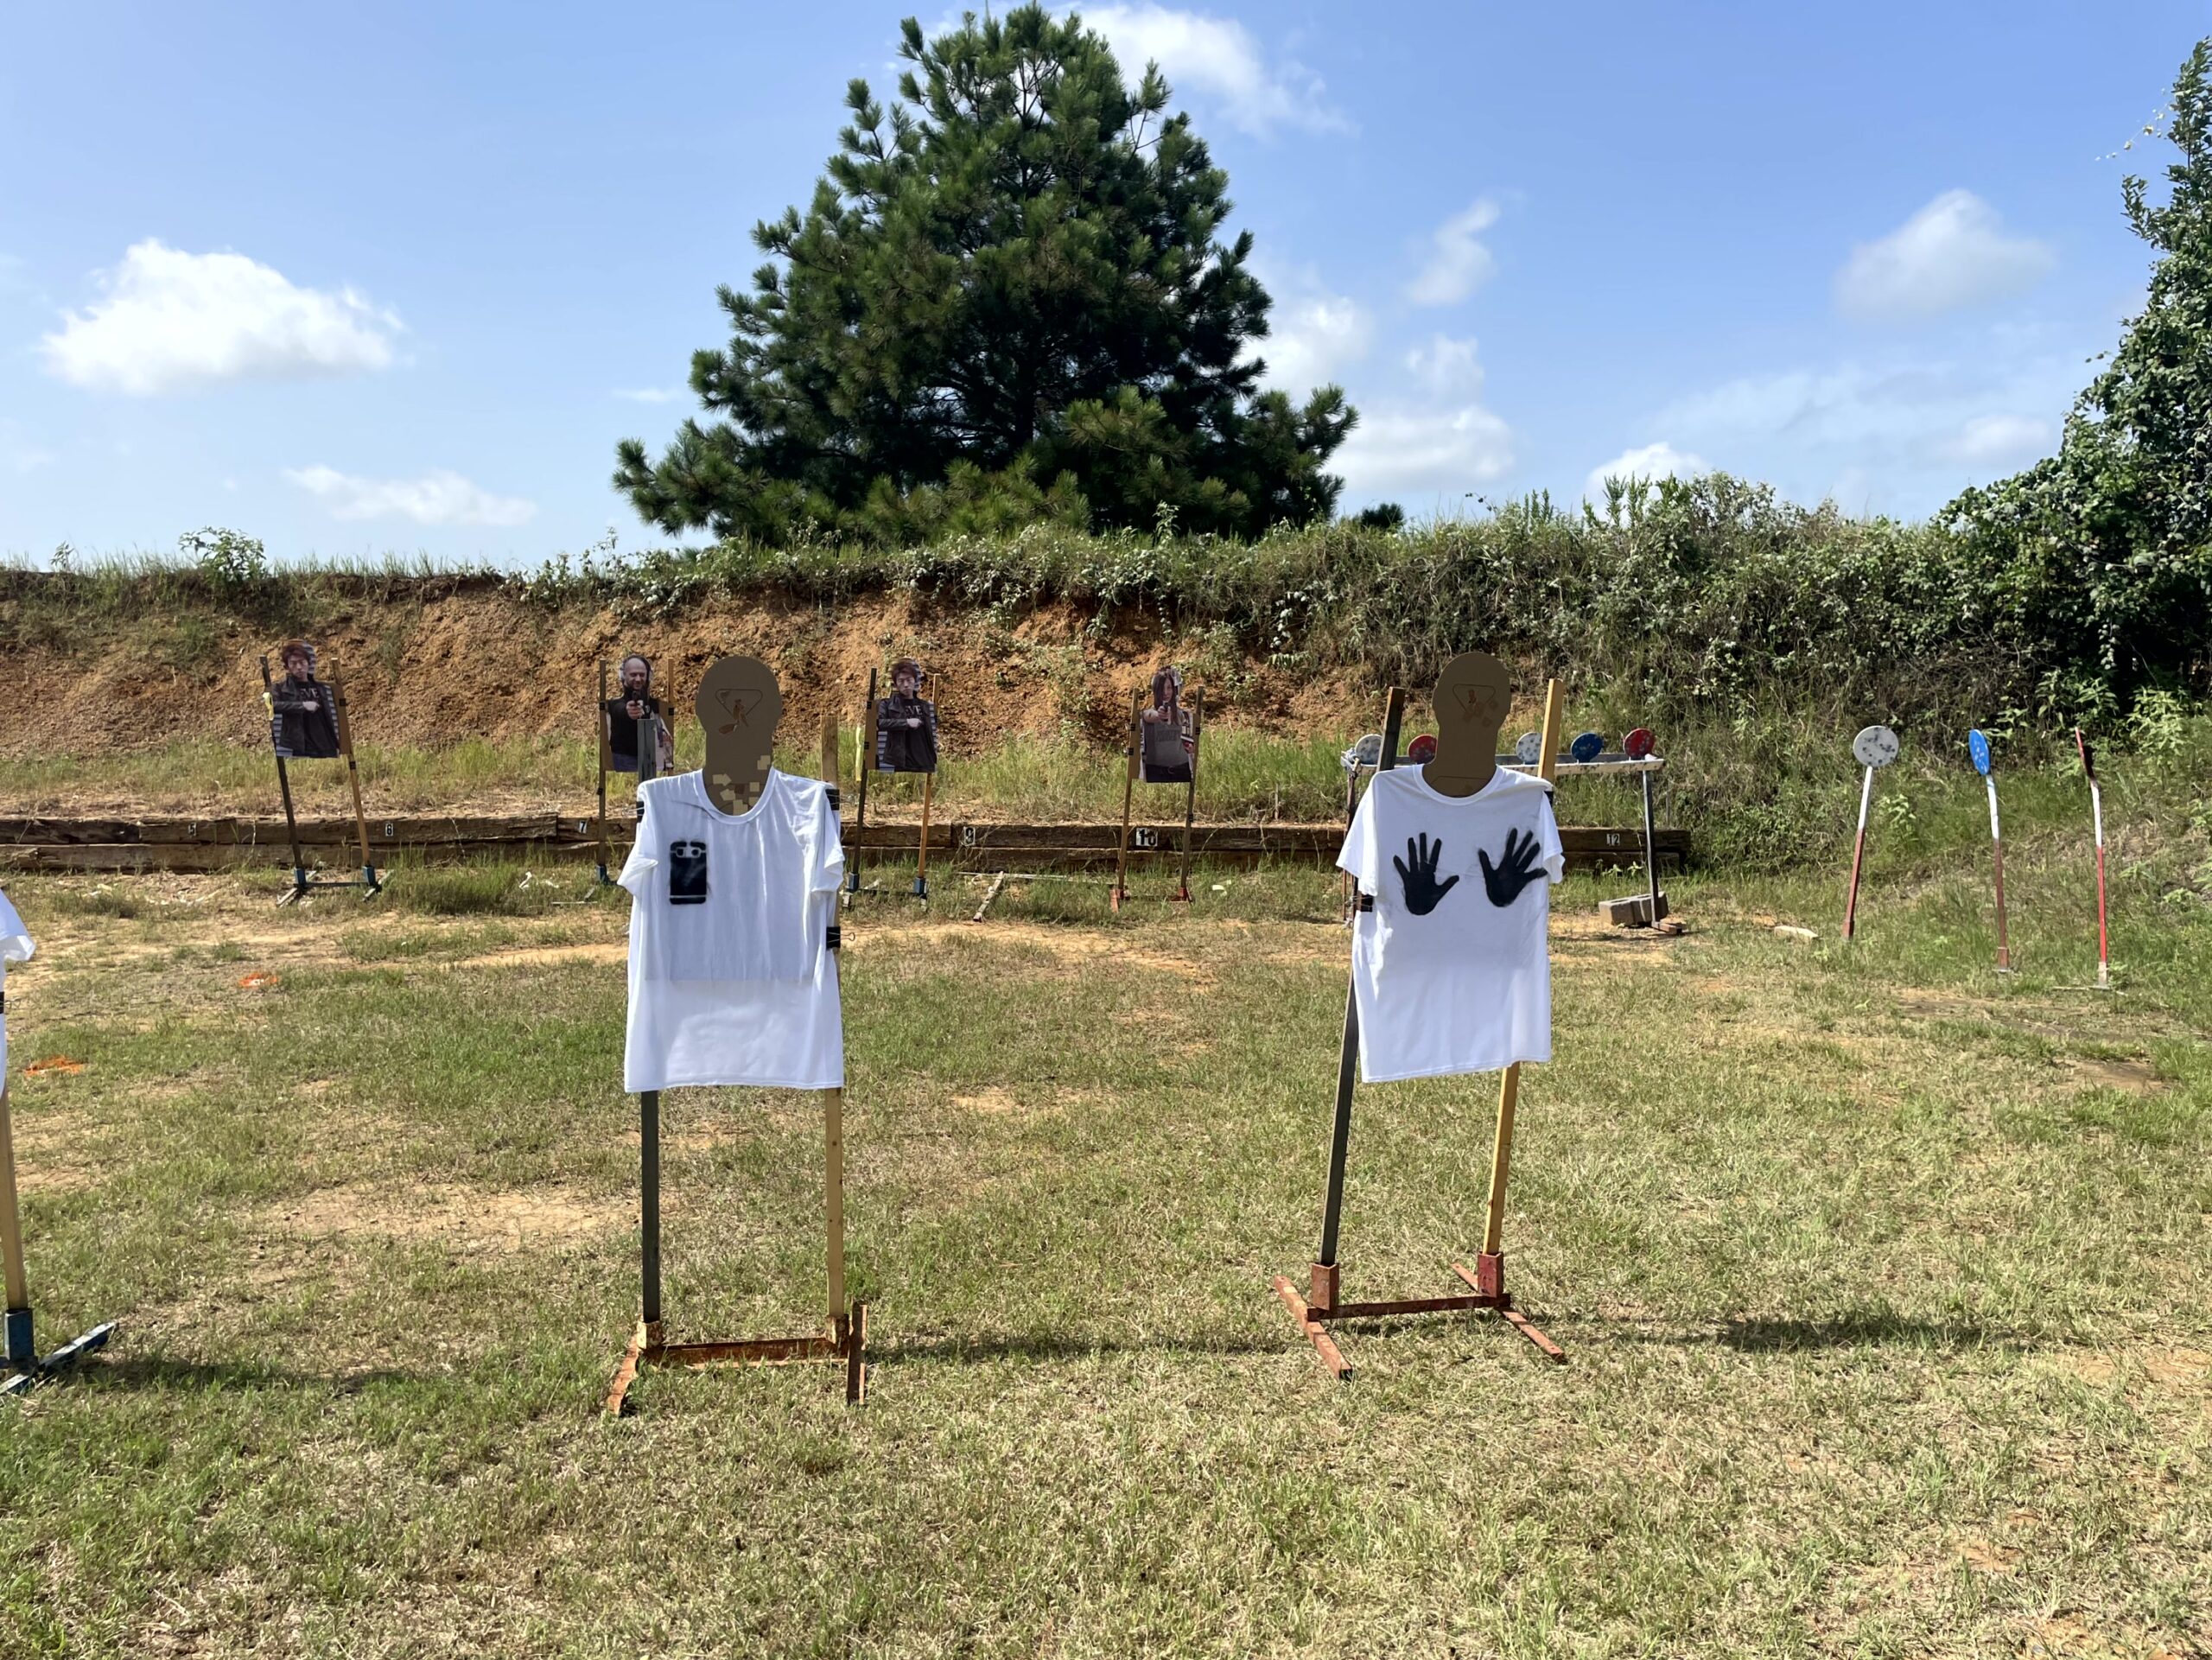
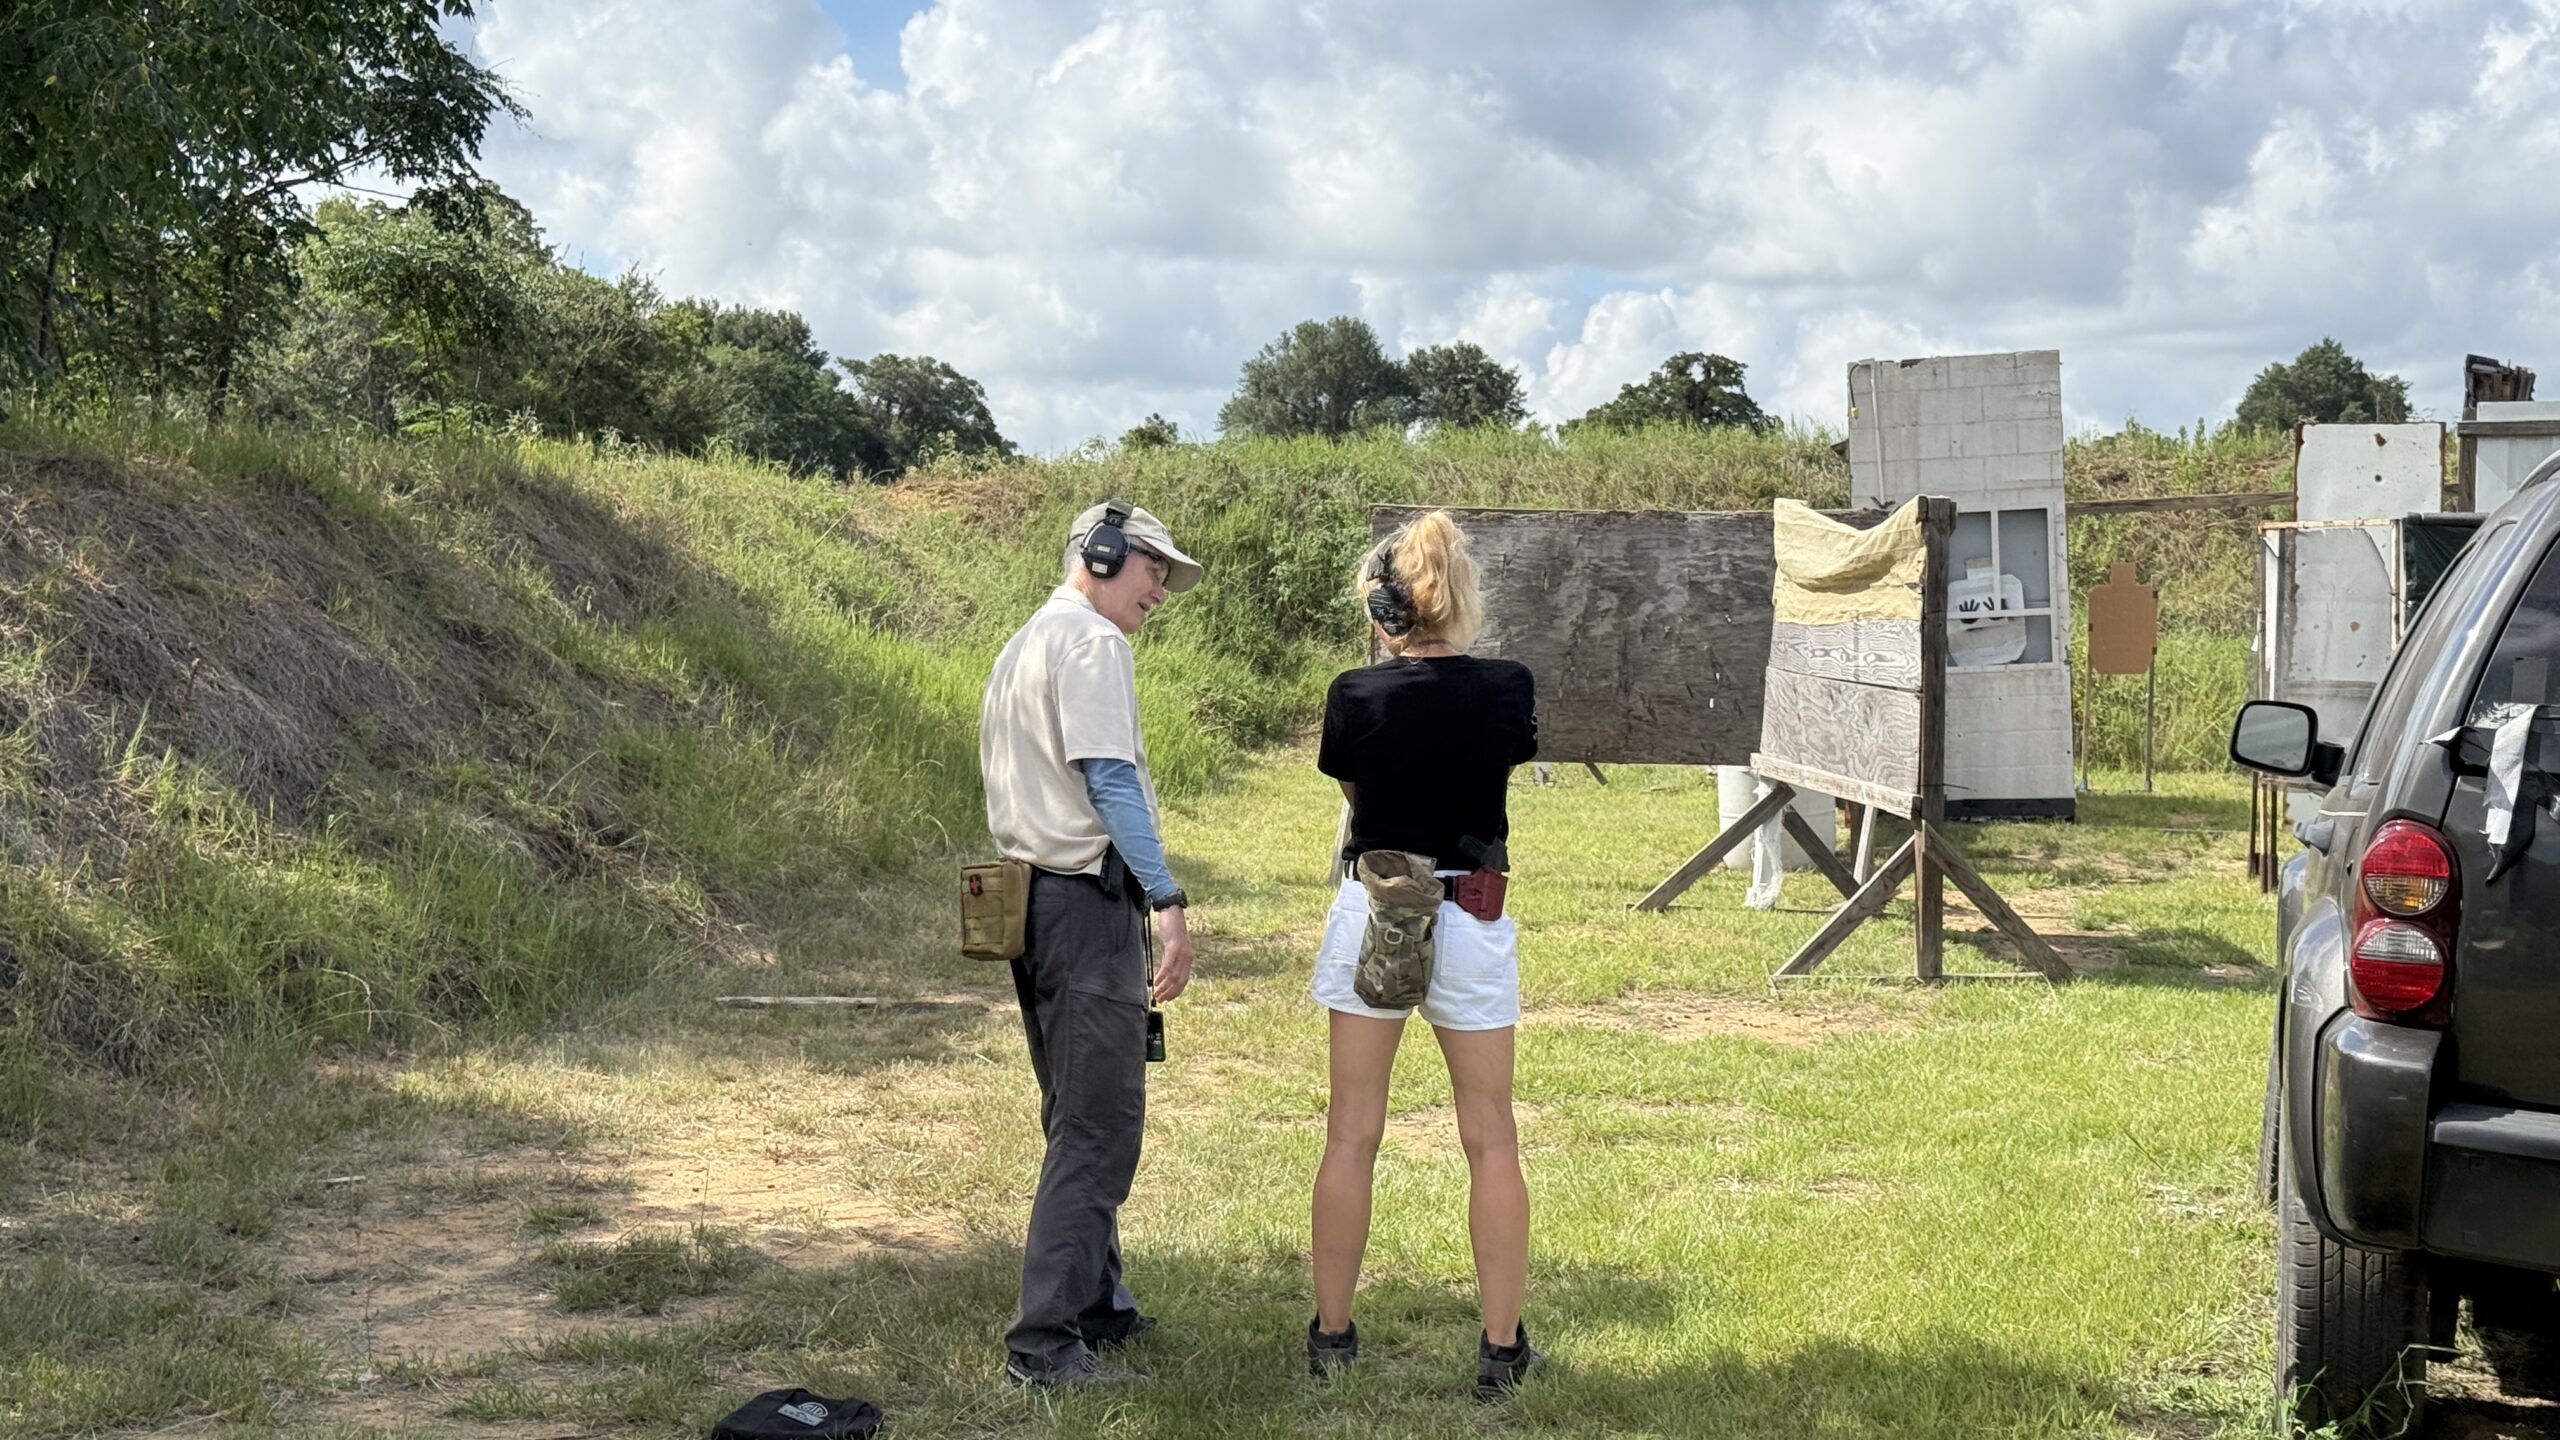
This 1/2 day course is intended for students with prior experience/training drawing from concealment, capable of hitting a 6″ or smaller target at 10 yards. The course goal was to improve each student’s ability to make shoot/no-shoot decisions and avoid muzzling bystanders in a shooting situation crowded with non threats. Doug used a variety of photo and clothed targets, 3D targets and moving targets in the live fire drills.
Many drills started with a position Doug called “covered ready”, which involved clearing the concealment garment and gripping the pistol in the holster, usually while giving verbal commands prior to drawing and engaging a threat.
The first set of live fire drills started from “covered ready”, drawing and engaging targets at distances from 3-10 yards, mainly to verify that students were capable of meeting the class accuracy standard.
Doug made a “back of cell phone” overlay to add to some non-threats.
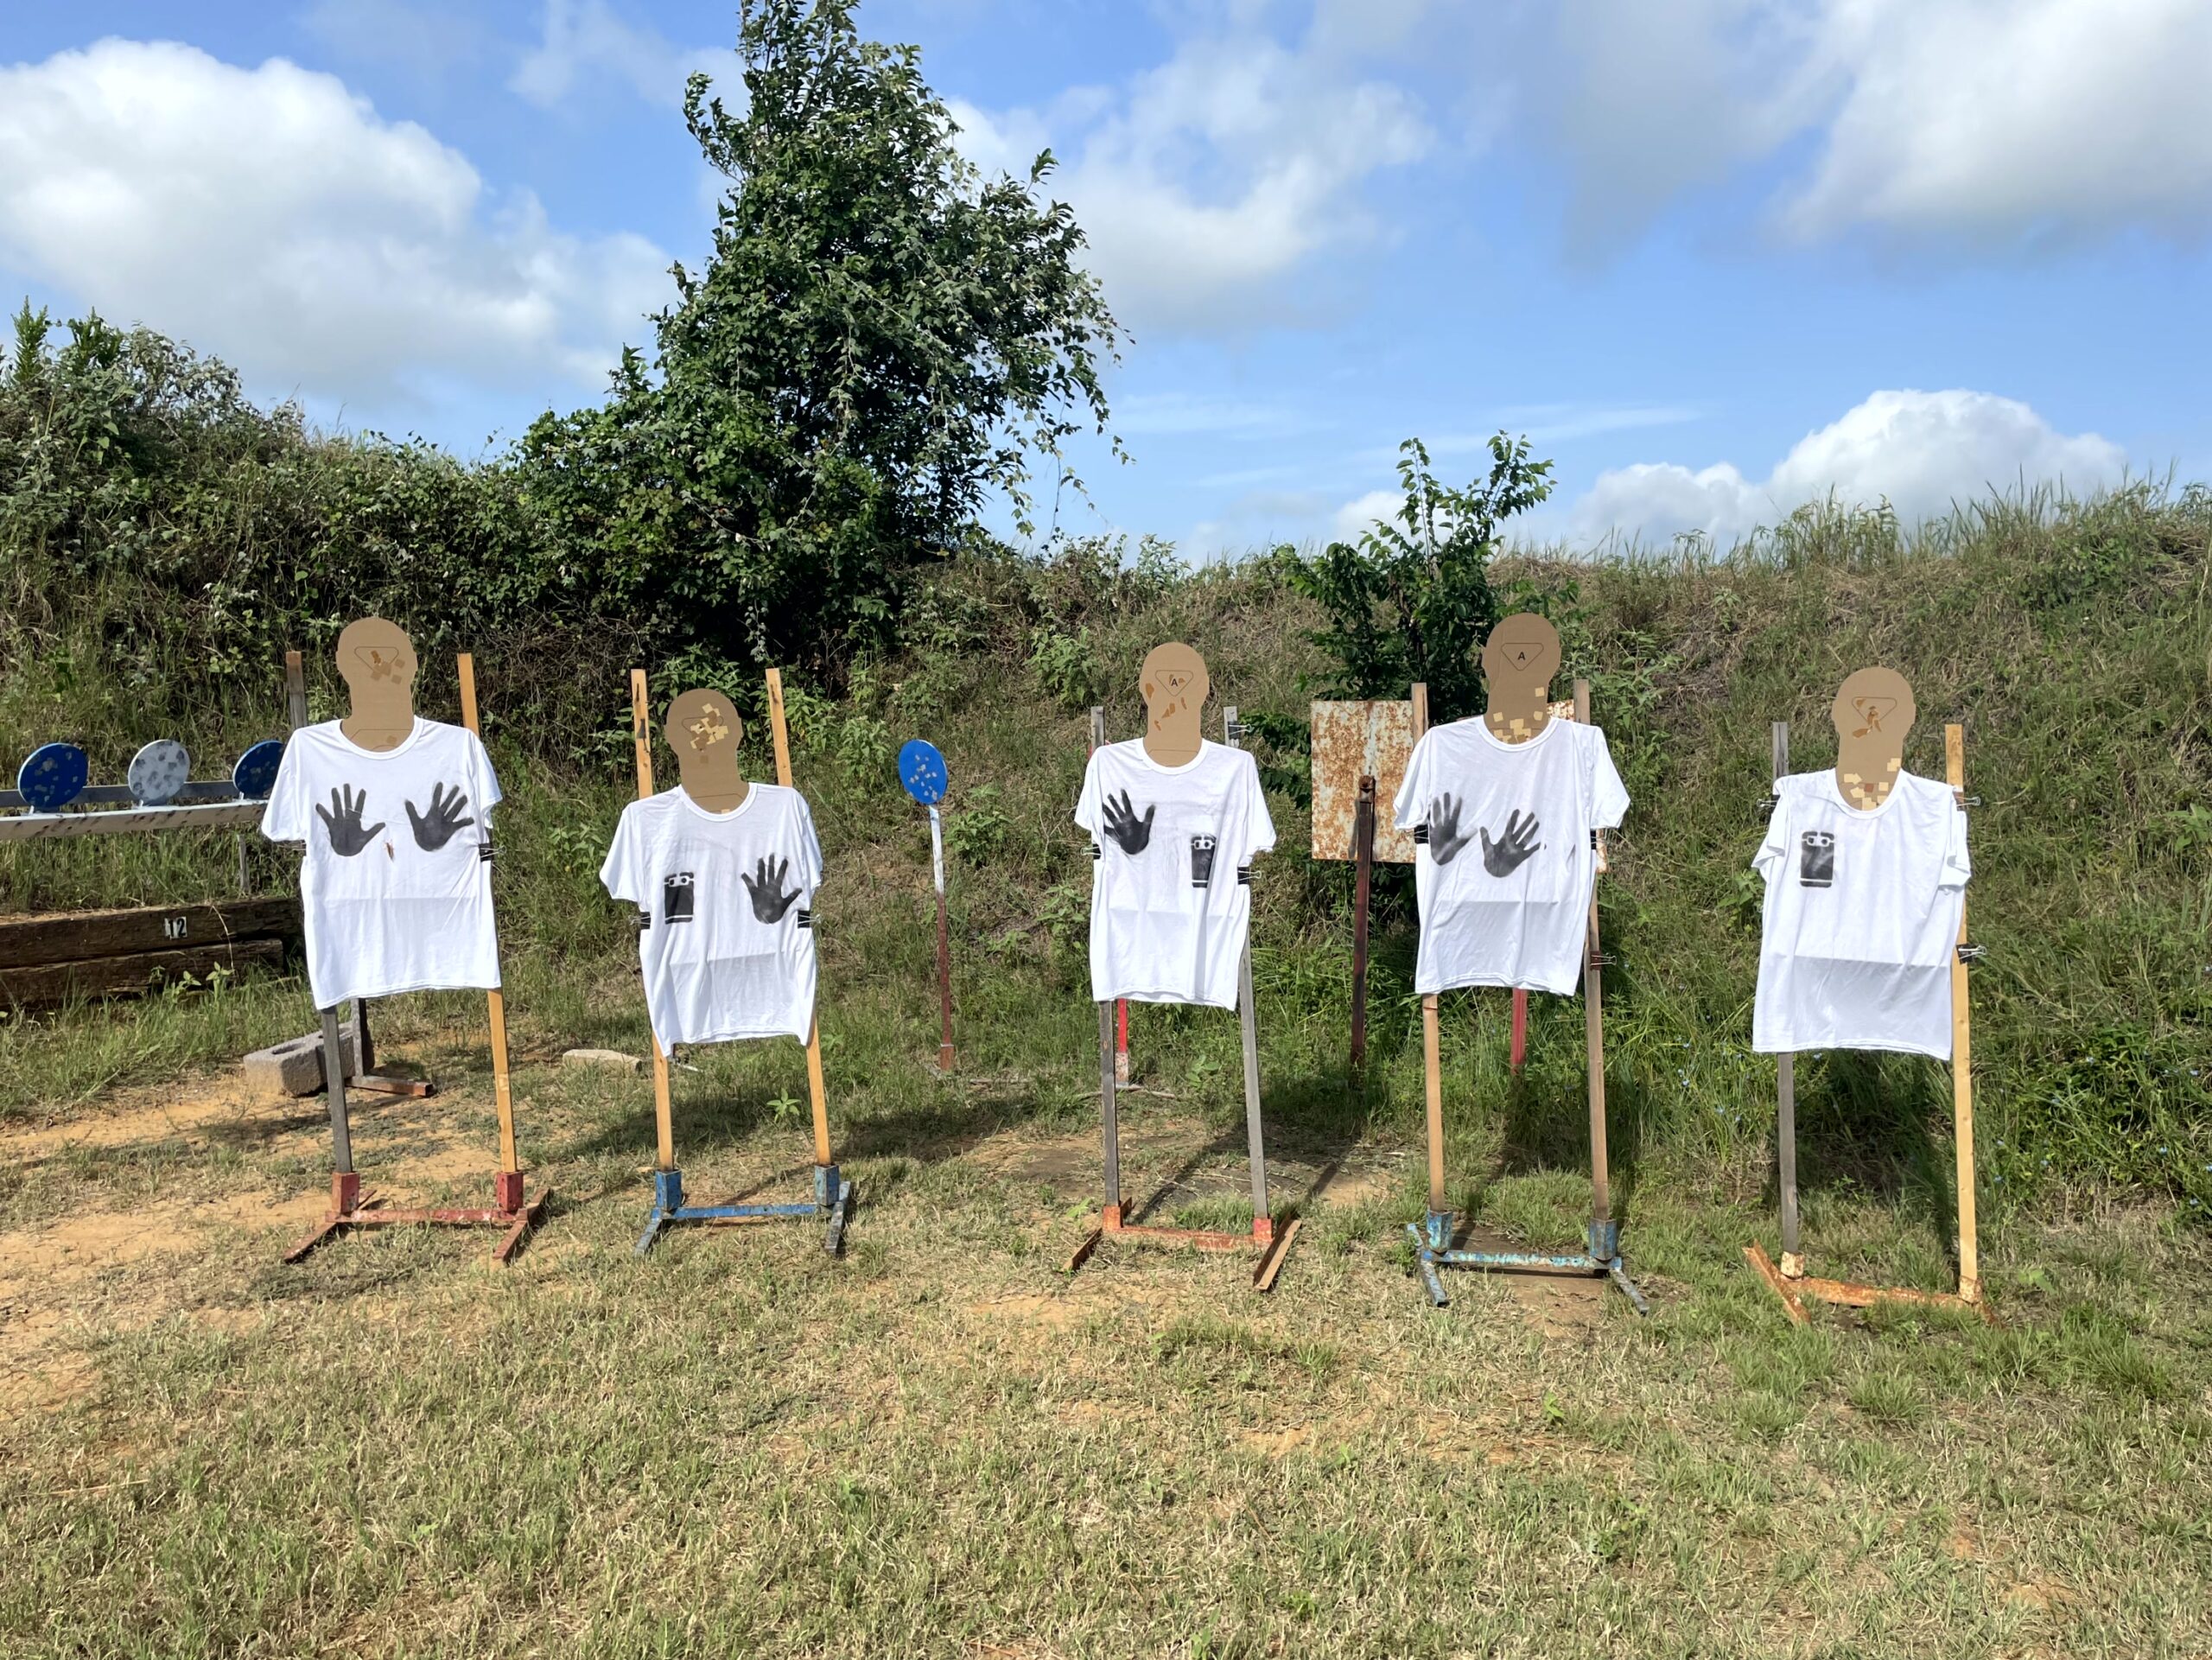
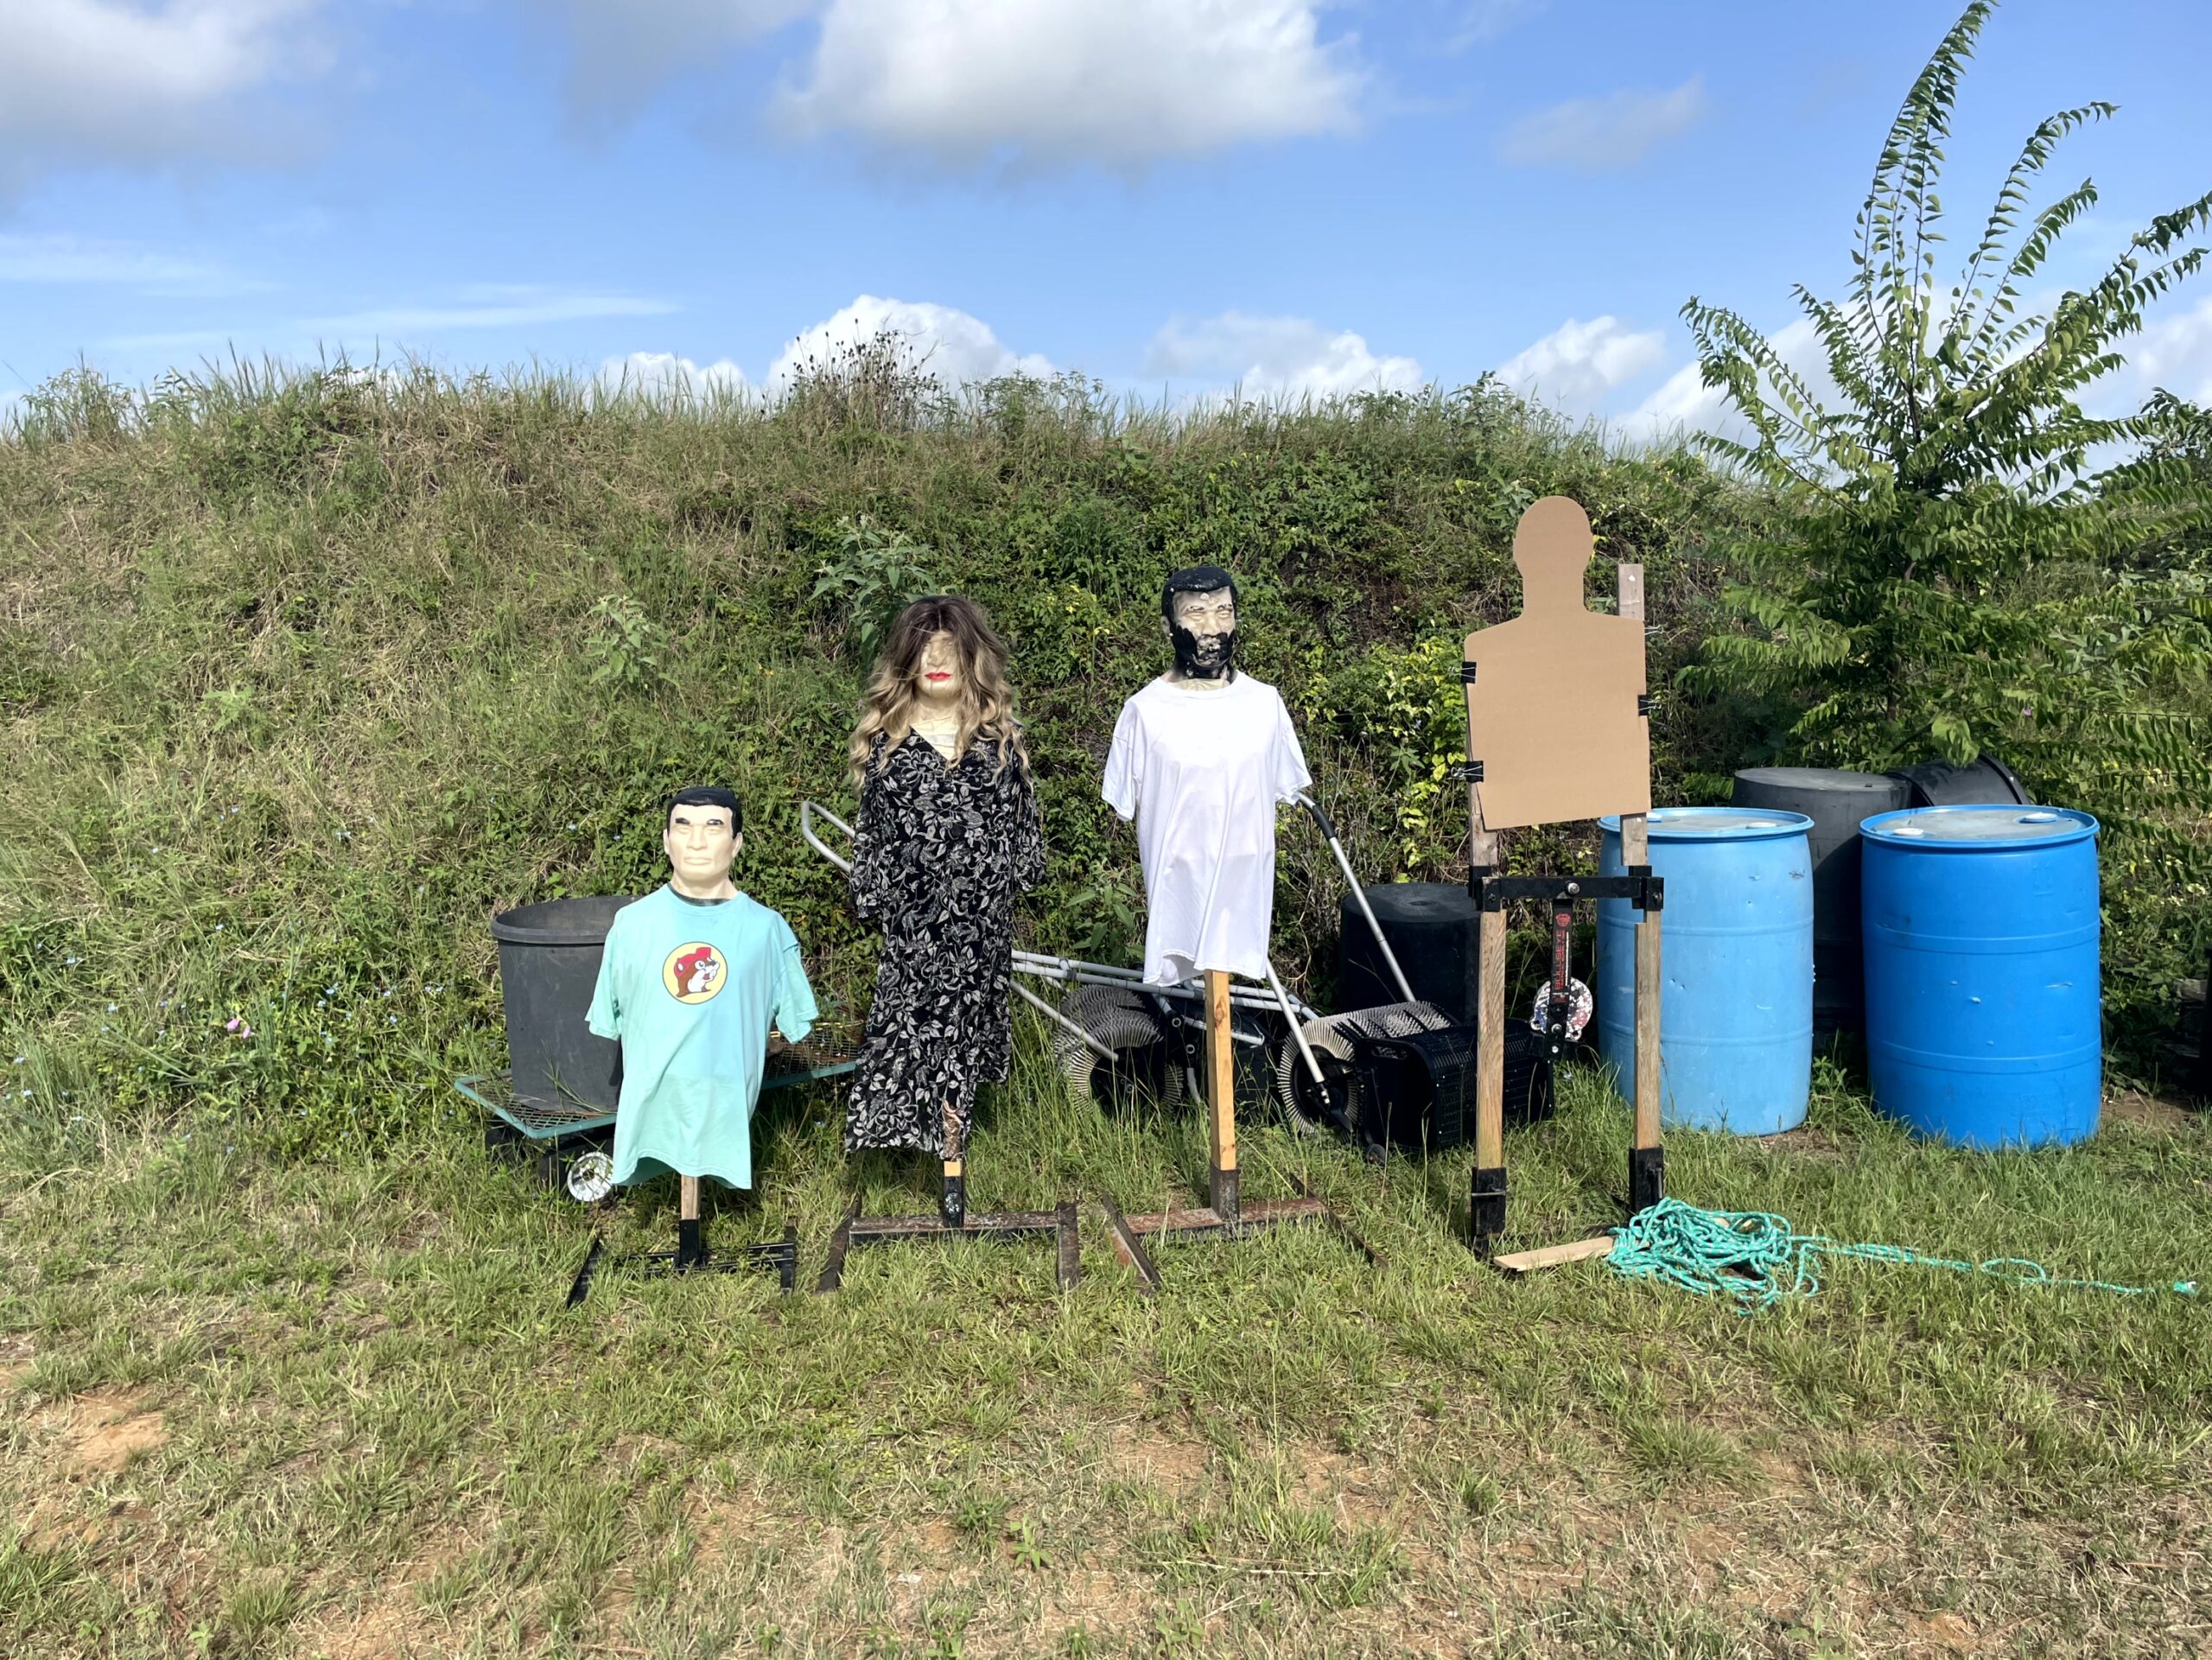
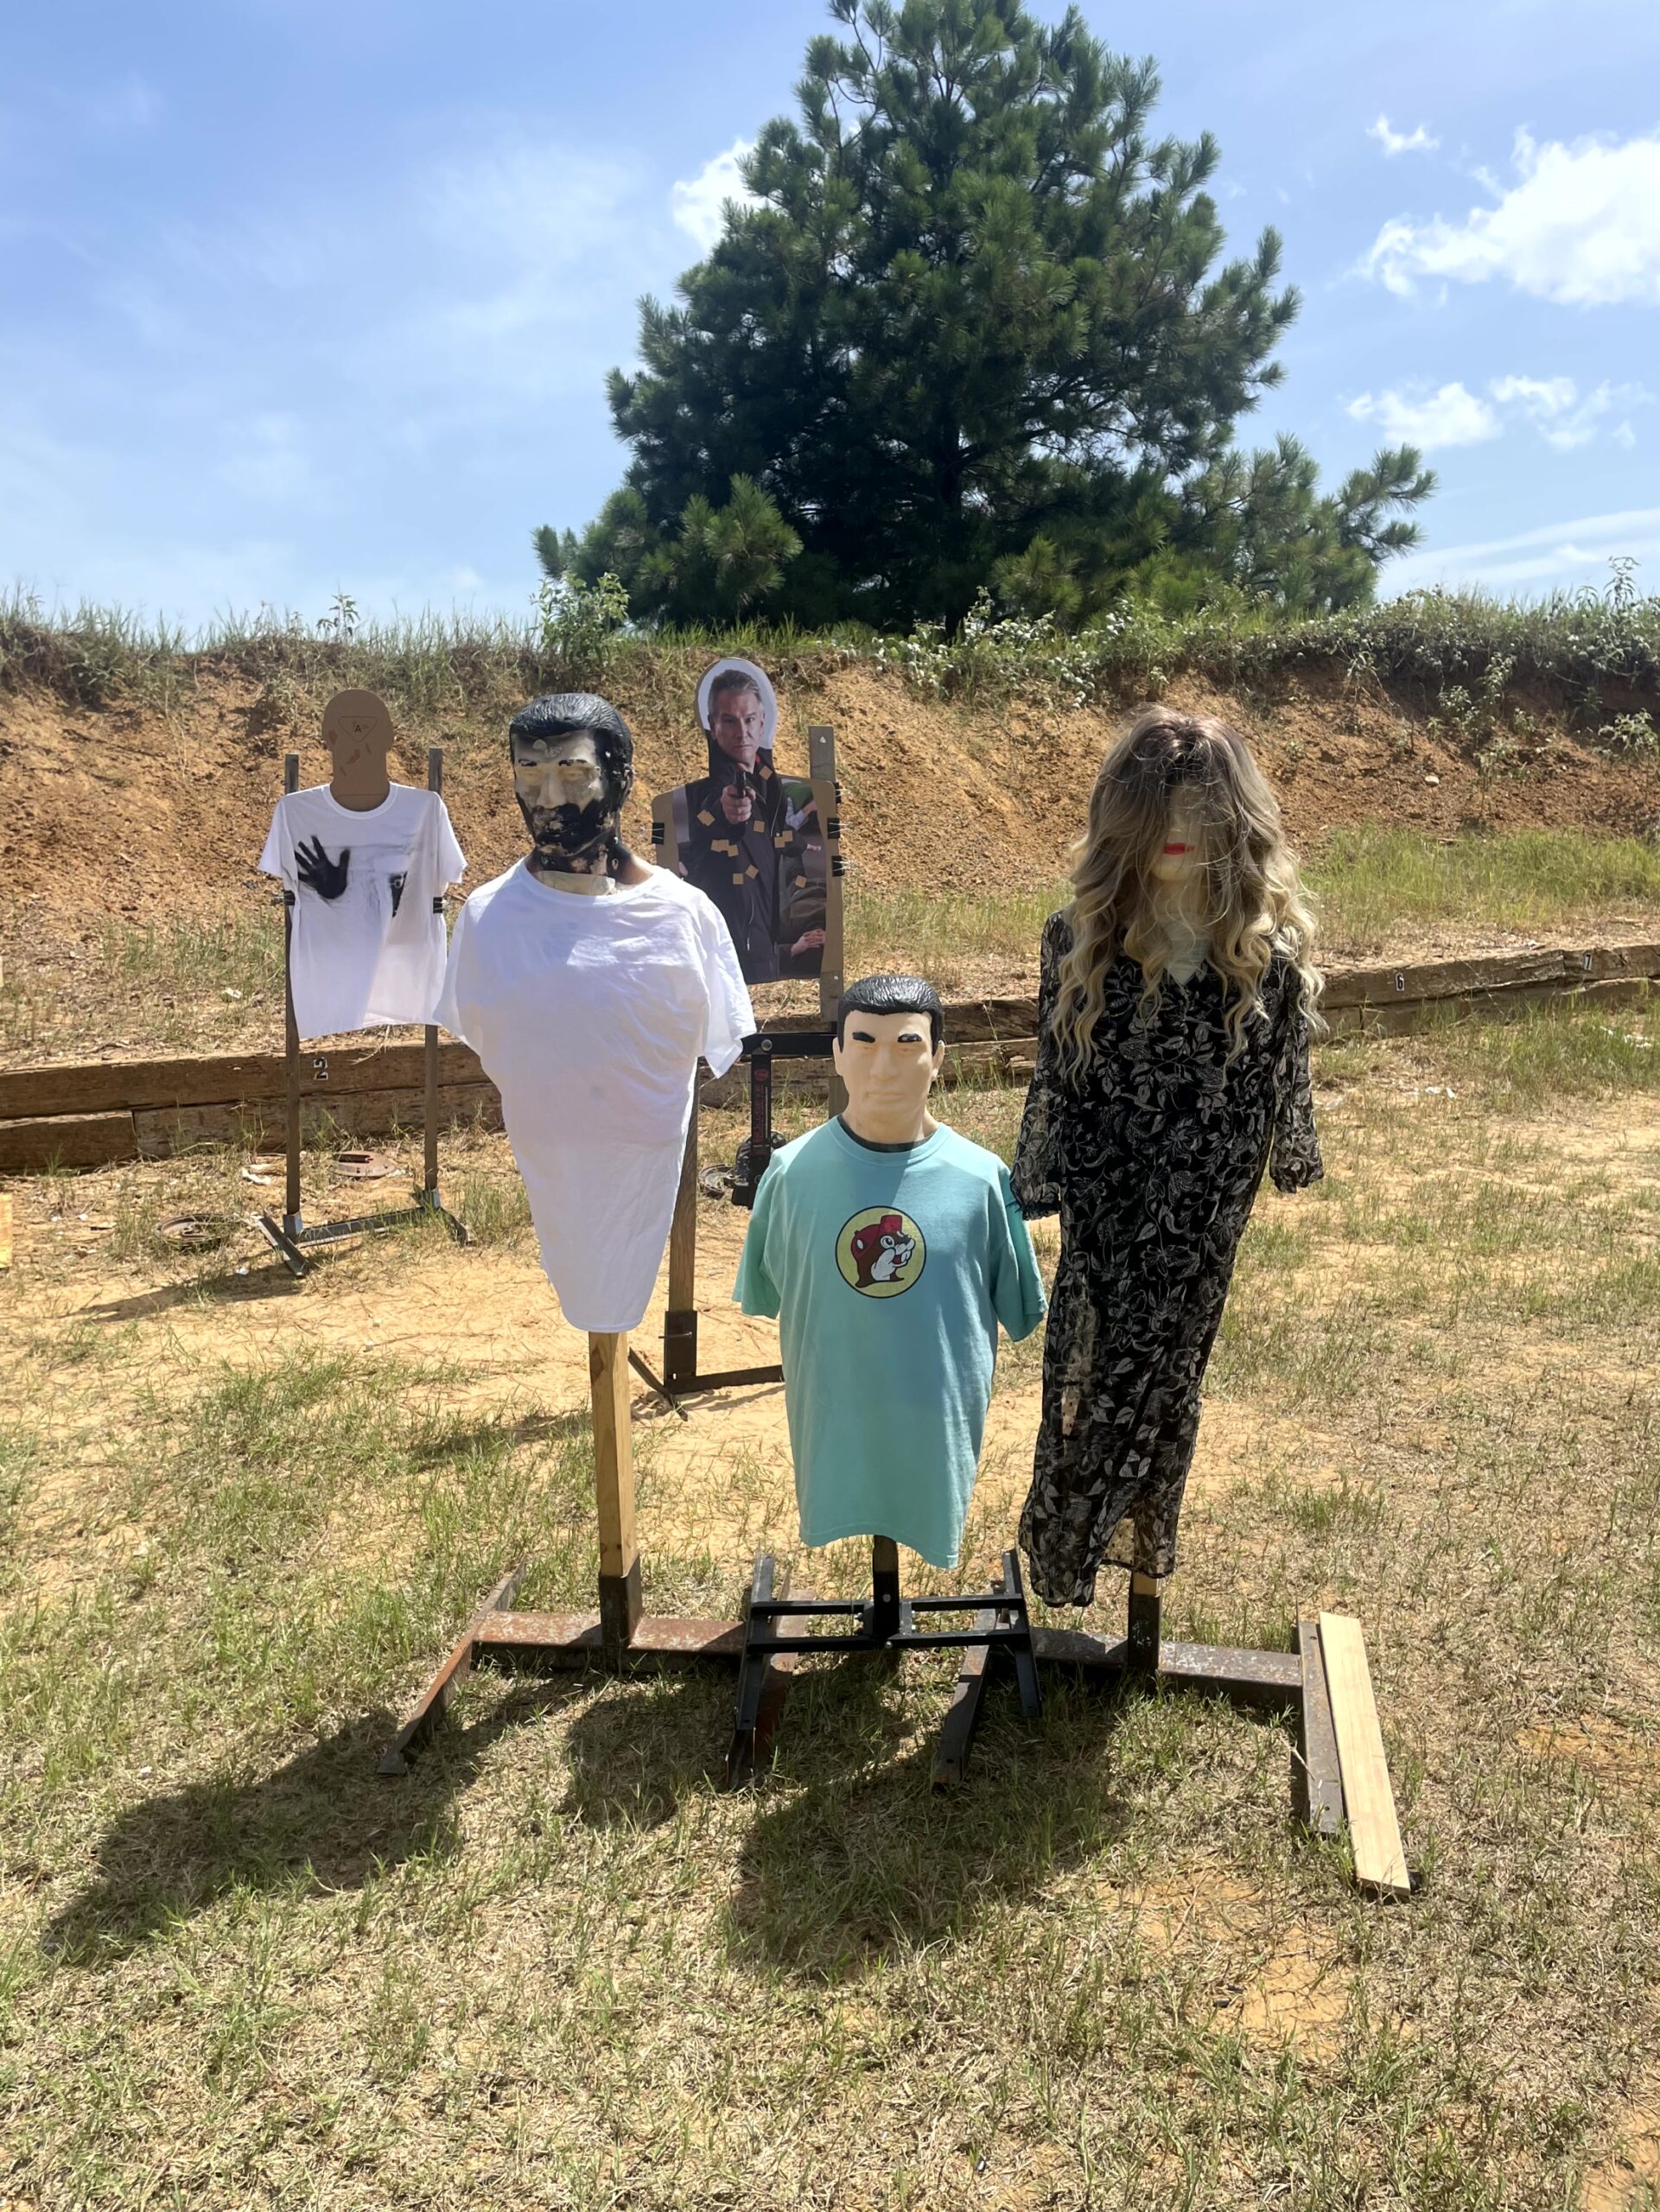
The short 3D target was intended to simulate a child.
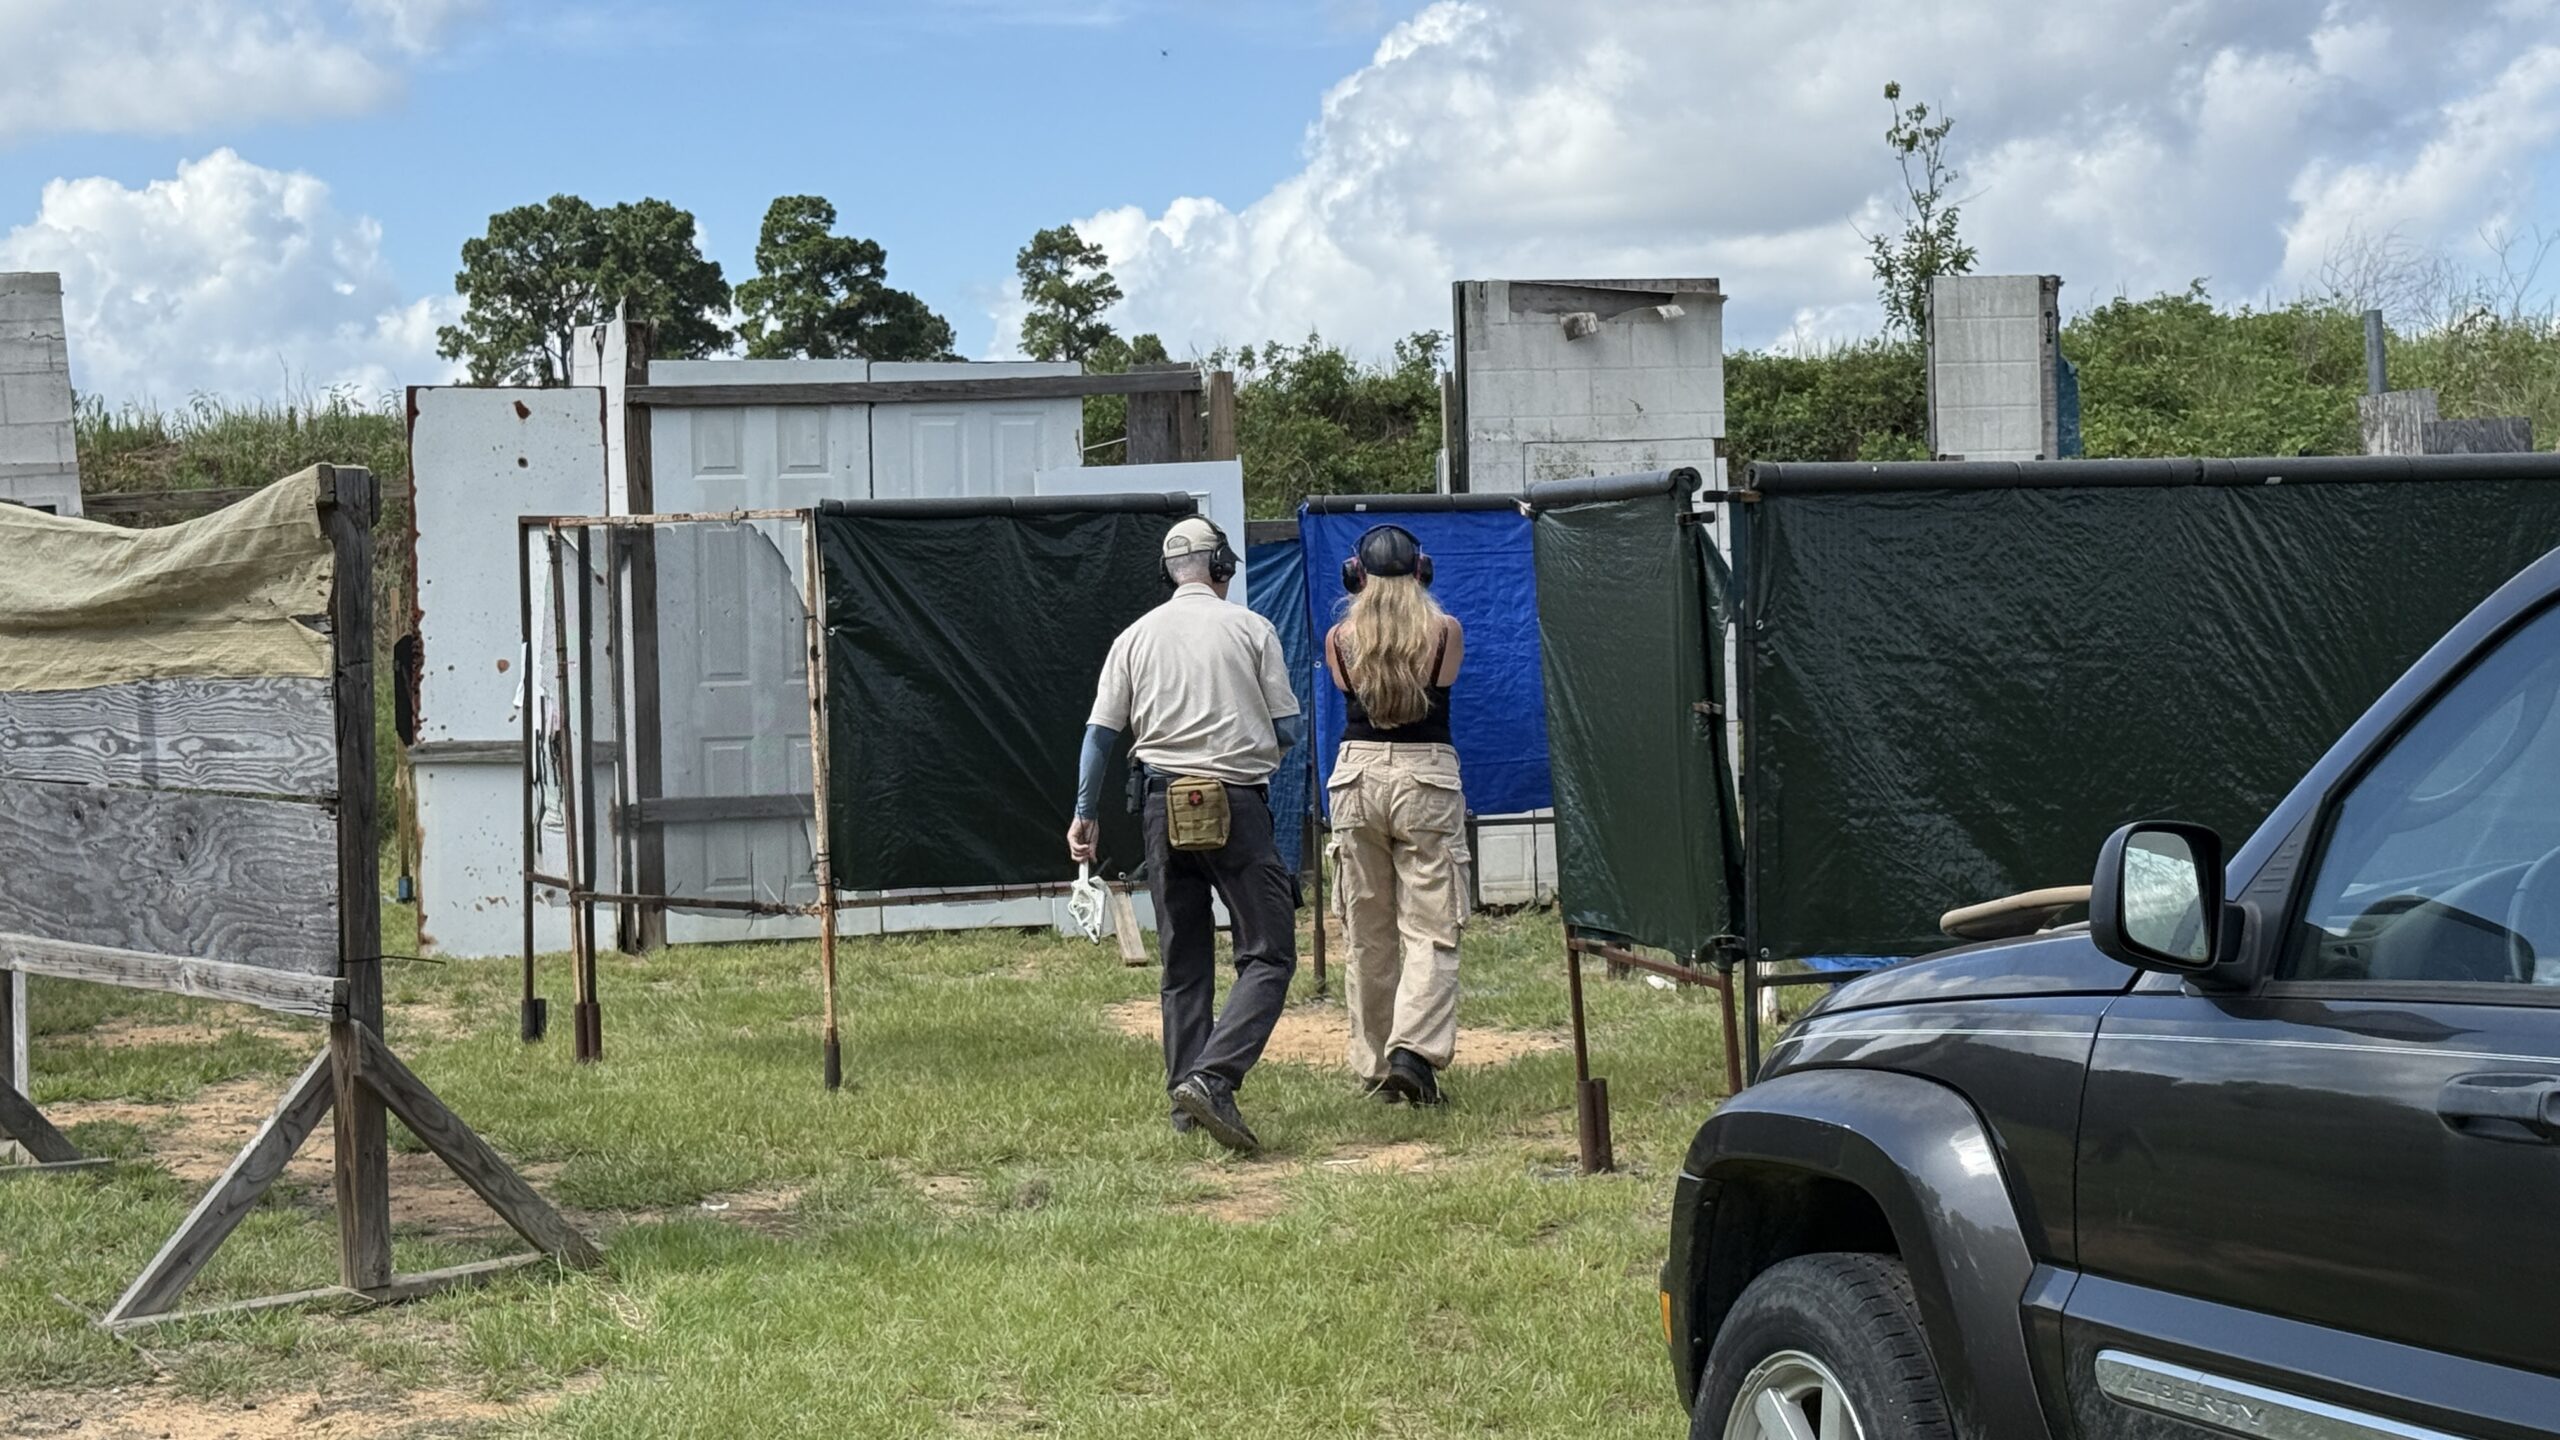
Some drills required you stand 1 yard from the non-threat, which was blocking your line of fire to the threat, and move around the obstacle before engaging. More and more obstacles were added to the drills as class progressed.
This setup had 4 non-threats blocking the shoot target.
One of the final drills in the course used the motorized 3D target moving around a crowded field of bystanders. Doug had marked one side of the moving target’s T-shirt to show a gun in the waistband, and when the target turned, it showed that the gun had been drawn, as the signal to engage. This required the target to initially appear to be backing up toward the student, but it was intended to simulate someone moving forward with a gun visible in the waistband.
In the video I move to the blue barrel (“cover”) while going to Doug’s “covered ready” position, and then drawing and moving to a position where I had a clear shot on the target as it simulated drawing and retreated as I engaged.
As an indoor=in-the-AC afternoon addon, Doug taught a CPR/AED/Stop the Bleed course. I have an AED at the A-Zone, so having more students and instructors trained in its use is beneficial. In this pic several students perform CPR and use the AED on one of Doug’s mannikins, while range dog Scudder Underfoot supervises.
https://www.facebook.com/share/v/1M3fhSc9Hp/
Doug’s Gunfighting in Crowds course will be in our regular rotation of class offerings each year. It offers use of innovative props, 3D targets, target movement and other features unavailable at indoor range courses, stand-and-shoot square range classes, or most dryfire simulators.
Lots of great classes coming up this summer in June and July! Plenty of slots open. Many of the classes mix indoor and outdoor activities so students aren’t baking in the summer heat all day. We are still making some final scheduling decisions about August and fall plans. More classes will be announced in the July newsletter.
RED DOT STUDY DATA COLLECTION – YOUR INPUT NEEDED
In September Penny and I will be presenting the results of our old “red dot vs irons vs lasers” study, where we measured performance of 120+ shooters at 5 and 10 yards using four different sighting systems. We are collecting additional data this summer on shooter performance at 10 and 20 yards, and allowing people to self-report their data. The instructions are here.
We are accepting user-submitted data from now until August 15, 2026. All you need is a pistol with an optic and usable backup irons, four B-8 target centers, 20 rounds of ammo and a timer or stopwatch (you can use a phone timer) to give you 10 and 20 second par times.
UPCOMING CLASSES
We have scheduled a lot of classes (and summer fun matches) for the next few months. Weekday private lessons are available on request. Two hours, $150, any topic, any gun, any skill level.
Every summer we run Wednesday night fun matches at the A-Zone. Unlike the big matches run on a weekends, these matches run fast. We start at 6 pm, shooters can show up as late as 7 pm, and we are done by 9. To make it run fast, I set up all the stages myself during the day, and we limit attendance to 25 shooters (preregistration is required). Shooters new to competition shooting, including juniors, are always welcome. Stages can be shot with pistols and pistol caliber carbines. Our matches are unaffiliated with any national organization and typically use “hit factor” scoring similar to USPSA. Stages typically include an all steel “Steel Challenge” style stage, a plate rack stages, some kind of standards/stand and shoot paper course, and a shoothouse stage. Typical round count is 90-100 if you don’t miss. After everyone has shot the stages, they stay open until dark for practice/fun runs. More information about the fun matches can be found here.
STAFF & ALUMNI NEWS
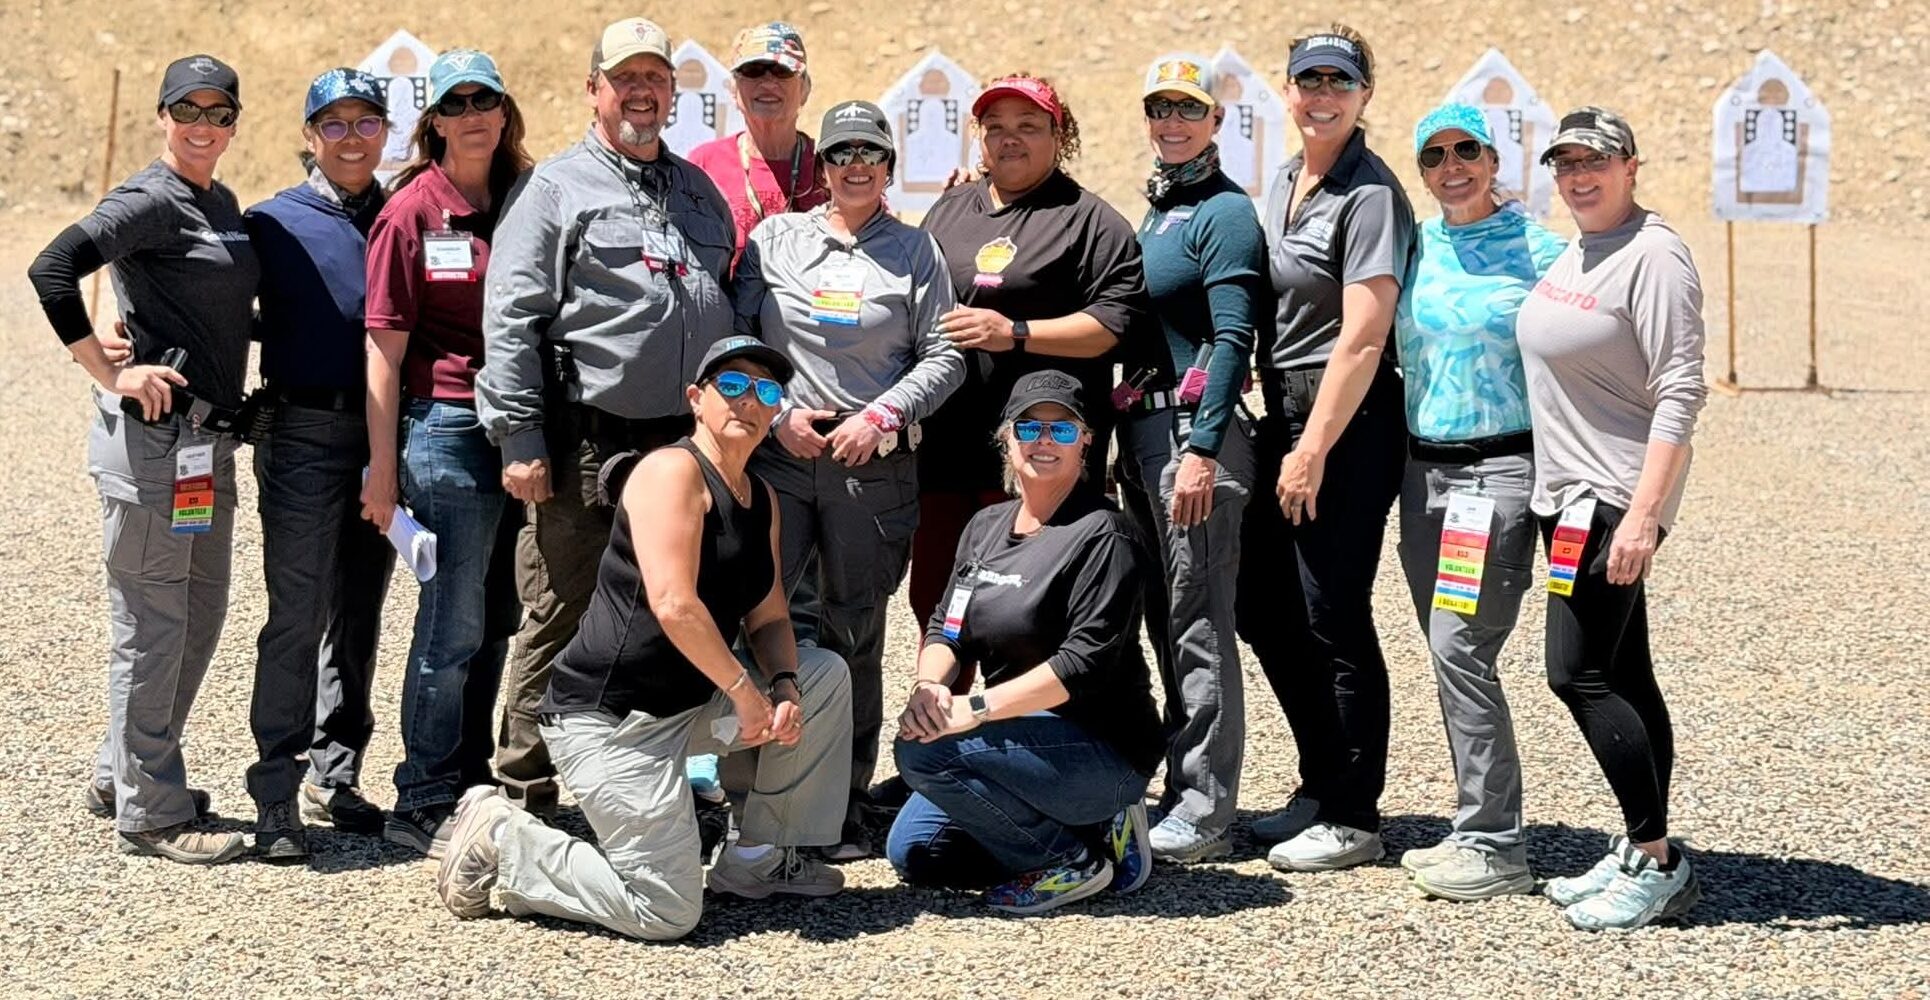
Doug Greig was a trainer at the national “A Girl and a Gun” 2026 conference. He taught 3 courses multiple times over the 3 days. Handgun Essentials, Manipulations and Accuracy, Top 5 Defensive Drills, and Red Cross First Aid w/ CPR/AED certifications.
I was a guest on the “Making Shooters Better” podcast, talking with Laser Ammo’s Terry Vaughan about the gap between carry permit standards and realistic defensive shooting standards.
I was also on the “That Weems Guy” podcast discussing the new irons/red dot study we will be doing this summer, along with other handgun shooting standards.
RIFLE CLASSES
We have three rifle classes on the calendar for June: Doug Greig is teaching half day sessions of basic rifle and intermediate rifle on June 14 (Sunday), and returning Saturday June 20 to offer the Palisades Training .22 rimfire rifle self defense course. Course designer Steve Moses talked about the course on this episode of the That Weems Guy podcast.
GREG ELLIFRITZ CLASSES
Greg is returning to the A-Zone in July to teach a one day “Knife Skills for Carry Permit Holders” class on Saturday, July 11. No prior knife training is required. This will be indoors in the AC all day. On Sunday Greg will offer a one day “Grid Down Medical” class teaching skills beyond the standard Stop the Bleed curriculum, including suturing.
JORGE PASTORE FOUNDATION
The Jorge Pastore Foundation is a local non-profit with the mission of enhancing the lives and careers of first responders through training opportunities, wellness programs and community engagement. It was started to honor the memory of Austin PD SWAT officer Jorge Pastore who was killed in the line of duty in 2023. JPF founder Kim Pastore has visited KR Training several times, as a match competitor and range guest. They are currently running a fund-raising online raffle for a “Sons of Liberty” rifle. Please support this great organization by purchasing a raffle ticket or just making a donation.
I have collected up all the discount codes we have set up with vendors we recommend. Alumni of KR Training classes will find them in the monthly e-news email. You’ll have to open the email and scroll to the bottom to find them. It’s a reward for actually opening and reading the email!
REFRESHER DEALS
Re-take any class you’ve taken before for half price! Contact me to get the alumni discount code. Firearms skills deteriorate without practice. Most ranges don’t allow drawing from a holster, shooting quickly, moving or shooting from cover. If you don’t practice the skills you learned in class, they won’t be there when you need them.
This video is from an April show with the Black Cat Choir, where we have some fun with the Rolling Stones’ “Miss You”, and our lead singer does his Mick Jagger impression.
The AI revolution in music is here. One of my old band mates has been using AI to “reimagine” songs we wrote and recorded in the 1990’s and early 2000’s. The AI engine takes in the original recording and produces pro-grade “cover versions” of the original song. Here’s the AI generated cover version of our song “Together For Life”, which is a sarcastic 80’s metal power ballad about a failed marriage, in the style of Ozzy and Guns and Roses’ “November Rain”.
In addition to my regular solo shows (Tuesdays at Luigi’s in College Station), I will be at the Kenney Store (near Brenham) with the Black Cat Choir Saturday night, June 13 (7-10p), and Midnight Express (playing 60’s-80’s classic horn band songs from Steely Dan to Chicago to Huey Lewis and Earth, Wind and Fire) will be at the Palace Theater in downtown Bryan June 26.
Late February and March were incredibly busy and I never got a March newsletter out, so this newsletter is a big one. We have an incredibly wide variety of classes coming up in the next few months – hopefully you will find something of interest and come train with us!
NRA ANNUAL MEETING
The NRA’s Annual Meeting is coming up April 17-19 at the George R. Brown Convention Center in Houston. Admission is free for NRA members, $35 for non-members. Why should you go? Every major gun maker and gun related product company will be there. The NRA Training Department will be running sessions featuring a lot of national level guest speakers. It’s like a gun show, but a professional grade one where you can see and handle (and buy) almost every product available in the whole gun industry. I’ll be there Friday as part of my duties on the NRA’s Education and Training Committee.
UPCOMING CLASSES
We have scheduled a lot of classes (and summer fun matches) for the next few months. We will be finalizing July-October class dates and getting those announced in the May newsletter.
These two specialty classes from nationally known trainer Greg Ellifritz each teach skills that are important in situations where the attacker is at arm’s reach: car jacking, street robbery, emotionally disturbed individual (drugs, mental illness, or anyone in a rage). The Close Quarters Shooting Class teaches shooting from retention, one handed drawing from concealment, and some weapon retention/disarm skills.
The Cane/stick/baton self defense is particularly useful for those that are older and have limited ability to fight back using unarmed skills. It’s a comfortably paced 6 hour course, suitable for all levels, including those that use a cane on a daily basis, teaching how to use a cane, an umbrella, a hiking stick, or any other medium or longer stick as a defensive tool. We offered this class in response to student requests, but registrations are still much lower than expected. It’s unlikely we will offer this class again in the next few years, so anyone with interest in this topic should make the effort to attend.
May begins with 4 classes intended for shooters with limited experience: Basic Pistol/License To Carry Completion is our entry level course helping new shooters learn fundamentals, gun selection and firing the Texas License To Carry shooting test, so they can complete their carry permit training with our online course.
KR Training’s revolver guru Tracy Thronburg will be running a 3 hour Double Action Revolver Skills, teaching how to run a double action trigger properly and methods to reload the wheelgun. This class would be an excellent choice for those that carry a snub revolver as a primary or secondary pistol, whether on body, in a pocket or in a bag, pack or purse.
Take Mom To The Range Day May 9
On May 9th we will offer two classes covering topics specific to ladies and the challenges of carrying a large gun “on body”. The Off Body Carry (Bag/Pack) seminar is a two hour classroom course teaching how to properly set up an off body carry system (using a purpose built kydex bag insert holster) and choose an appropriate bag, pack, or purse from the wide variety of products designed specifically for off body carry. The wrong (but sadly, popular) answer is to put a small revolver or semiauto (without a round chambered) loose into a bag and call that “carrying”. The right answer is to have a dedicated pouch, with a built in rigid holster that specifically fits the gun being carried, so that the gun can be carried with a round chambered and drawn as quickly as a gun carried in a belt holster.
We have many loaner guns, loaner holsters and loaner bags that students will be able to use at no charge for this course.
That afternoon we will run our traditional start-of-summer Defensive Pistol Small Gun class. The course focuses on pocket carry, carry of subcompact semiautos and revolvers, and use of non traditional belt holsters including the Enigma, belly bands, deep carry draws from tucked in shirts, and the off body bag/pack/purse skills covered in the morning session.
SUMMER FUN MATCHES AND COMPETITION PISTOL TRAINING
Every summer we run Wednesday night fun matches at the A-Zone. Unlike the big matches run on a weekends, these matches run fast. We start at 6 pm, shooters can show up as late as 7 pm, and we are done by 9. To make it run fast, I set up all the stages myself during the day, and we limit attendance to 25 shooters (preregistration is required). Shooters new to competition shooting, including juniors, are always welcome. Stages can be shot with pistols and pistol caliber carbines. Our matches are unaffiliated with any national organization and typically use “hit factor” scoring similar to USPSA. Stages typically include an all steel “Steel Challenge” style stage, a plate rack stages, some kind of standards/stand and shoot paper course, and a shoothouse stage. Typical round count is 90-100 if you don’t miss. After everyone has shot the stages, they stay open until dark for practice/fun runs.
Intro To Competition Pistol (Saturday May 16) is for people that have had training drawing from a holster who want to learn about pistol competition by shooting a ‘practice match’ that includes coaching. Competition Pistol Level 2 (Saturday May 23) will be taught by Texas A&M Corps of Cadets Marksmanship Team assistant coach David Reichek. This class will focus on improving stage and match performance by focusing on stage strategy, target transition, movement and other skills that go beyond the basics.
RANGEMASTER & CITIZENS SAFETY ACADEMY COURSES
May 28-29, Dr. Tiffany Johnson and Aqil Qadir bring their nationally acclaimed Gateway Instructor Development course to the A-Zone. A Gateway Instructor is someone that mainly teaches entry level and carry permit level shooters – not just those teaching formal classes but also those looked to by family and friends as an informal pistol coach. If you find yourself helping or coaching others progress from the basic level to armed citizen, this class can teach you how to be better at it.
May 30-31, Tiff and Aq put on their Rangemaster Staff hats and teach the classic 2 day Rangemaster Combative Pistol course: the foundation of everything Tom Givens teaches. Tom’s material works: 71 Rangemaster students have been in shooting incidents, with a hit ratio of 96% (roughly triple the performance of officers in most law enforcement agencies). If you’ve taken KR Training’s Defensive Pistol Skills 1 or higher level classes and want a more in depth, 2 day immersive defensive pistol course, this is the class for you.
JUNE – JULY
The May newsletter will have more information about all of these June and July courses:
At the end of February Karl, Tracy and Ken Carden traveled to Sorrento, LA, between Baton Rouge and New Orleans, to attend the Vicki Farnam FlexCCarry(tm) instructor certification course. More about that trip in this blog post.
Eric “Clark” Victorin attended and passed the Gunsite Pistol Instructor course in April. Tracy Thronburg took a revolver class from Wayne Dobbs at the Dallas Pistol Club (sample target below).
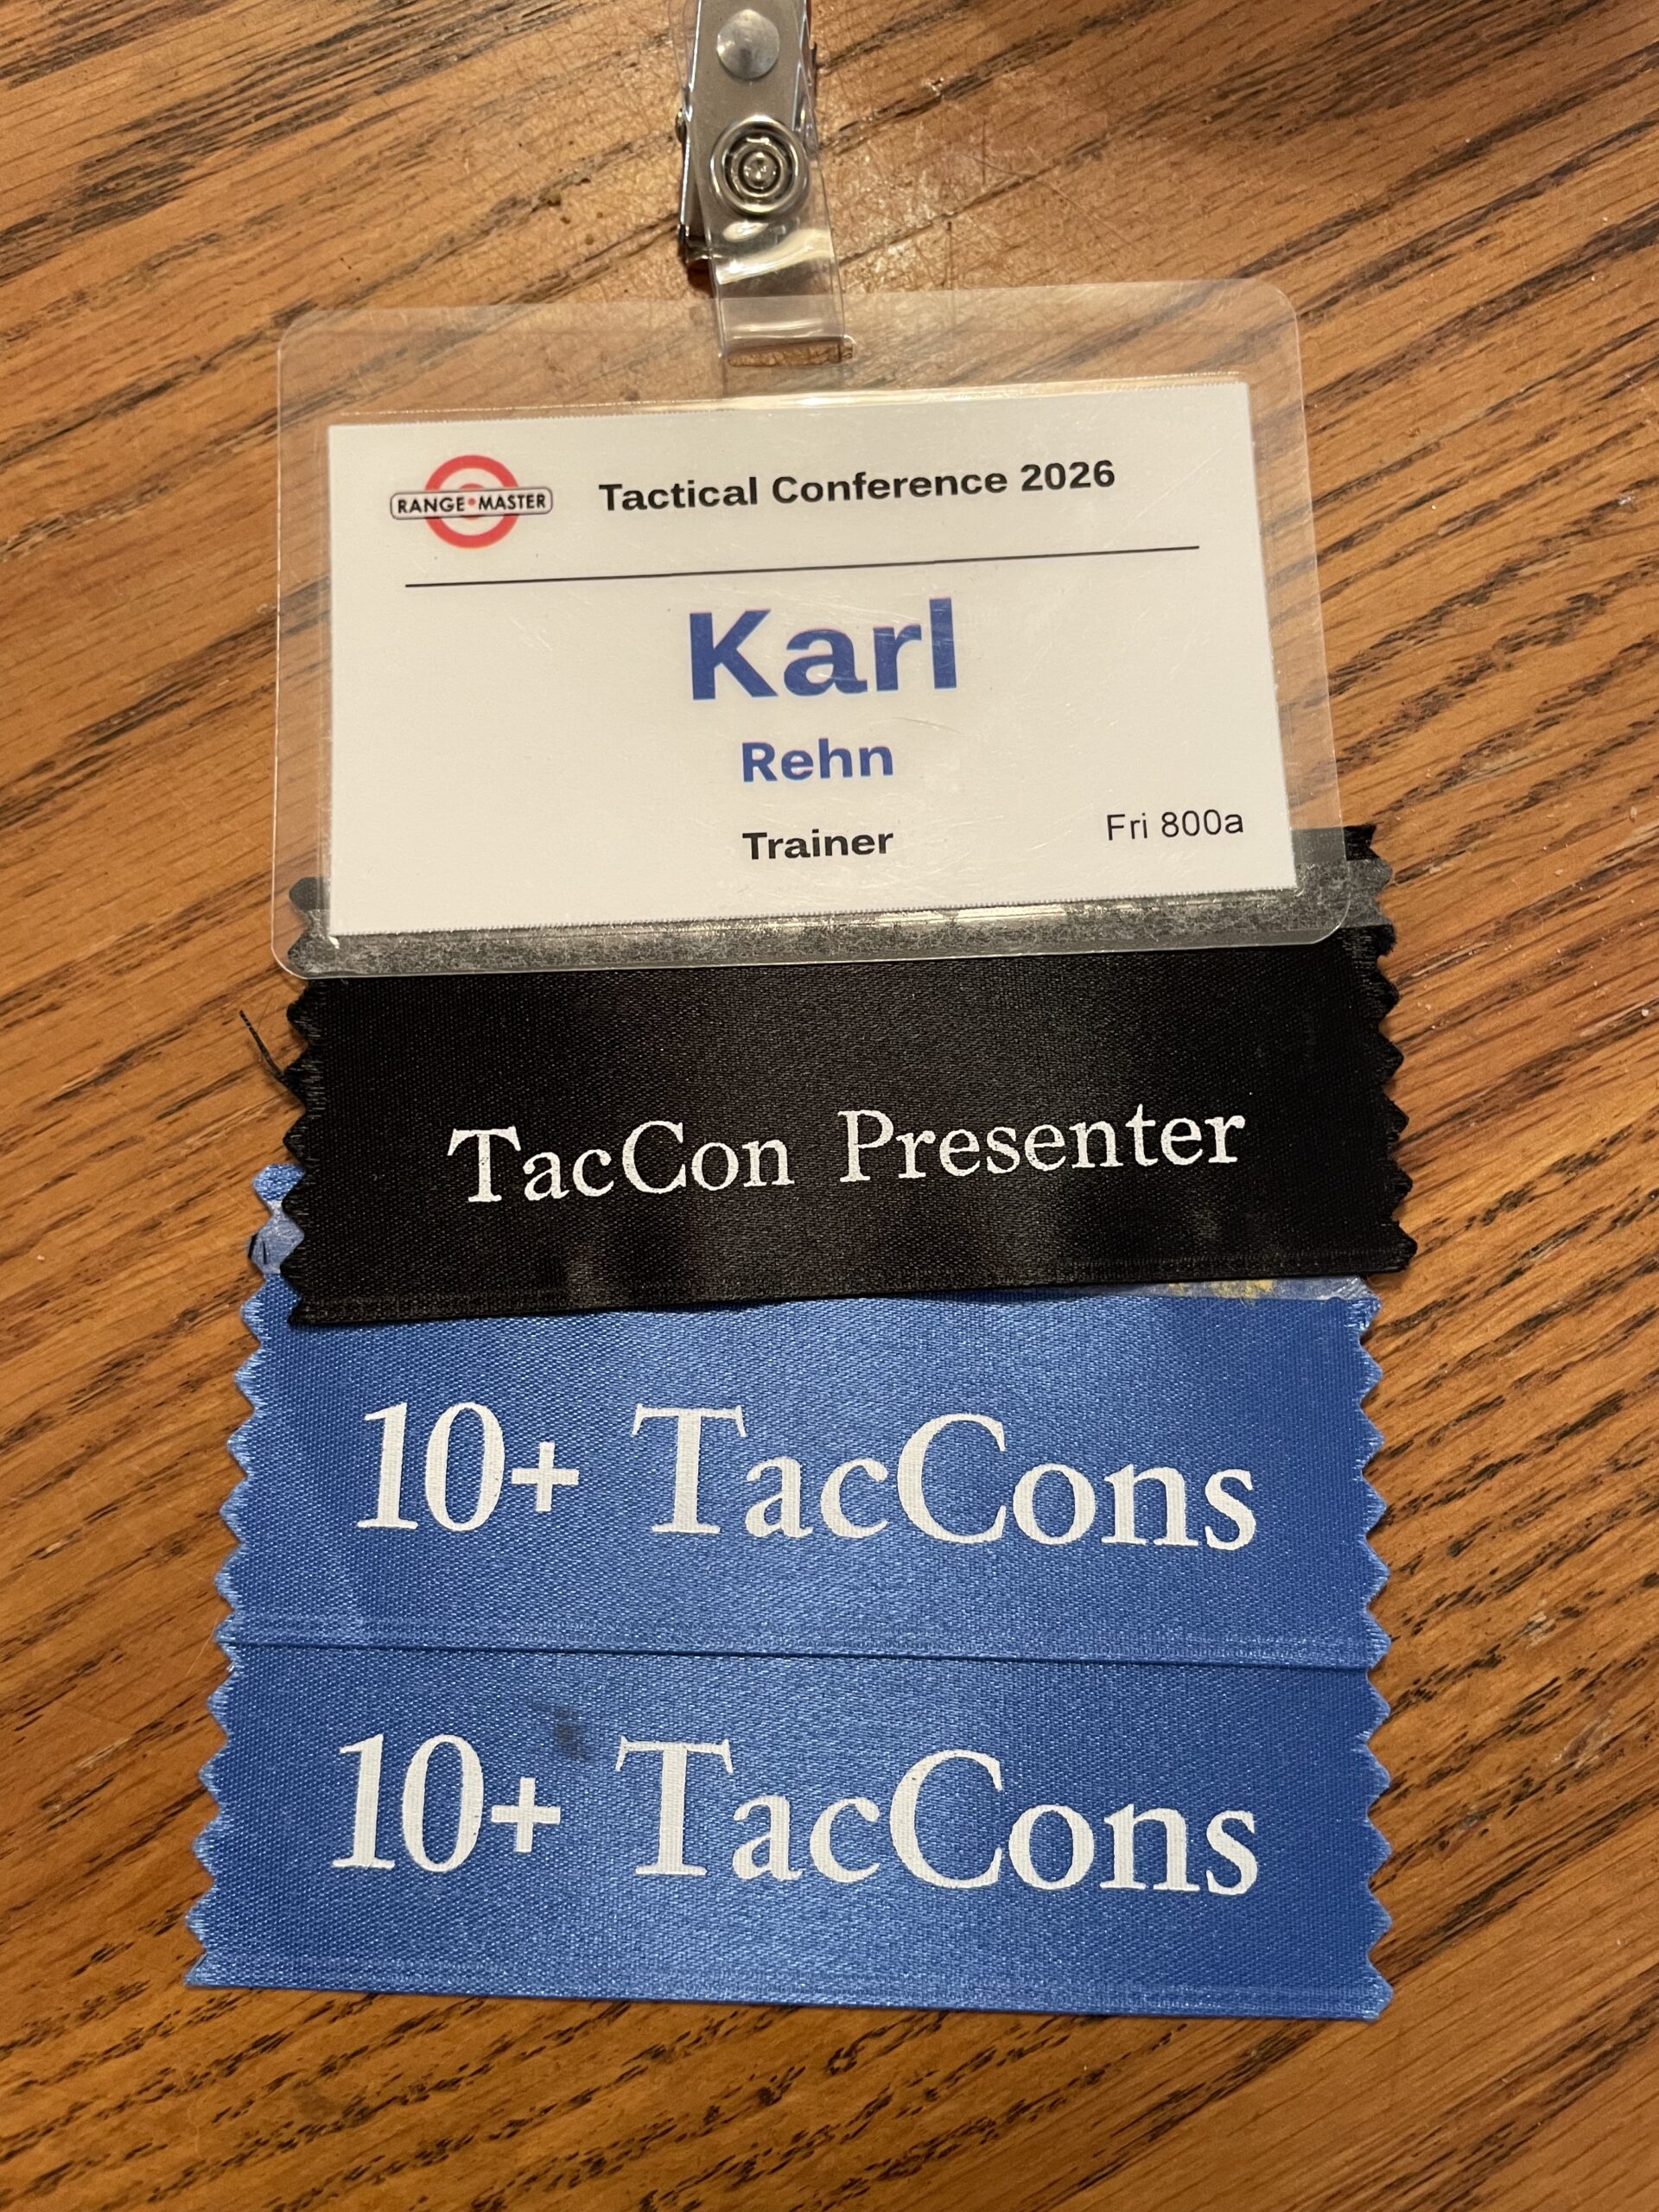
Karl, Dave Reichek, David Tschirhart, Ed Vinyard, Ken Carden, Randy Wallen, Jeff Edwards, and Bobby Holmes all attended the RangeMaster Tactical Conference in Dallas in late March. Karl presented two lecture blocks and two live fire blocks, Dave worked as an RSO. Details about Karl’s presentation and TacCon sessions attended can be found here.
Doug Greig and I collaborated on a revision of our free drills ebook, compiling the carry permit qualification courses of fire from all 50 states. That material, along with a collection of historical handgun drills, and other content, will be included in the revised e-book, to be released later this year.
I have collected up all the discount codes we have set up with vendors we recommend. Alumni of KR Training classes will find them in the monthly e-news email. You’ll have to open the email and scroll to the bottom to find them. It’s a reward for actually opening and reading the email!
REFRESHER DEALS
Re-take any class you’ve taken before for half price! Contact me to get the alumni discount code. Firearms skills deteriorate without practice. Most ranges don’t allow drawing from a holster, shooting quickly, moving or shooting from cover. If you don’t practice the skills you learned in class, they won’t be there when you need them.
That last article about the difference between “carry” and “capability” is important. Read it. It says that 40-60% of the AG&G members who carry don’t ever practice drawing their pistol. We see this problem in every class. Dry fire practice is free and only takes a few minutes to do 10-20 draw and dry-fire one shot drills. The longer the gap between repetitions of this critical skill, the more that skill deteriorates. Leaving the gun in the car isn’t “carrying”, and likely won’t result in you having a gun within reach when you need one. Can’t figure out how to carry on body? Come take our Bag/Off Body Carry class May 9th and learn about options that are better than leaving the gun in the car or leaving the house unarmed.
MUSIC VIDEOS OF THE MONTH
In March I played a lot of shows, mostly with the Black Cat Choir at various Antique Show events in Round Top and two nights at the Austin Rodeo. Penny and I also went to the “Croce Plays Croce” show in Houston, where A.J. Croce (a great piano player and singer) performed his own songs and the songs of his father, Jim Croce (Bad Bad Leroy Brown, Time in a Bottle). I’ve been a fan of A.J’s for a long time, and I cover his song “That’s Me in the Bar” in my solo shows. Here’s a video of me performing it at Luigi’s in March.
The AI revolution in music is here. One of my old band mates has been using AI to “reimagine” songs we wrote and recorded in the 1990’s and early 2000’s. The AI engine takes in the original recording and produces pro-grade “cover versions” of the original song. Here’s the AI generated cover version of our song “Slow Drivin’ Man” (a country song from the perspective of a slow driver who likes to get in the left land and drive the speed limit).
Here’s the original recording, for those that want to hear the difference between the AI and original version.
I’ve been presenting at and attending the Rangemaster Tactical Conferences since the early 2000’s. The only folks I know of that have been at, or presented at, more TacCons than me are Tom Givens, Massad Ayoob and John Farnam.
Friday
Due to performing a show with one of the bands I’m in on Thursday night before TacCon started, I drove up Friday morning, missing all the Friday am sessions.
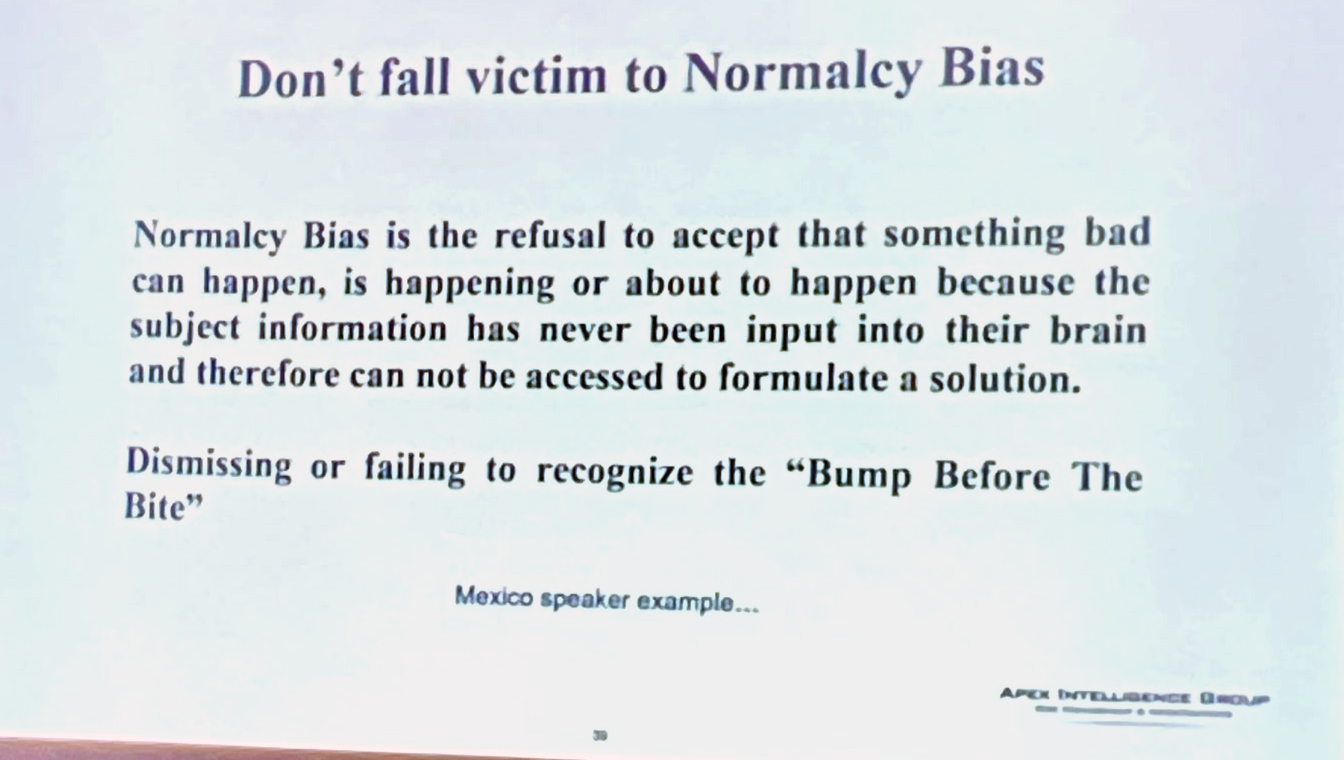
The first session I attended was Don Redl’s talk on “Pathway to Violence and Criminal Trends”. Don is a longtime private security & executive protection expert. He’s presented at several of the recent TacCons and has been a part of the private sector training industry for a long time, going back to his involvement with the National Tactical Invitational events in the 1990’s.
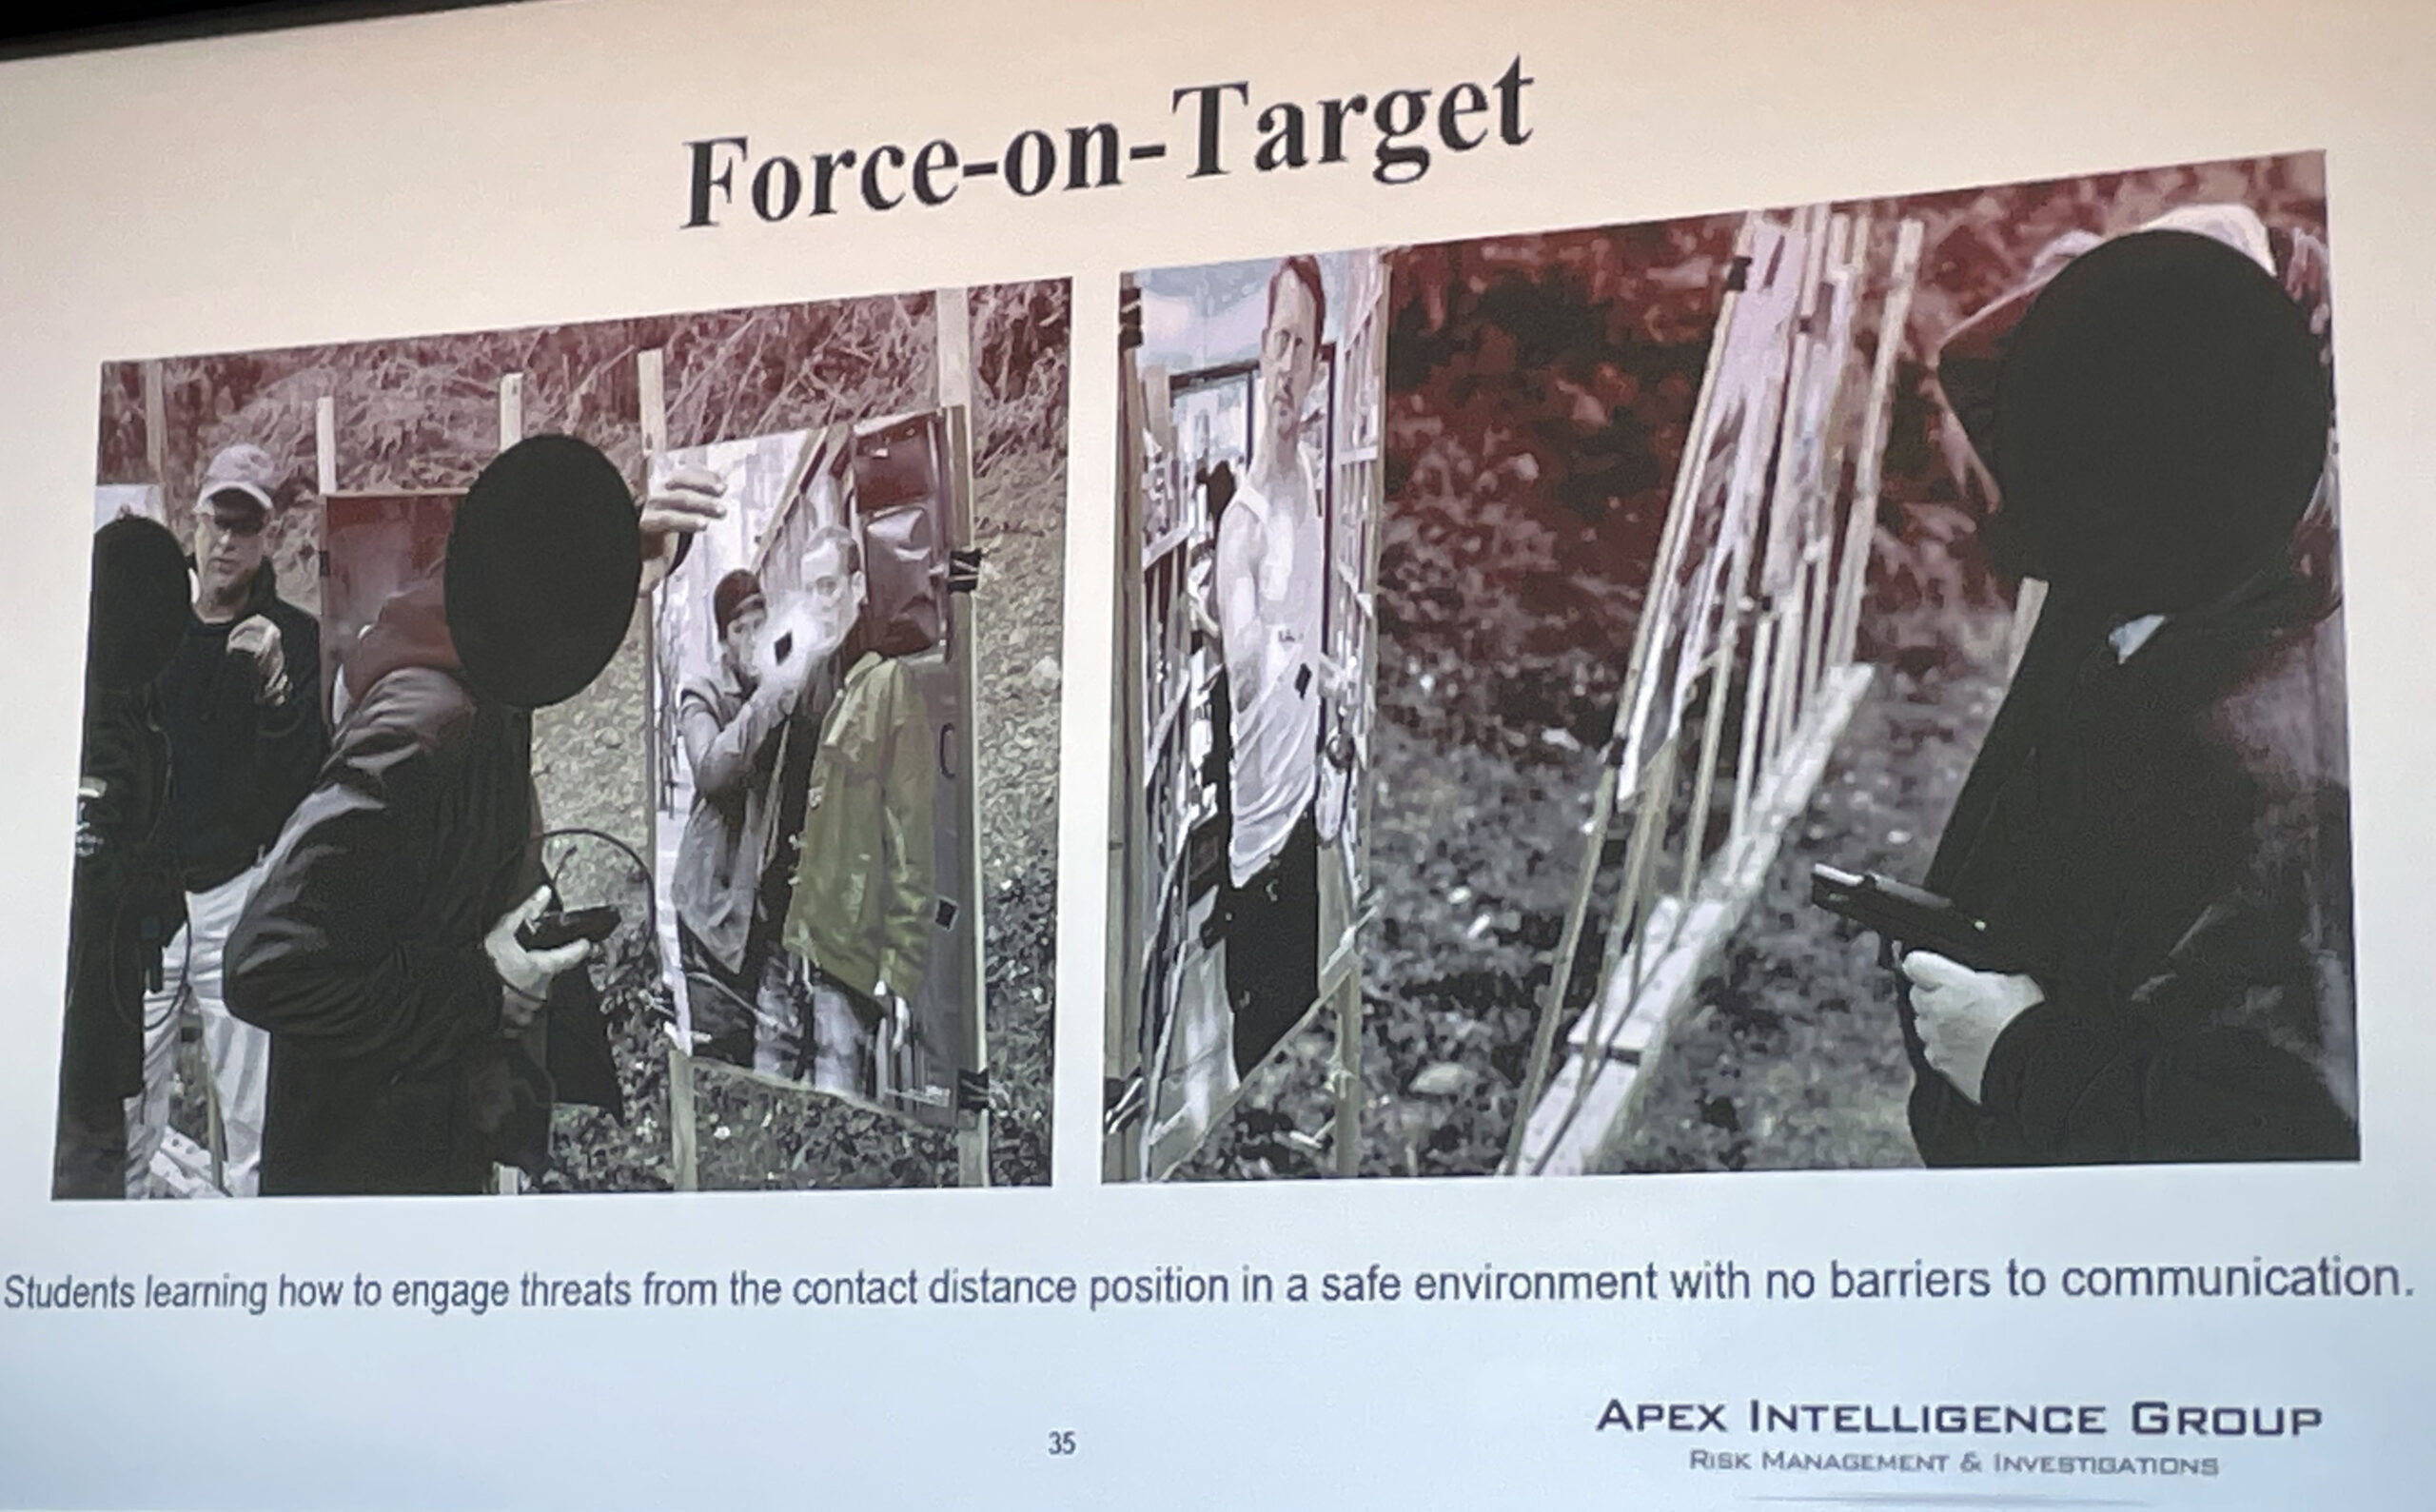
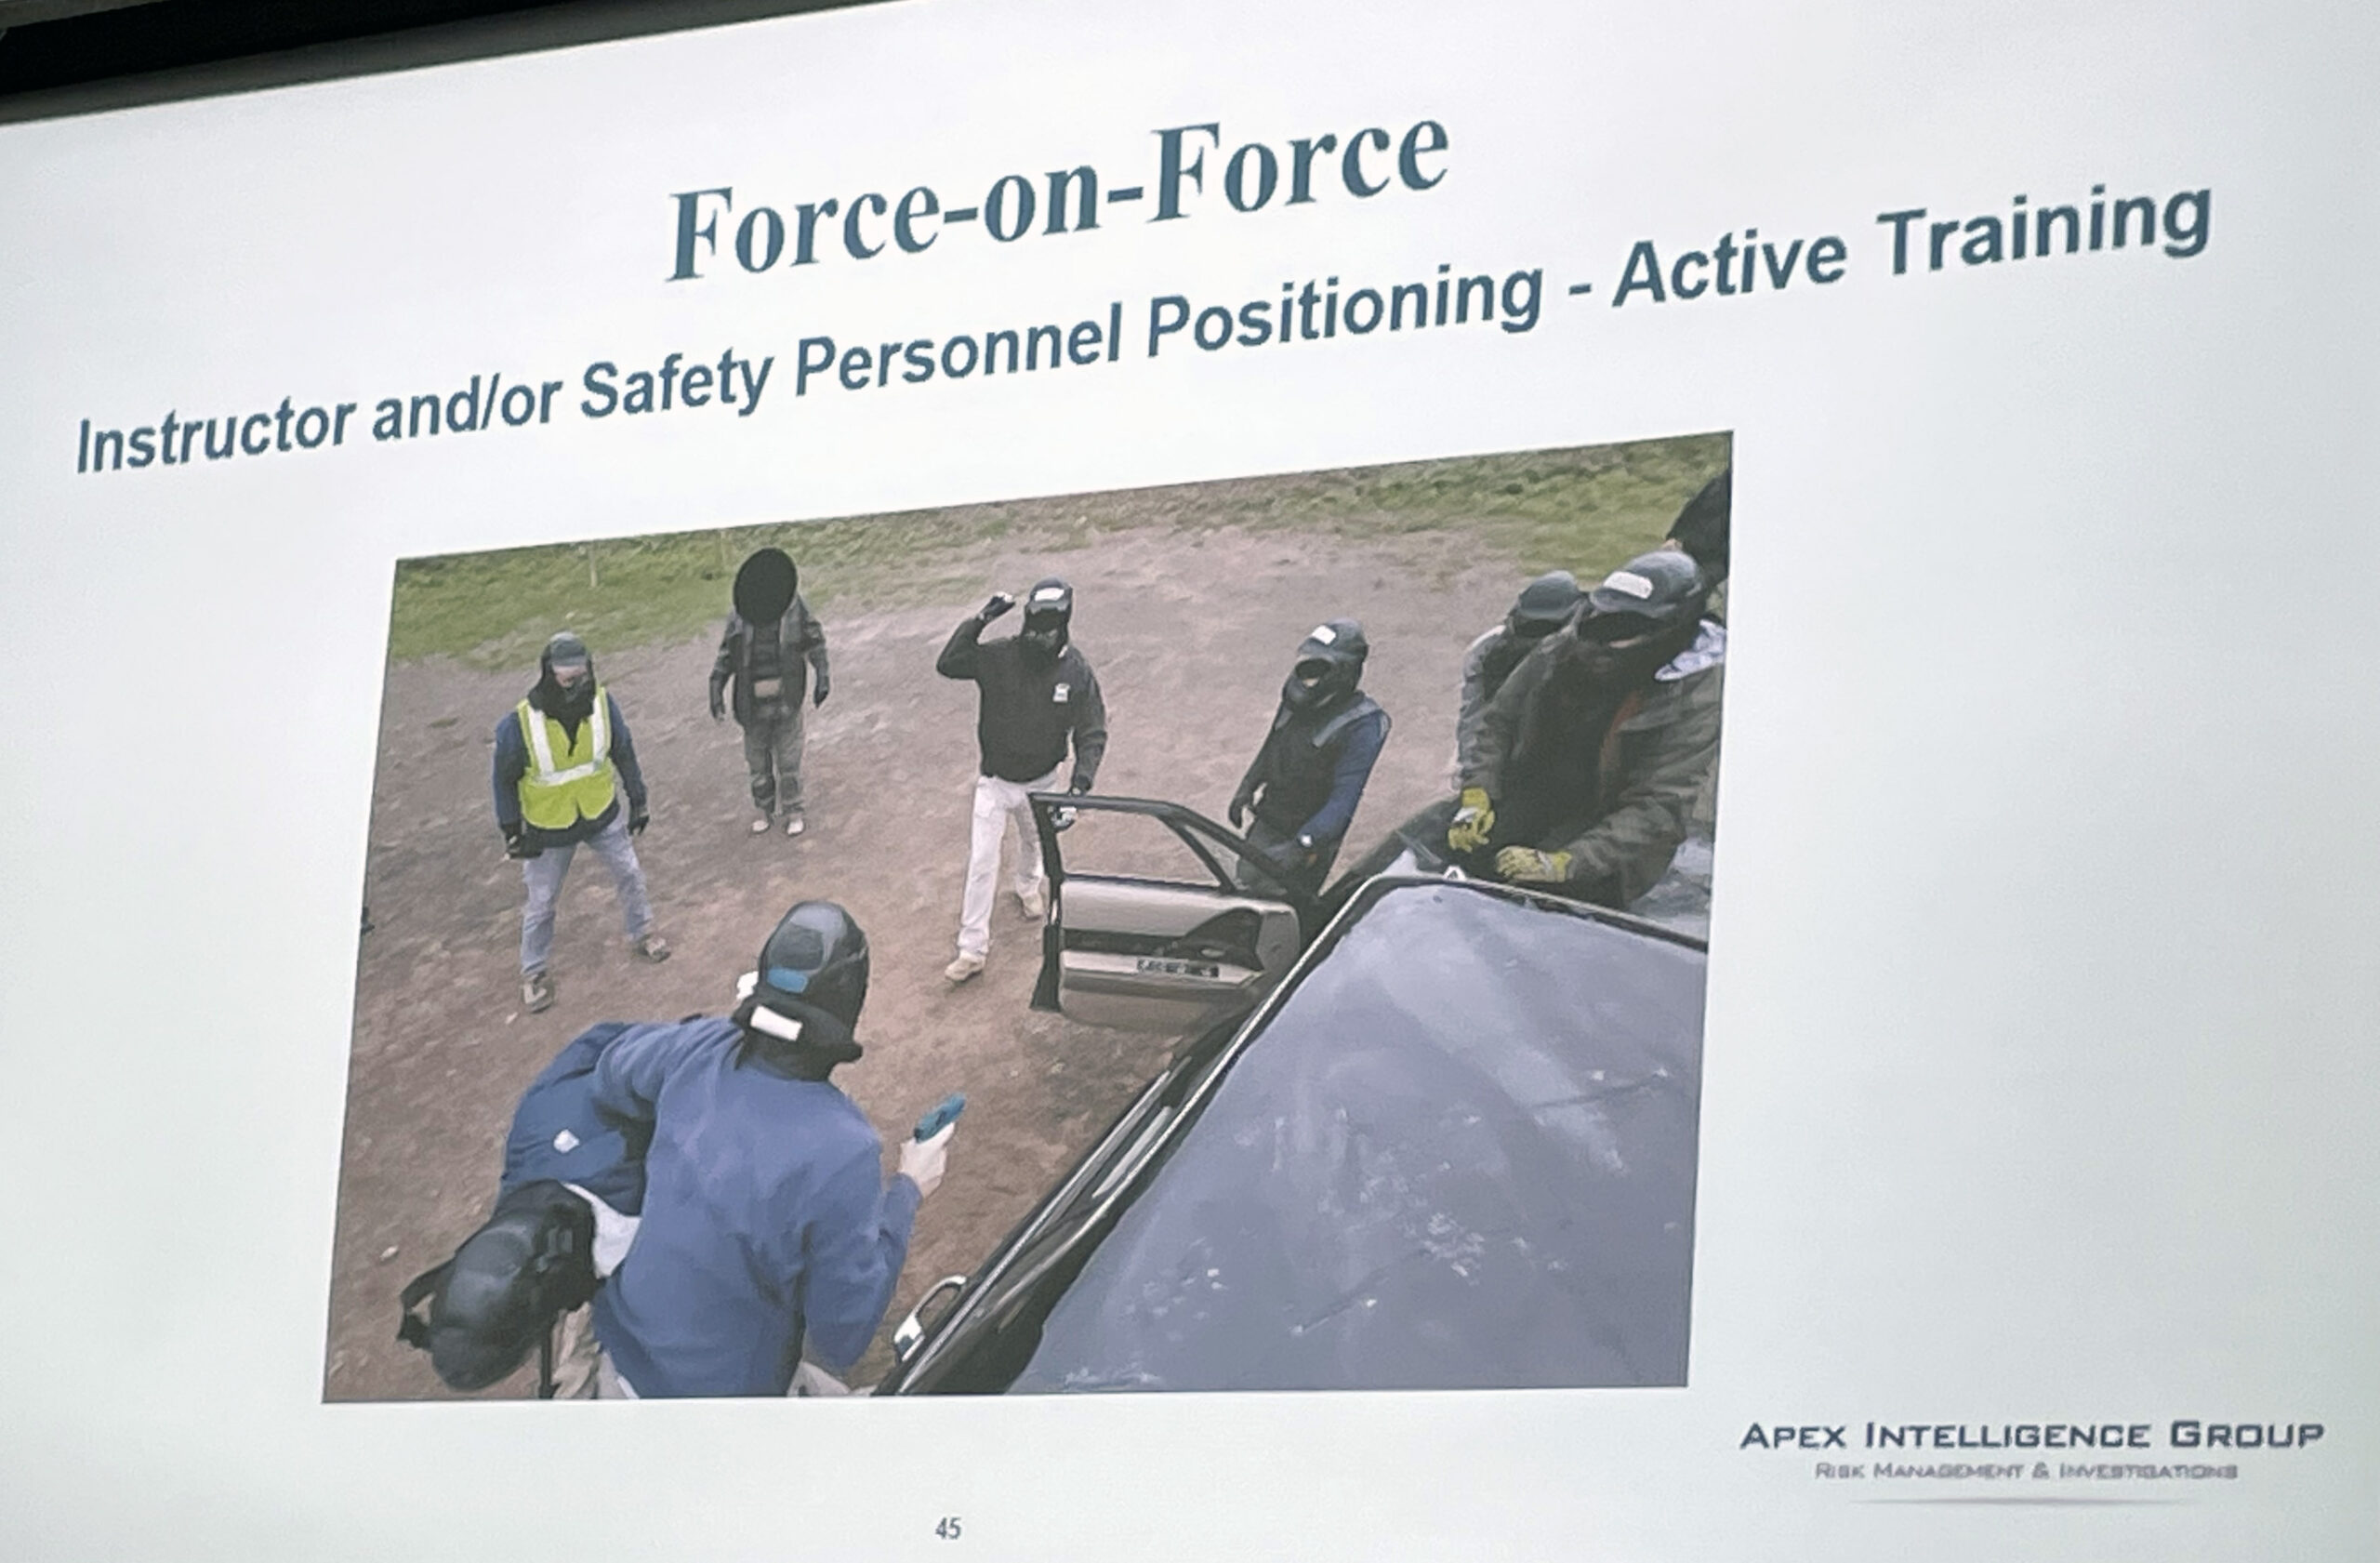
His first slide explains the different levels of escalation. It’s also a great guideline for those designing force on force scenarios, as each step describes different criminal behavior that may require different actions in response.
This slide sums up the essential information everyone should know about vehicle tactics. The typical untrained / carry permit only level armed citizen (or at least the ones that comment on some of the forums and groups I read) thinks that they need to be able to gunfight while sitting in the driver’s seat. This incorrect understanding of appropriate vehicle defense tactics drives the sales and interest in car holsters and kinds of bad ideas involving “carrying” in glove boxes, consoles, and everywhere but in a holster on the body.
Don talked about the “bump before the bite” which can be a wide variety of probing or pre-fight assessment behaviors that occur before the full attack begins.
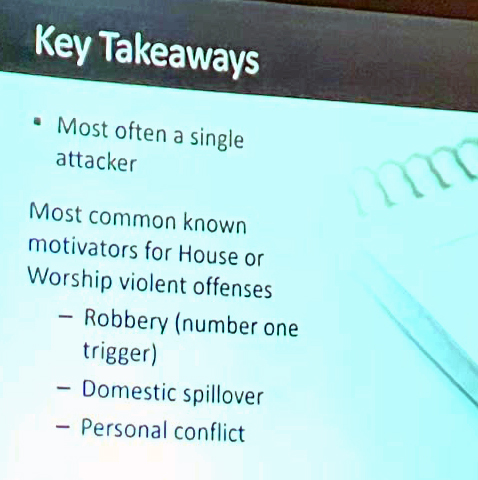
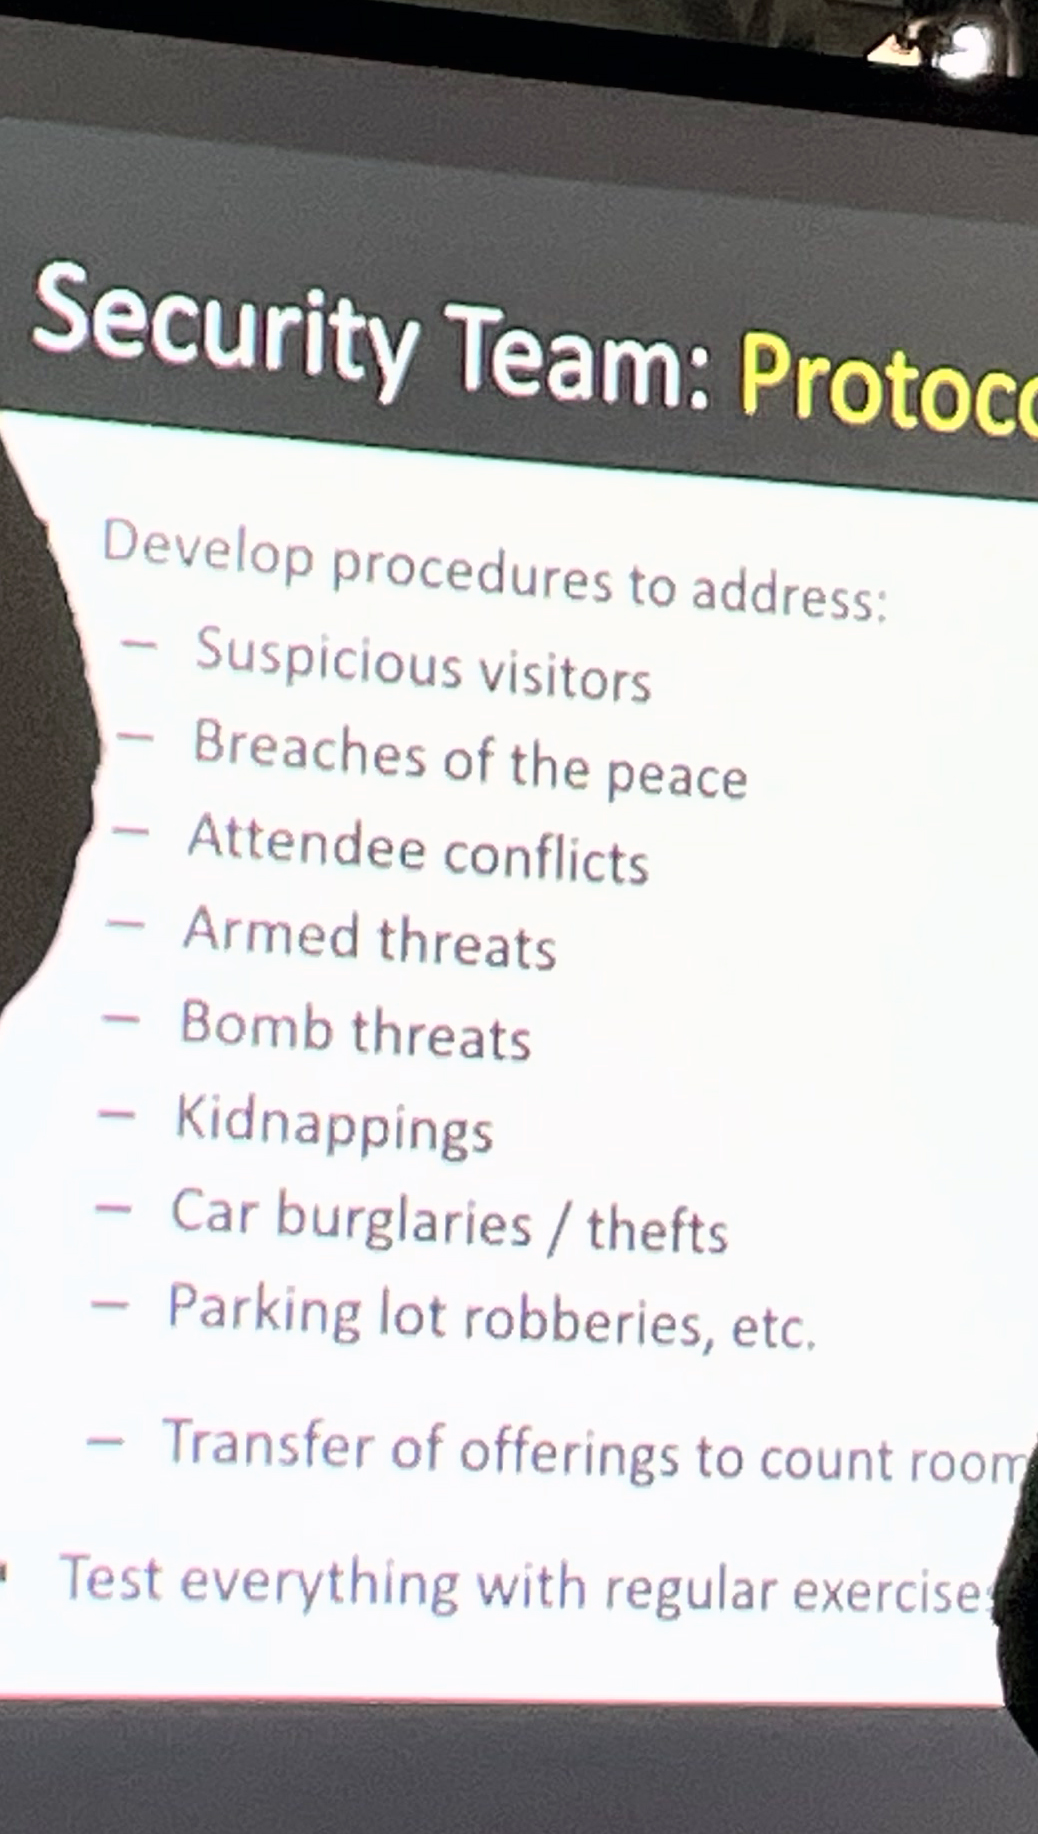
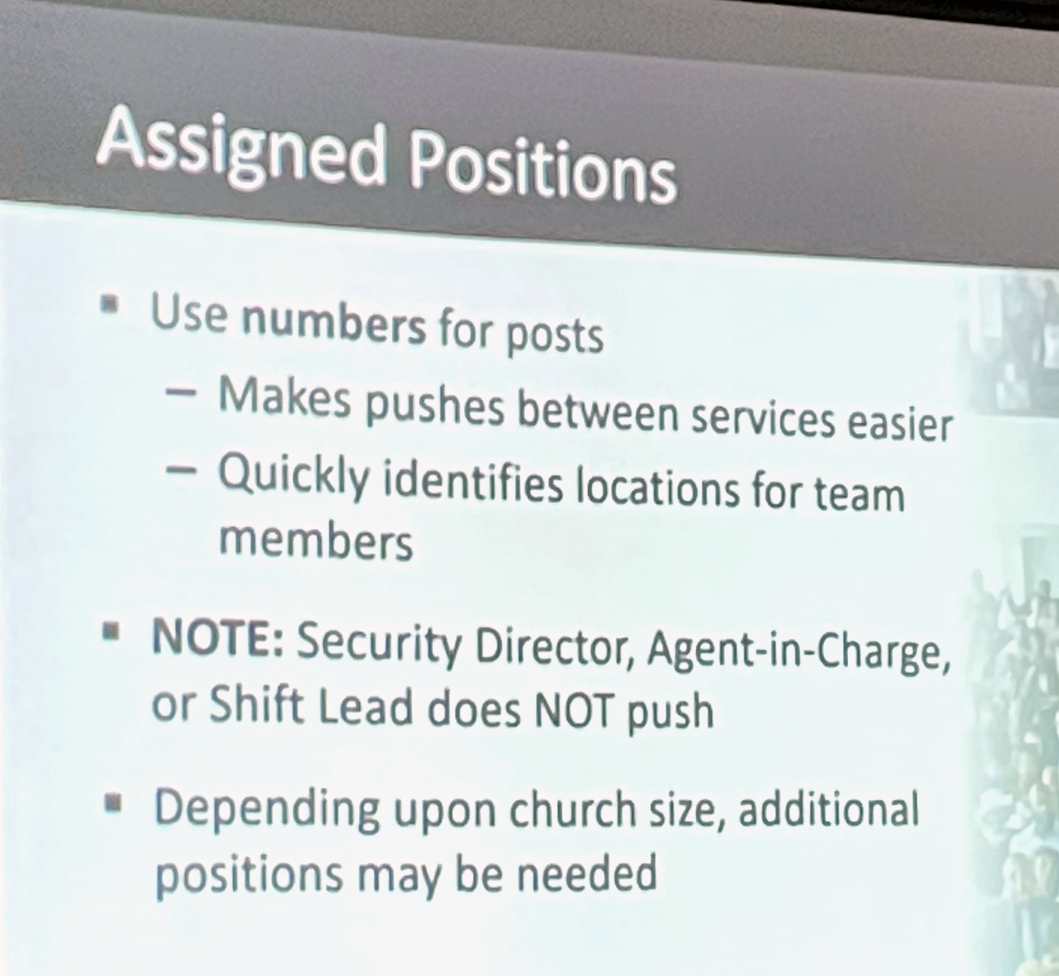
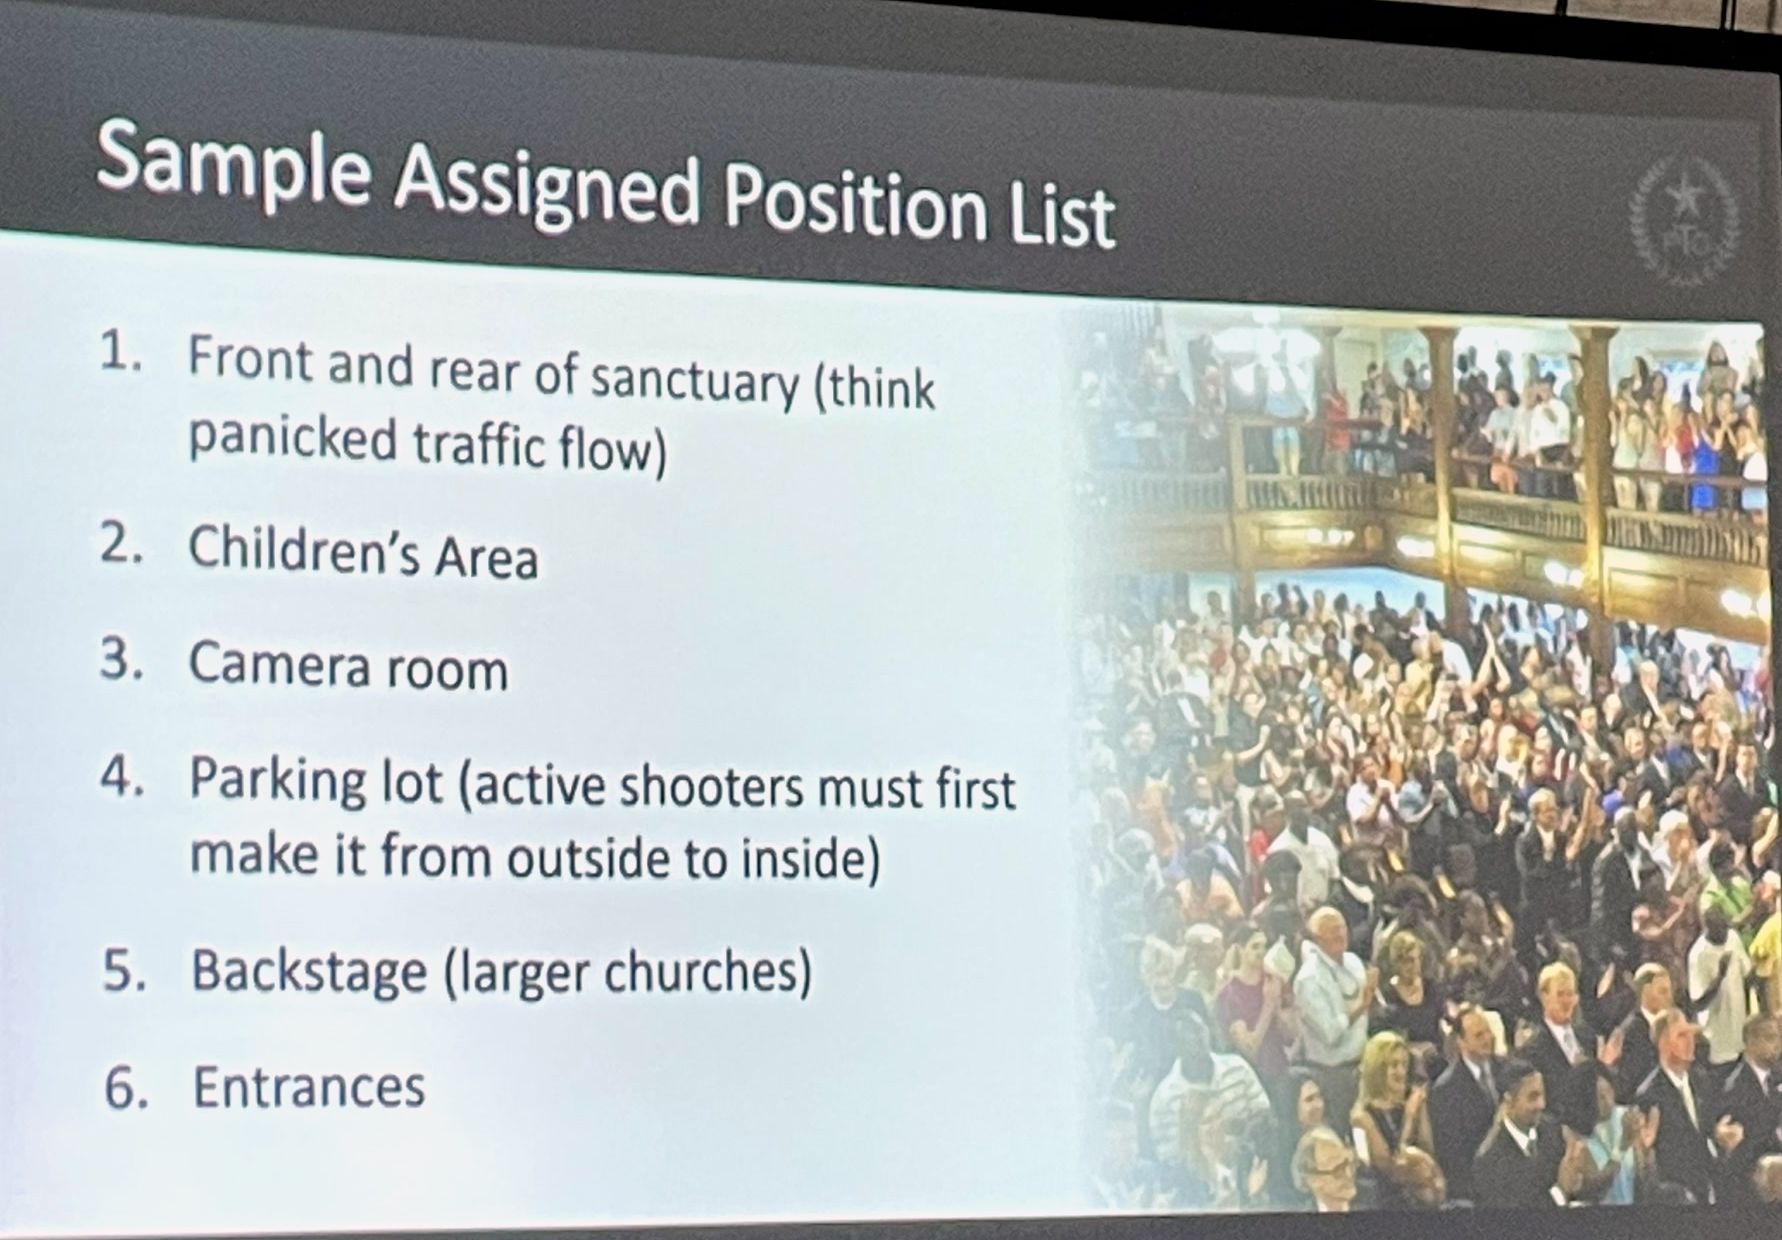
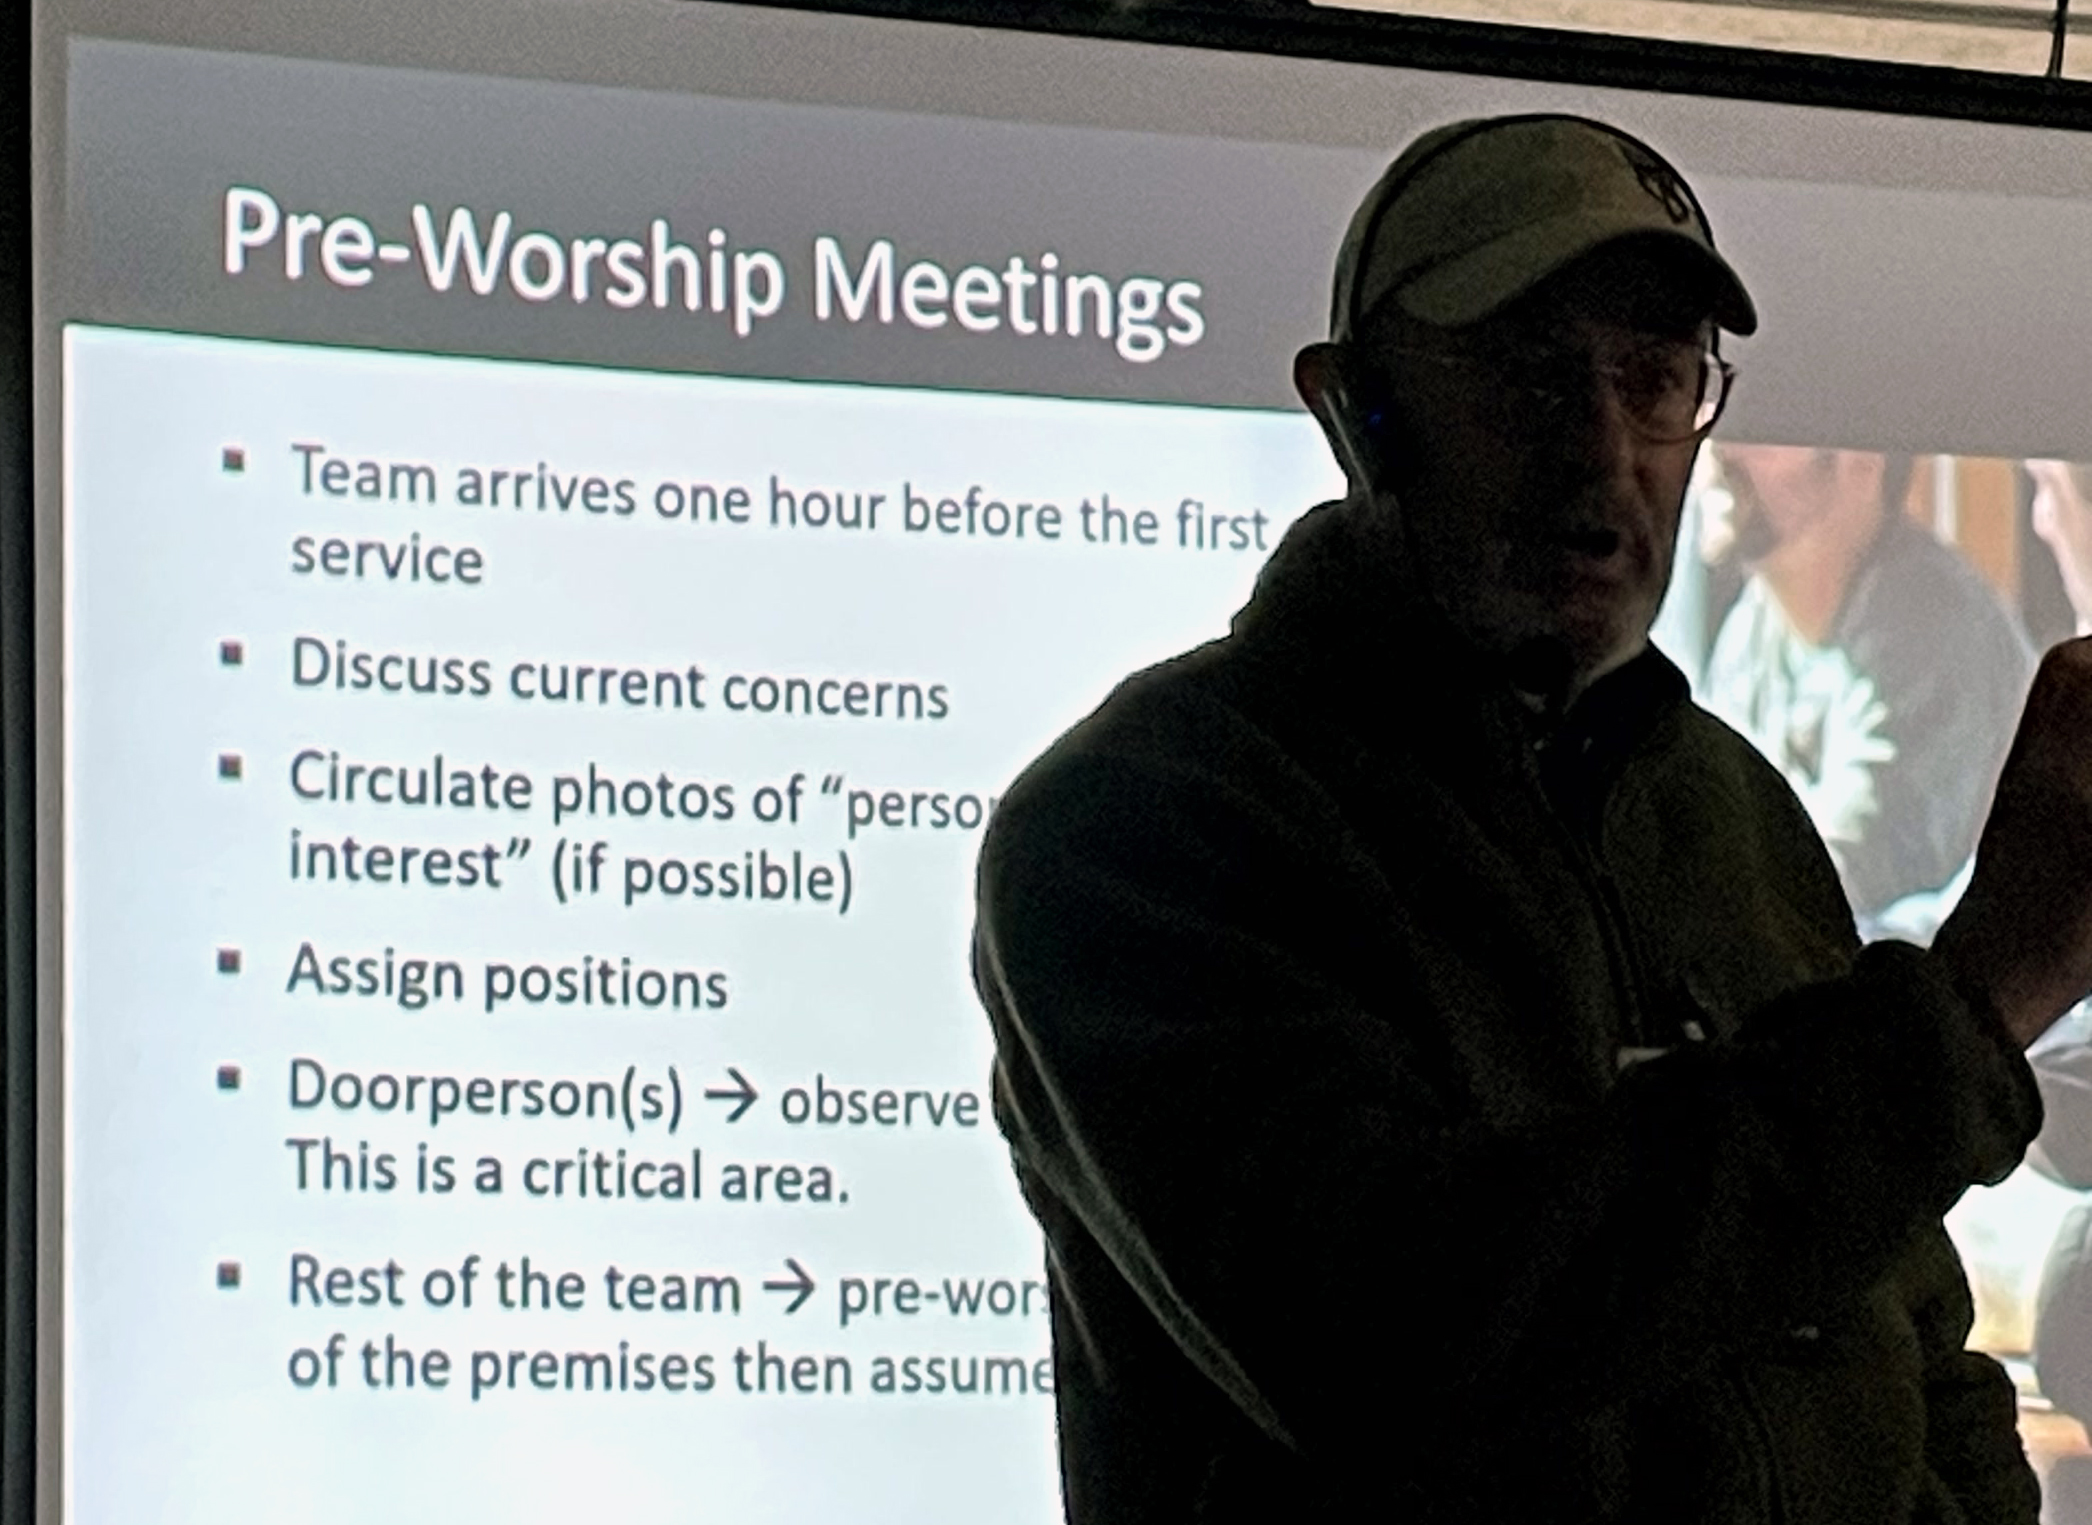
Following Don’s talk, Steve Moses went deep into key concepts related to running a church security team. Steve is one of the very few trainers that gives a serious professional perspective on the mission and tasks and function of a church security team. Most programs focus on building live fire skills, medical and active shooter response, all of which are important elements, but Steve’s presentation focused on threat assessment, personnel assignments, and many elements not considered by many informally run church security teams.
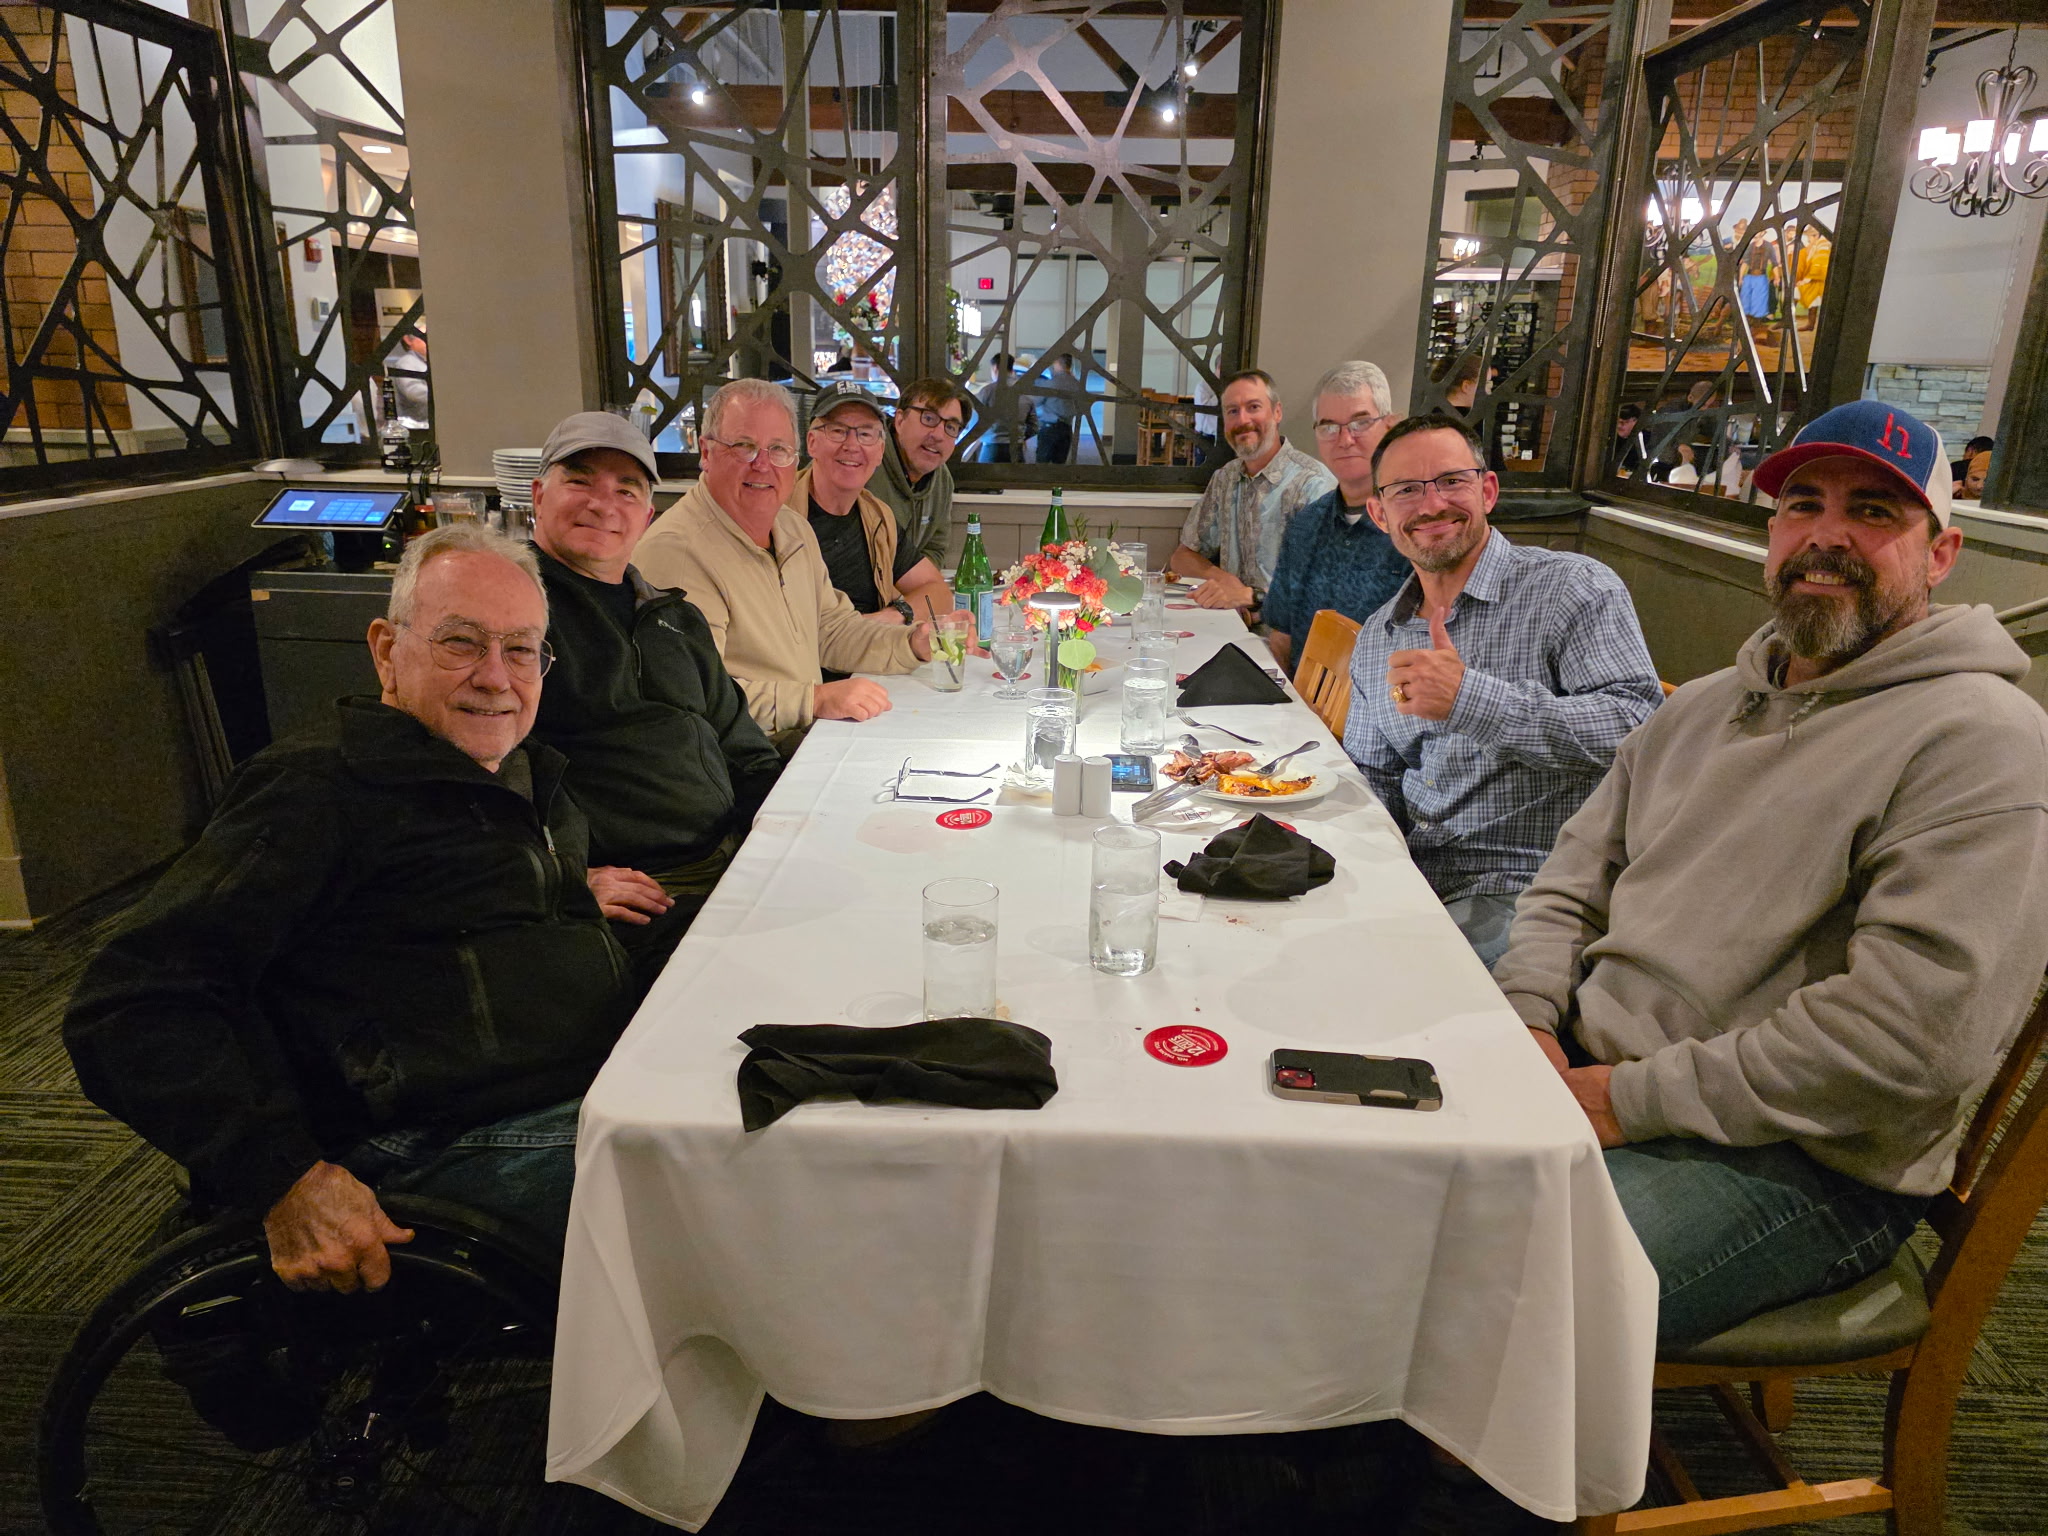
Friday wrapped up with the traditional KR Training dinner at 12 Cuts, a great Brazilian steakhouse not far from the event hotel and range.
Saturday
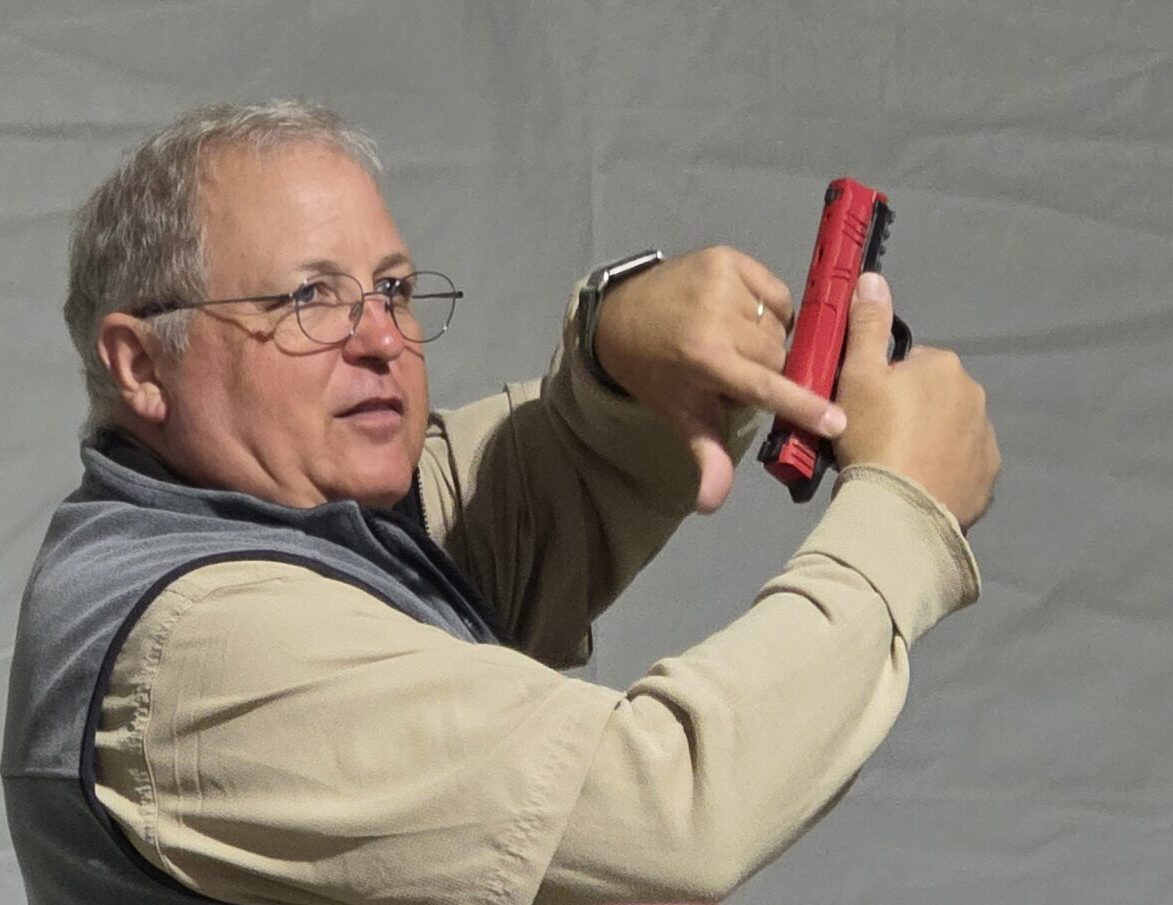
I taught two sessions of my Hand and the Handgun/ Handgun Ergonomics talk Saturday morning. I’ve shared much of the content of my talk in other blog posts.
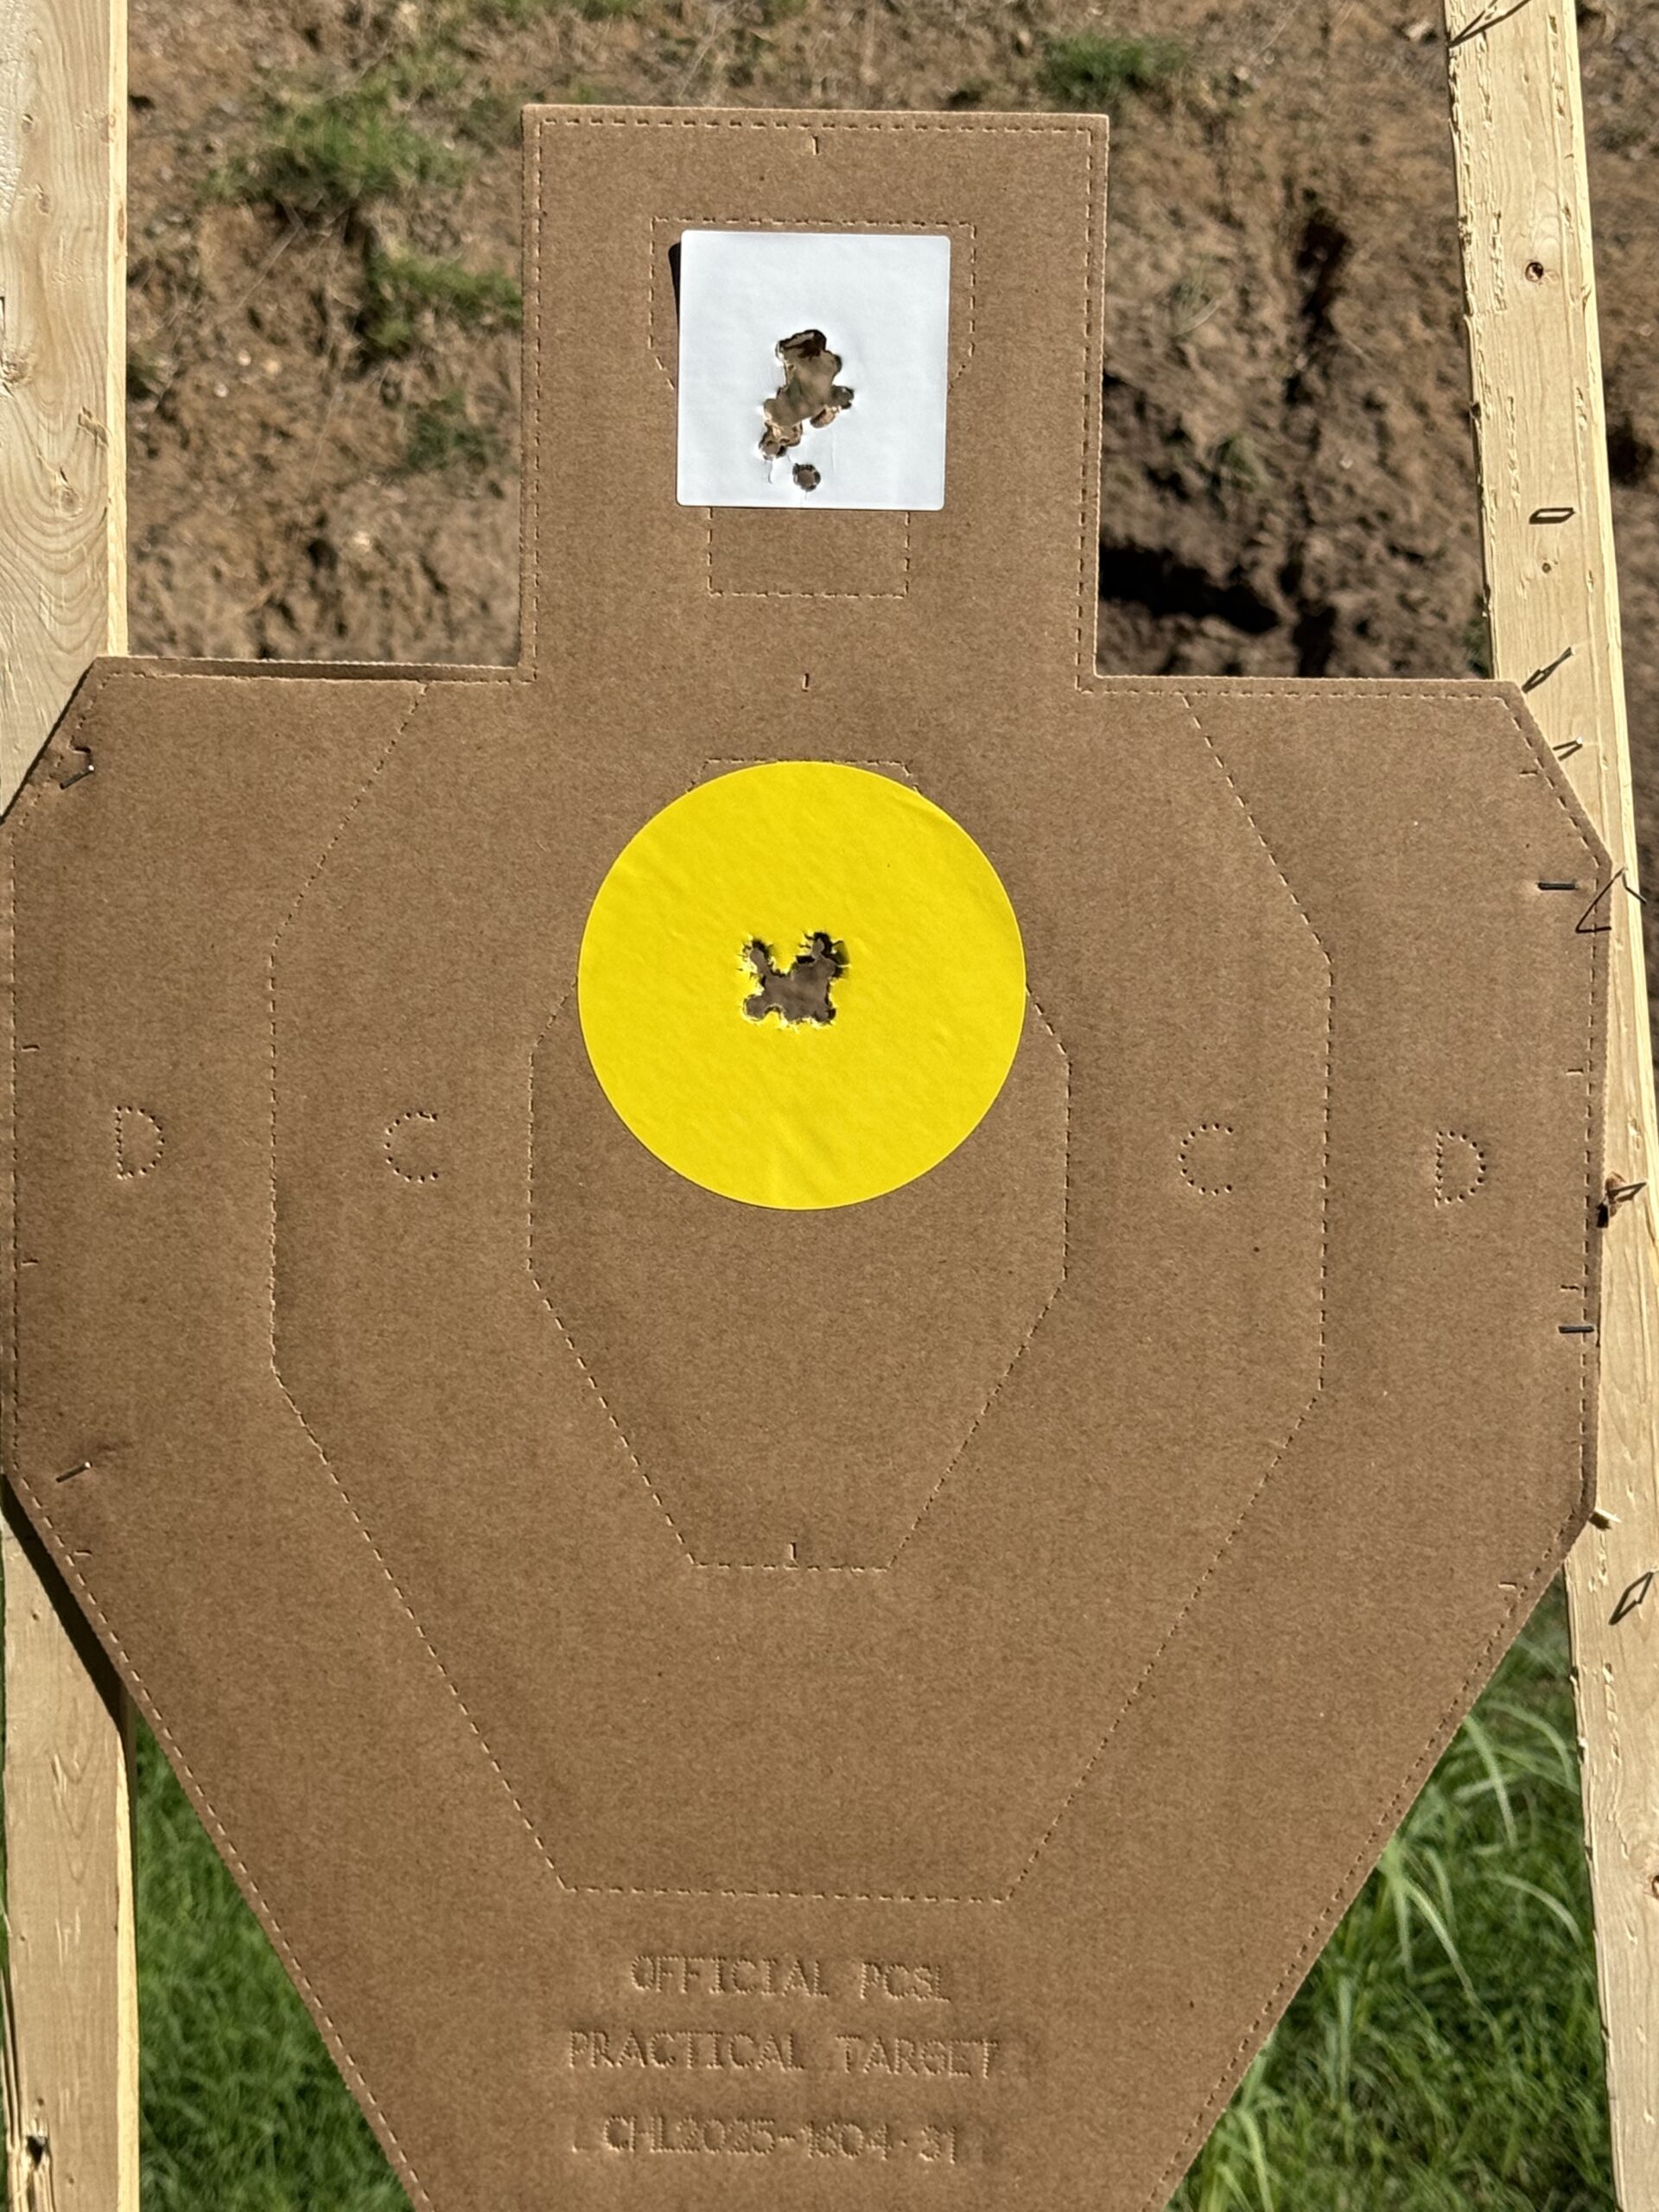
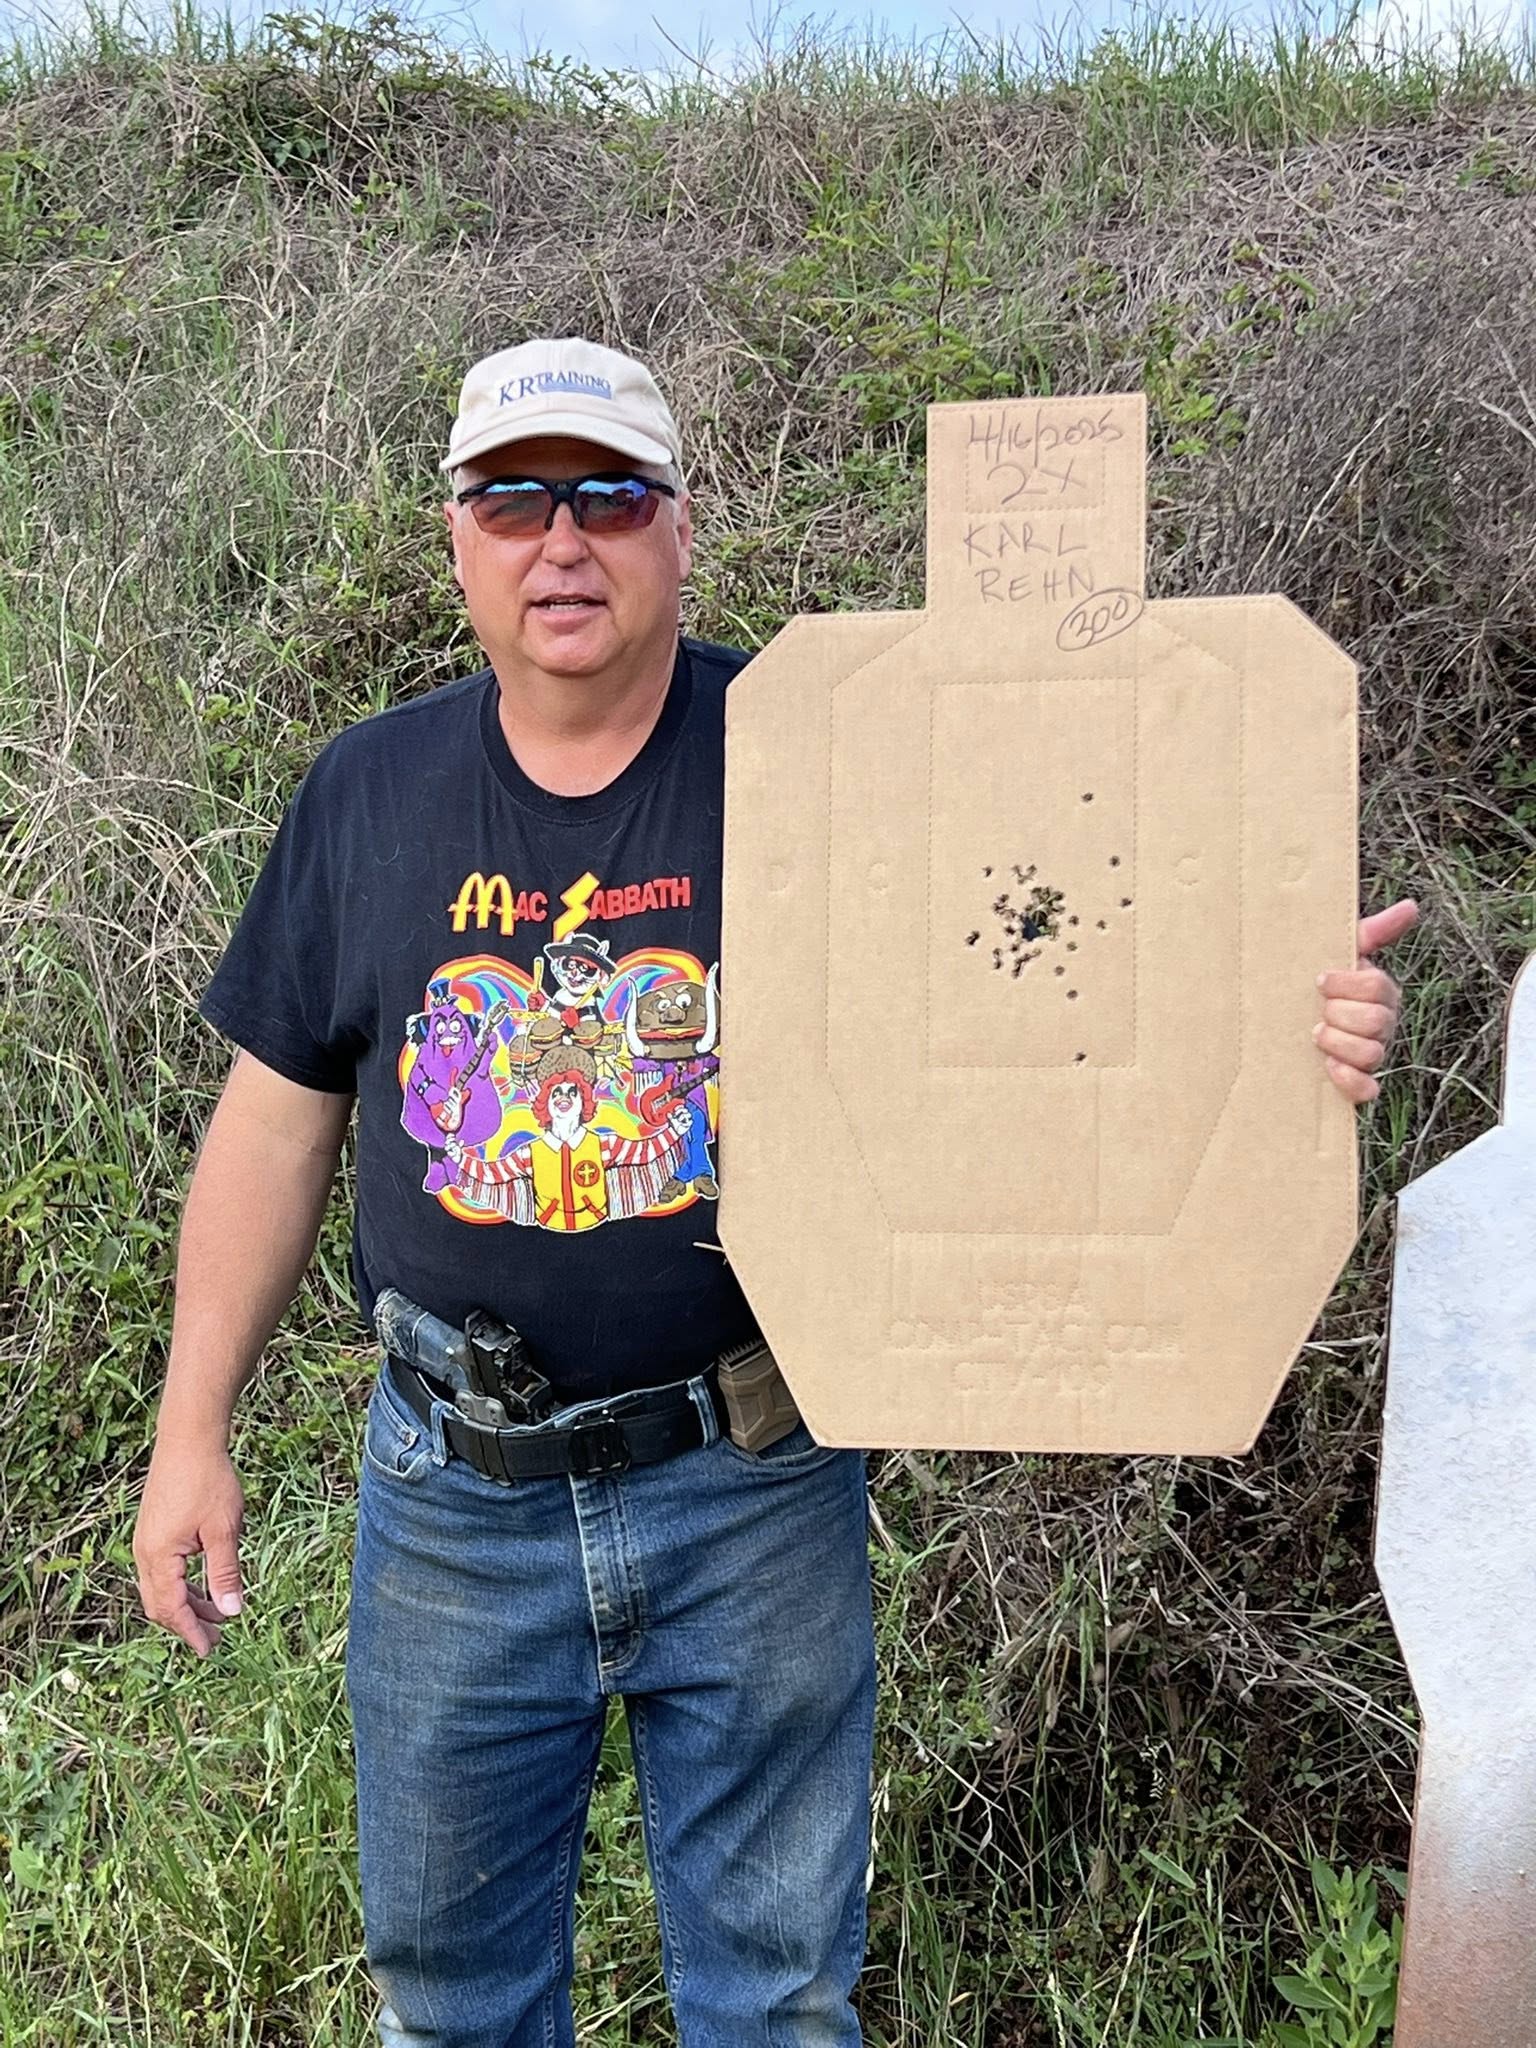
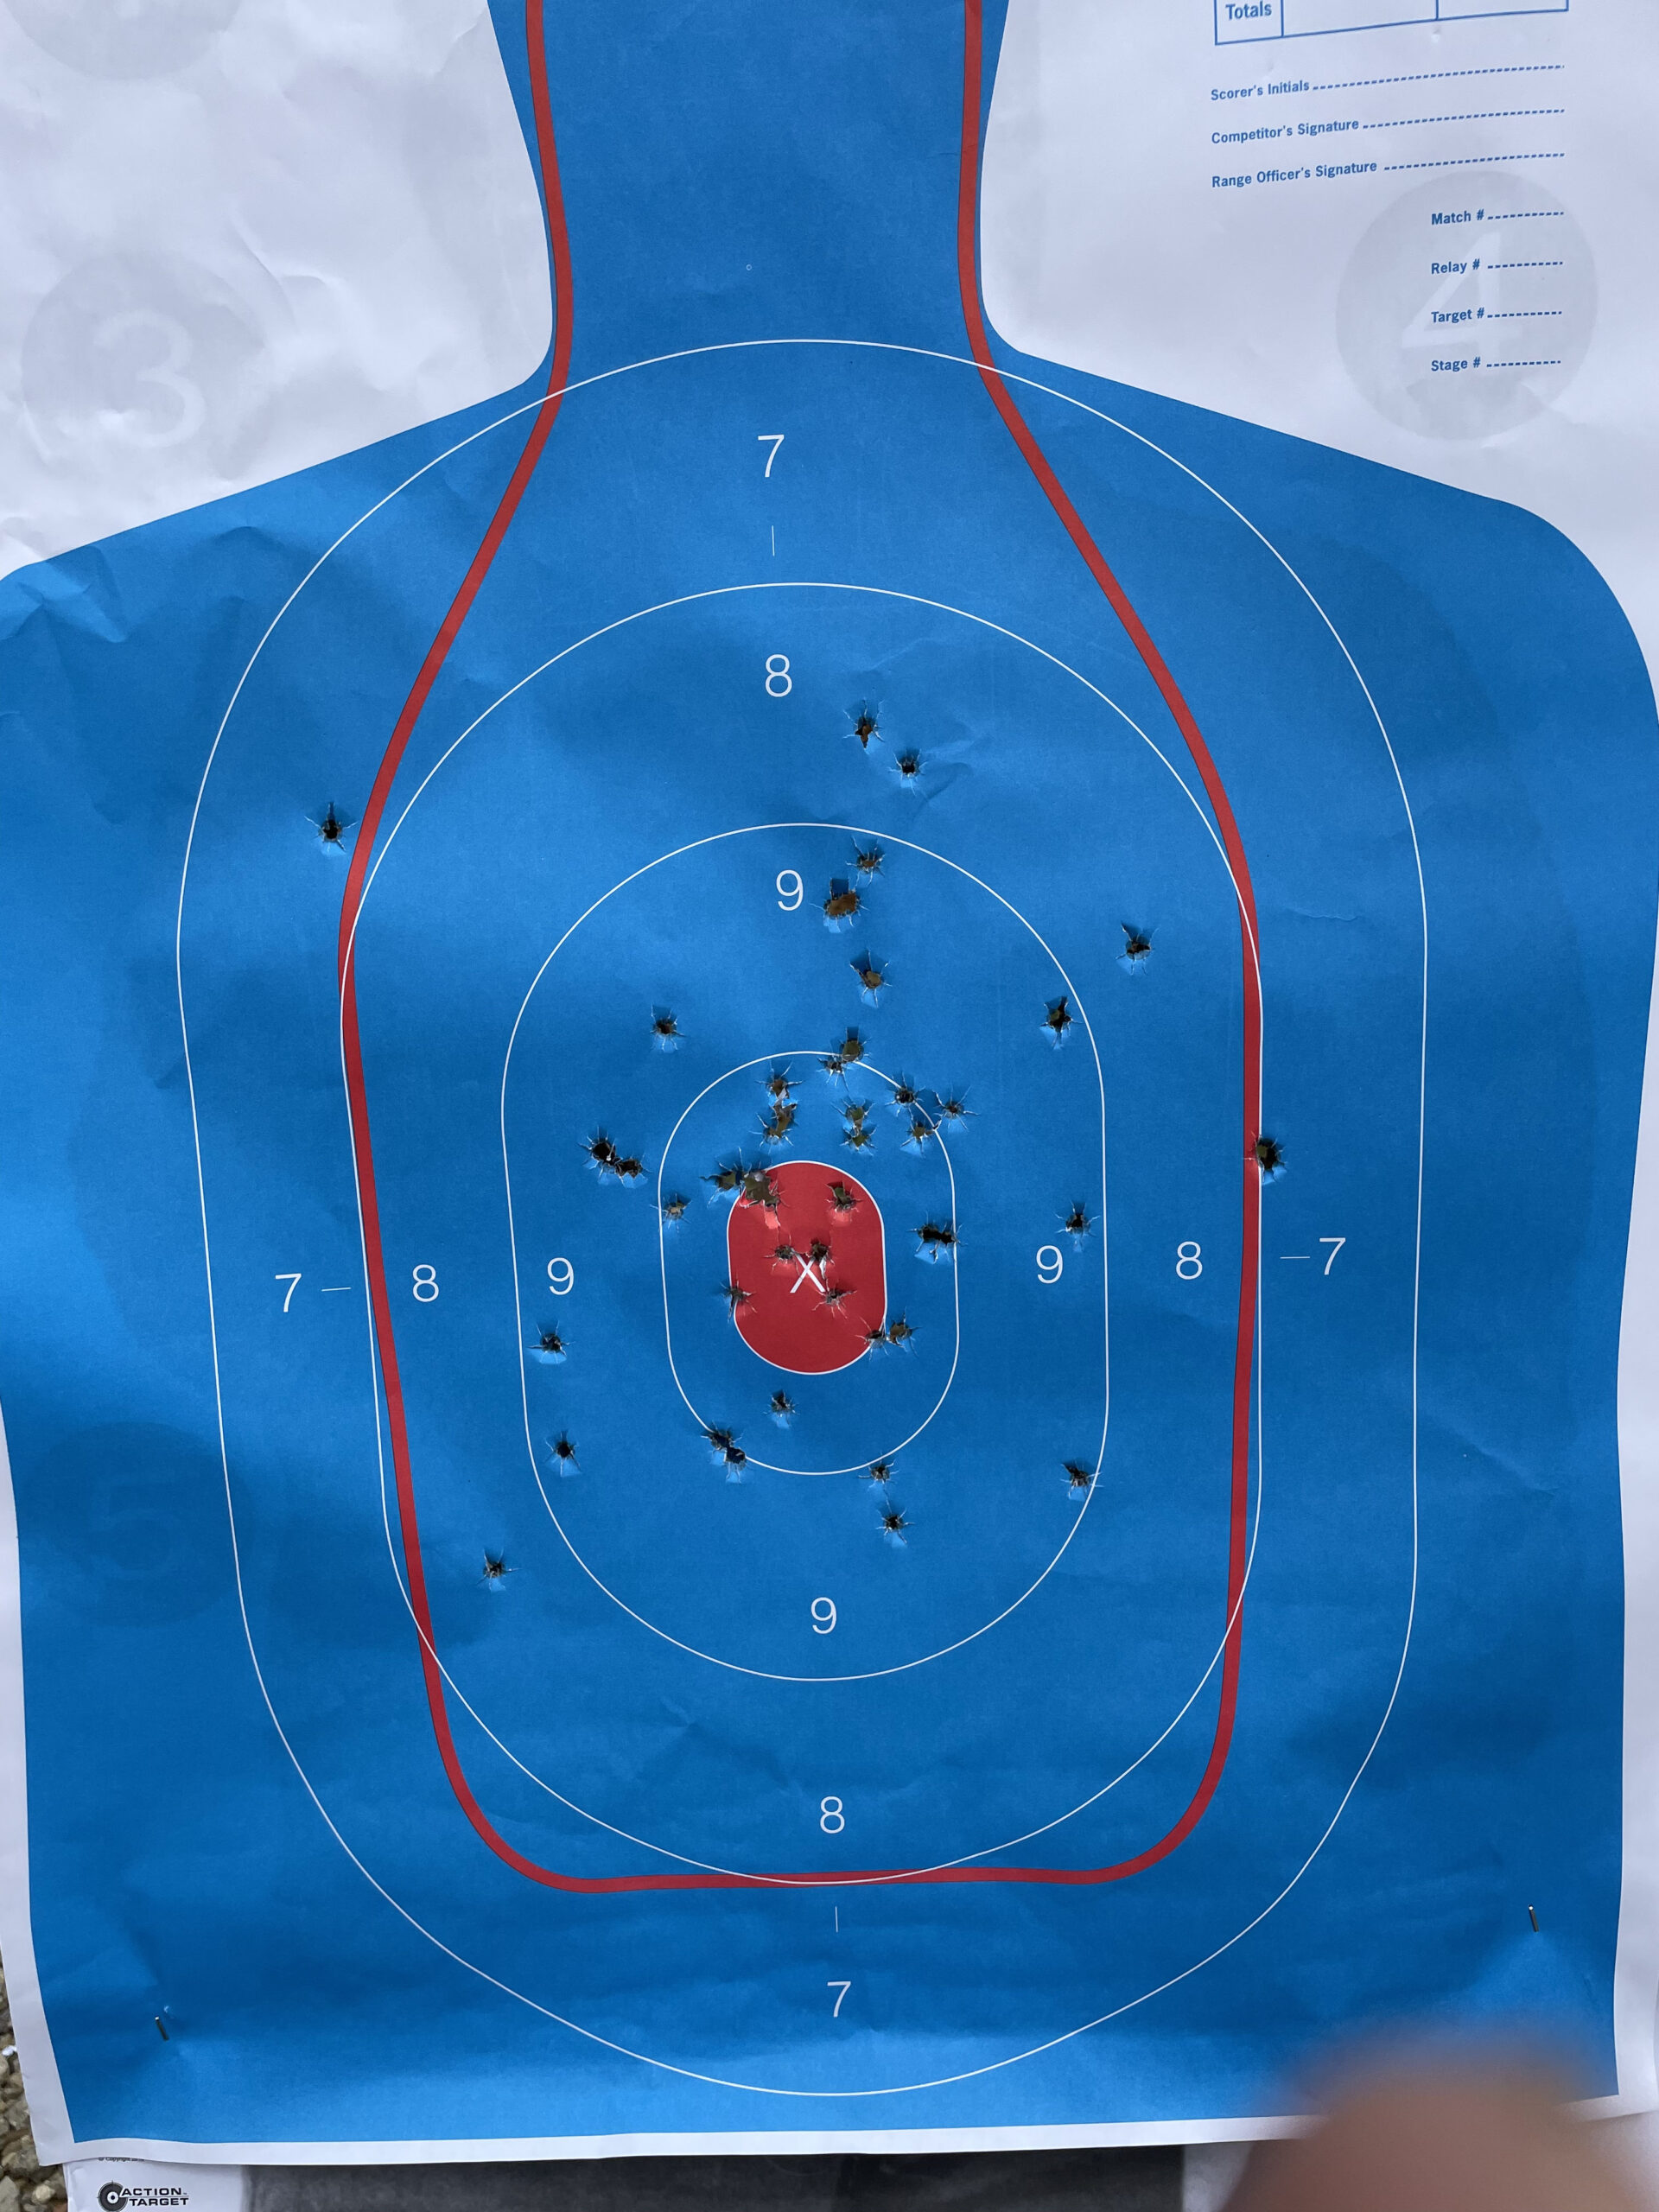
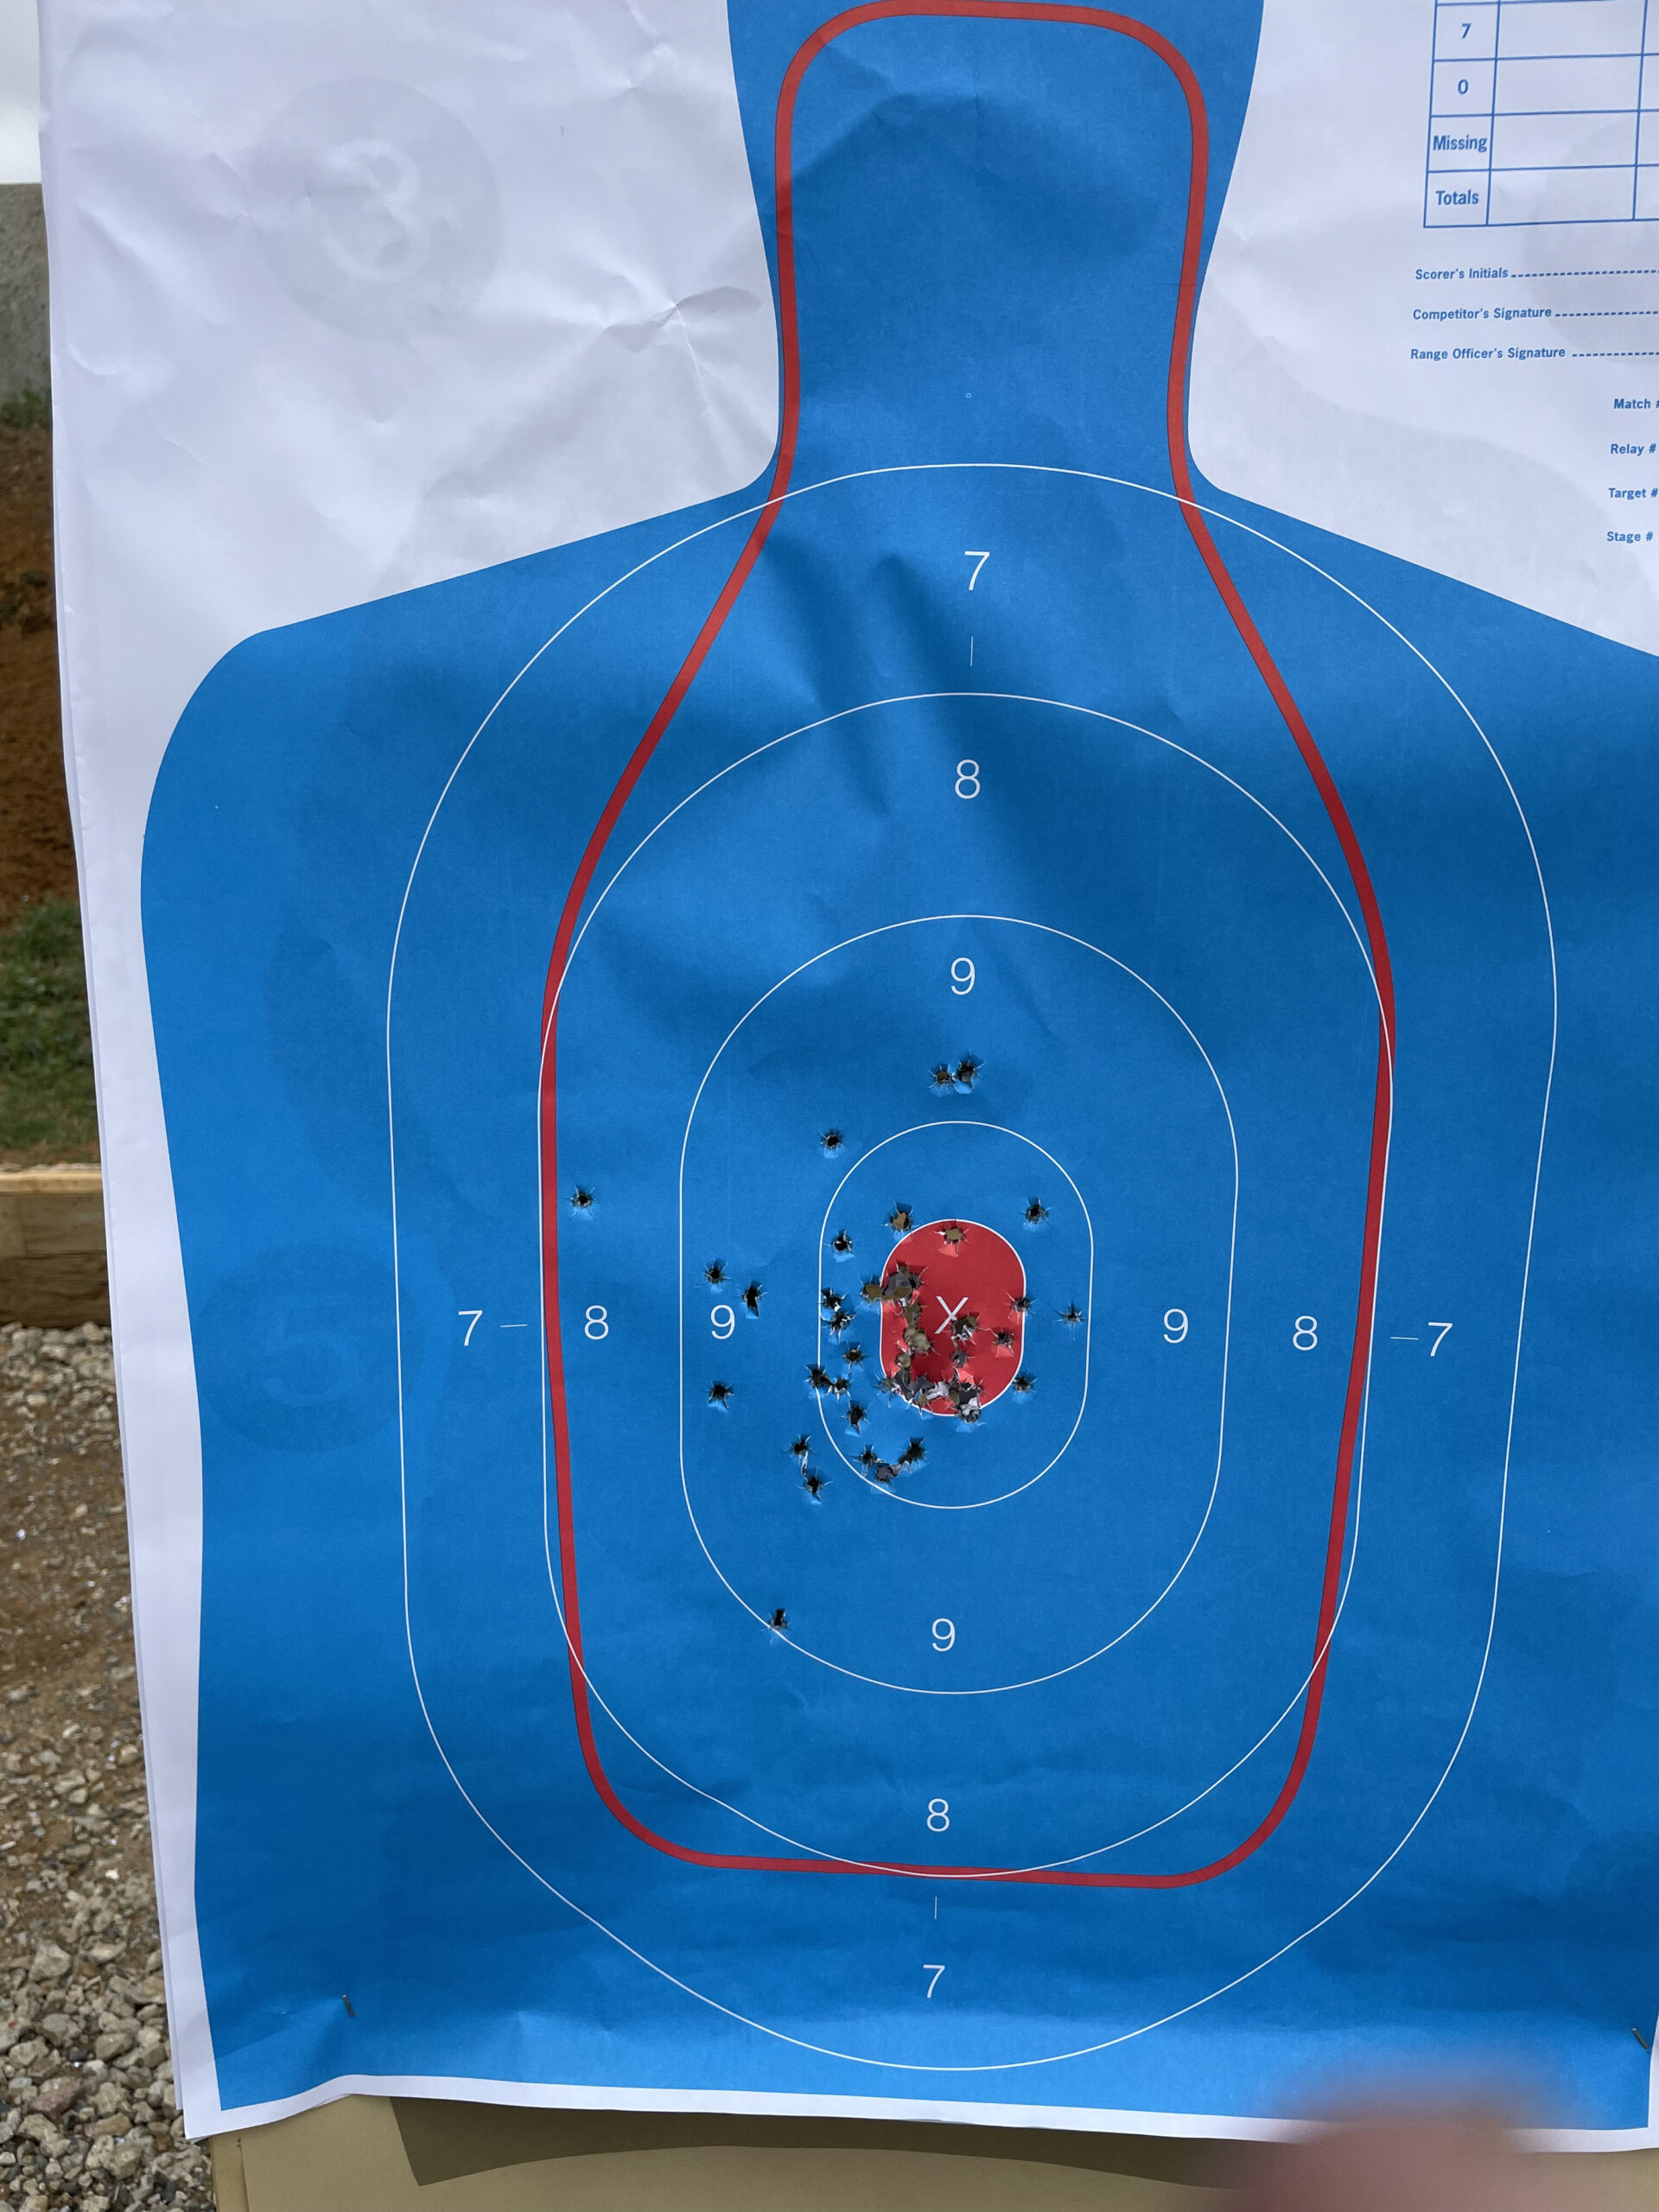
Saturday afternoon I shot the pistol match. I shot clean (200/200) on Phase 1, but on Phase 2, run with hit factor scoring, I knew that a fast time was going to be important to move into the top 10. Unfortunately I pushed a little too hard for speed, dropped too many points on the small circles that were worth 10 points (or zero if you didn’t hit them), and did not make the shoot off. I shot my M&P Shield X from a strong side inside waistband holster for the match, and it performed well.
I was able to attend the “Remediating Marksmanship Errors” session taught by instructors from Carrollton PD (Carmichael and Stuart). It focused mostly on “slapping the trigger” techniques, teaching shooters how to react quickly to stimulus (starting aimed with finger on trigger), pressing the trigger quickly, with a goal of hitting a 4″ square at 5-7 yards in less than 0.30 from the start of the beep. I’ve seen and participated in this type of training before, but I don’t use it in my own program. My main takeaway from the session was that the term “slapping the trigger” may not be conveying to the student what the instructors intend. Often it’s easier to explain a trigger control topic using the classic Mudgett methods of putting your finger on top of the student’s finger or having them press the trigger by putting their finger on top of yours than to use words. When I just shot the way I normally do, I could achieve the results they wanted, but trying to “slap” the fairly long striker-fired-gun trigger with more of a “slap” motion mostly caused the gun to move as I did it. I’m going to spend some range time diving into this concept, though, as I think it relates to the ergonomics topics I’ve been thinking about a lot recently.
The Trainer’s Dinner is always the highlight of TacCon. It’s the private banquet where all the presenters and staff dress up and socialize. This year we were celebrating Tiffany Johnson’s graduation from her PhD program, and, as we do every year, Lynn’s birthday, complete with birthday cake.
Sunday
Because I was checking out Sunday morning and had to teach two live fire sessions Sunday afternoon, I took my time getting up, packing up and checking out, arriving on the range in time to attend Scott Cronin’s live fire course. Cronin is part of the GunSet team, and this was his first year to present at TacCon. He covered the GunSet philosophy for training standards and cold performance, focusing on their 555 drill: 5 shots, 5 seconds, 5 yards into a playing card. We shot several other standards drills from their program, along with some training drills. I earned a GunSet sticker for passing the 555 drill and one other standard during the session.
Sunday afternoon was spent running two sessions of my “Hardest State Quals” block. Doug Greig and I have been compiling all the state carry permit standards for an upcoming revision of the KR Training drills ebook that John Daub published several years ago. I chose the Maryland, New Jersey and Kauai standards, along with a bonus course drawn from the Texas First Responder training course developed by Texas DPS (state police) certification program that allows some fire/EMS personnel to carry on duty. The first session did not get to shoot the bonus course because we had two relays, but the final session of the day, with one relay, got to shoot all 4 of the courses.
We are working hard to finalize the updated drills e-book, which will be something we post for sale on Amazon, with spiral bound print copies probably offered via Lulu since Amazon does not do spiral bound print on demand. The updated book will include the original drills from Daub’s book, supplemented with carry permit qualification courses from the states that have shooting tests, an updated version of the Top 10 Drills material in our previous “Strategies and Standards” book, an archive of all the “historical handgun” drills I’ve written about on this blog in the past, standard widely used drills, and shooting tests from many well known national and regional programs (Gunsite, Rangemaster, Firearms Academy of Seattle, Gabe White, Matt Little, KR Training and many others). We’ll announce it when it’s ready.
After TacCon26, I was a panelist on the That Weems Guy podcast, with Cecil Burch and Tim Reedy, discussing our live fire blocks and the unique challenges of teaching a 2 hour live fire block to a large group of students with unknown backgrounds and abilities.
This is part 2 of my posts sharing information I presented in my talk at the 2026 Rangemaster Tactical Conference.
Reload Technique
This is the long version of a video on the handgun reload techniques I discussed in my talk.
The problem of sympathetic movement of thumb and forefinger occurs when pressing the trigger with the finger, and with trying to manipulate magazine release and slide lock with the firing hand thumb. My observation is that most instructors (particularly those teaching 10 or more students at a time, with no assistants, on a firing line) don’t notice (or maybe don’t care) that the trigger finger gets out of register and moves around, even curling to push on the frame to “back up” the pressing of the mag release button by the firing hand thumb. For many years I didn’t notice it, and then one way I saw it and began noticing how common it was.
Even among the subset of shooters that have guns that actually fit their hands properly, it’s common to have difficulty reaching the magazine release button with sufficient thumb length and strength to be able to press it to release a magazine without either shifting the grip or sympathetic trigger finger movement. One solution that can work for some is installing a slightly extended magazine release button – but if the button is too big, it can be pressed by the support hand when it grips the gun hard, or can be pressed by the holster. In both cases it results in an unexpected ejection of the magazine, which is a big problem, costing far more time than the 0.5 second time difference between using the support hand thumb to press the magazine release vs firing hand thumb. I do have extended magazine releases on both my Glock 48 and M&P that work reliably. Both are duty-sized extended releases and not oversized competition buttons.
If you have never tried the slide lock manipulation technique I demonstrate in the video (using the support hand thumb to pull down on the lever, with firing hand thumb pointing up to get out of the way, try it before you dismiss it as “slower” or less efficient. If you prefer the overhand rack technique, that’s fine. But in the interest of being a well-informed shooter, try it 10 times, then do some timed live fire reloads (10 each way, firing hand thumb, support hand thumb, overhand rack) and compare not only the times but the quality of your first-shot-after-reload hits. I contend that the support hand thumb method makes it easier and more efficient to rebuild your grip than either of the other two…if works 10 times out of 10 for you.
Even the only reloads you do are competition speed reloads where the gun isn’t locked back, using the support hand thumb to press the magazine release may have value, if flipping the gun to change your grip and then flipping the gun back is costing you consistency or time.
One alternative I didn’t discuss in the video is the idea of using the trigger finger to press the magazine release button, which can be enabled by reversing the magazine release on most popular polymer striker fired models. This retains the advantage of being able to reach for the new magazine in parallel with ejecting the old one, and guarantees that the trigger finger is not on the trigger when the mag button is pressed. The majority of the speed loss from the support hand technique is having to wait to reach for the new magazine with the support hand until it presses the button to eject the old one. Flipping the magazine release and using the firing hand trigger finger should be just as fast as using the firing hand thumb, without the need to flip the gun to reach it and without the risk that sympathetic movement of trigger finger could cause an negligent discharge.
The Support Hand
I also talked about the support hand in detail. This picture shows me gripping the pistol with only the support hand, to show how much wrist rotation is ideal. Notice in the picture my wrist is rotated enough to point my thumb parallel to the barrel. Most people do not fully rotate the wrist, which doesn’t engage the brachialis muscle (the major flexor of the elbow). By not engaging that muscle, it feels more “comfortable” because the muscle is neutral and not doing any work — which doesn’t help control the pistol at all.
This instagram video shows a way that you can assess your support hand grip. If you try this, read all of the following disclaimer, and follow ALL of the instructions!
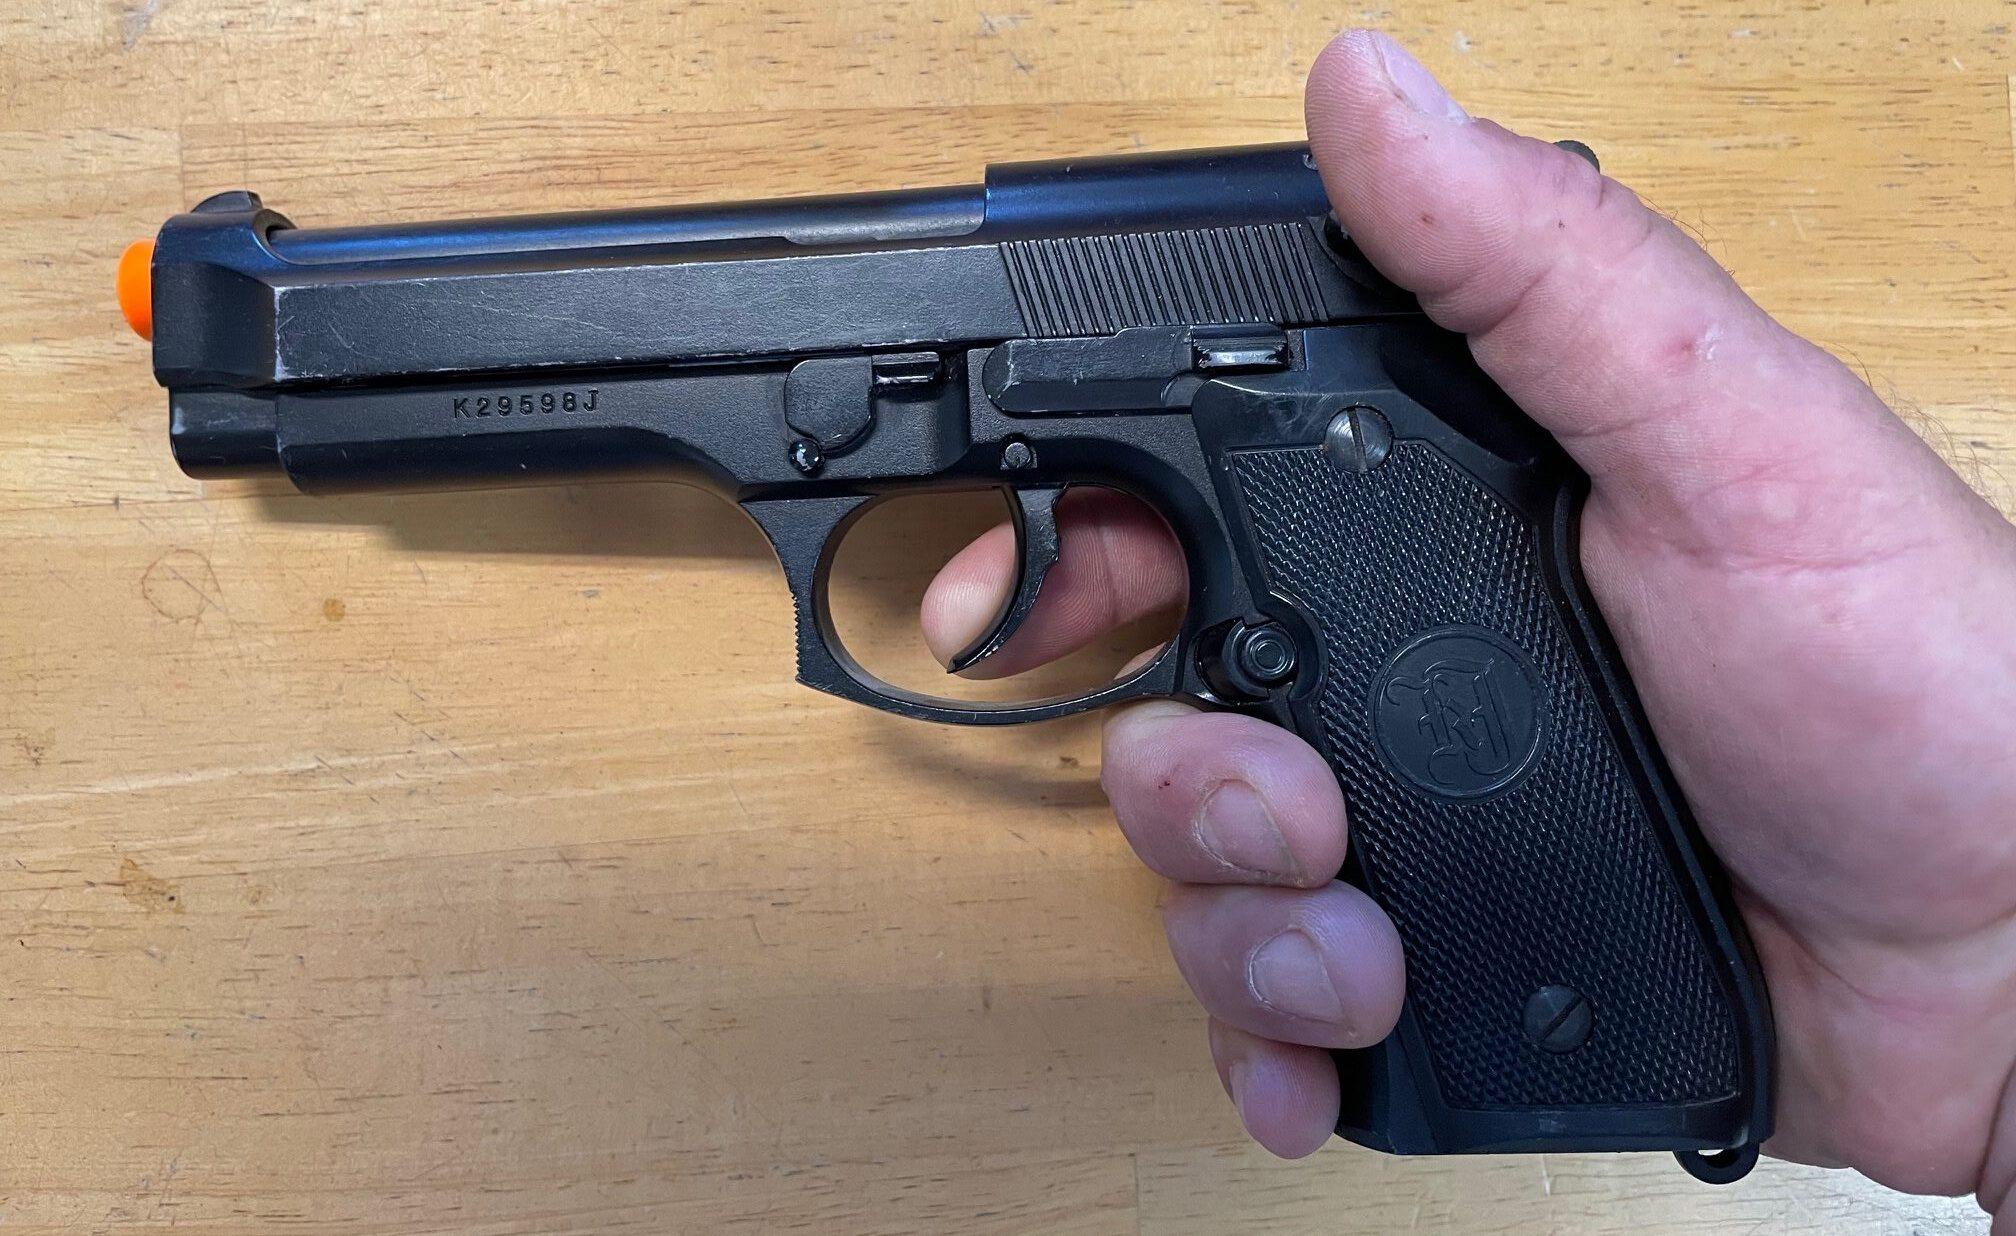
DISCLAIMER: if you try this and you don’t have enough support hand grip to hang onto the pistol when you fire it, the gun is going to flip backward out of your hand, likely muzzle you in the chest and possibly fall to the ground. ONLY LOAD ONE ROUND. You absolutely do NOT want the gun to capable of firing again if you lose control of it. Don’t do this at a commercial range or standing on a concrete pad. Having the gun flip out of your hand and fall to the ground could damage the gun and likely get you ejected from the range. Try this with an airsoft gun or CoolFire gun or a .22 (on a private range) before you try it with a larger caliber. If you don’t have at least 60 pounds of grip strength in your support hand, don’t try this test with any 9mm pistol. I have about 90 lbs of grip strength in my support hand, and the gun I was firing had a compensator and a weapon mounted light, firing 9mm practice ammo.
This video shows how I use the SIRT pistol to demonstrate and teach the importance of the support hand grip in minimizing gun movement, particularly when the trigger is pressed at high speed.
I’ve found that trying to explain those concepts with words doesn’t produce the same level of understanding as putting a SIRT pistol in a student’s hands and having them observe the stability (or lack thereof) of the takeup laser (the red laser dot) on the target as they work the trigger as fast as they can go (induces maximum gun movement, typically resulting from sympathetic movement of thumb and other fingers), with no support hand grip on the gun, minimum support hand grip, and maximum support hand grip.
At the 2026 Rangemaster Tactical Conference, I gave a 2 hour presentation on “The hand and the handgun” discussing handgun ergonomics, gun fit, grip strength and related issues. It was very well received and shared some insights I’ve had over the past few years.
My central thesis, based on decades of experience and applying science (vs “feels”) to the issue, is that gun fit is widely misunderstood or completely neglected in the handgun buying process, and the impact of poor gun fit on shooting capability mostly ignored. Those coming from the military/law enforcement background taught in an environment where everyone was stronger/fitter than the average population, with more grip strength than average, and equipment was mandated. Those that could not perform to standards because of equipment issues were washed out, often without the instructors understanding why the individuals were struggling – leaving the instructors ill equipped to assist or advise private sector/armed citizen students with small hands, short fingers and limited grip strength.
In an earlier era, the single stack 1911 pistol, with its skinnier frame and shorter trigger reach, actually fit more shooters better than the “everyone must have a Glock 19” approach that followed the end of the 1911 era in training. It’s only been in the past 5 years that the skinny double stack polymer guns, starting with the SIG 365 family, now including the Glock 43X/48, Hellcat Pro, Shield X, and similar guns have provided practical solutions.
Because the average gun buyer doesn’t understand gun fit, and doesn’t understand grip technique, and is unrealistically paranoid about “printing”, subcompact guns with frames chopped so that only 3 of the 4 fingers of the support hand can grip the frame are popular. Marketing people will point out that the gun comes with one flush fit mag (useless for anything but pocket carry and suboptimal gripping) and one useful mag with a pinky shelf, that allows a proper 4 fingered grip when it is inserted. Unfortunately, without a Rogers Tap-Rack-Training aid in an empty magazine preventing the gun from locking back each time the slide is racked, dry fire practice with the 3 finger framed gun is impossible, and since retail gun stores don’t sell the TRT devices, and most gun retailers don’t know what they are or why they are useful, the typically 3 finger frame gun buyer has no understanding of why the short framed gun is a bad choice. Similarly, since the typical 3-finger frame gun buyer never practices reloads under time pressure, the problem of trying to avoid crushing the floating pinky finger when quickly changing magazines is never experienced. Until the recent crop of narrow but 4-fingers-long pistols were introduced, serious shooters with small hands and short fingers had very few viable options.
Gun Fit – the U and general hand alignment
Novices are told to find a gun that “feels good in their hand” with no guidance as to what that means or even what features to look for. “Feels good in the hand” needs to be banished to the same penalty box as “slow is smooth, smooth is fast”.
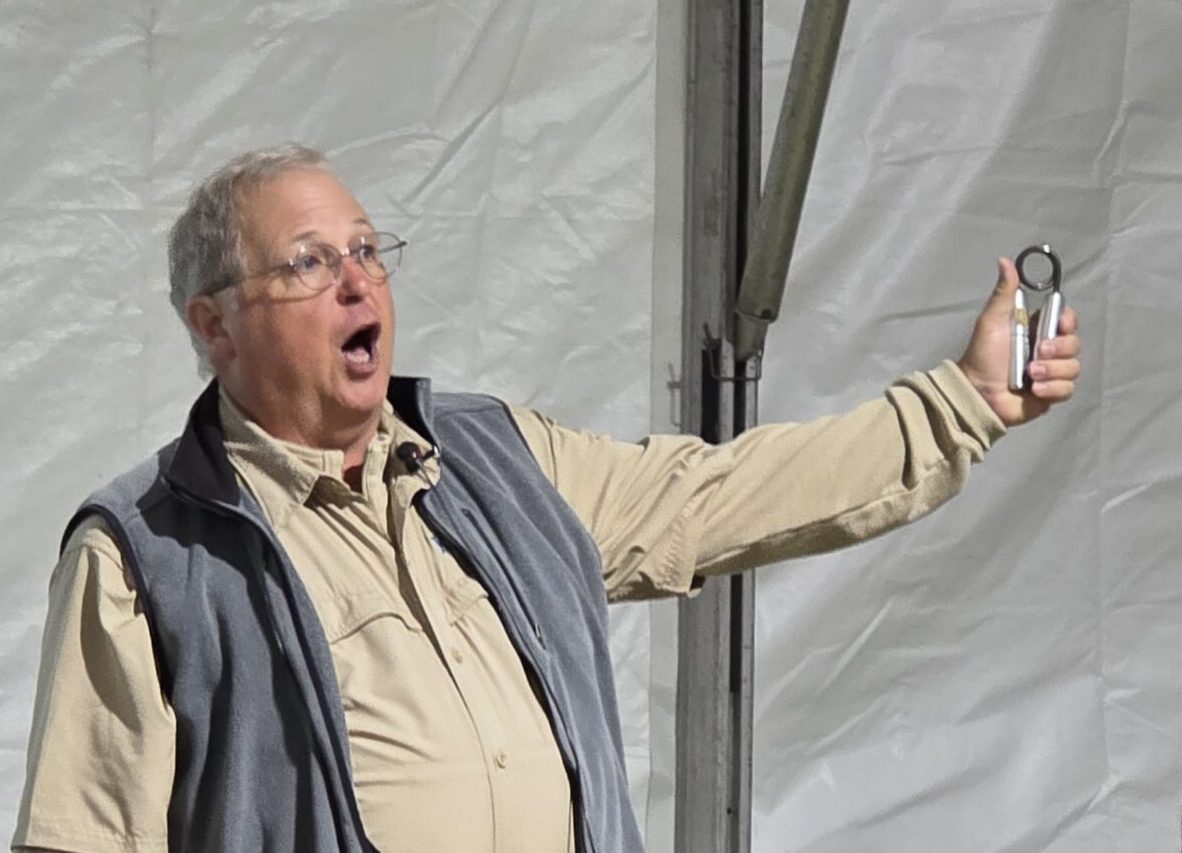
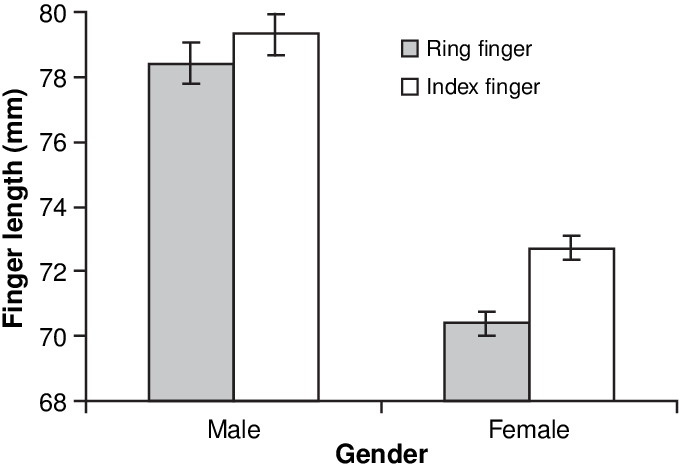
The first thing I do is assess student grip strength, using a grip strength meter or the Captains of Crush grippers, including the Zenith 50/70 lb models as well as the 80/100/140 lb models. Typical male grip strength is between 60-80 pounds; typical female strength is 50-70 lbs. Top tier shooters typically have max grip strength of 100 lbs or more — but they only use 70% of that when gripping the pistol.
This leads to advice about “don’t death grip the gun” and similar – that makes perfect sense and works great for the 100 lb grip strength fit male, and produces bad results for the less strong. Unfortunately the physics of the mass of the gun and recoil generated by a 9mm cartridge is the same for everyone…making the value of minimum acceptable grip pressure on the pistol the same for everyone regardless of grip strength. 70% of 60 is not the same as 70% of 100.
Grip strength measured by using the full hand, with all 4 fingers wrapped around the thing being gripped, and the thumb down produces the maximum grip pressure.
Stick the thumb up and only measure the grip strength of the 4 fingers gives a lower reading, and only putting the fingertips on the gripper or measuring device will return an even lower result.
This is where gun fit matters.
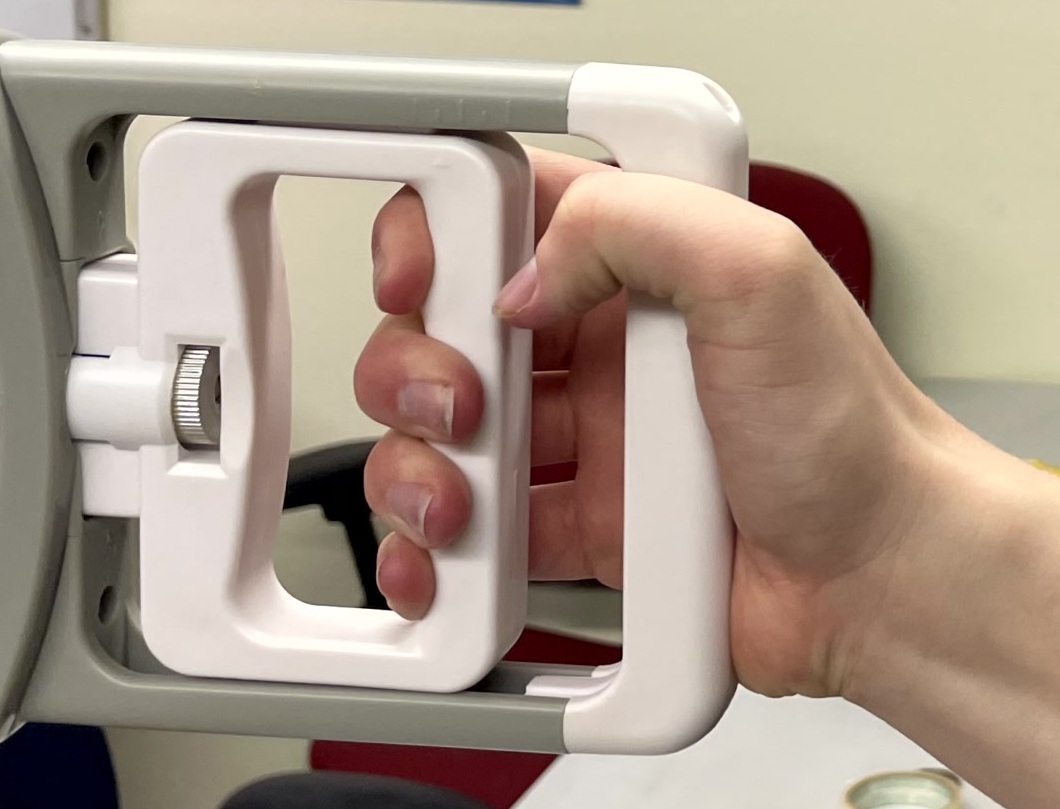
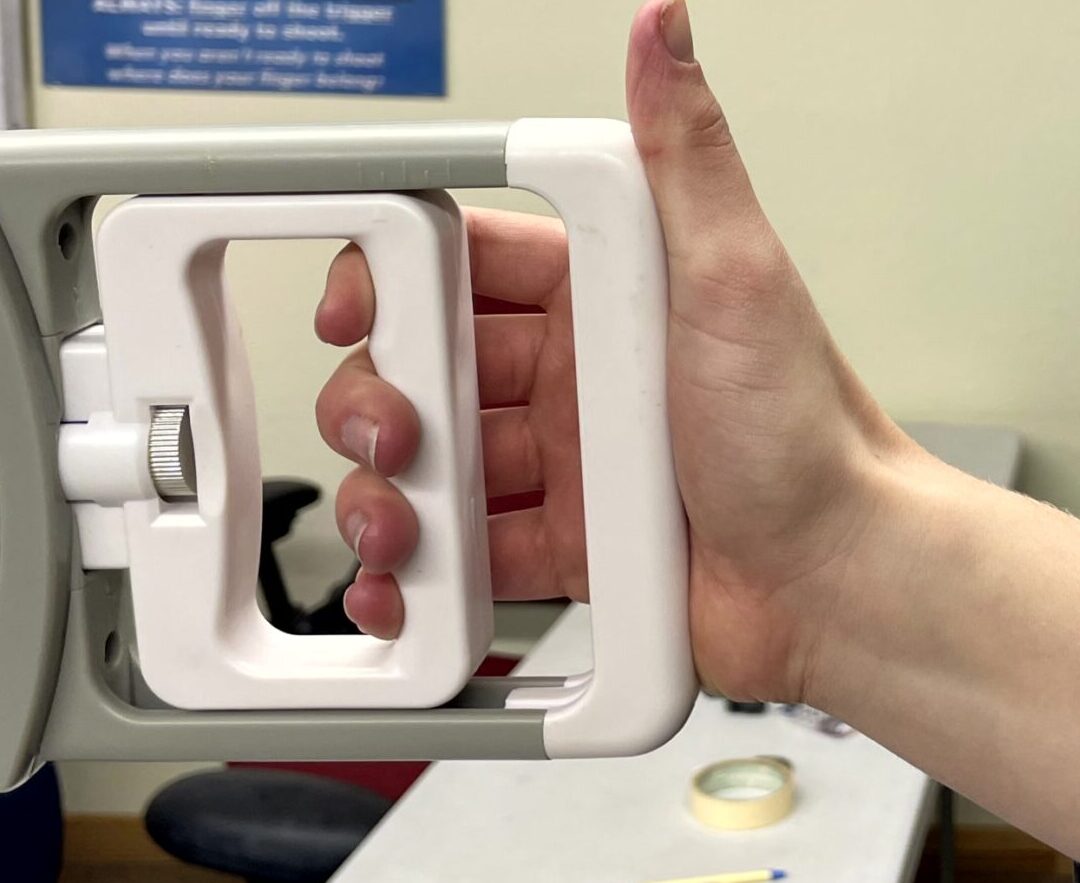
When a novice shooter picks up a gun, the first thing they pay attention to is how far the three fingers wrap around the front strap. When the frame is too wide or fat for the shooter, their grip looks like this:
Then they twist the gun in their hand so it “feels good” and it looks like this.
This second grip puts the gun in the “U” that the three fingers make, and allows for better gripping, using the available grip strength in the hand.
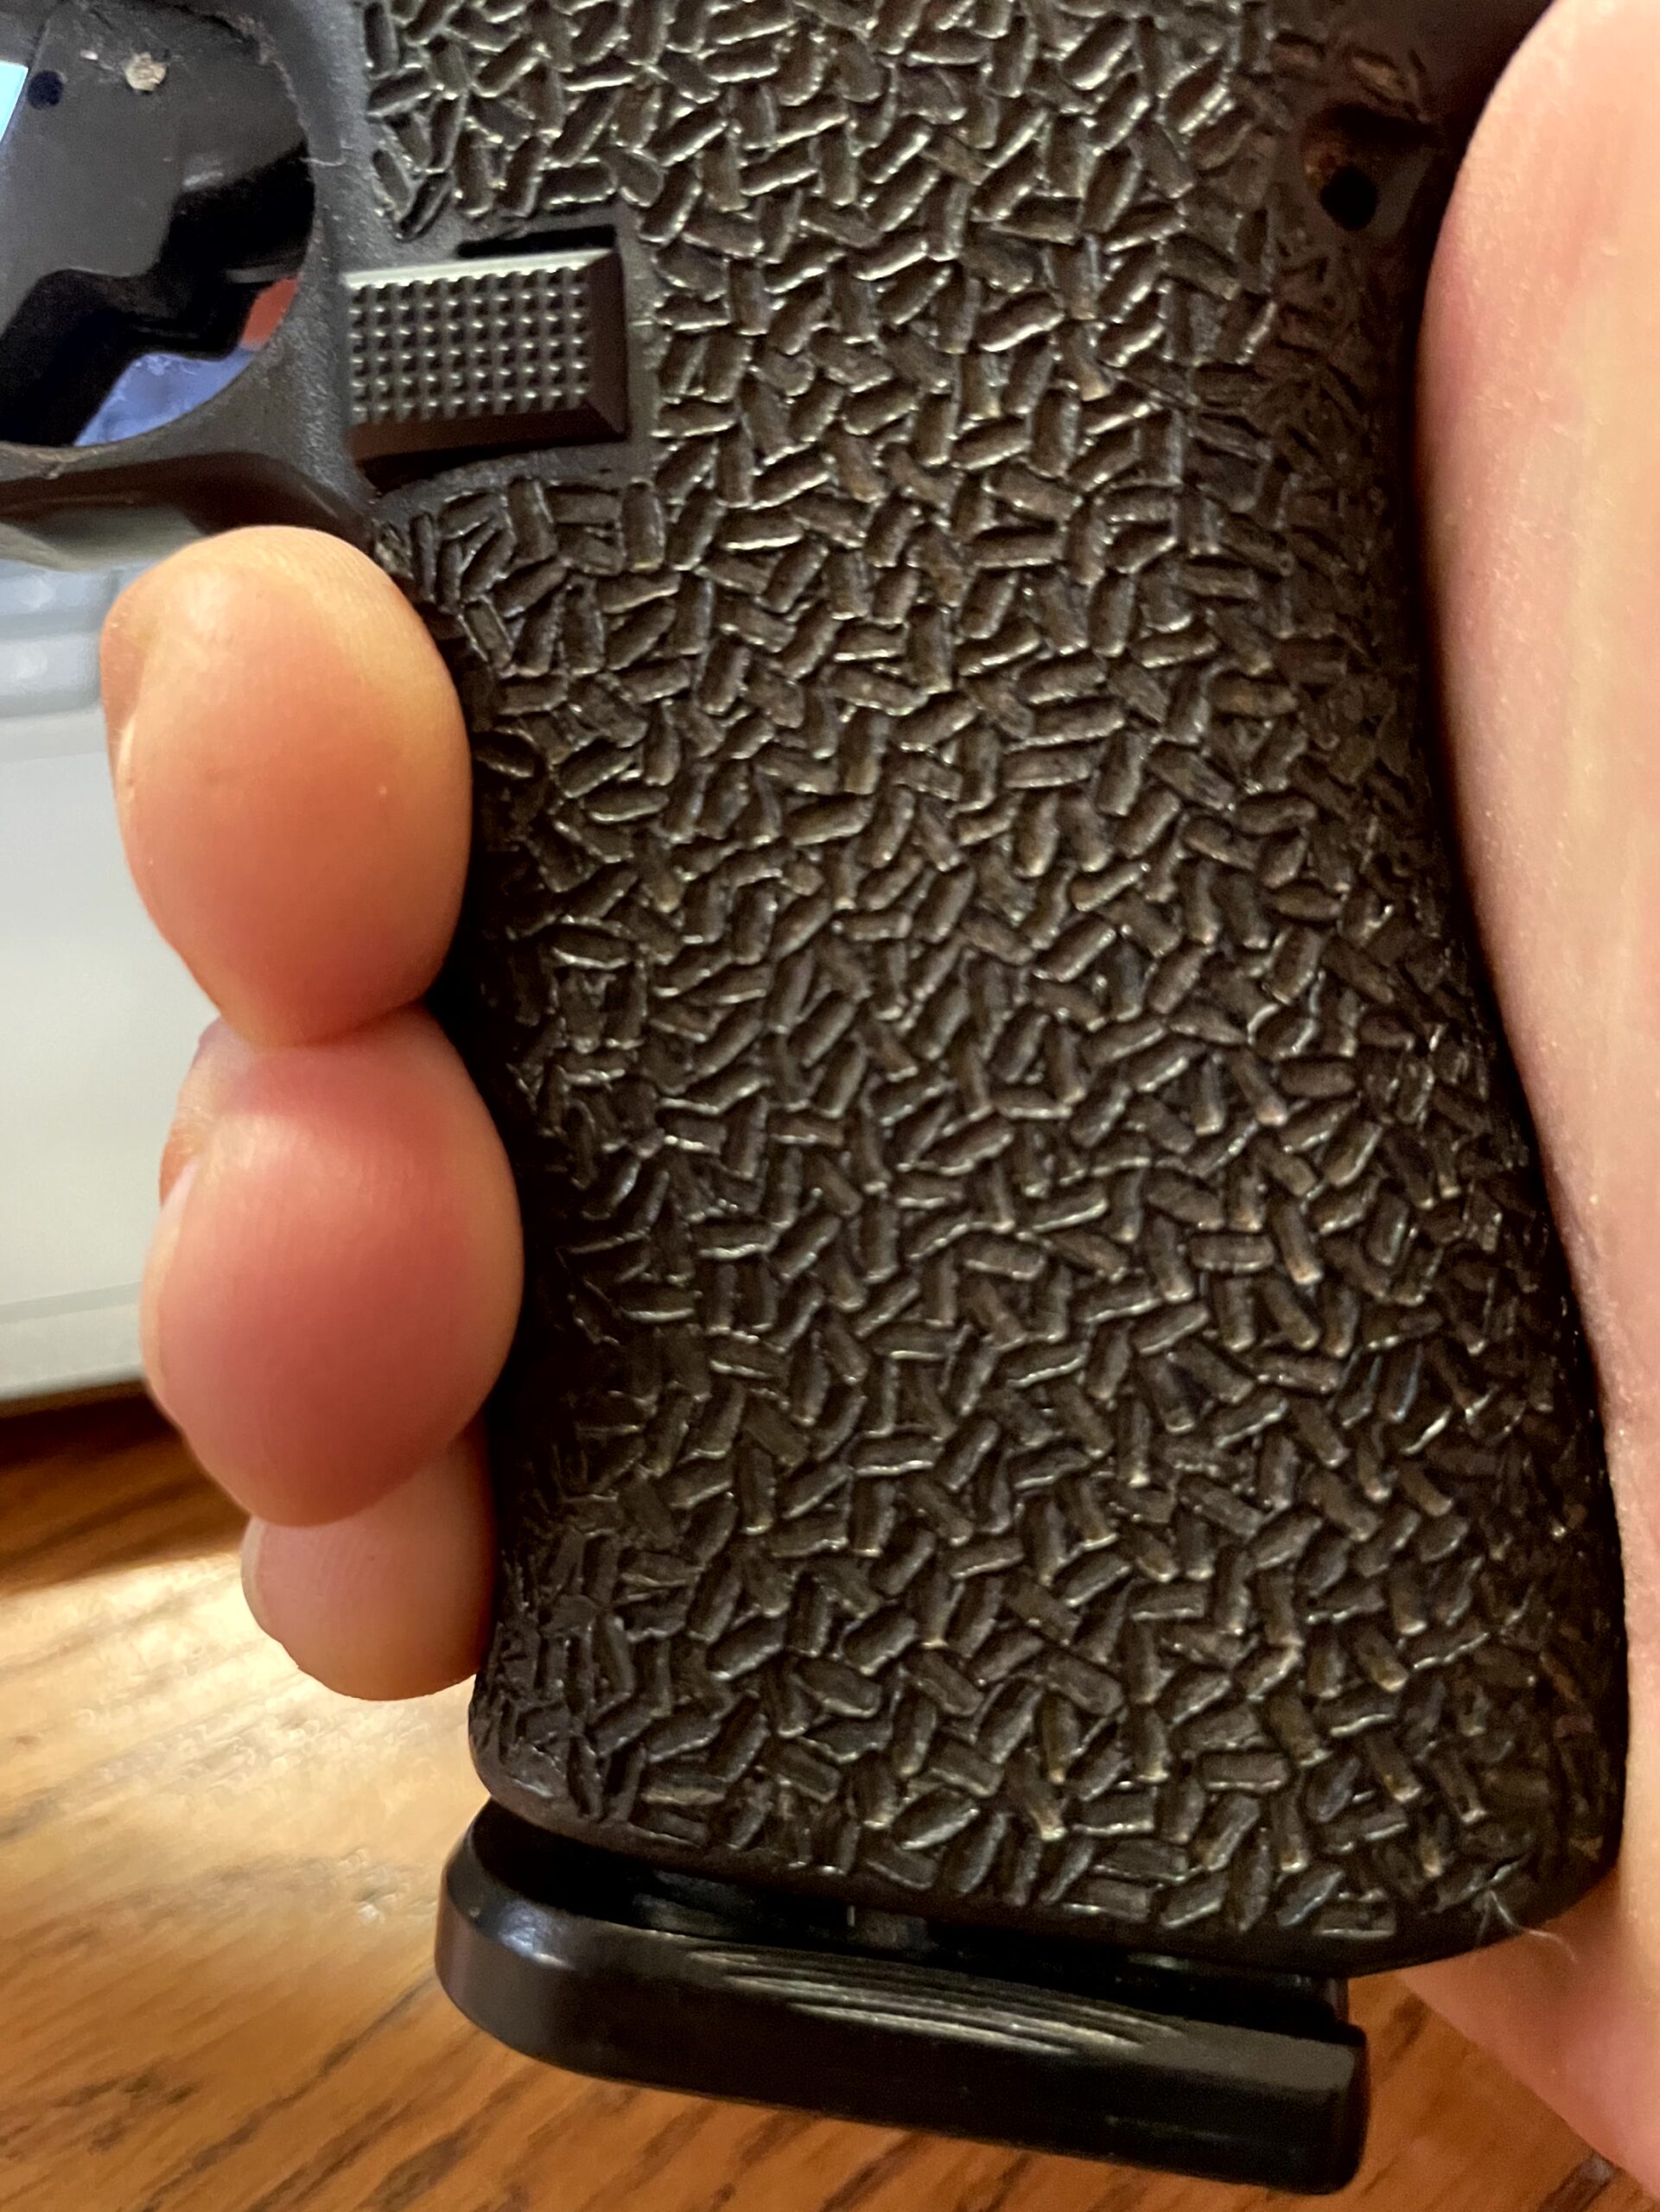
When the hand is small, though, it twists the gun out of alignment with the rest of the hand and the structure of the body. In this picture I’ve circled the knuckles and drawn a line between them, with a bisecting line showing where the gun should align with the web of the hand for ideal natural pointing.
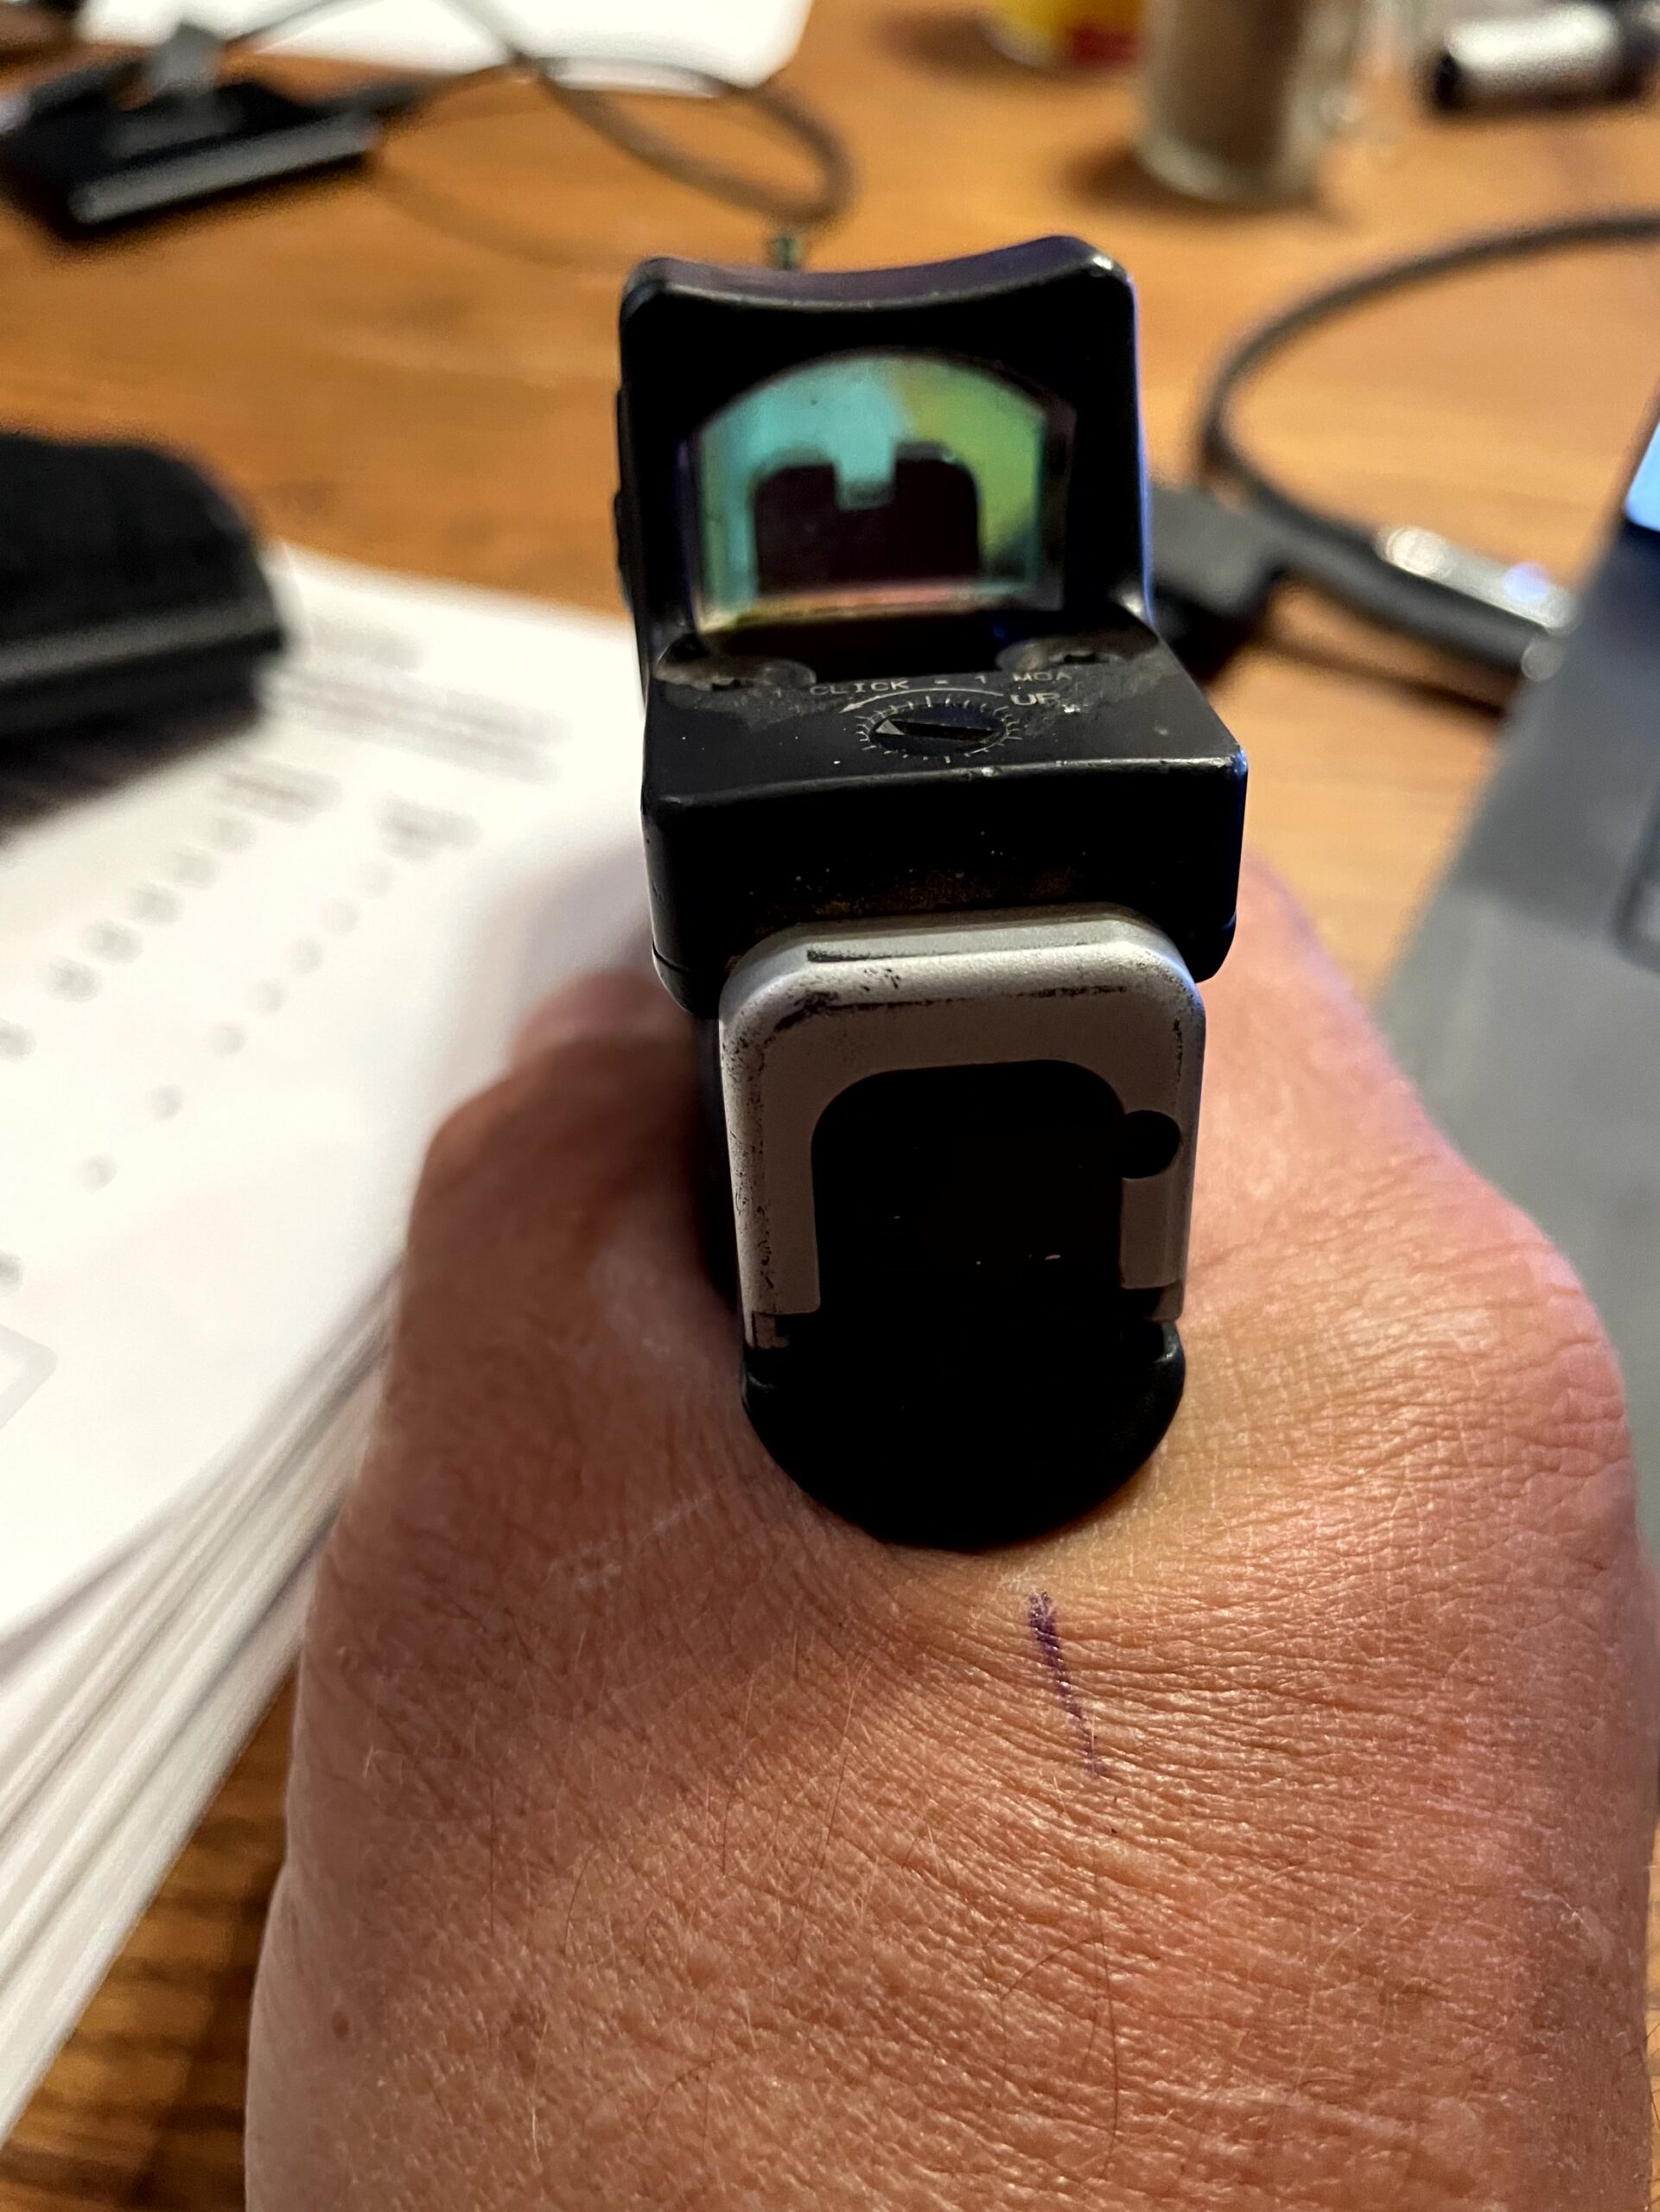
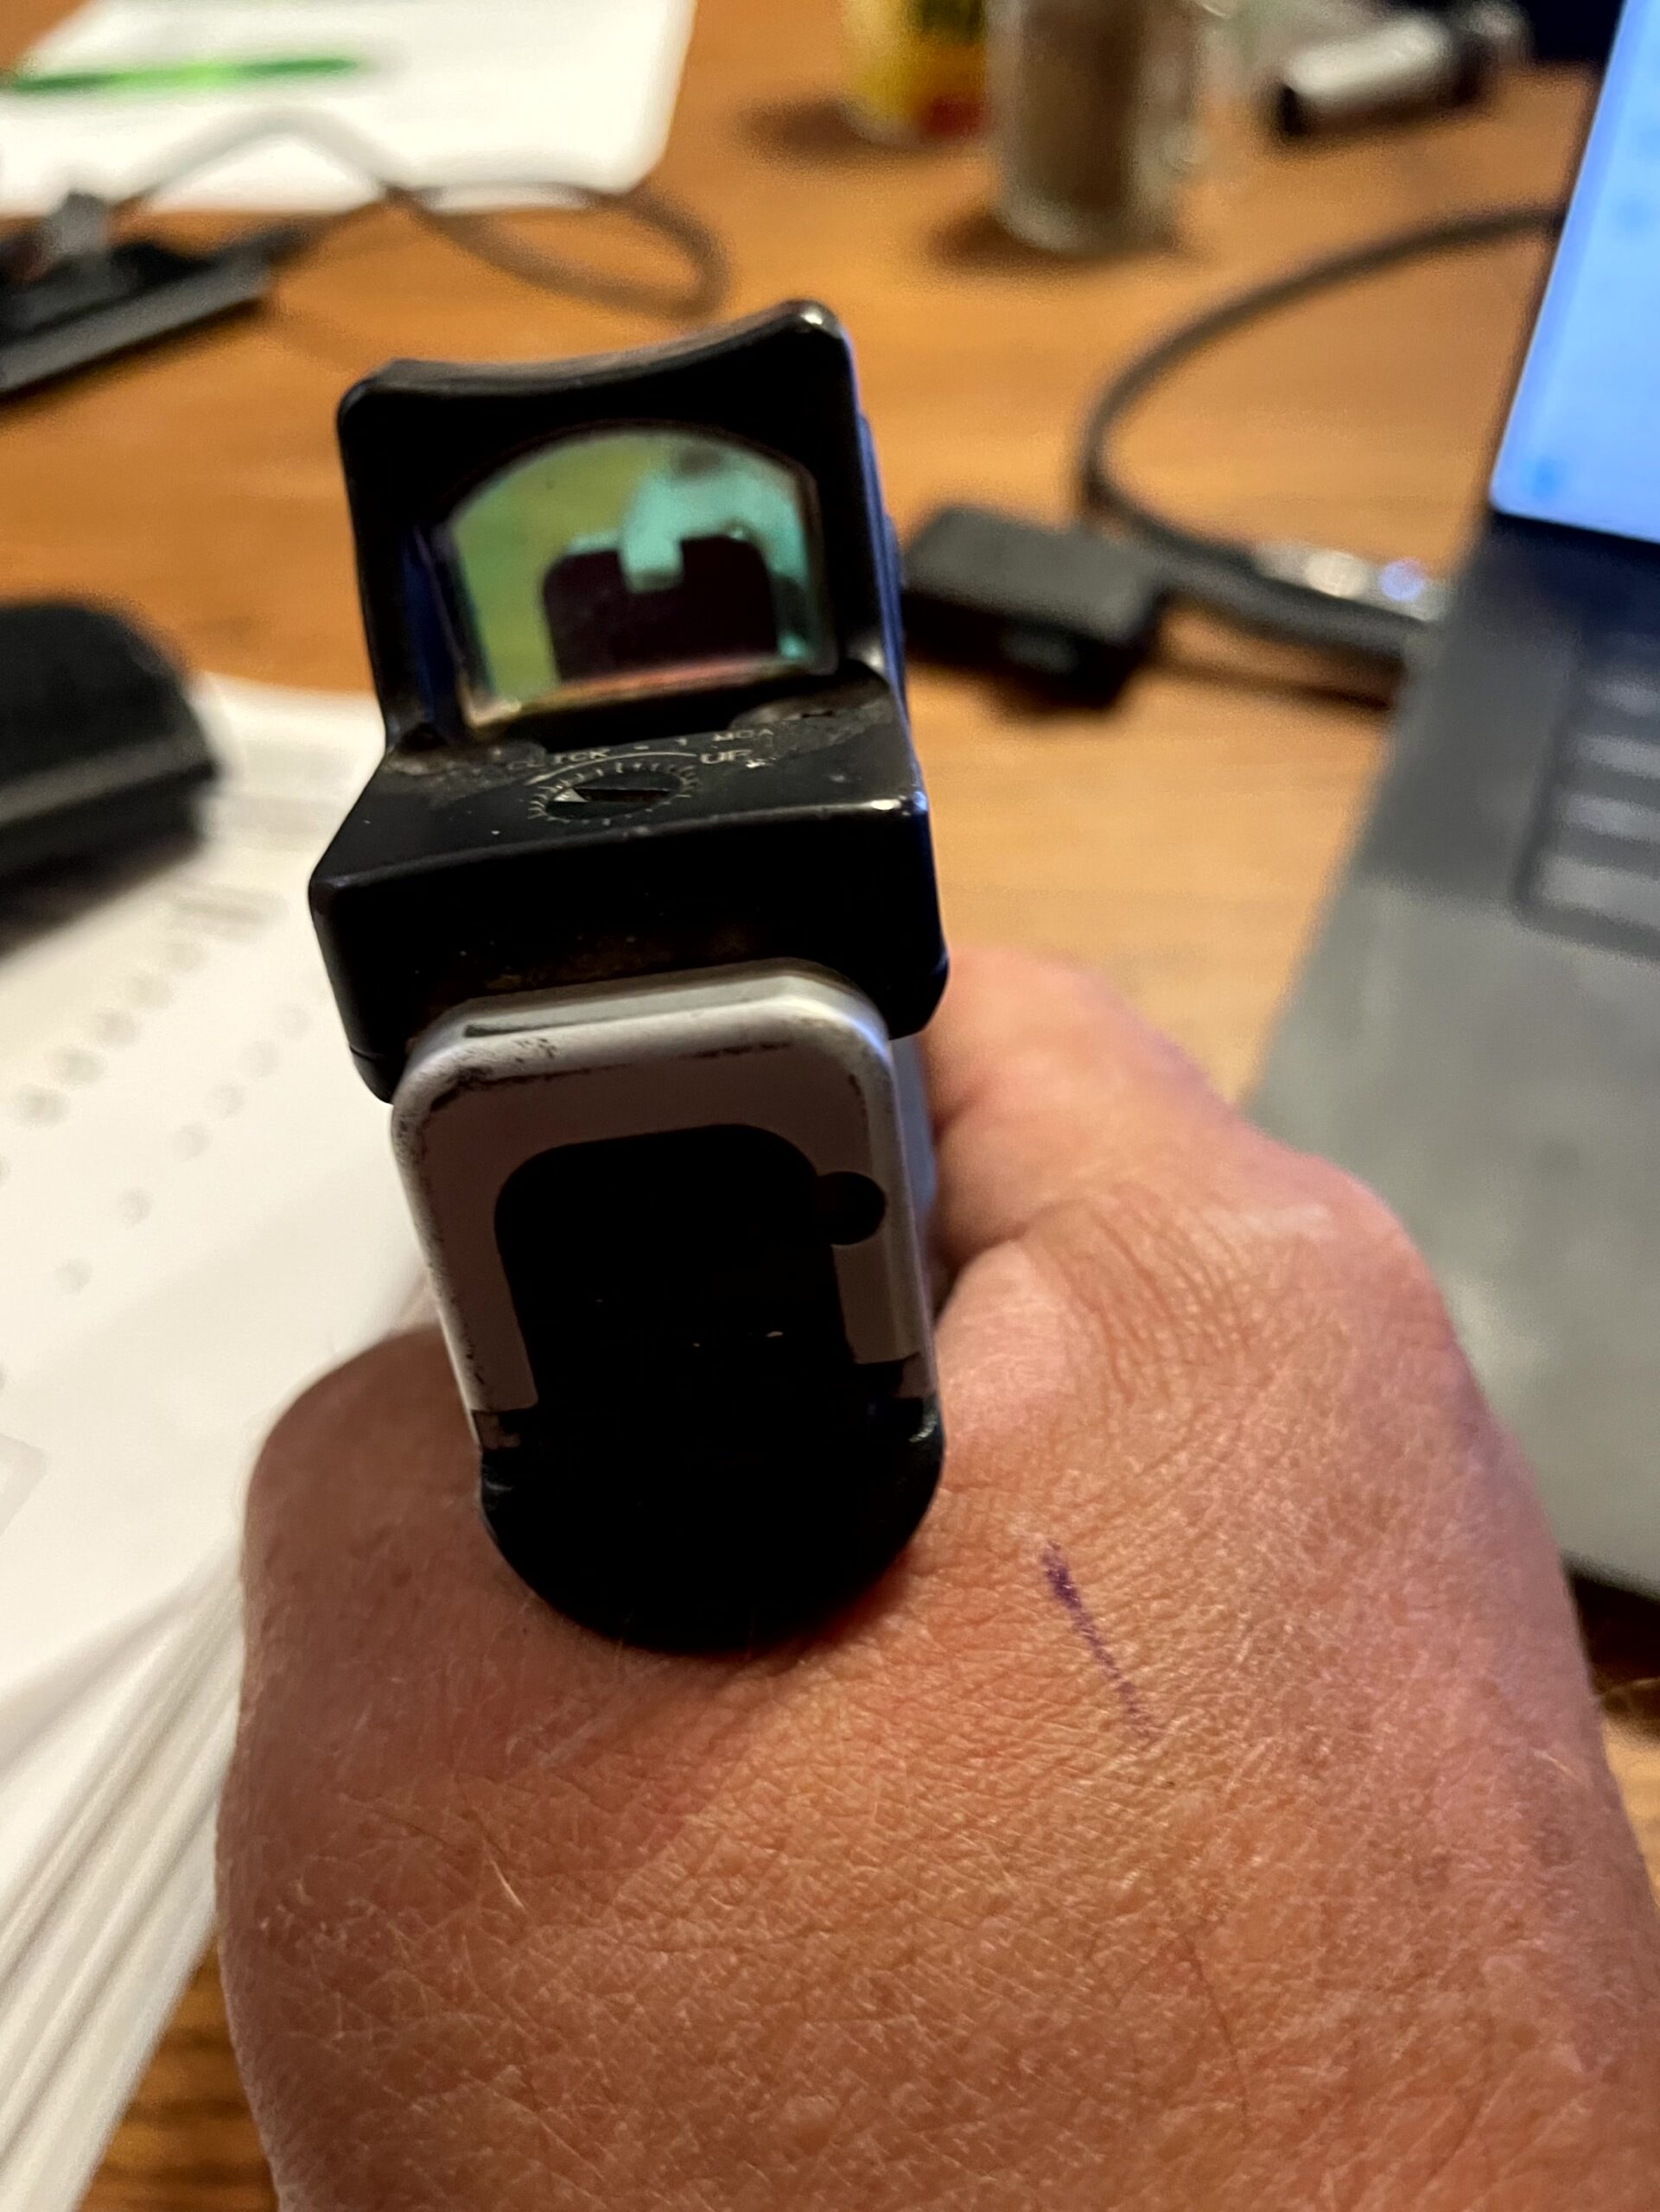
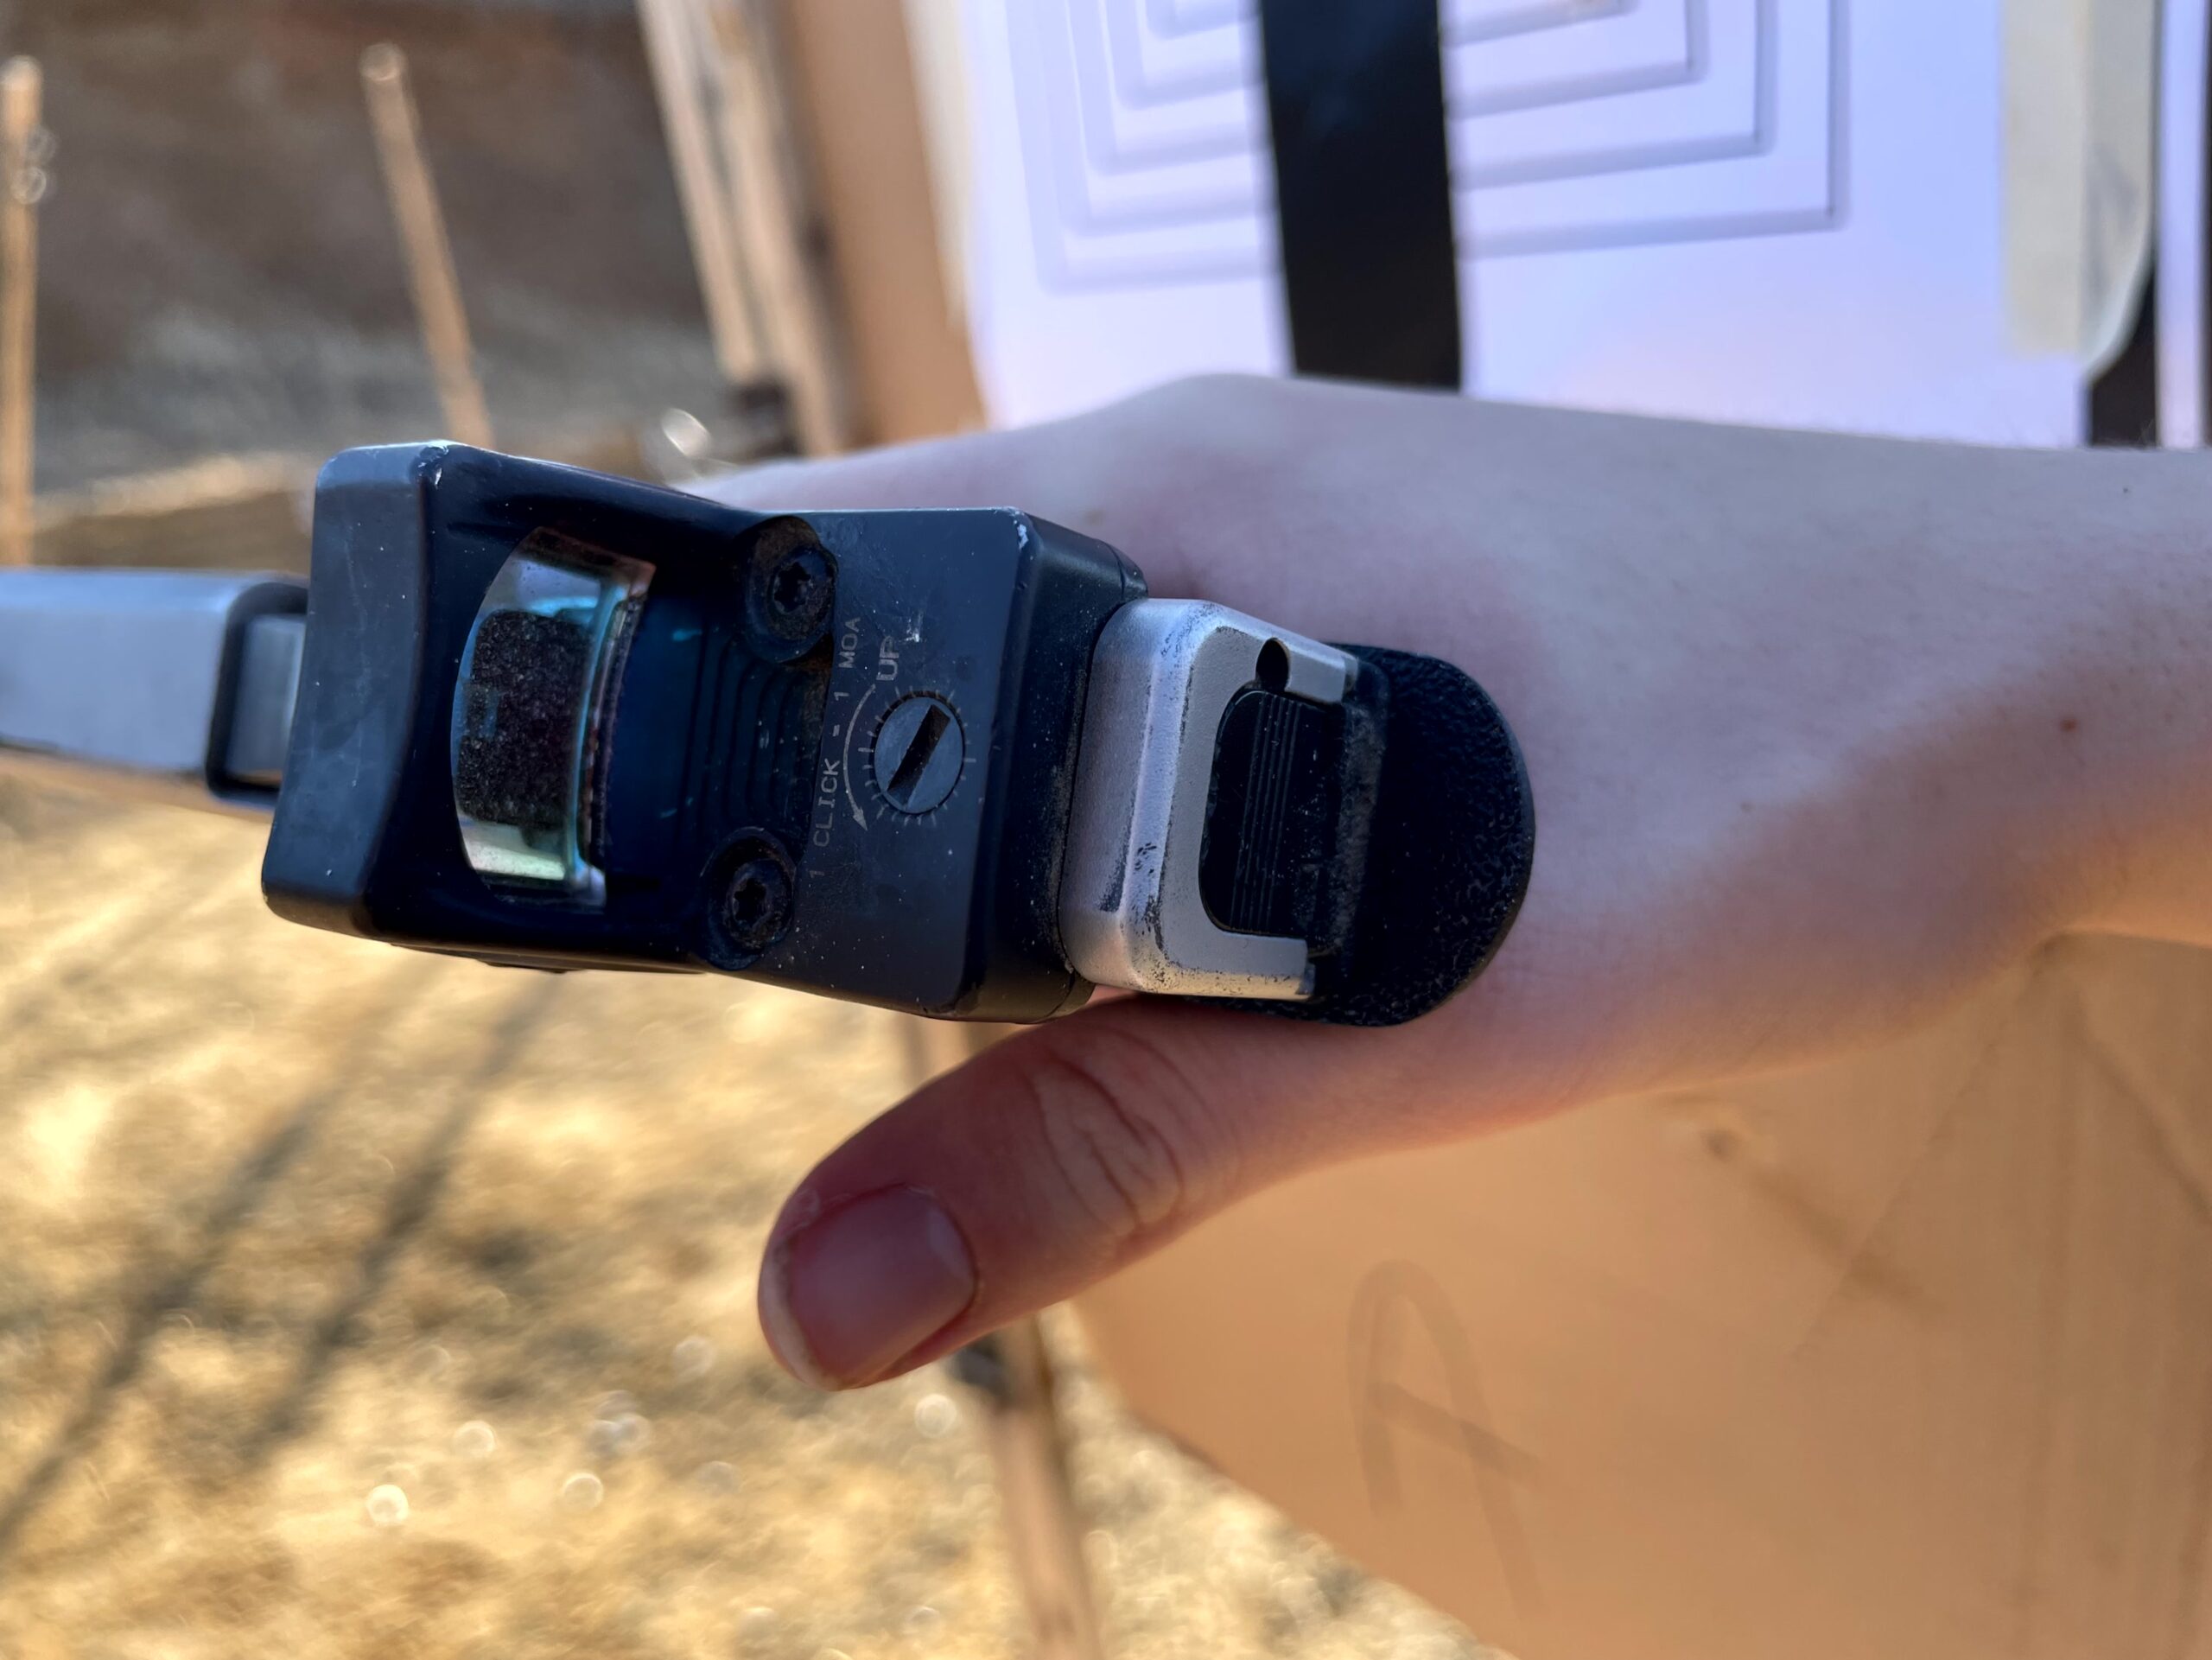
Having the gun line up properly with the hand can also making finding the dot easier on guns with optics.
When the gun is twisted in the hand due to front strap grip problems, it looks more like this.
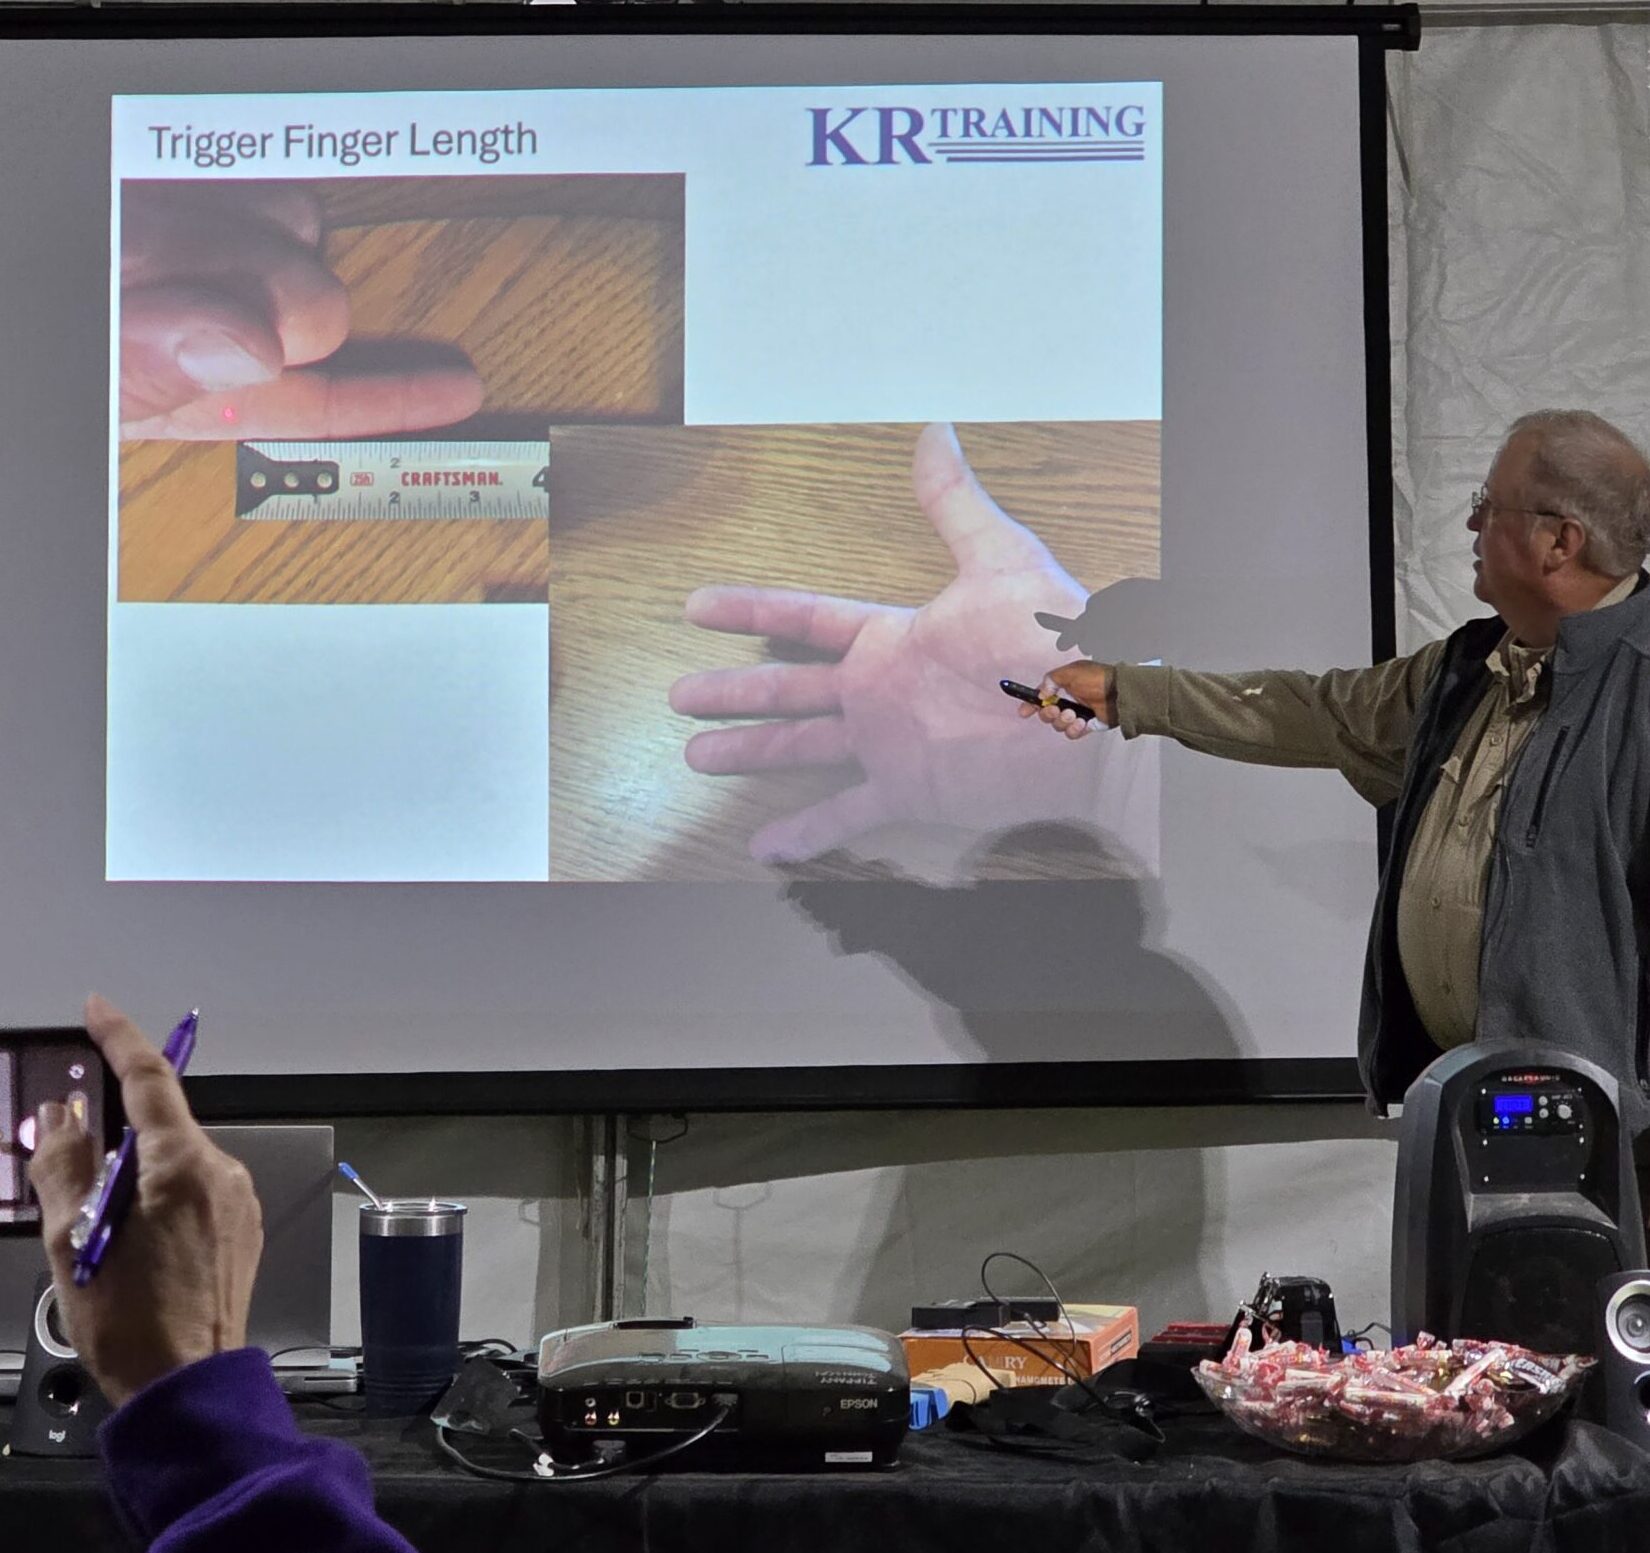
Trigger Reach
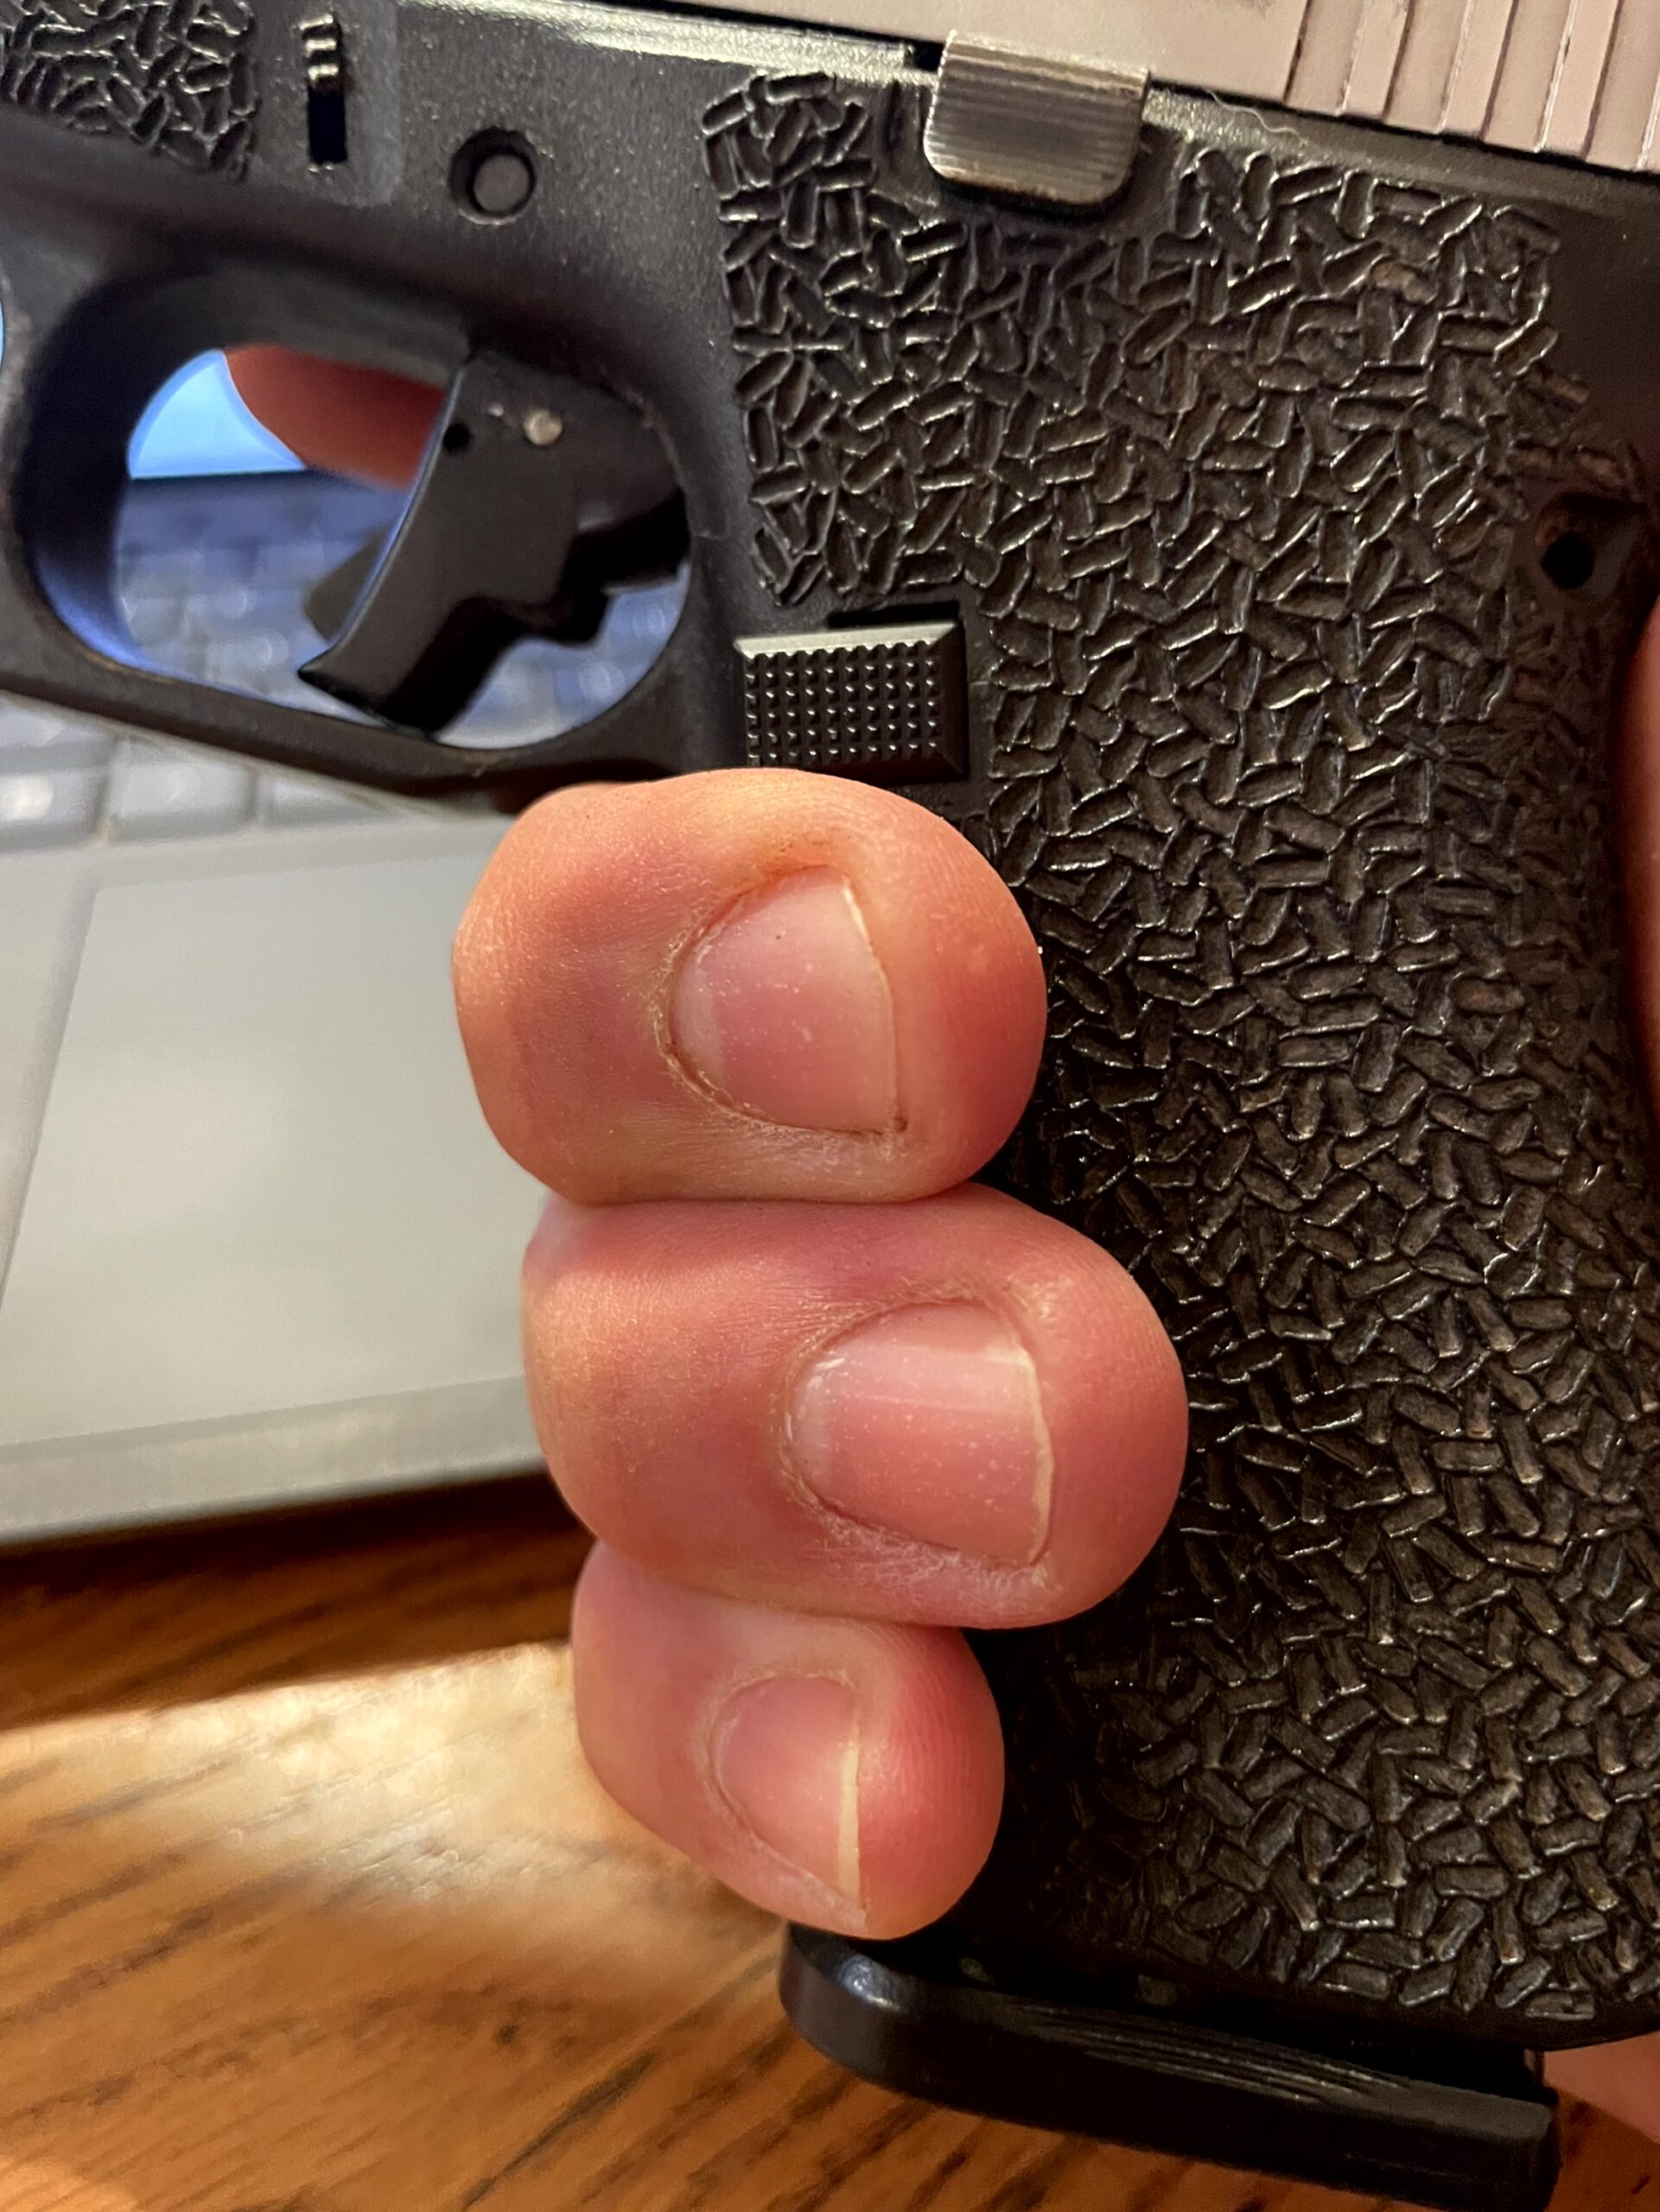
Even if the gun lines up with the hand when the U is properly wrapped around the front strap for optimal gripping, trigger finger length can be a problem. Optimal is that the middle joint of the trigger finger does not lay or rub against the frame, and the center of the fingerprint can touch the trigger. This allows the trigger to be pressed straight to the rear without trigger finger movement exerting any side to side pressure on the frame.
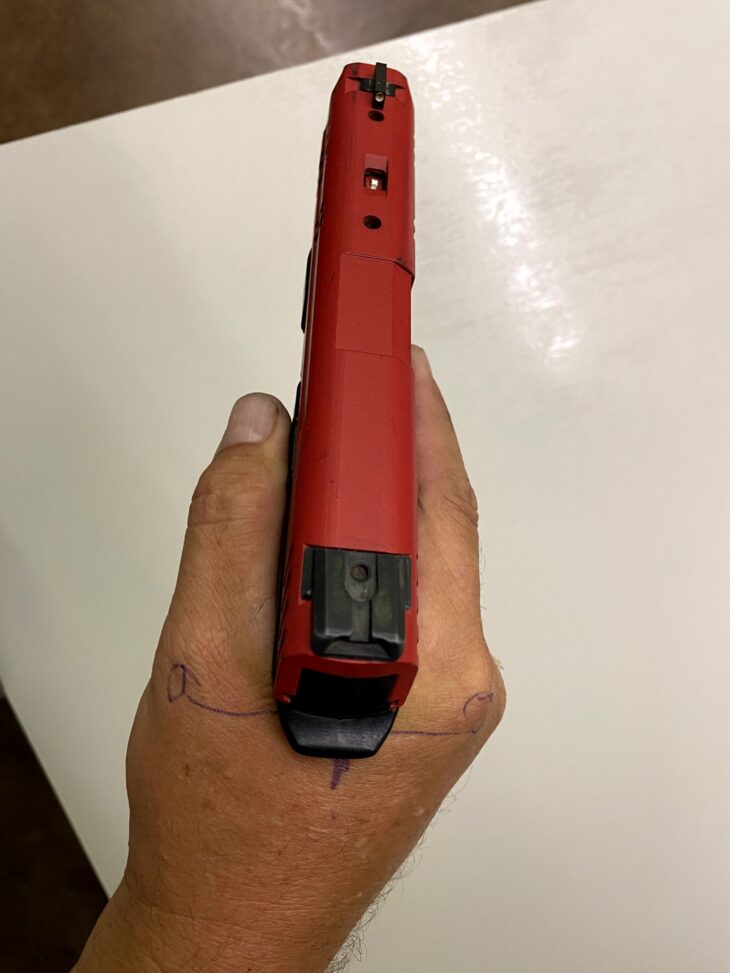
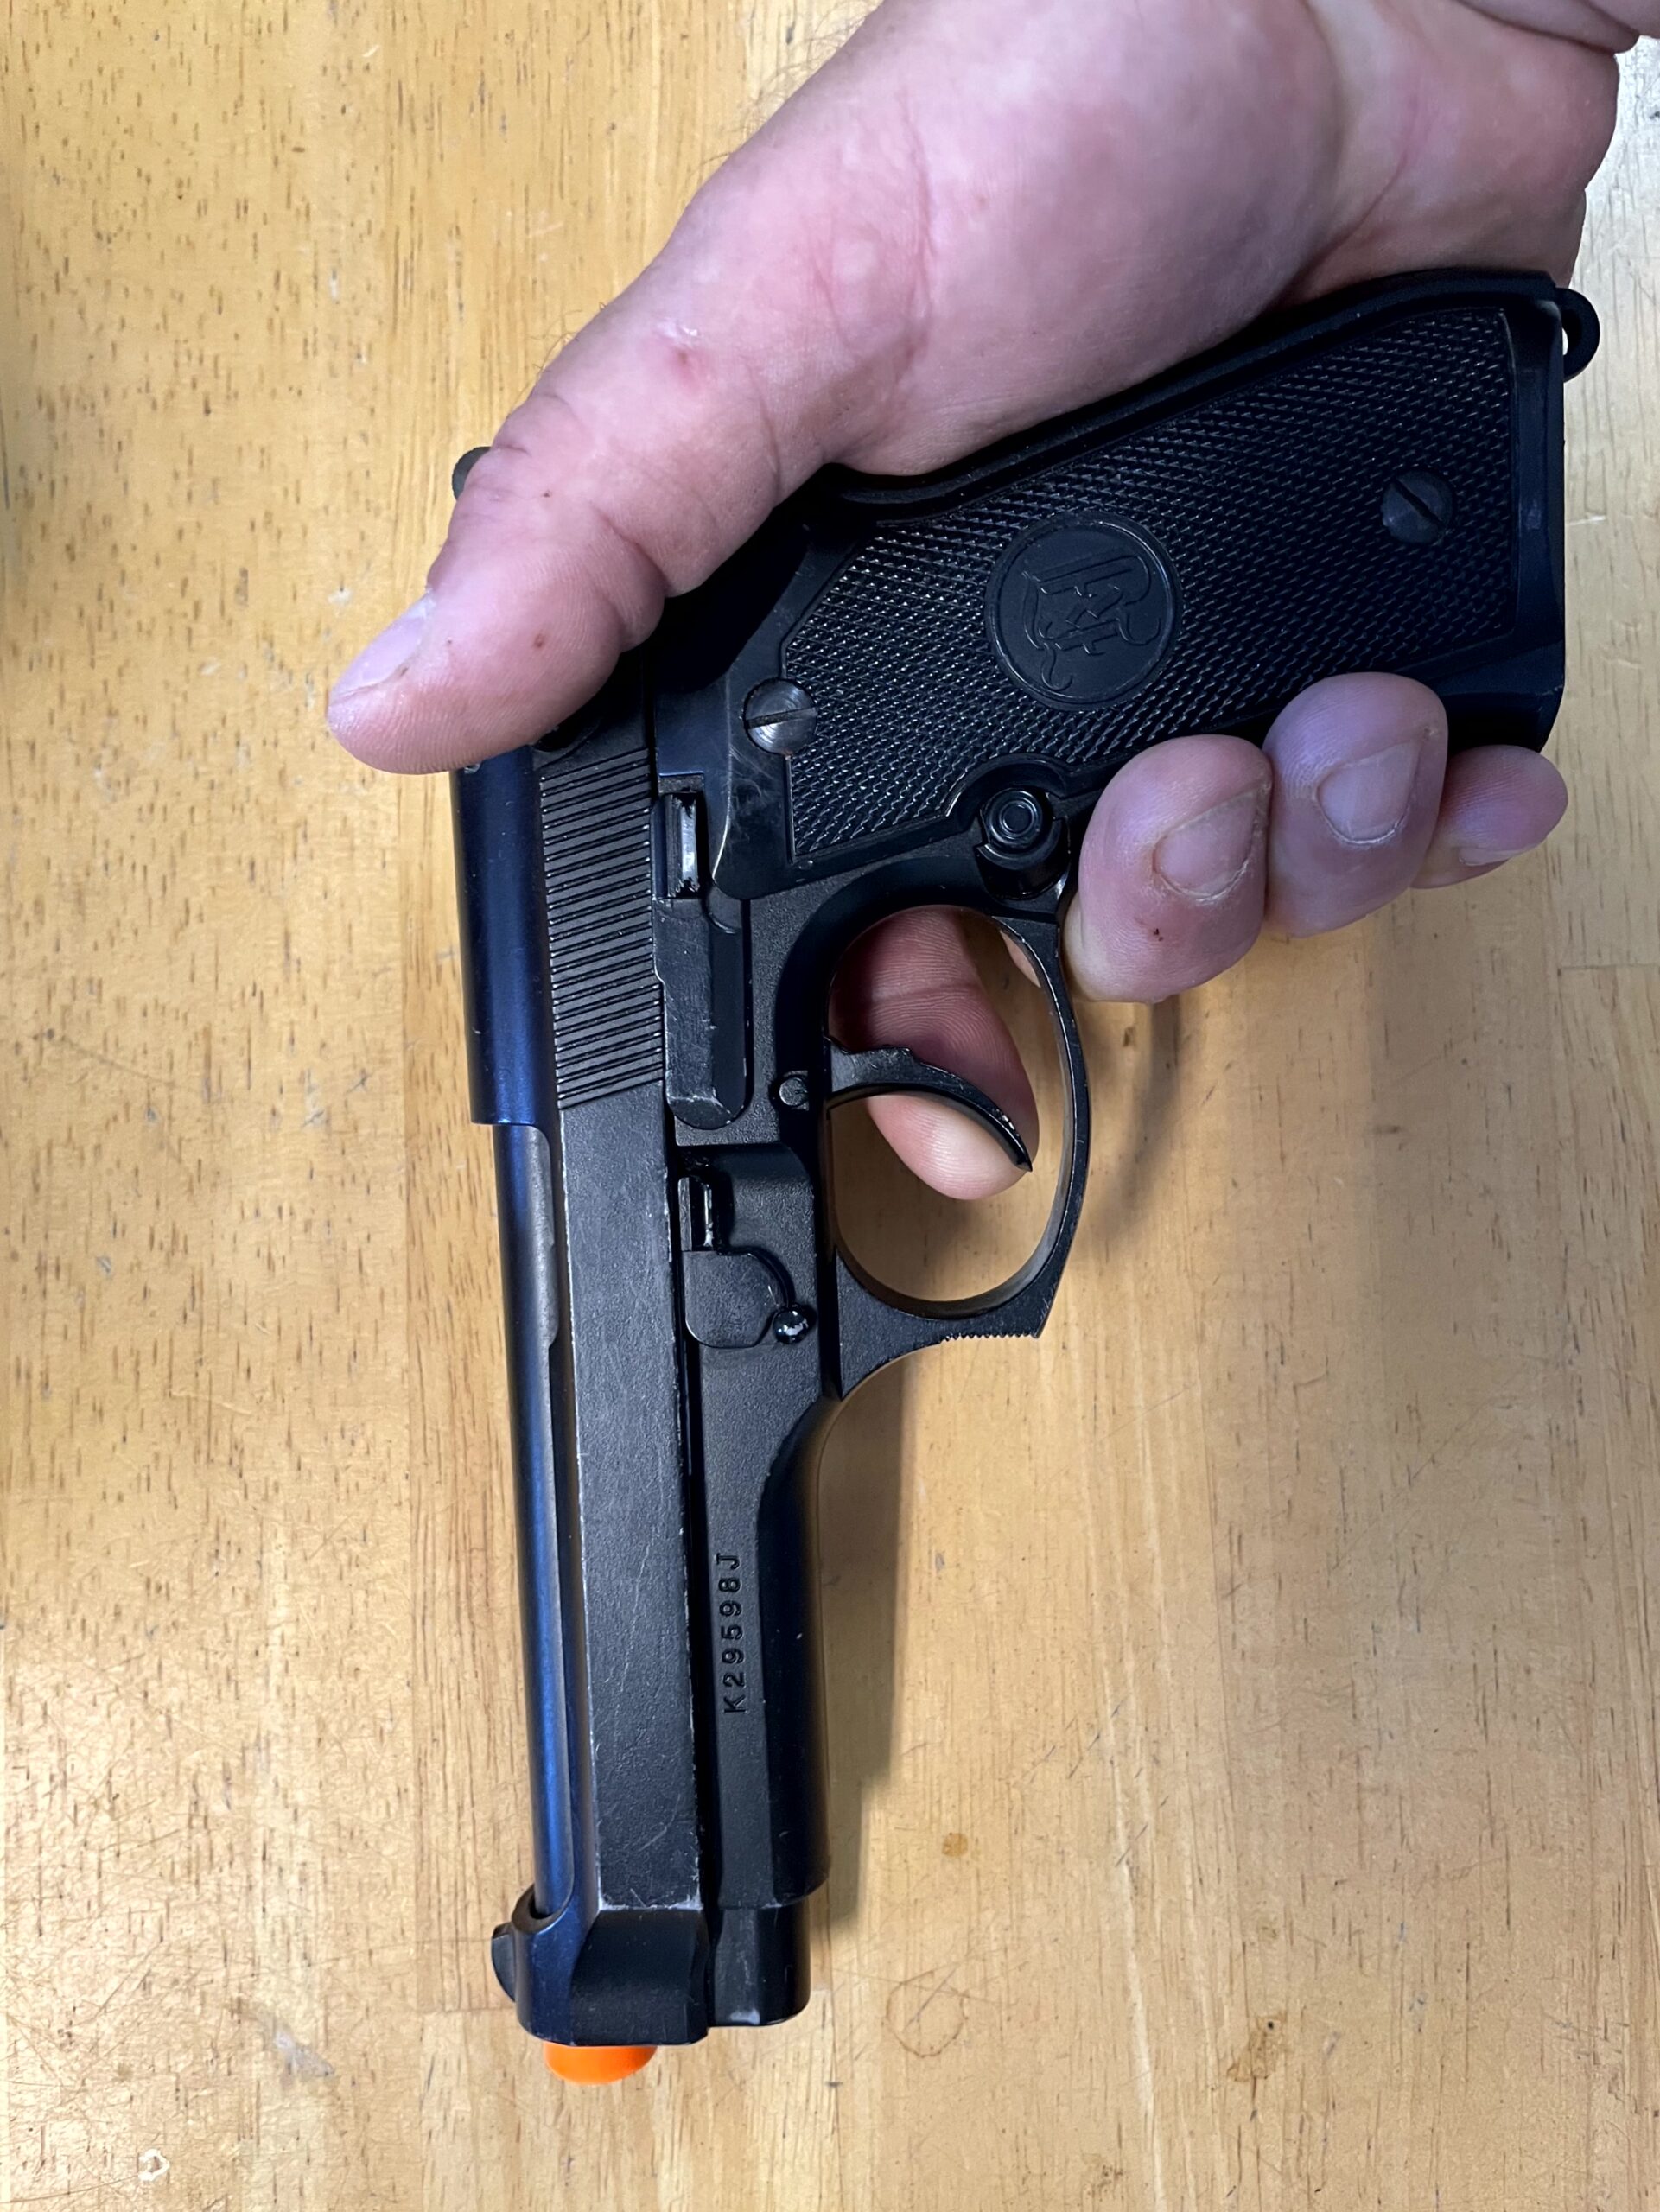
The extreme case is the double action pistol with its long trigger reach. In this picture, I have sufficient front strap grip, but my short trigger finger cannot curl around the double action trigger. My finger is laying beside it, leaving me the only solution of twisting the gun in my hand to get proper leverage on the trigger.
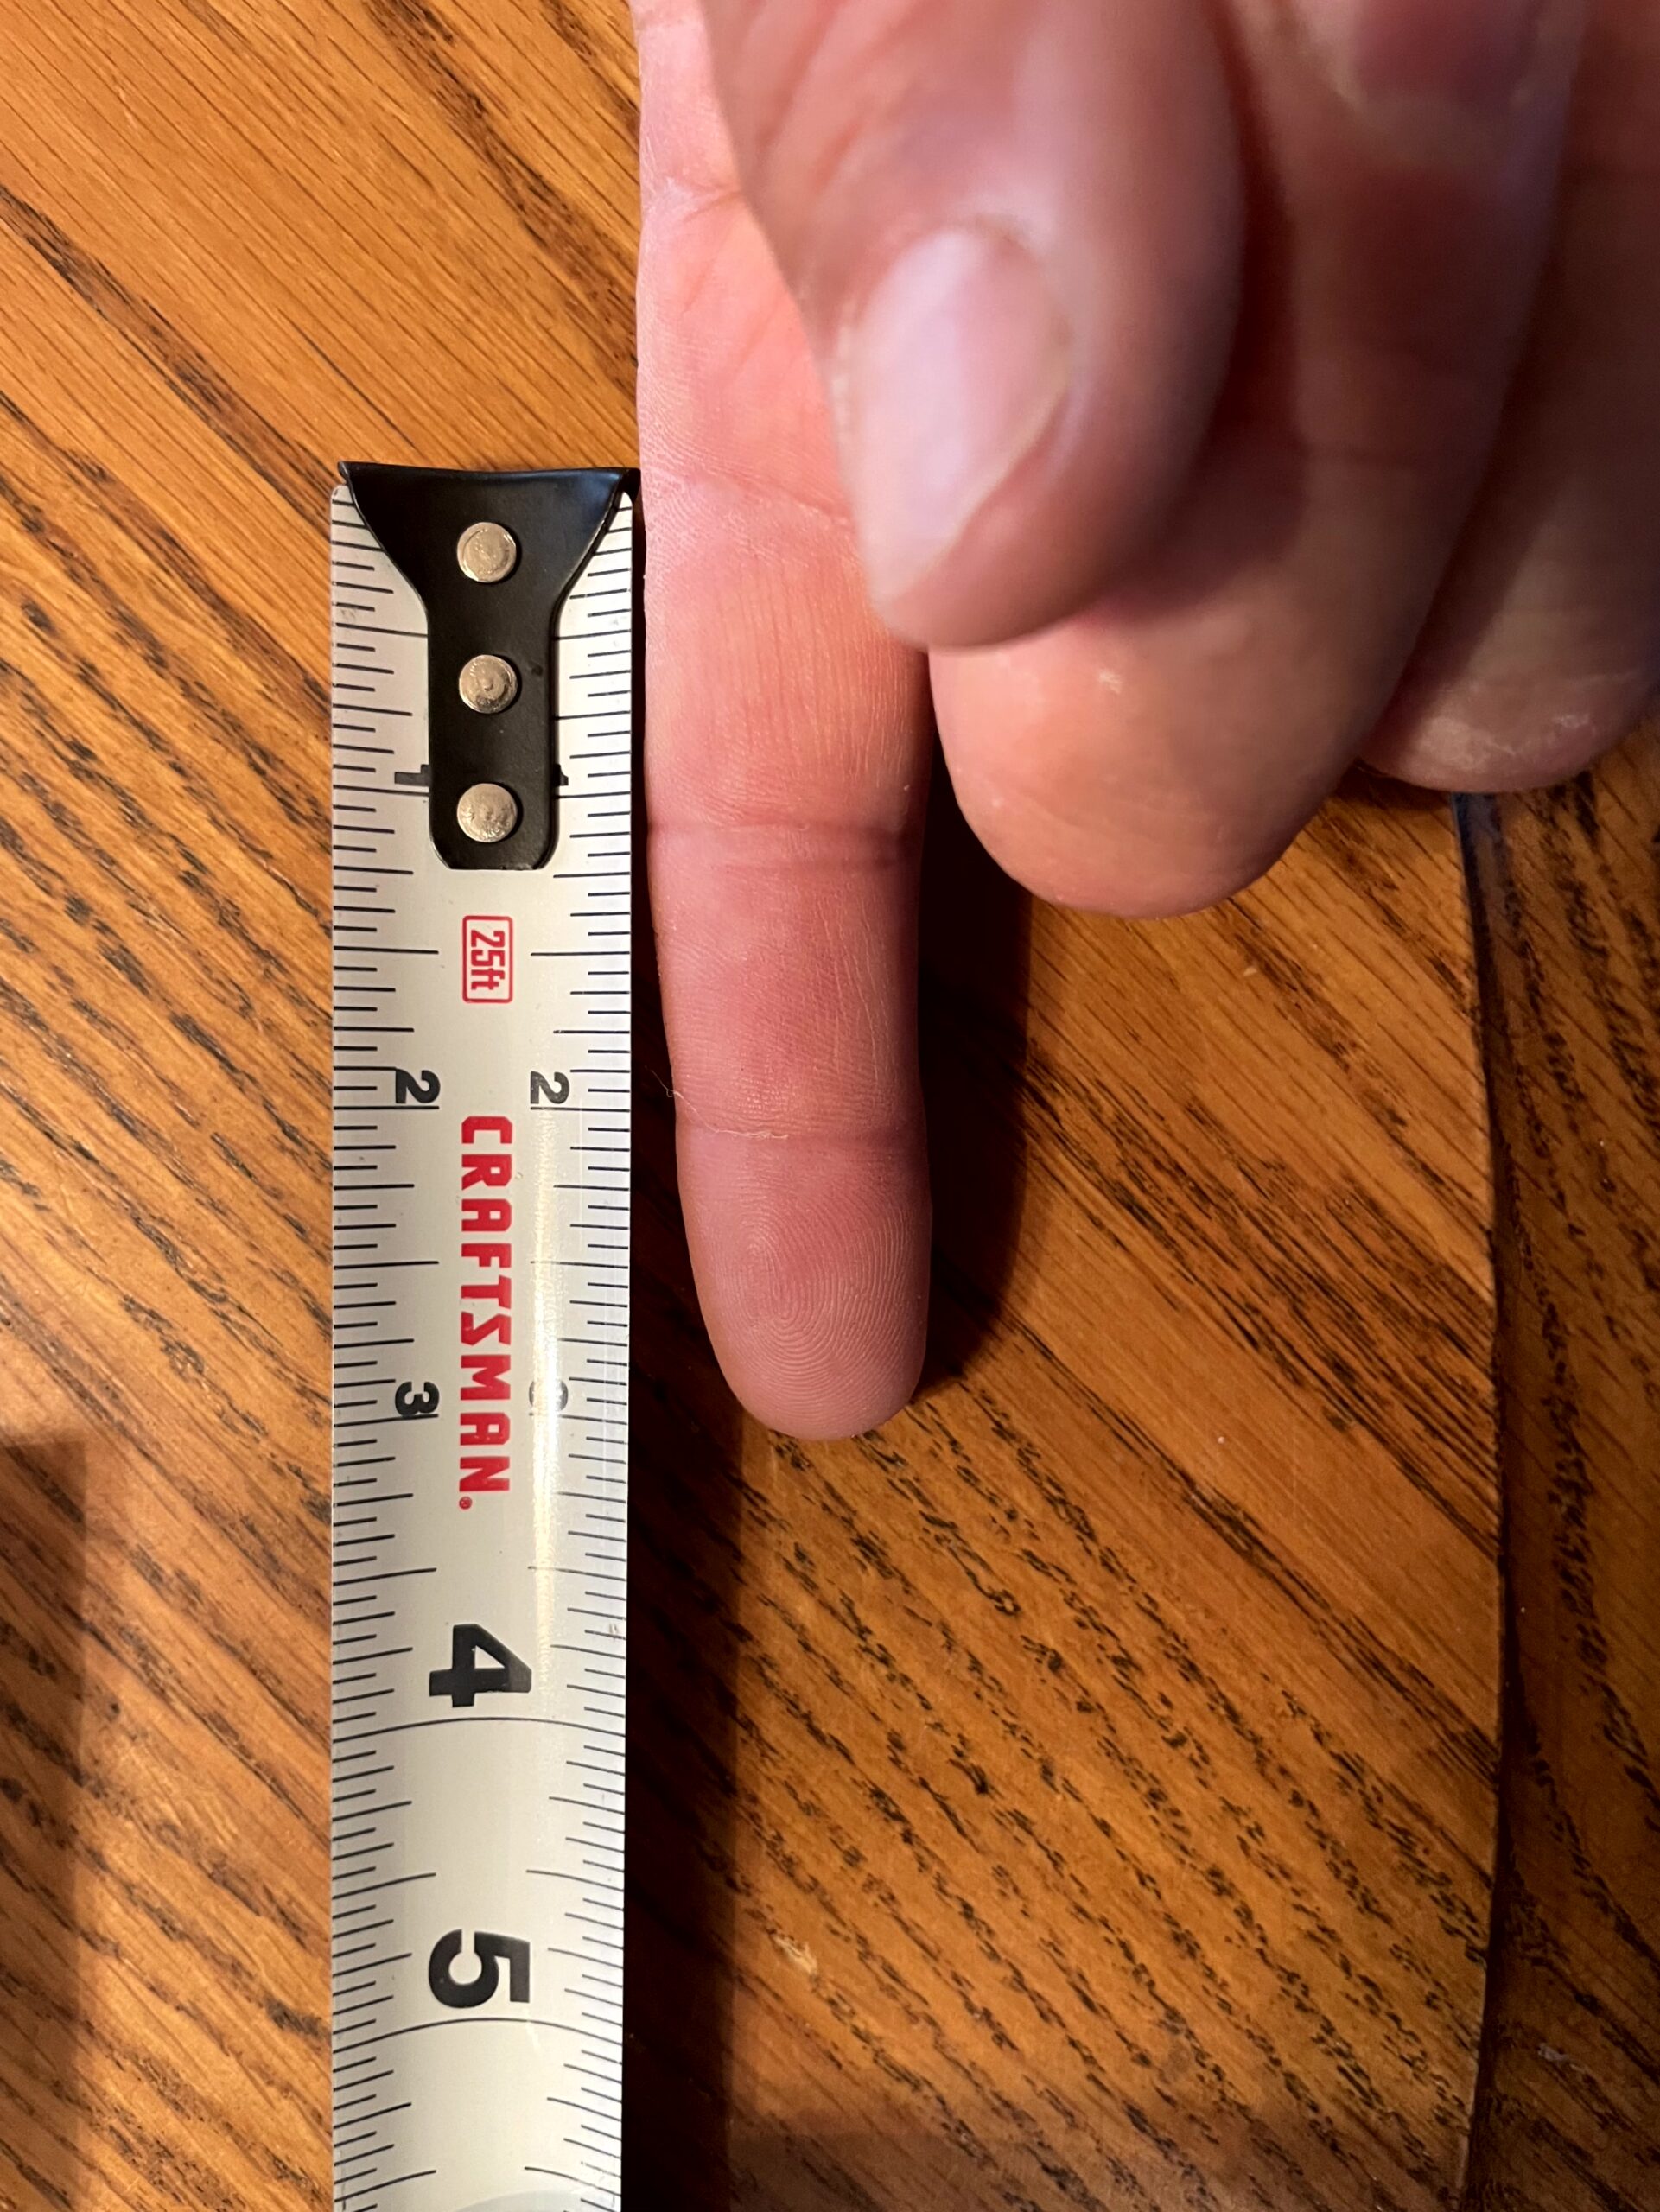
In my basic pistol classes I provide loaner guns to half (or more) of the students. The quick assessment includes a measurement of grip strength and trigger finger length. The trigger finger should be measured from where the finger connects to the palm to the tip.
From this I break down trigger finger length into 4 categories with associated gun models:
XL – 3.50″ or longer – any gun L – 3.25-3.50 – Glock 17/19 or similar M – 3.00-3.25 – Glock 48, Hellcat Pro, Shield X, SIG 365, 1911 S – less than 3.00 – EZ 380, Springfield EMP, S&W Shield, Glock 42, S&W Bodyguard and others
Most of the “Small” guns end up being single stack .380s, because the shorter cartridge length of the .380 results in a shorter trigger reach. I see a LOT of students show up for class with Glock 19 sized guns who really need the medium sized guns due to hand size.
Thumbs
Although the “thumbs forward” grip is by far the most popular grip technique taught by modern trainers, thumbs up and thumbs down techniques are also taught. All 3 variants (up, down, and forward) can work fine for those with sufficient grip strength. Most people, when told to “grip harder”, instinctively push down with their thumbs. In a thumbs-forward grip this pushes the support hand lower and lower down the pistol with each shot. Those most likely to do this are people with limited grip strength (less than 60 pounds). For those shooters, switching to a thumbs down grip solves the “thumb pushing” problem and decreases the amount of muzzle flip that occurs when the gun recoils. We documented this in a slow motion video using a shooter with 65-70 lbs of grip strength.
Compensators
Back in the 1980’s, compensators on pistols were the New Cool Thing, particularly with USPSA competitors running .38 super loads at pressures that exceed SAAMI specs, which was required to get the .38 super load to meet the “Major” power factor standard (which was 185,000, not today’s 165,000). In the 1990’s, as everyone in USPSA put a frame mounted optic on their pistol, .38 super major loads began using lighter bullets pushed to very high (1400+ fps) velocities, because the compensator would essentially negate all muzzle flip, allowing extremely rapid follow up shots and never losing sight of the dot in recoil. During that time, tactical trainers, military and law enforcement all opposed the idea of compensated pistols for duty and defensive use.
Compensators have returned to the gun industry as the New Cool Thing, now on guns primarily marketed for defense and duty use. Compensated guns are not allowed at all in IDPA competition, and are only allowed in USPSA Open division. Private sector trainers and social media influencers, particularly those obsessed with split times and superfast Bill drills have mainstreamed the idea of shooting a compensated gun. Those with sufficient grip strength may not see significant change in their shooting performance by running a compensated gun. This week I had a private lesson student with 100+ lbs of grip strength in each hand running a stock Glock 19 with iron sights, hitting .20 splits into A-Zones on USPSA targets at 7 yards using the stock trigger and iron sights. Would a compensator have gotten his splits into the sub .20s? Maybe. Does the difference between a 0.15 split and 0.20 split matter anywhere but on match day or for bragging rights on social media? Probably not.
When we investigated the value of a compensator as a recoil reduction tool for compact/subcompact pistols configured for every day carry, not open carry range toy use, in the hands of our test subject with small hands and 65-70 lbs of grip strength, the benefit of a compensator on a small gun was revealed.
The video shows compensated and uncompensated S&W Shield X pistols in slow motion.
The standard objections to compensated guns are all valid: they make the gun louder, they can reduce projectile velocity, could be a problem when shot from retention due to gasses venting up. However: if the compensator makes the basics of shooting more viable (ability to hang onto the gun in recoil, ability to maintain consistent grip for multiple shots), it may have value, particularly on smaller guns in the hands of those with limited grip strength.
Works for Me!
Some of you reading this may react with the typical “but it works for me!” or “I don’t see those problems with the people I teach!”. I wasn’t aware of these problems 15 years ago, when I was teaching everyone just to “grip the gun the way I do because the top shooters do it this way”, like a majority of trainers do.
When I started paying more attention to the strugglers in classes, trying to figure out why techniques weren’t working for them, particularly the problem of twisting the gun in the hand (related to grip strength, gun frame and trigger reach issues), the root causes became clear. Grip strength and strong fundamentals can “work around” these impediments, but the effort required to shoot well is often too much for the beginner. A super motivated runner can learn to race a 5K in steel toed work boots if they train hard enough…but for the less fit, less motivated runner, properly fit shoes optimized for the task are going to bring them more success sooner – and eventually the steel toed shoe runner is going to fall behind those using better equipment. In the current market, with guns available to fit every sized hand, there’s just no reason for anyone to have to work around problems created by bad gear selection decisions.
Several people sent me video clips from the two times I gave the talk. Here’s that highlight reel:
Manipulations
The second part of my talk addressed the impact of gun fit, trigger finger length and interdigit sympathetic movement on gun manipulations. I’ll put that information in a separate post.
In February 2026, Tracy Thronburg, Ken Carden and I all attended a 3 day FlexCCarry(tm) instructor course taught by Vicki Farnam and her team of assistant instructors.
The focus of this course was to teach us how to instruct others in the use of non-belt-holster carry methods. Vicki has published an excellent book on the topic and as a free sampler book available also.
My thoughts on the value of this class and making it easier for people carrying in bags, packs, and purses to attend regular defensive handgun courses…
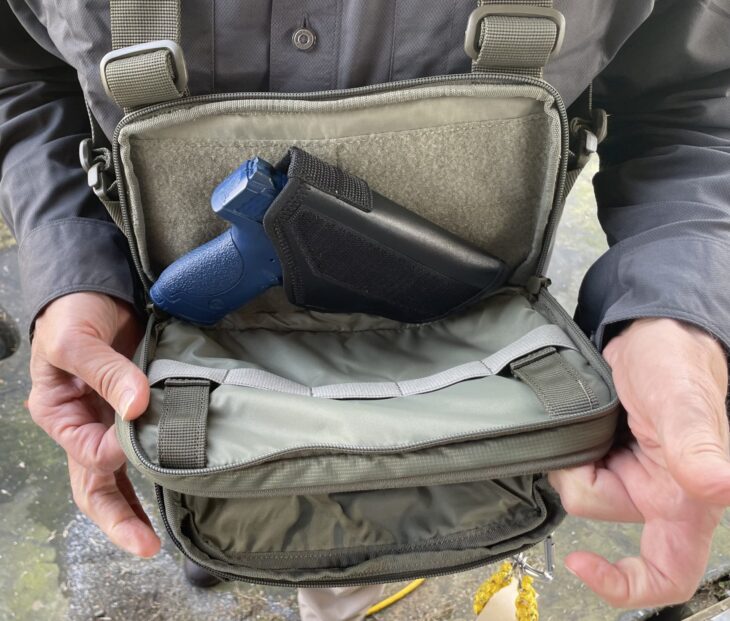
Vicki brought more than 40 different bags for us to try, and part of the course involved changing bags/packs/purses frequently, so we got familiar with as many different products as possible.
Here are some videos of me working from different bags.
The VERTX SOCP bag turned to be my favorite, and after class I purchased two of those bags: one each for Penny and I. I also purchased multiple Crossbreed modular holsters to upgrade some of the other bags and packs I had in my loaner library.
The class included many different live fire drills: examples of how FlexCCarry could be integrated into standard defensive pistol drills, including shooting from cover, shooting on the move, doing reloads and clearing malfunctions. This video shows some of those drills. They were all to be shot at “demoing for student” speed, not “showing off for social media” speed.
Tracy and I will be teaching a classroom Off Body Carry specialty class May 9 (the Saturday before Mother’s Day) paired with a 3 hour Defensive Pistol Small Gun live fire course that focuses specifically on carrying and shooting subcompact semiautos and snub revolvers – perfect for summer carry and off body carry. The Off Body Carry course will be 2 hours of learning about and trying a variety of our loaner bags, packs and purses, working with inert pistols. The Small Gun course will be live fire skills. Students can bring their own guns or use our loaners (loaner guns w/ ammo are $30, contact me in advance to arrange this.) We recommend students interested in off body carry skills take BOTH courses. This is why we are offering them back to back on the same day. Those not interested in the off body material are welcome to attend just the 12-3 Small Gun live fire course.
Thanks to everyone that has signed up for January, February and March classes! The shotgun and Defensive Pistol Skills classes coming up are all sold out. We do still have some classes in March and April with space available. Greg Ellifritz will be teaching two classes in April (Close Quarter Shooting and Cane/Baton Defense), and two classes in July (Knife Skills for CCW and Tactical First Aid). Don’t miss out on these specialty courses. They are all suitable for people at the carry permit level. You don’t have to be an expert or an advanced student to attend.
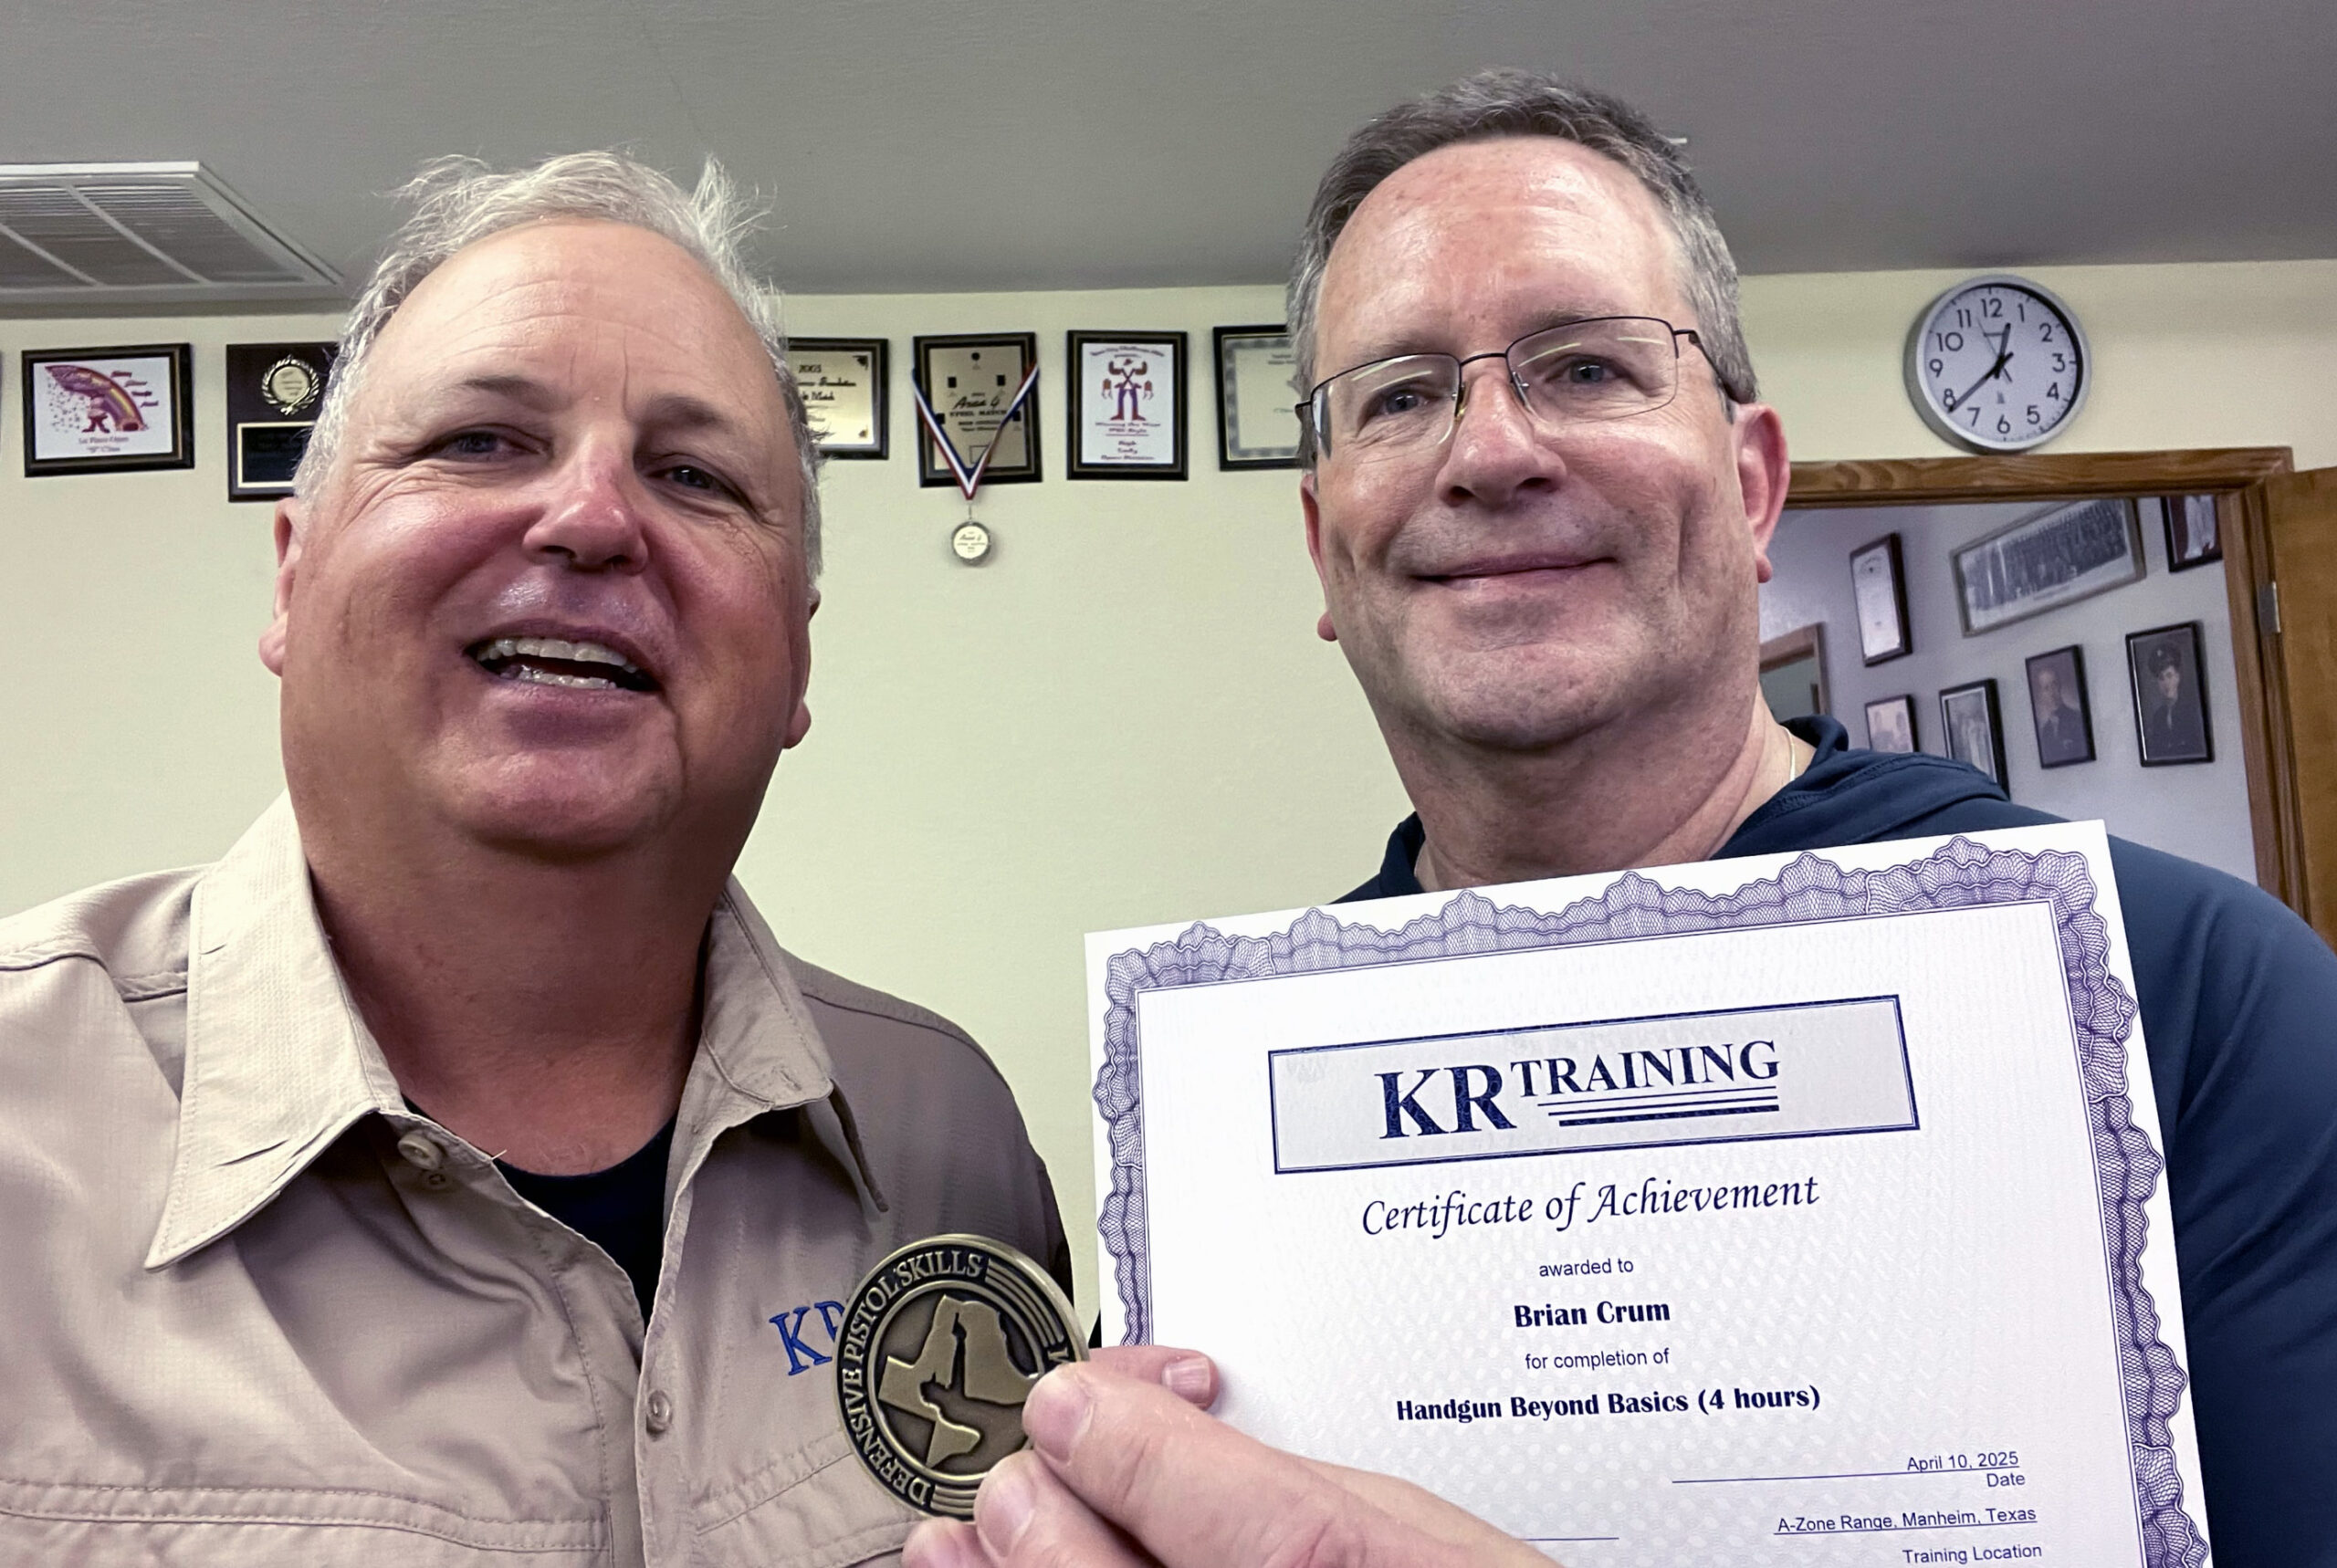
Handgun Beyond Basics & Personal Tactics Skills – March 14
On March 14 we will offer two courses: Handgun Beyond Basics is our “performance pistol” short course teaching techniques to improve speed and accuracy at 10 yards and beyond. The focus of that course is to educate pistol shooters about the differences between the three modes of shooting: “quickly” (maximum speed), “carefully” (medium speed with higher accuracy), and “precisely” (precision shooting). Most pistol shooters fire every shot with a medium grade sight picture and a too-quick trigger press, which results in too-slow hits on close targets, and poor hits on targets past 7-10 yards. This course explains appropriate sight picture (irons and optic) for the three modes, and teaches the differences in how the trigger is manipulated and pressed for each mode, to balance speed and accuracy regardless of target size and distance.
That afternoon we will offer our Personal Tactics Skills class. It’s part two of our three course tactics curriculum; teaching “what to do” for the most likely scenarios people might encounter outside the home. Training includes use of the Image Based Decisional Drills materials, inert pepper spray, non-firing inert “red guns” and other training props to provide hands on instruction.
Doug Greig will offer three different rifle classes in March: Basic Rifle and Intermediate Rifle will be on the same day, so people that want a full day rifle course can attend both. Basic Rifle is for people with limited/no rifle experience. We have loaner guns available for all of the rifle courses. These courses focus on the technical aspects of rifle shooting. For those wanting rifle instruction specific to personal defense with a AR-15 platform rifle, Doug will offer Armed Citizen Defensive Carbine on March 28.
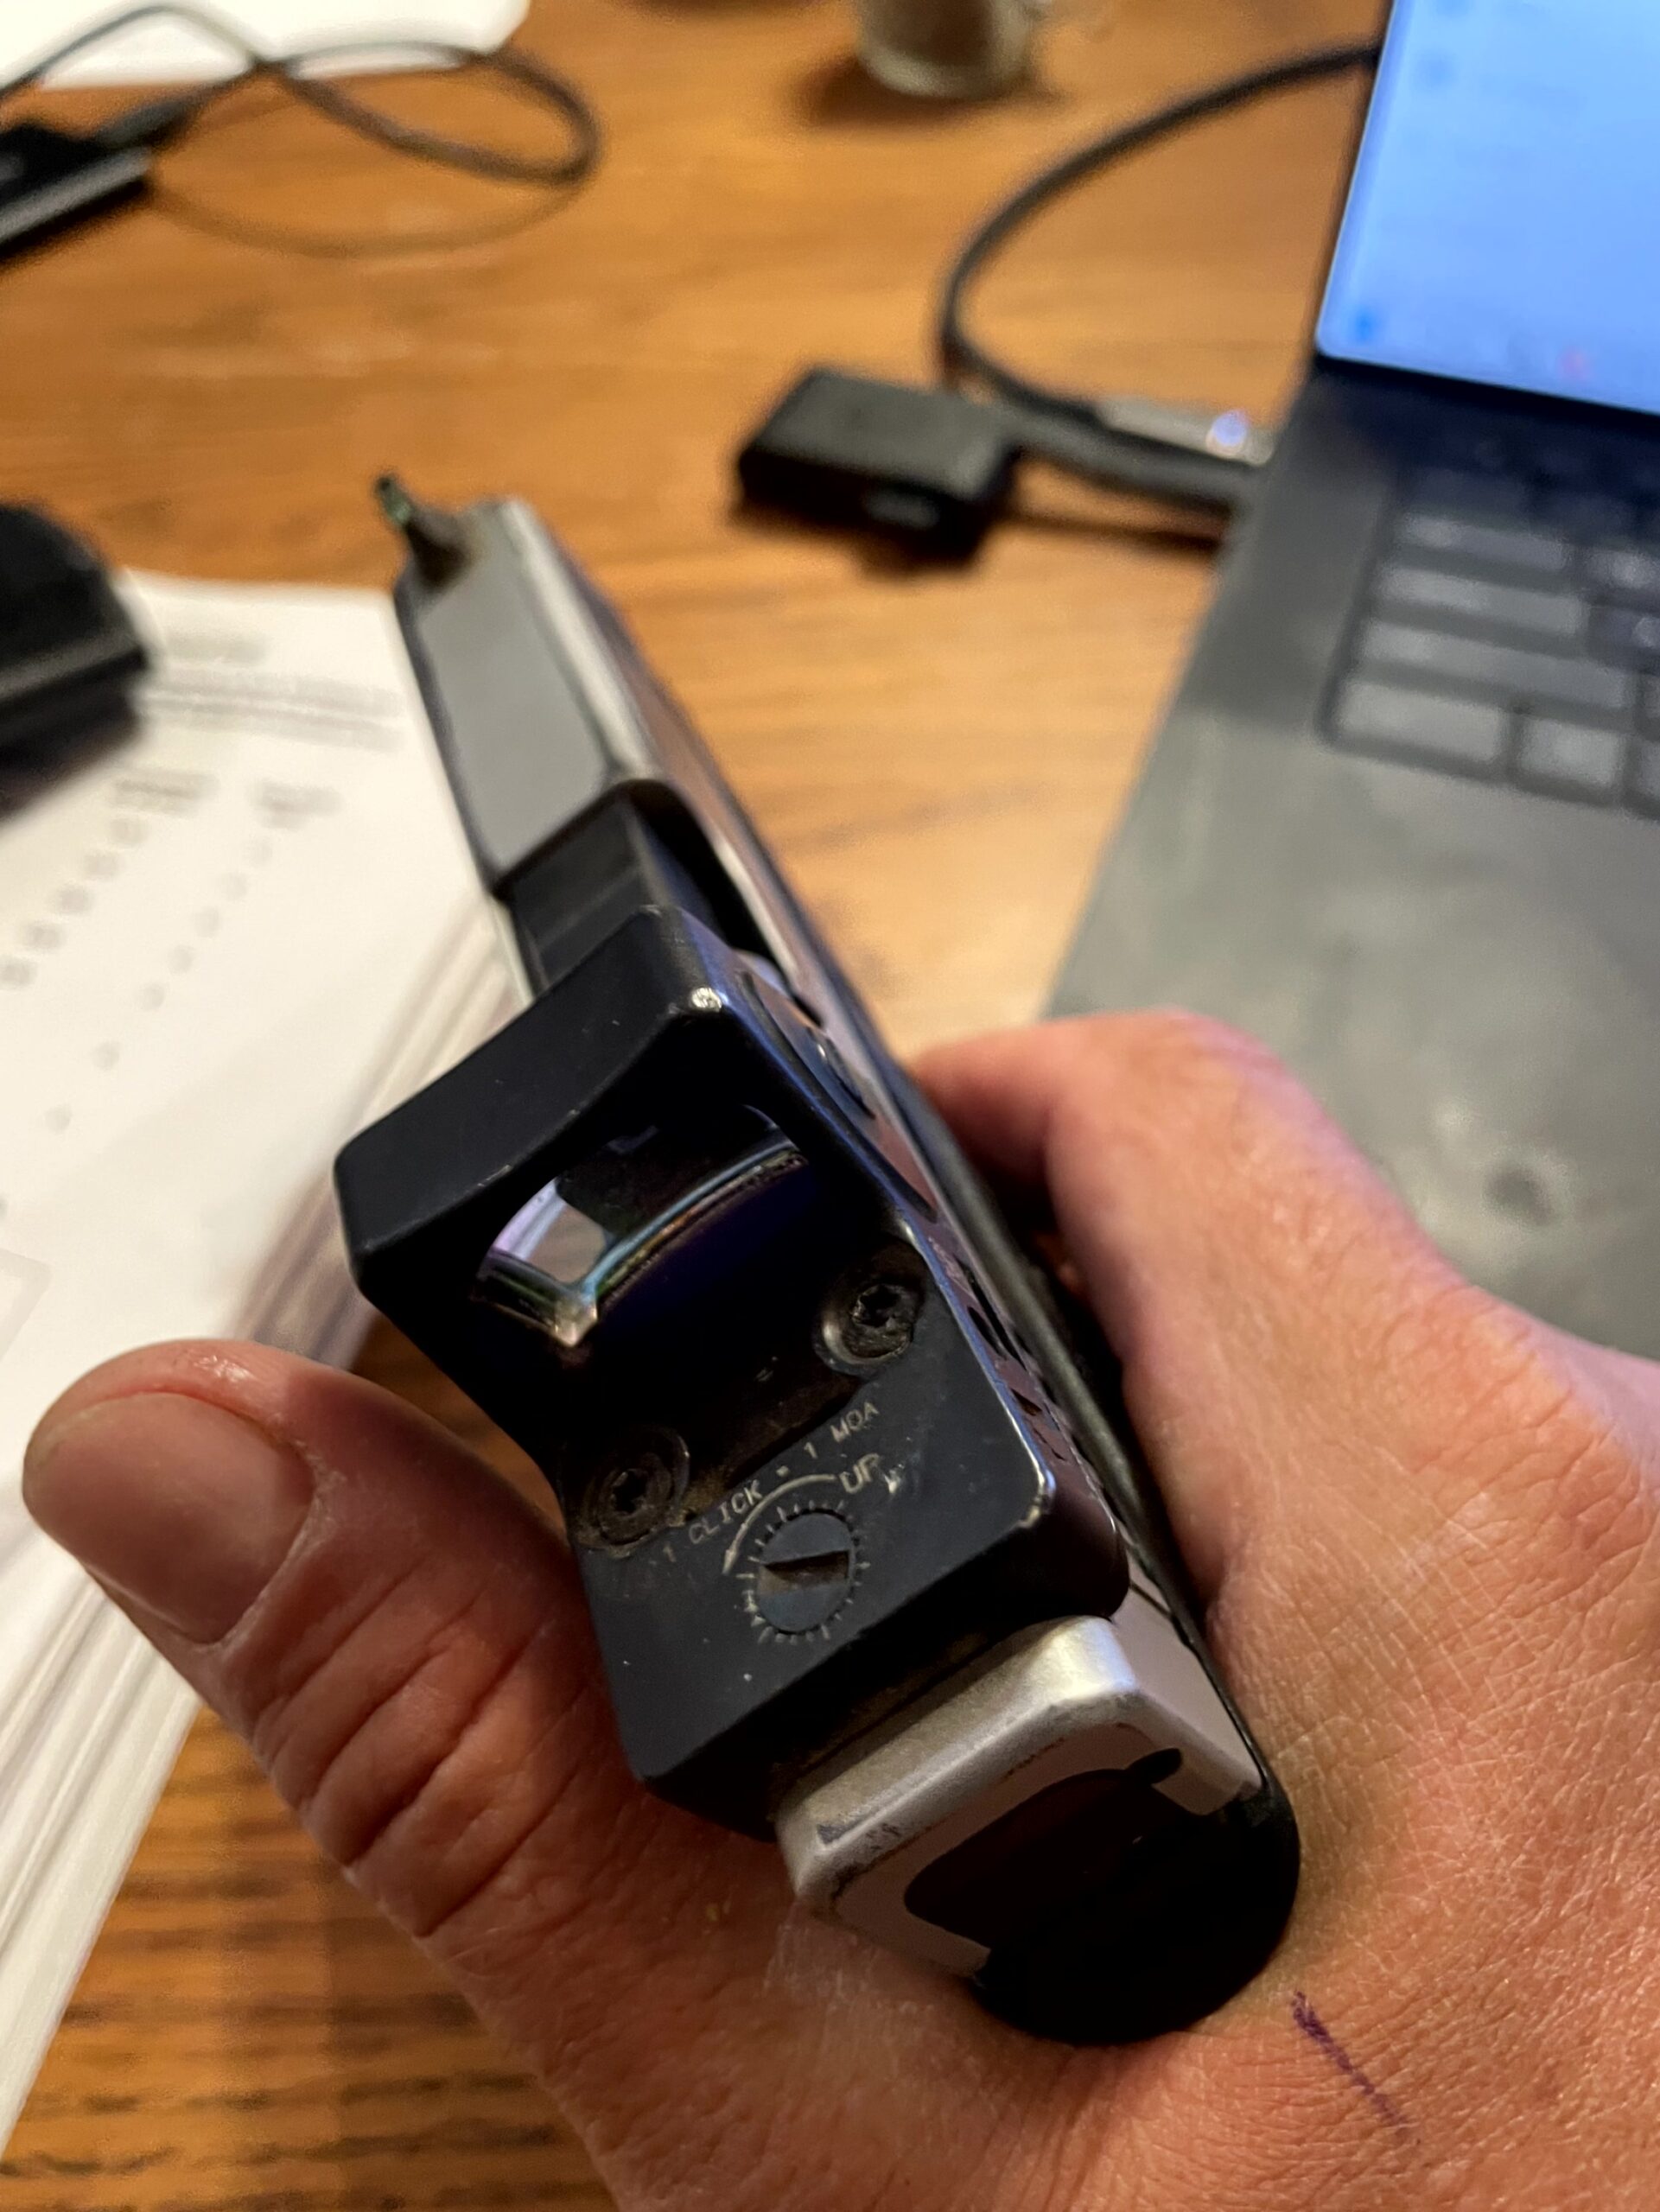
Red Dot Pistol Level 1
Curious about the benefits of upgrading your pistol’s sights to an optic? Have an optic on your gun but always struggle to find the dot? Haven’t zeroed your dot, or don’t know the right way to zero? Doug will offer a four hour introduction to pistol optics (Red Dot Pistol Level 1) on Sunday, March 29. Loaner guns will be available for those that want to try an optic sight without modifying their own gun.
STAFF & ALUMNI NEWS
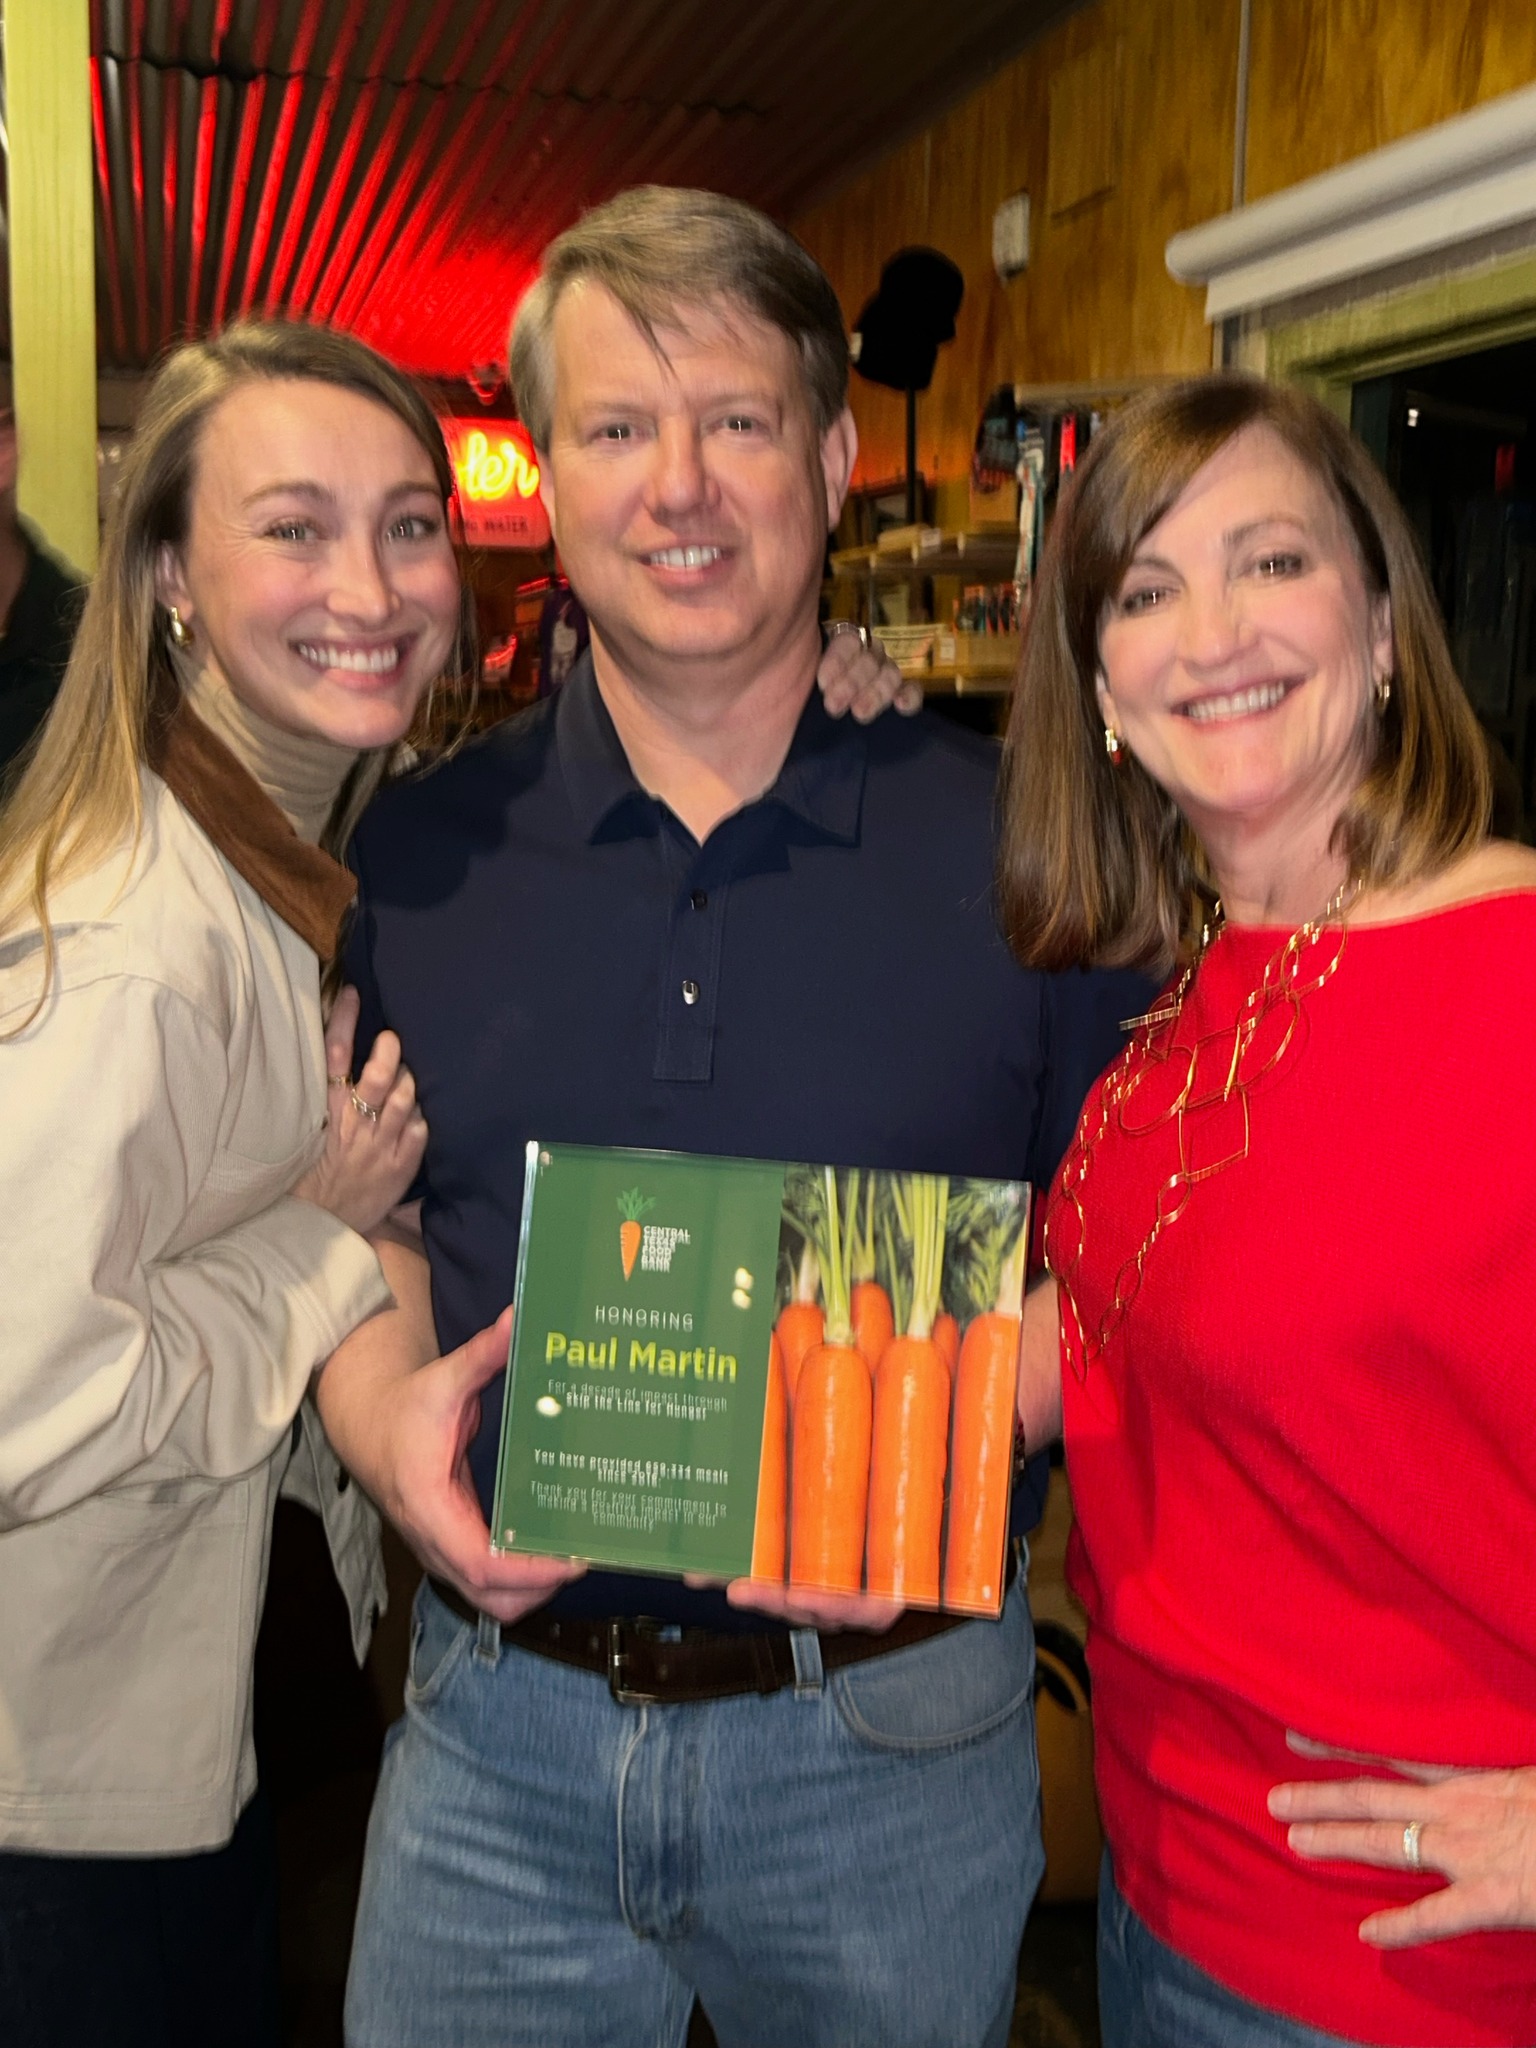
In February KR Training supported the Lee County Wildlife Association and the Central Texas Food Bank by donating class gift certificates and books as fund-raising auction items. Paul Martin and Tracy Thronburg represented KR Training at the “Skip the Line” CTFB fundraiser at Franklin’s BBQ in Austin. Paul received a special award from the Central Texas Food Bank. This year’s fundraiser brought in over $40K, and to date Paul’s events have raised over $260K in funding feeding the needy in the Austin area.
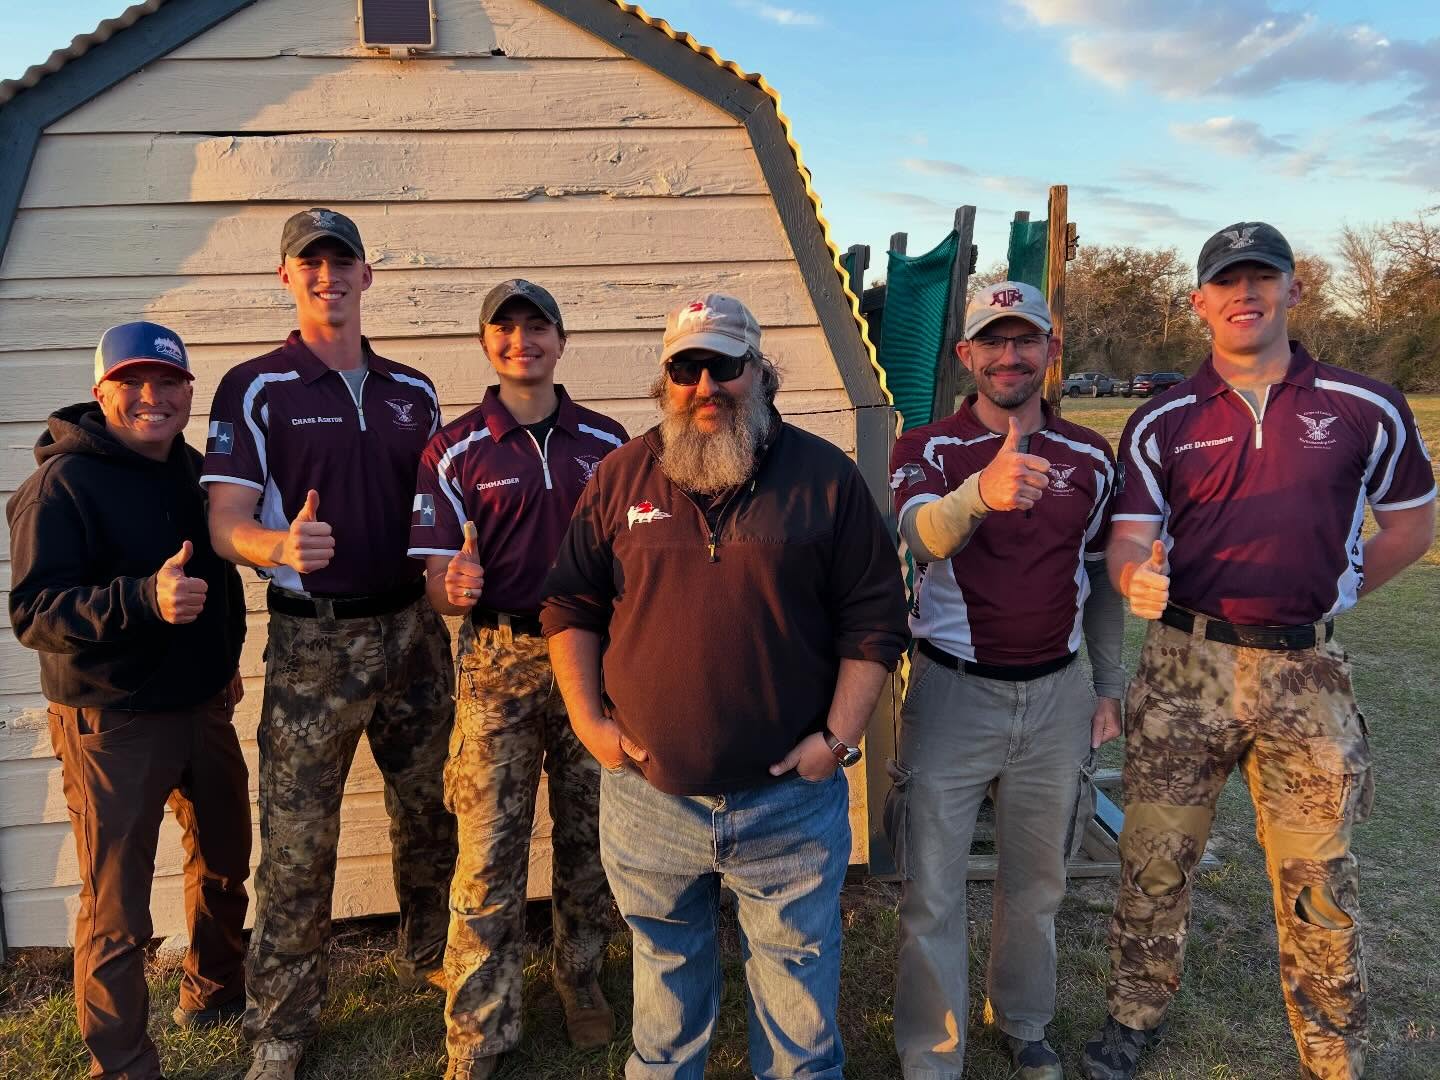
KR Training instructors Dave Reichek and Clark Victorin attended the Tim Herron/AJ Zito performance pistol classes held at the A-Zone in February. Three cadets from the Texas A&M Corps of Cadets Marksmanship Unit were also able to attend and observe the training. KR Training supports the CCMU with range time and coaching from Dave and Karl.
In March, most of the staff will be in Dallas for the Rangemaster Tactical Conference, the premier training event of the year, where dozens of national trainers teach short courses for 3 days. There might be a few slots still open. Register here.
DISCOUNT CODES
I have collected up all the discount codes we have set up with vendors we recommend. Alumni of KR Training classes will find them in the monthly e-news email. You’ll have to open the email and scroll to the bottom to find them. It’s a reward for actually opening and reading the email!
REFRESHER DEALS
Re-take any class you’ve taken before for half price! Contact me to get the alumni discount code. Firearms skills deteriorate without practice. Most ranges don’t allow drawing from a holster, shooting quickly, moving or shooting from cover. If you don’t practice the skills you learned in class, they won’t be there when you need them.
Buy It Cheap and Stack it Deep (Caleb Giddings) – Caleb is an industry insider who says ammo prices are about to go up. He recommends stocking up on ammo sooner than later.
MUSIC VIDEOS OF THE MONTH
In February my trio did a special “Triple Tribute” show where we performed the music of Ray Charles, Frank Sinatra and Elvis Presley. Here’s a video of me with bass player Brian Lippman doing Ray Charles’ classic “I Got a Woman”. In the second video we are joined by singer Terry Price doing his Elvis-inspired version of the Frank Sinatra classic “My Way”.
January 2026 started out strong with two weekends of sold out courses for pistol and rifle. We have one more January class and a full schedule for February and March, with more classes being added for April-October. We just added four Greg Ellifritz classes, two in April (Close Quarter Shooting and Cane/Baton Defense), and two in July (Knife Skills for CCW and Tactical First Aid). Details on the KR Training website.
The class is suitable for anyone at the carry permit level or higher. This is not a SWAT team course for advanced shooters. It’s a practical course teaching how two people can work together in realistic situations, even when one person has significantly less skill than the other, or different equipment.
For example, two parents moving together from their bedroom to a child’s bedroom, one skilled shooter with a handgun and another less skilled person with a long gun, or pepper spray, medical kit, or just a cell phone and flashlight.
Another example: two co workers, church or school security team members working together to move to and neutralize an active shooter.
The class will include indoor “red gun” training and live fire drills on our big range and in our shoot house.
We only offer this class once a year. Again, it’s suitable for anyone at the carry permit level or above, and it covers material not presented in any other class we teach.
Defensive Shotgun 1 and 2 February 28
We will offer both of our half day shotgun courses back to back on February 28th. Defensive Shotgun 1 is an introduction to the defensive shotgun: proper fundamentals, understanding shot patterning and basic applications including shooting from cover.
Defensive Shotgun 2 teaches mitigating recoil using the Haught technique (push/pull or stretch), shotgun manipulations (reloads, malfunctions) and performance under stress.
In March we will offer all of the core Defensive Pistol Skills Program courses along with some rifle and red dot pistol courses. Come enjoy the spring weather and make progress toward earning your challenge coin! We will offer all the core courses multiple times in 2026.
STAFF & ALUMNI NEWS
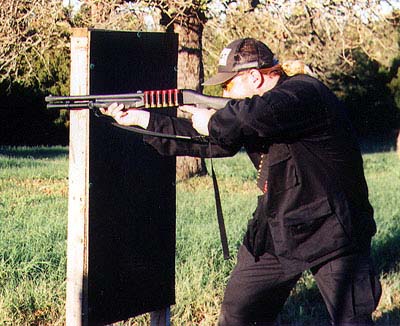
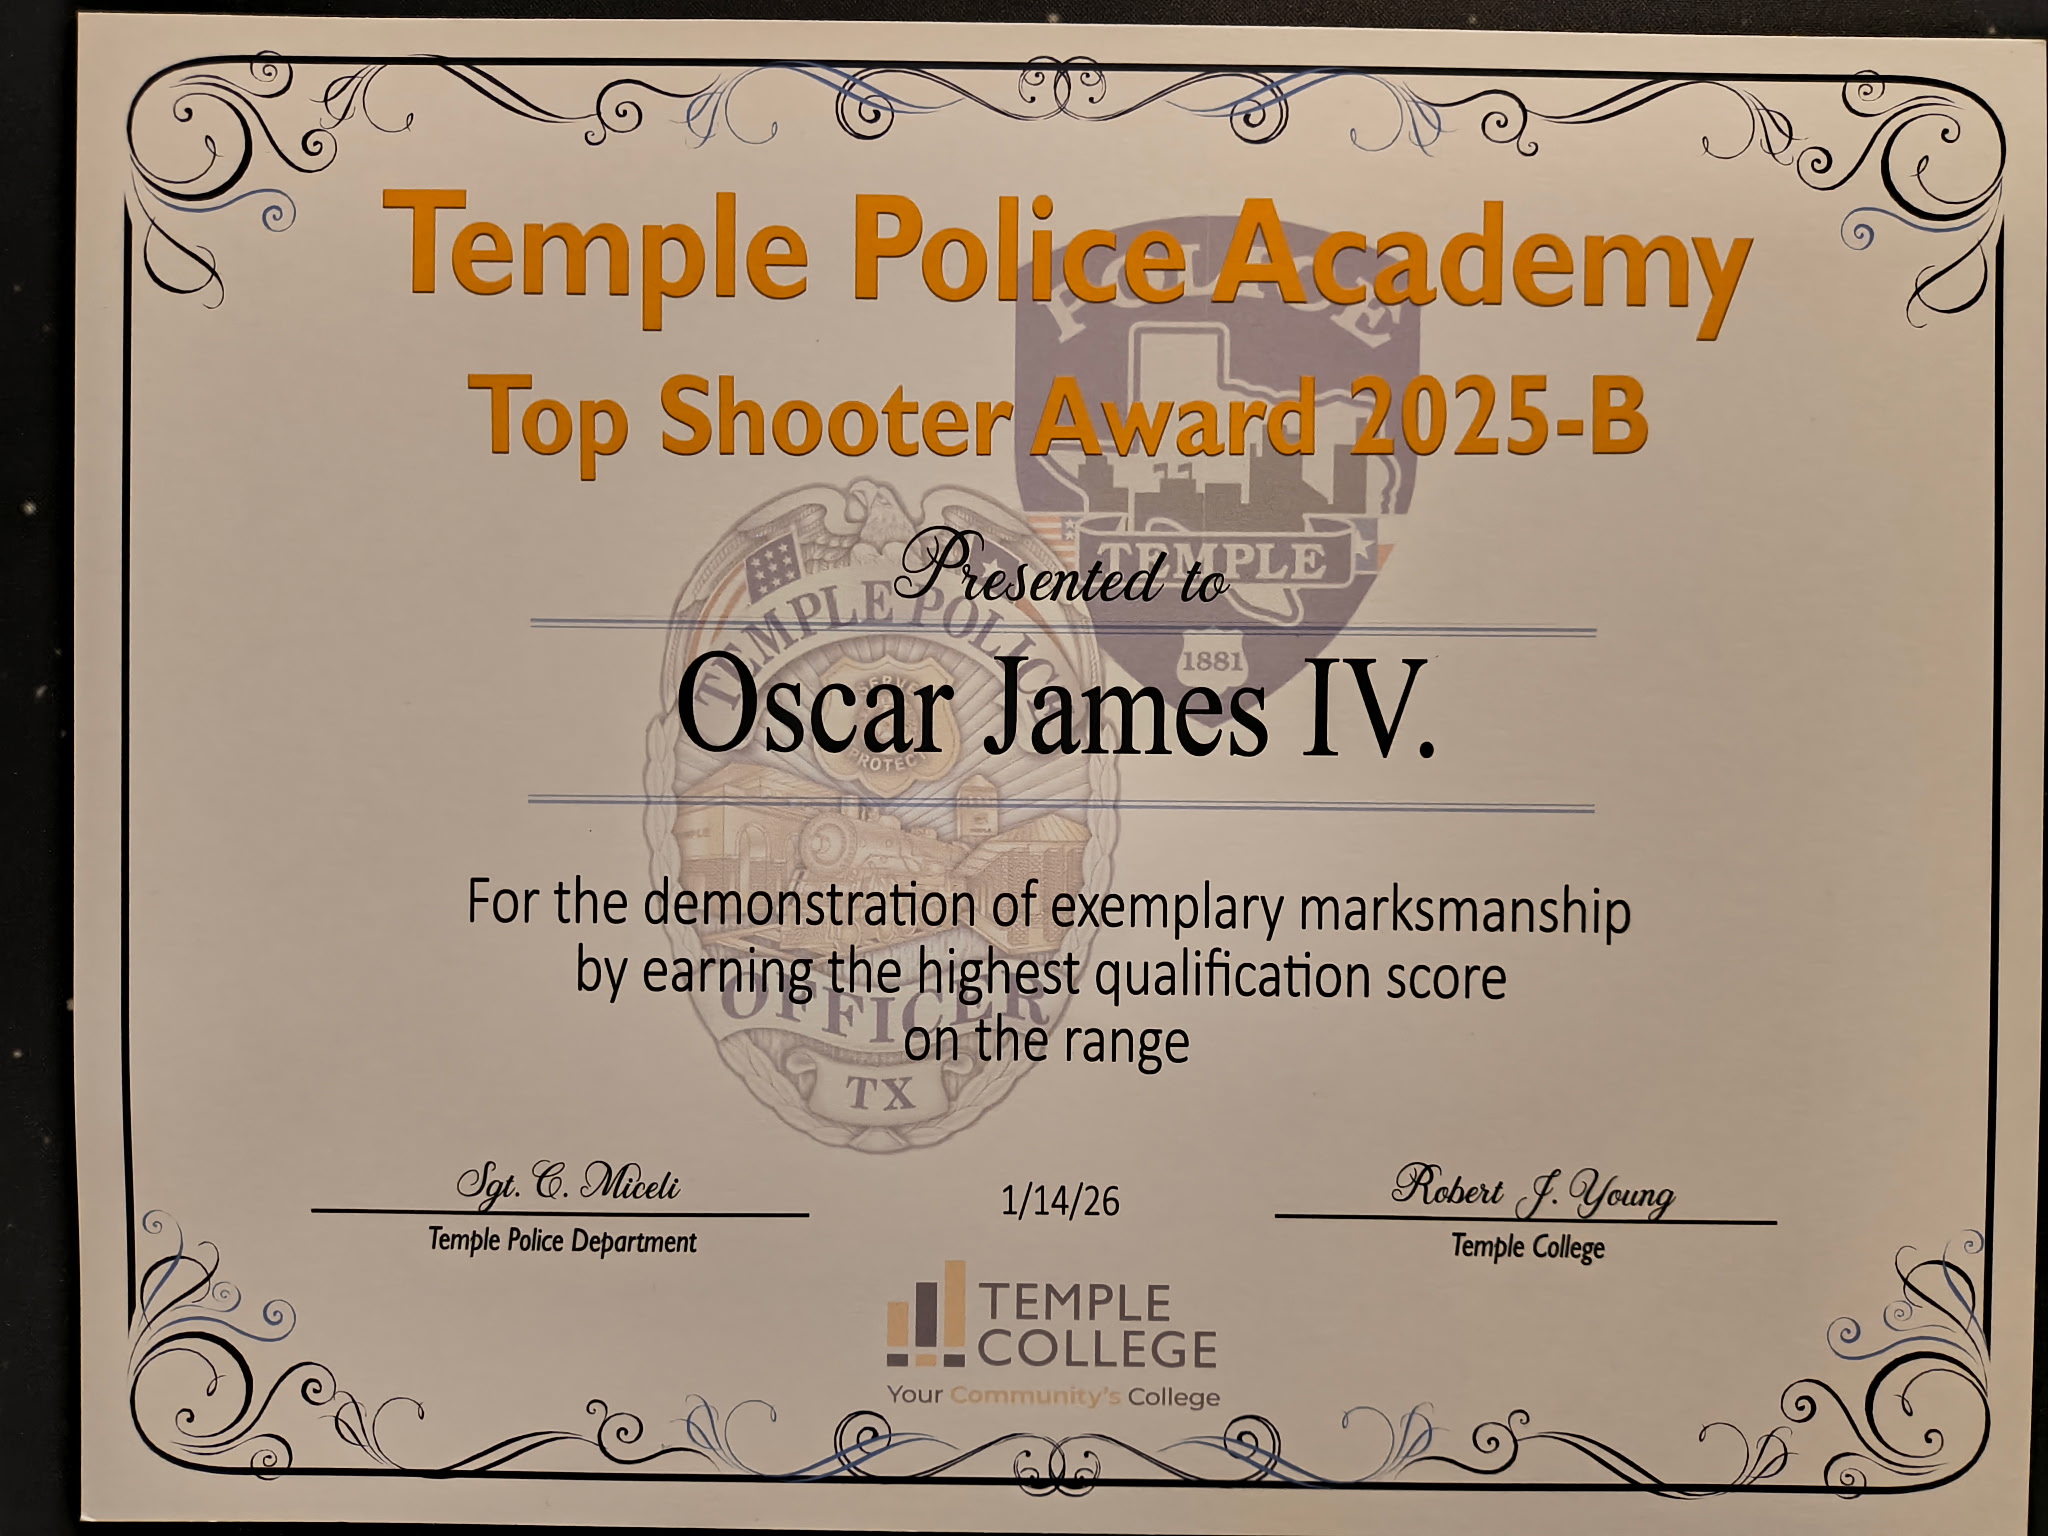
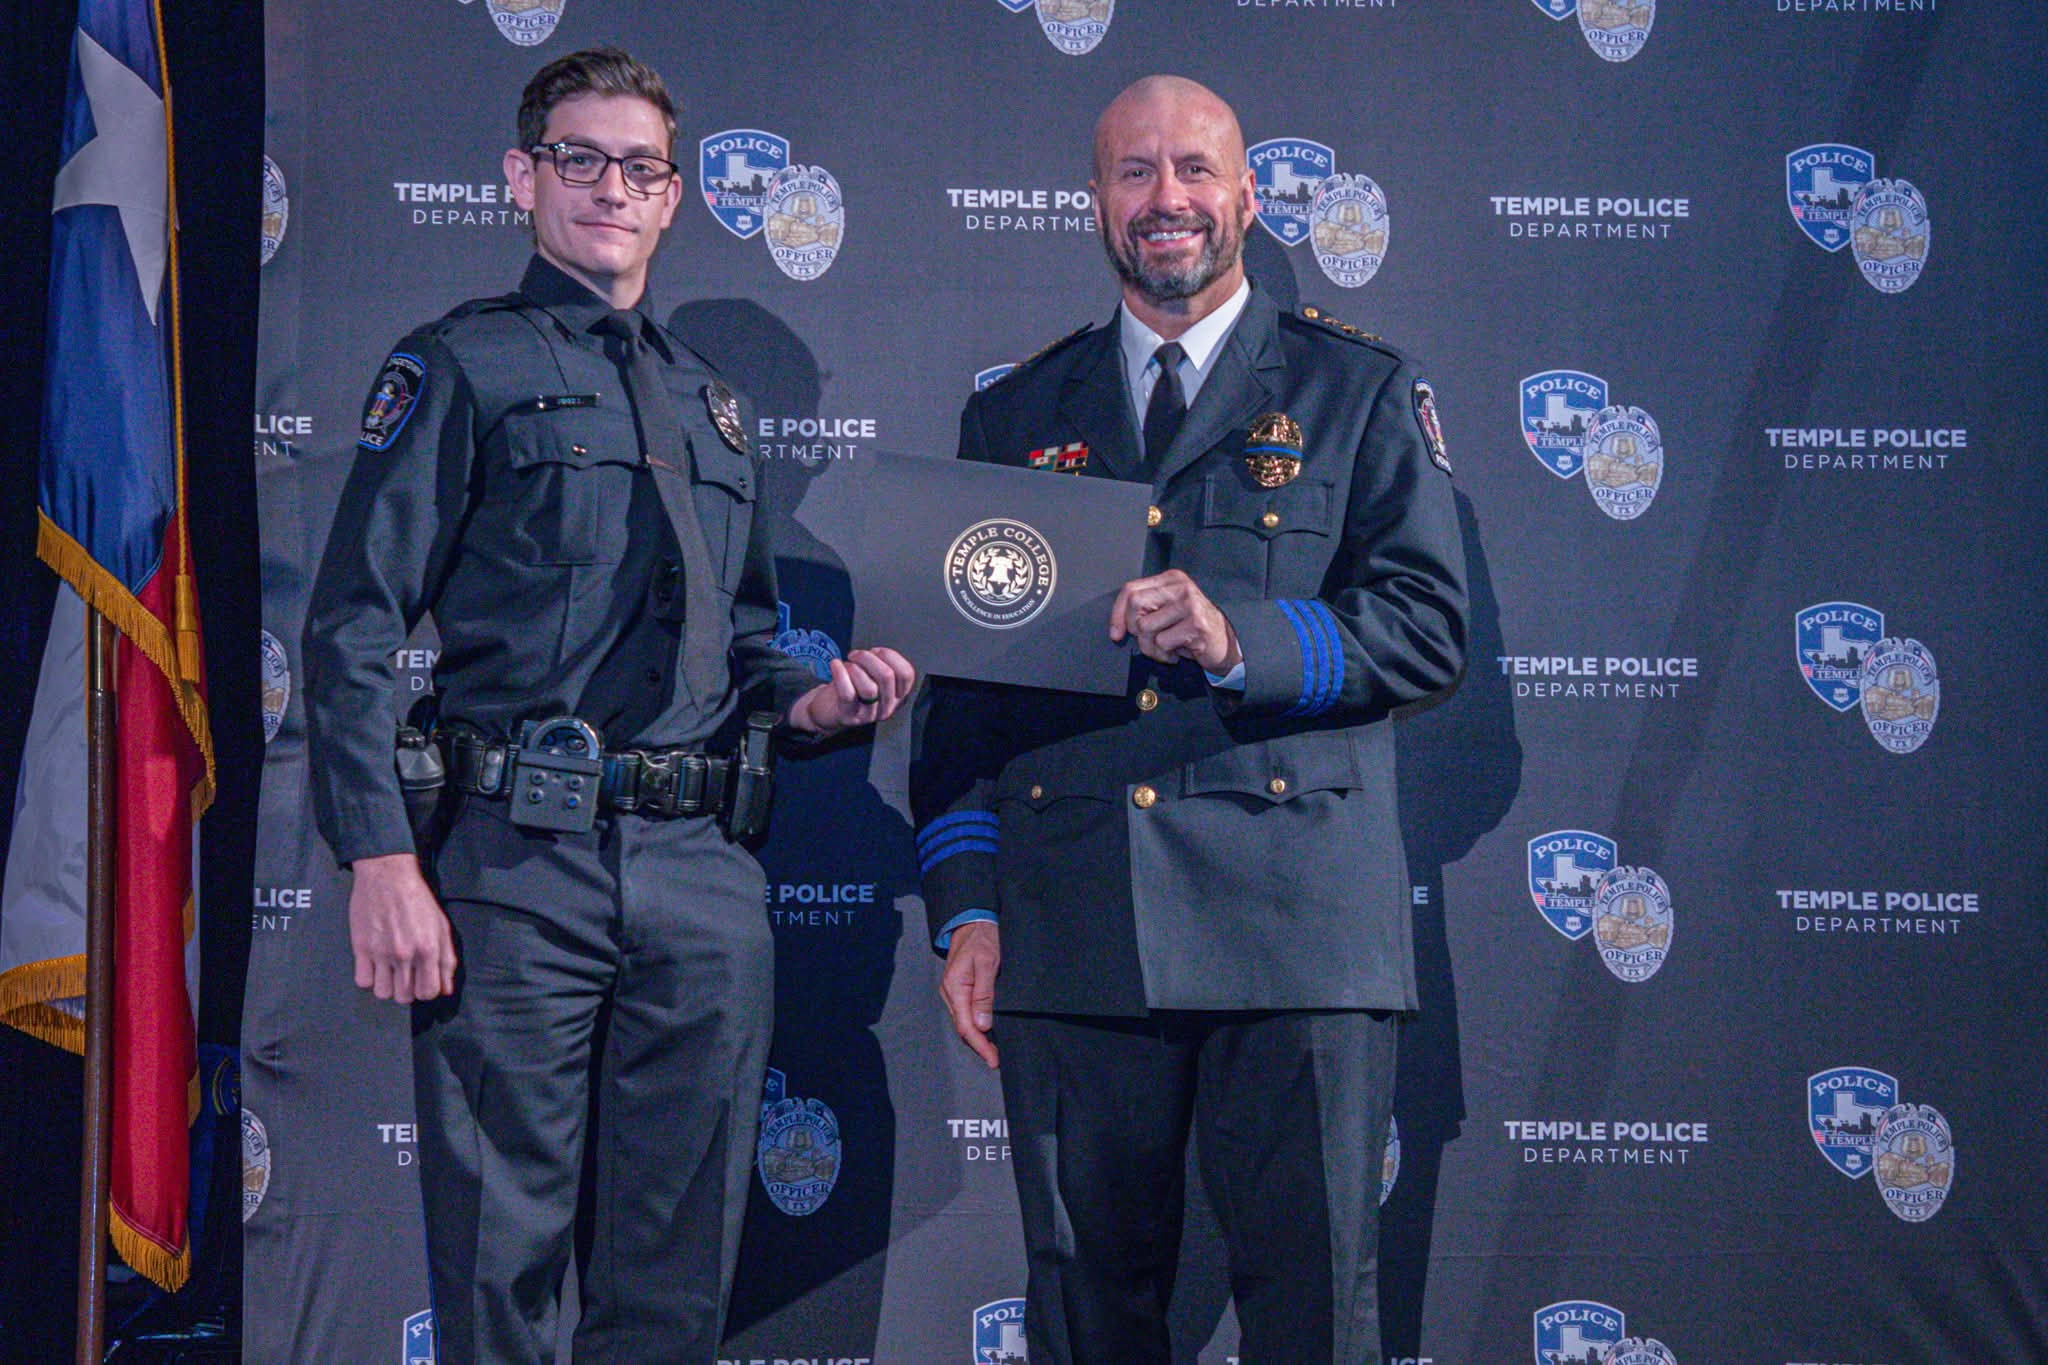
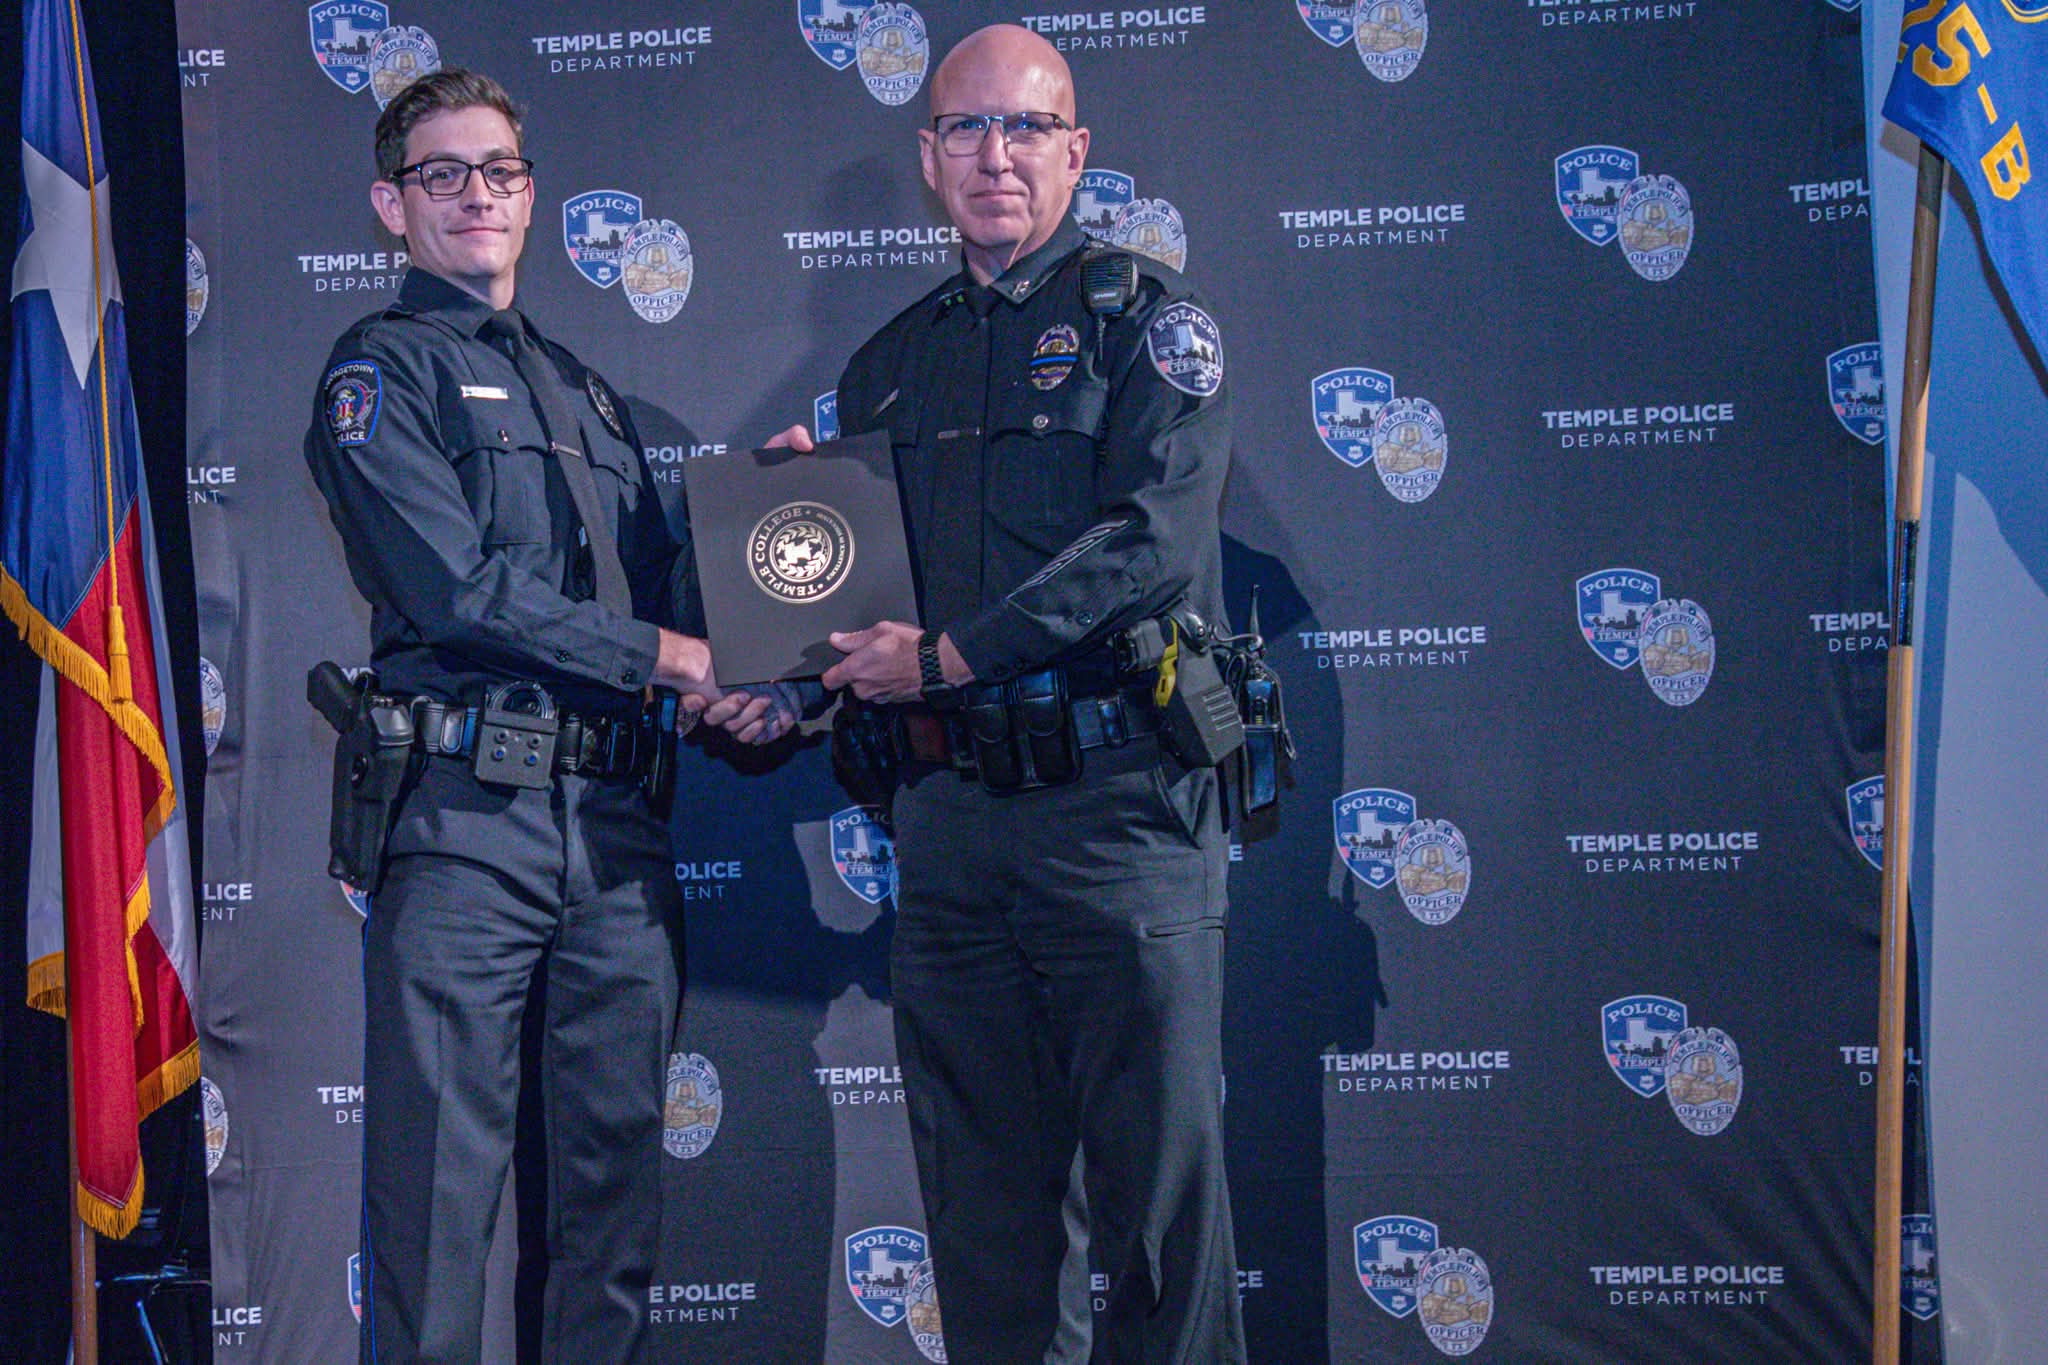
KR Training graduate Oscar Lee James IV, son of KR Training assistant instructor Oscar Lee James III, graduated from the Temple Police Academy earning “top shot” honors as the best shooter in the class. OLJ IV will be protecting and serving with Georgetown PD. KR Training guest instructor Eric Wise retired from Austin PD and is now working for Georgetown PD also.
Karl joined Matt Little for an episode of Matt’s “The Way Is In Training” podcast. It should be online in the next few weeks. Link will be in next month’s newsletter and on our Facebook page.
DISCOUNT CODES
I have collected up all the discount codes we have set up with vendors we recommend. Alumni of KR Training classes will find them in the monthly e-news email. You’ll have to open the email and scroll to the bottom to find them. It’s a reward for actually opening and reading the email!
REFRESHER DEALS
Re-take any class you’ve taken before for half price! Contact me to get the alumni discount code. Firearms skills deteriorate without practice. Most ranges don’t allow drawing from a holster, shooting quickly, moving or shooting from cover. If you don’t practice the skills you learned in class, they won’t be there when you need them.
In November I played a lot of private parties with the Black Cat Choir. We recorded high resolution video and multi-track audio. Here’s our version of “God Blessed Texas” with me on lead vocals.
Here’s one of us doing SRV’s “Pride and Joy” where I get a long piano solo.
2025 was another busy year for KR Training, with 42 weeks of classes, matches and special events. Guest instructors included Chuck Haggard, Chuck Baxter, Massad Ayoob, Gabe White, Matt Little, Greg Ellifritz, Chuck Pressburg, Tom Givens, Ben Weger and James Beck. The A-Zone became the home range for Lee County 4-H Shooting Sports. KR Training instructors were also on the road, presenting at conferences, taking classes from other trainers, and coaching the Texas A&M Corps of Cadets Marksmanship Team to a national championship.
2026 OVERVIEW
January-April courses are now online and open for registration. Guest instructors confirmed for 2026 include Eric Wise (Cornerstone Performance), Tim Herron & AJ Zito, Aqil Qadir & Tiffany Johnson (Citizens Safety Academy & Rangemaster), NURO inventor Dustin Solomon, and John Hearne. They will be offering a wide variety of courses, from high level competition skills, to instructor development, to the classic Rangemaster Combative Pistol course, and the most innovative cognitive decision making live fire drills. Expect 1-2 more guest instructor courses to be added to our summer/fall schedule.
KR Training staff will be on the road several times in 2026, teaching in New Orleans, teaching at the Rangemaster Tactical Conference, attending training at other facilities, and at the NRA’s Annual Meeting in Houston in April.
If Santa brings you a new pistol for Christmas, or your New Year’s resolution is to “get some quality pistol practice”, “learn pistol basics”, “get my carry permit” or “get medical training”, our classes on January 10 can help you achieve that goal. For beginners, we will offer the 3 hour Basic Pistol & License To Carry (LTC) Completion course. It’s 2 hours of indoor training on pistol basics, with an hour of live fire shooting the NRA Basic Pistol drills and the Texas LTC shooting test. Take our online LTC course before or after the class and that completes the mandatory training for your carry permit!
While the beginners are attending Basic Pistol, we will be running our popular Top 10 Drills class on the range. It’s a perfect refresher and tune up for experienced shooters, whether you haven’t been to the range since your last class with us or you shoot every week.
Both shooting classes will start at 10 am (instead of our usual 9 am) and finish at 1 pm. We will offer the 2 hour Stop the Bleed class (indoors) from 2-4 p.
We paired these courses together to encourage families or friends to come out together, take whichever shooting course is appropriate, and stay for the short medical class afterward.
NEWSLETTER SPECIAL: two or more people that come as a group, attend the shooting classes, stay for Stop the Bleed and tell me the secret word “FAMILYTIME” will get the cost of the Stop the Bleed course refunded to you in cash.
Cornerstone Performance Rifle Classes January 17
Austin-area trainer Eric Wise will be offering two half day rifle classes back to back on January 17th. Basic Rifle is in intro course for those with new AR-15 rifles or new to rifle shooting. It will include review of fundamentals and rifle zeroing. The afternoon class will be the short range material from his City Block Rifle course, working on 0-50 yard shots relevant to defensive use of the carbine.
In March we will offer all of the core Defensive Pistol Skills Program courses along with some rifle and red dot pistol courses. Come enjoy the spring weather and make progress toward earning your challenge coin! We will offer all the core courses multiple times in 2026.
STAFF & ALUMNI NEWS
Tracy Thronburg and Dave Reichek trained with Citizen Defender (John Murphy) in his recent class at the Dallas Pistol Club. Doug Greig competed in the Tactical Games Skirmish in Austin. Paul Martin, in association with KR Training, hosted communication and medical preparedness classes at the A-Zone in November.
During his Gunsite 350 class, Eric Victorin earned a Gunsite coin for a perfect score shooting long range targets on the move in low light with his pistol.
KR Training shooting team member Roy Stedman won Top Senior at the recent 2025 Colt Texas Single Stack Championship, in addition to winning 1st Senior in Single Stack at the USPSA Nationals earlier this year.
DISCOUNT CODES
I have collected up all the discount codes we have set up with vendors we recommend. Alumni of KR Training classes will find them in the monthly e-news email. You’ll have to open the email and scroll to the bottom to find them. It’s a reward for actually opening and reading the email!
REFRESHER DEALS
Re-take any class you’ve taken before for half price! Contact me to get the alumni discount code. Firearms skills deteriorate without practice. Most ranges don’t allow drawing from a holster, shooting quickly, moving or shooting from cover. If you don’t practice the skills you learned in class, they won’t be there when you need them.
In November I played a lot of private parties with the Black Cat Choir. We recorded high resolution video and multi-track audio. Here’s our version of the Atlanta Rhythm Section’s “So Into You”. Lead guitarist John Holmes and I do some great lick trading doing the outro.
Every fall I play with the weekday house band at Santa’s Wonderland, the largest Christmas theme park in the world. Santa’s will be open through January 3rd this year. One night a few years ago our lead singer (Doc Tiktock) had a night off, and drummer Michael Holleman and I filled in on vocals. Here’s a fan-shot clip of us doing “Santa Looked A Lot Like Daddy”.
We had an extremely busy September and October, with full classes, guest instructors and special events. Due to our agreement with our range neighbors to be quiet during deer season, we are only offering a few weekend classes in November and December. Weekdayprivate lessons are available with Karl at the A-Zone, by appointment, on any gun, at any level, on any topic we offer.
We are currently planning our January-May class dates for 2026. If there’s a specific course you want, let us know so we can add it to the schedule. Already confirmed for 2026: USPSA Grandmasters Tim Herron and AJ Zito for an instructor development course and weekend performance pistol course in February. We will also be hosting Aqil Qadir and John Hearne of Rangemaster in 2026, dates to be announced soon.
Courses marked with *** count toward our Defensive Pistol Skills Program coin. Reminder: any Texas LTC class counts for the coin program.
Preparedness Courses
In collaboration with Paul Martin we are offering three preparedness courses in November.
Citizen Communications is a one day course discussing ham radios and other communication devices useful for getting information and staying in contact with family, friends and neighbors during a grid-down or internet-down situation.
Dr. Ben Weger will be presenting two medical courses: Trauma Medicine for Prepared Citizens and Medical Preparedness for Citizens. These hands on courses start where “Stop the Bleed” ends, teaching skills you might need to keep yourself or another person alive in a situation where medical response is limited and/or slow to arrive. No prior medical training is required to attend these courses. They are suitable for students of all ages and abilities.
HOME DEFENSE TACTICS AND SHOOTING SKILLS
On Saturday, Dec 6 I will offer a four hour Home Defense Tactics and Shooting Skills course, suitable for anyone that has Basic Pistol level handgun skills. The class does NOT require holster. It focuses on skills relevant to home defense: retrieving a pistol from a box or drawer, moving to cover, and engaging threats at home-defense distances. I documented several of the drills from that course in this recent blog post:
In September, John Holschen (West Coast Armory North) was scheduled to teach class at the A-Zone, and I was going to get trained in his curriculum during that class. John had been using the NURO devices developed by Dustin Solomon in his innovative pistol course. We were one of the first to host it when he took it on the road last year. I got a phone call on a Thursday morning telling me that John had passed away unexpectedly. He was supposed to get on a plane that next day to travel to Texas. I had been training with John for more than 30 years and considered him one of the true greats of the training world.
Defenders Live reposted this interview with John after his passing.
Honoring John Holschen + Corrected Episode 156 | Building Thinking Shooters: NeuroDrills & Real-World Skills by Lora Thorson
A few weeks later, Marty Hayes, founder of the Firearms Academy of Seattle (FAS) and the Armed Citizens Legal Defense Network, passed away on the beautiful land in Idaho where he was building a retirement home on for himself and his wife, Gila. Marty & Gila built their own permanent training facility and ran a regional training business offering instruction to a wide variety of students. The success of FAS was a huge influence on Penny and I as we followed a similar path in Central Texas. I took classes from Marty, including the Massad Ayoob Group Deadly Force Instructor he and Massad Ayoob co-taught for KR Training, and he invited me to FAS to train all of his instructors (and students) in my Force on Force scenario program.
Kat Stevens wrote an in-depth memorial to Marty here.
This fall I will write proper memorials to both of them, who deserve more than a paragraph to recognize their contributions and achievements.
STAFF & ALUMNI NEWS
Karl and Alonso Robles attended Chuck Pressburg’s “No Fail” pistol class, held at the A-Zone in early October. Ty Clark attended and passed the Rangemaster Basic and Advanced Instructor 5 day course, also held at the A-Zone in October.
Karl taught the pistol portion of the “Youth Shooting Sports and Hunter Safety Field Day” for high school students from Lee and Washington Counties at Nails Creek Park at an event coordinated by Texas Parks and Wildlife and the Lee County Wildlife Association.
Karl also was a guest on a episode of “The Way is in Training” podcast with Matt Little. That episode will be shared in December.
The Texas A&M Corps of Cadets Marksmanship Unit, led by Kevin Jimmerson and assistant coach Dave Reichek, won the 1st annual USPSA collegiate national championship. KR Training is a proud supporter of the CCMU, providing them range facilities and coaching since their inception. KR Training’s Dave Reichek is the current assistant coach of the team and traveled with them to the match, advising them on stage strategy and match mindset during the event.
I have collected up all the discount codes we have set up with vendors we recommend. Alumni of KR Training classes will find them in the monthly e-news email. You’ll have to open the email and scroll to the bottom to find them. It’s a reward for actually opening and reading the email!
REFRESHER DEALS
Re-take any class you’ve taken before for half price! Contact me to get the alumni discount code. Firearms skills deteriorate without practice. Most ranges don’t allow drawing from a holster, shooting quickly, moving or shooting from cover. If you don’t practice the skills you learned in class, they won’t be there when you need them.
Compilation video from the history of IPSC World Shoots
MUSIC VIDEOS OF THE MONTH
In October, Midnight Express put on their “Changes” costume as a Chicago tribute band and performed a 2 hour sold out show at the Deep Roots winery near Conroe, Texas. Earlier in 2025 we played to a packed house at the Palace Theater in Bryan, Texas. In honor of Halloween, here’s our cover of Stevie Wonder’s “Superstitious”.
Every fall I play with the weekday house band at Santa’s Wonderland, the largest Christmas theme park in Texas that attracts over 300K visitors each holiday season. It’s south of College Station and features more than 4.5M lights, ice skating, sledding, multiple stages of live music, local food, beer and wine. Our band does “Santa-tized” versions of rock and country songs, like our version of Hank Williams Jr’s “Born to Boogie”.
We have scheduled most of the classes we plan to offer through the end of the year. Weekday private lessons are available with Karl at the A-Zone, by appointment, on any gun, at any level, on any topic we offer.
It’s not too early to start planning your fall training. We have a packed schedule in September and October before our annual November/December deer season hiatus. Plan ahead and get registered for one or more of these upcoming courses!
SEPTEMBER – NOVEMBER CLASSES
We have a lot of training opportunities for all levels planned for the fall. Visit the KR Training website to get more information about these courses.
We have several of the core Defensive Pistol Skills Program courses coming up in the next 2 months.
Defensive Pistol Skills 1, coming up Saturday Sept 6 in a small class, 3 hour format, teaches you how to select and safely use a belt holster for concealed carry. Even if you only plan on “carrying in the car” or at home, a holster can be useful. My article on car carry in the NRA’s Shooting Illustrated explains in more detail. Every pistol shooter should have a practical holster for their gun – and mass market holsters sold in gun shops and at gun shows are typically low quality. You can spend the same money online from a quality vendor and get a much more useful, safer holster
Handgun Beyond Basics and Handgun Skill Builder are coming up back to back on Saturday Sept 20. These classes improve your pistol skills with coaching and drills to get you faster and more accurate.
The last weekend of October we will offer four of the coin courses on Saturday and Sunday: AT-2 Scenarios and Tactical Scenarios are only offered twice a year. These scenario courses use live roleplayers and simulated weapons to give students the opportunity to “do what they would do” in actual situations. In my opinion these courses are the most important classes we offer. You don’t have to be a great shooter to attend. Content is suitable for anyone at the carry permit level or higher. On Sunday of that weekend we will offer Defensive Pistol Skills 2, which focuses on armed movement in structures and shooting from cover, and Low Light Shooting 1, which teaches skills when you have weak ambient light, a handheld flashlight and/or a weapon mounted light. We only offer the Low Light Shooting class twice a year. Both of those live fire classes teach skills that should be considered essential for any armed citizen.
RIFLE COURSES
In September, Doug Greig will offer two rifle classes: Intermediate Rifle (and Pistol Caliber Carbine) at the A-Zone, and Midrange Mastery (50-300 yards) at his private range near Caldwell. The Midrange Mastery course is a makeup class for a session of this course that was cancelled and rescheduled from earlier this year.
CHUCK PRESSBURG “NO FAIL PISTOL”
Retired Army Ranger Chuck Pressburg will be offering his No Fail Pistol class at the A-Zone October 4-5. The class is an intermediate/advanced class focused on high accountability shooting for real world applications. The course would be an excellent choice for armed teachers and church security personnel concerned with active shooter defense, engaging targets at distances out to 25 yards in situations where missed shots are unacceptable. The course has received rave reviews from Eric Wise (Cornerstone Performance) and John Hearne (Rangemaster, Two Pillars Training). A few slots are still open in this class.
Here’s a 15 minute video where a recent graduate of the No Fail Pistol class provides an in-depth AAR.
STAFF & ALUMNI NEWS
Karl and Ed Vinyard attended the Knife Skills for CCW Instructors course put on by Greg Ellfritz at the A-Zone in August. This class was attended by instructors from multiple states (Florida, Tennessee, Missouri, New Mexico and Texas) to learn Greg’s curriculum for teaching knife skills to carry permit holders.
If you are interested in a half day introduction to Greg’s knife curriculum, contact us. We could offer that course in half day or full day version in December or January.
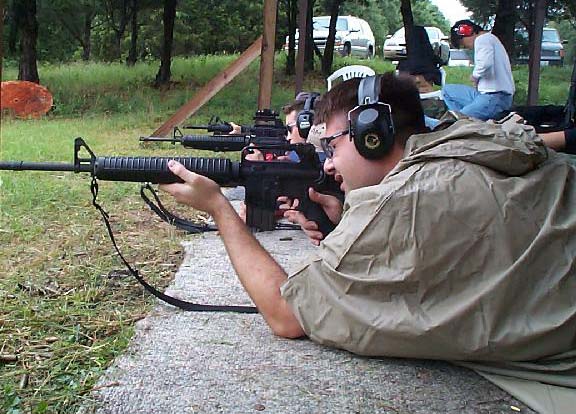
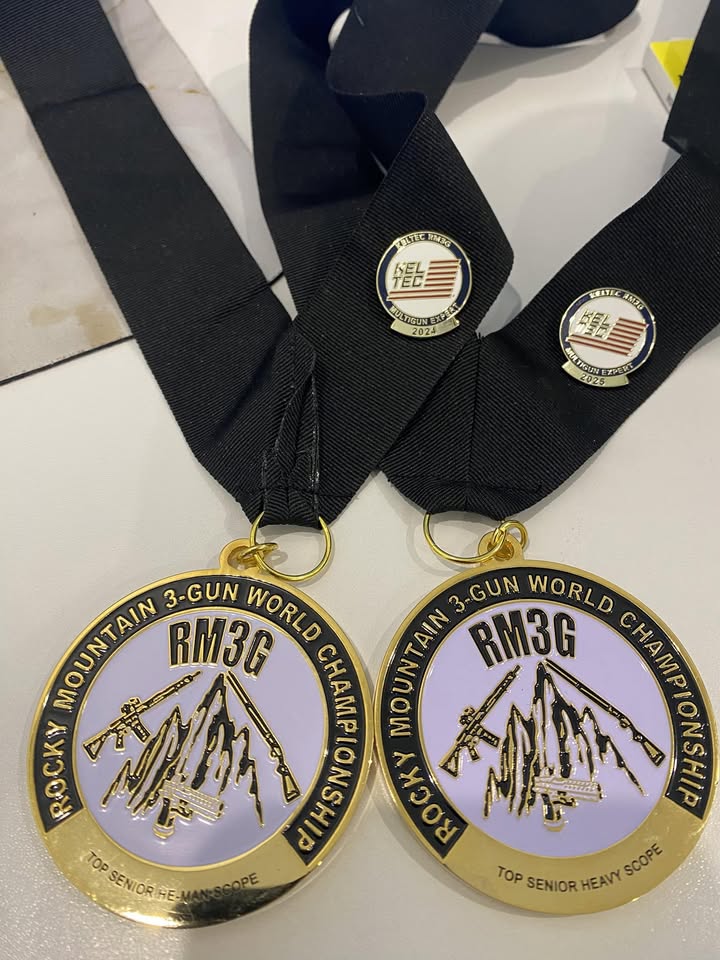
Thomas Rodriguez competed in the Rocky Mountain 3-Gun match. I loaned Thomas a 2011 in .45 ACP and gave him some pre-match coaching. He finished top 3 in “heavy scope” division and top senior in the overall match.
DISCOUNT CODES
I have collected up all the discount codes we have set up with vendors we recommend. Alumni of KR Training classes will find them in the monthly e-news email. You’ll have to open the email and scroll to the bottom to find them. It’s a reward for actually opening and reading the email!
REFRESHER DEALS
Re-take any class you’ve taken before for half price! Contact me to get the alumni discount code. Firearms skills deteriorate without practice. Most ranges don’t allow drawing from a holster, shooting quickly, moving or shooting from cover. If you don’t practice the skills you learned in class, they won’t be there when you need them.
Great video from PHLster showing their tests of car holsters.
This video compiles match footage and other clips to give the history of practical shooting in Canada. It’s a great overview showing how equipment, stages, and shooting techniques have evolved and changed.
MUSIC VIDEOS OF THE MONTH
This month’s videos are from the Black Cat Choir at SD’s Roadhouse (formerly the Stone Cellar) in Round Top, Texas. Both feature all the players in the band on extended jams: SRV’s “Tin Pan Alley” and a jam on the end of “Long Train Runnin”.
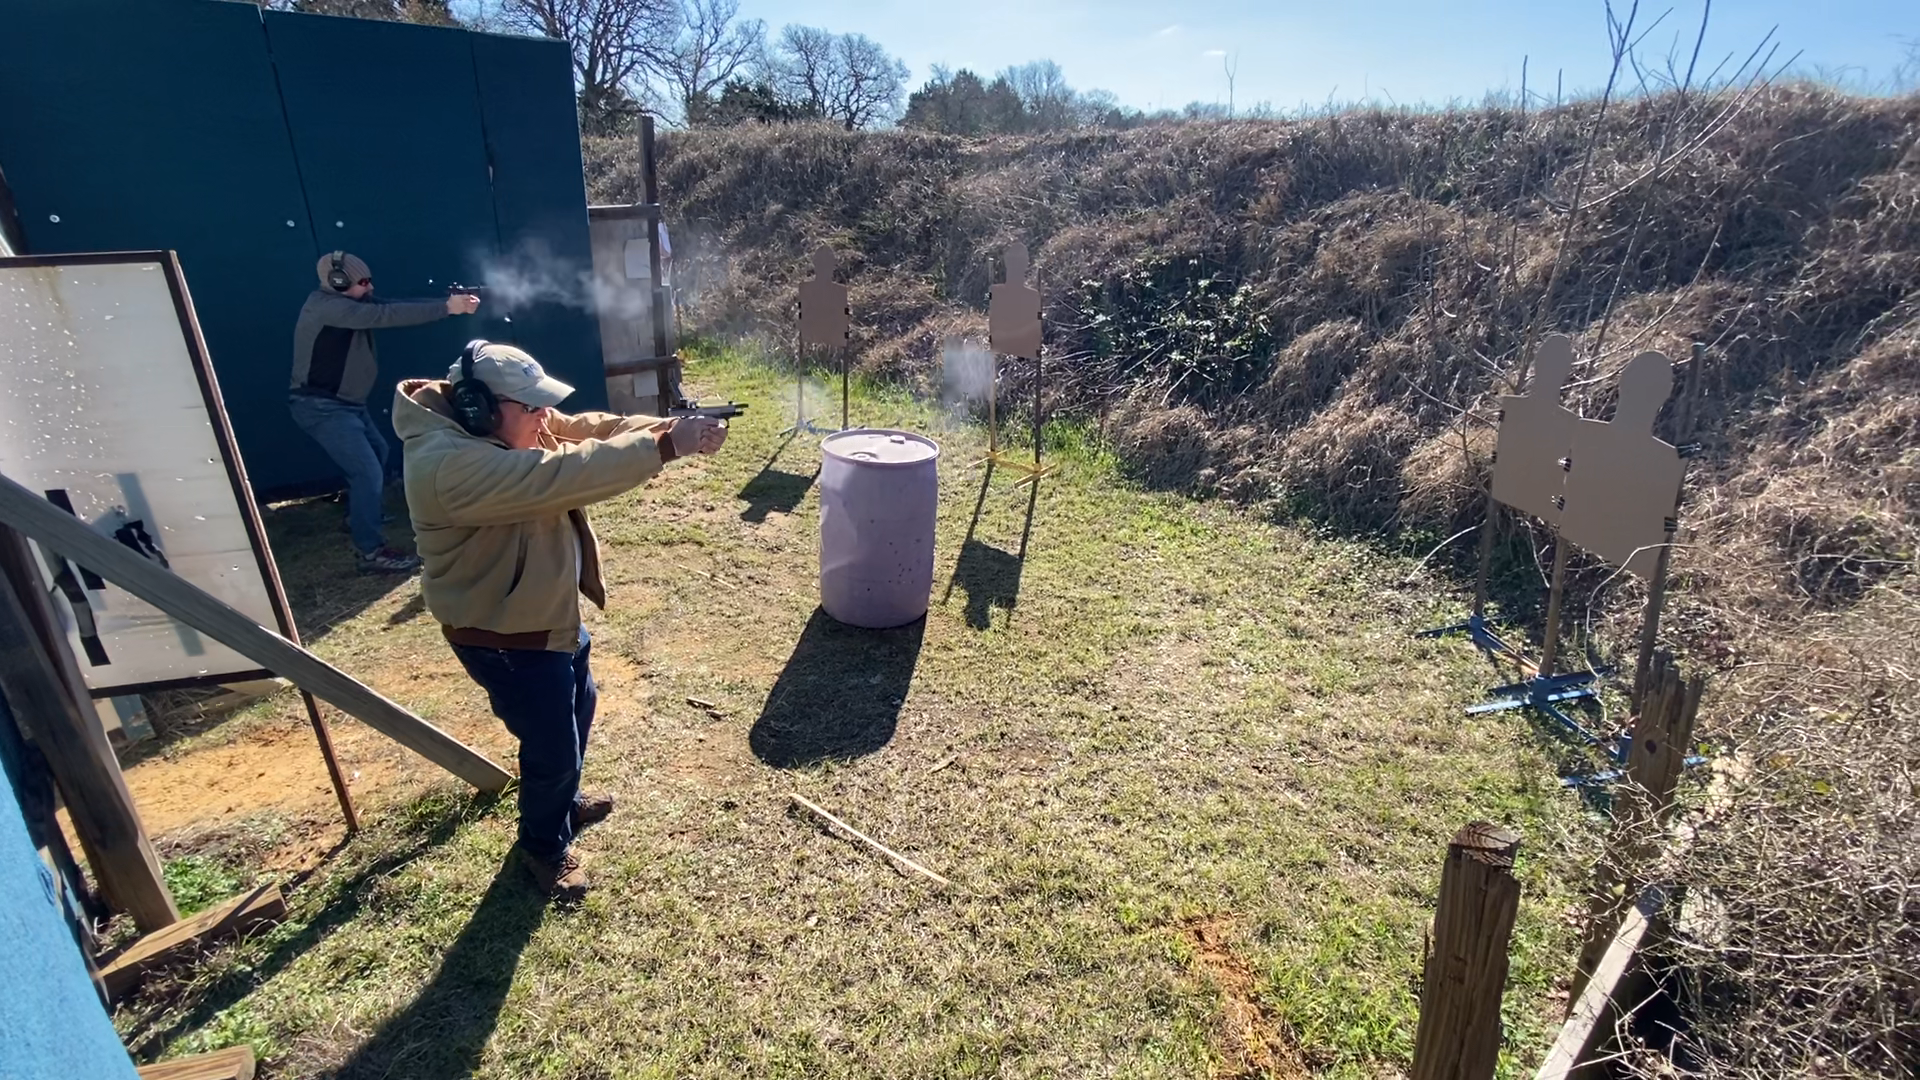
We’ve had an unusually high number of basic level students train with us in 2025, but their interest in higher level classes, particularly those focusing on carrying on body outside home, has been low. In response to that trend, I modified our old Home Defense Tactics course into the new Home Defense Tactics and Shooting Skills course. Instead of teaching home defense with inert plastic guns (often called “red guns” or “blue guns”) in a student’s home, I teach the same skills in the A-Zone classroom building with the inert guns and add an extra hour of live fire drills. Part of my curriculum development work for the live fire drills was to go to the range and shoot the drills I planned to use in the course. Here are two short videos that show a progression of drills from simple to complex.
The Demo Videos
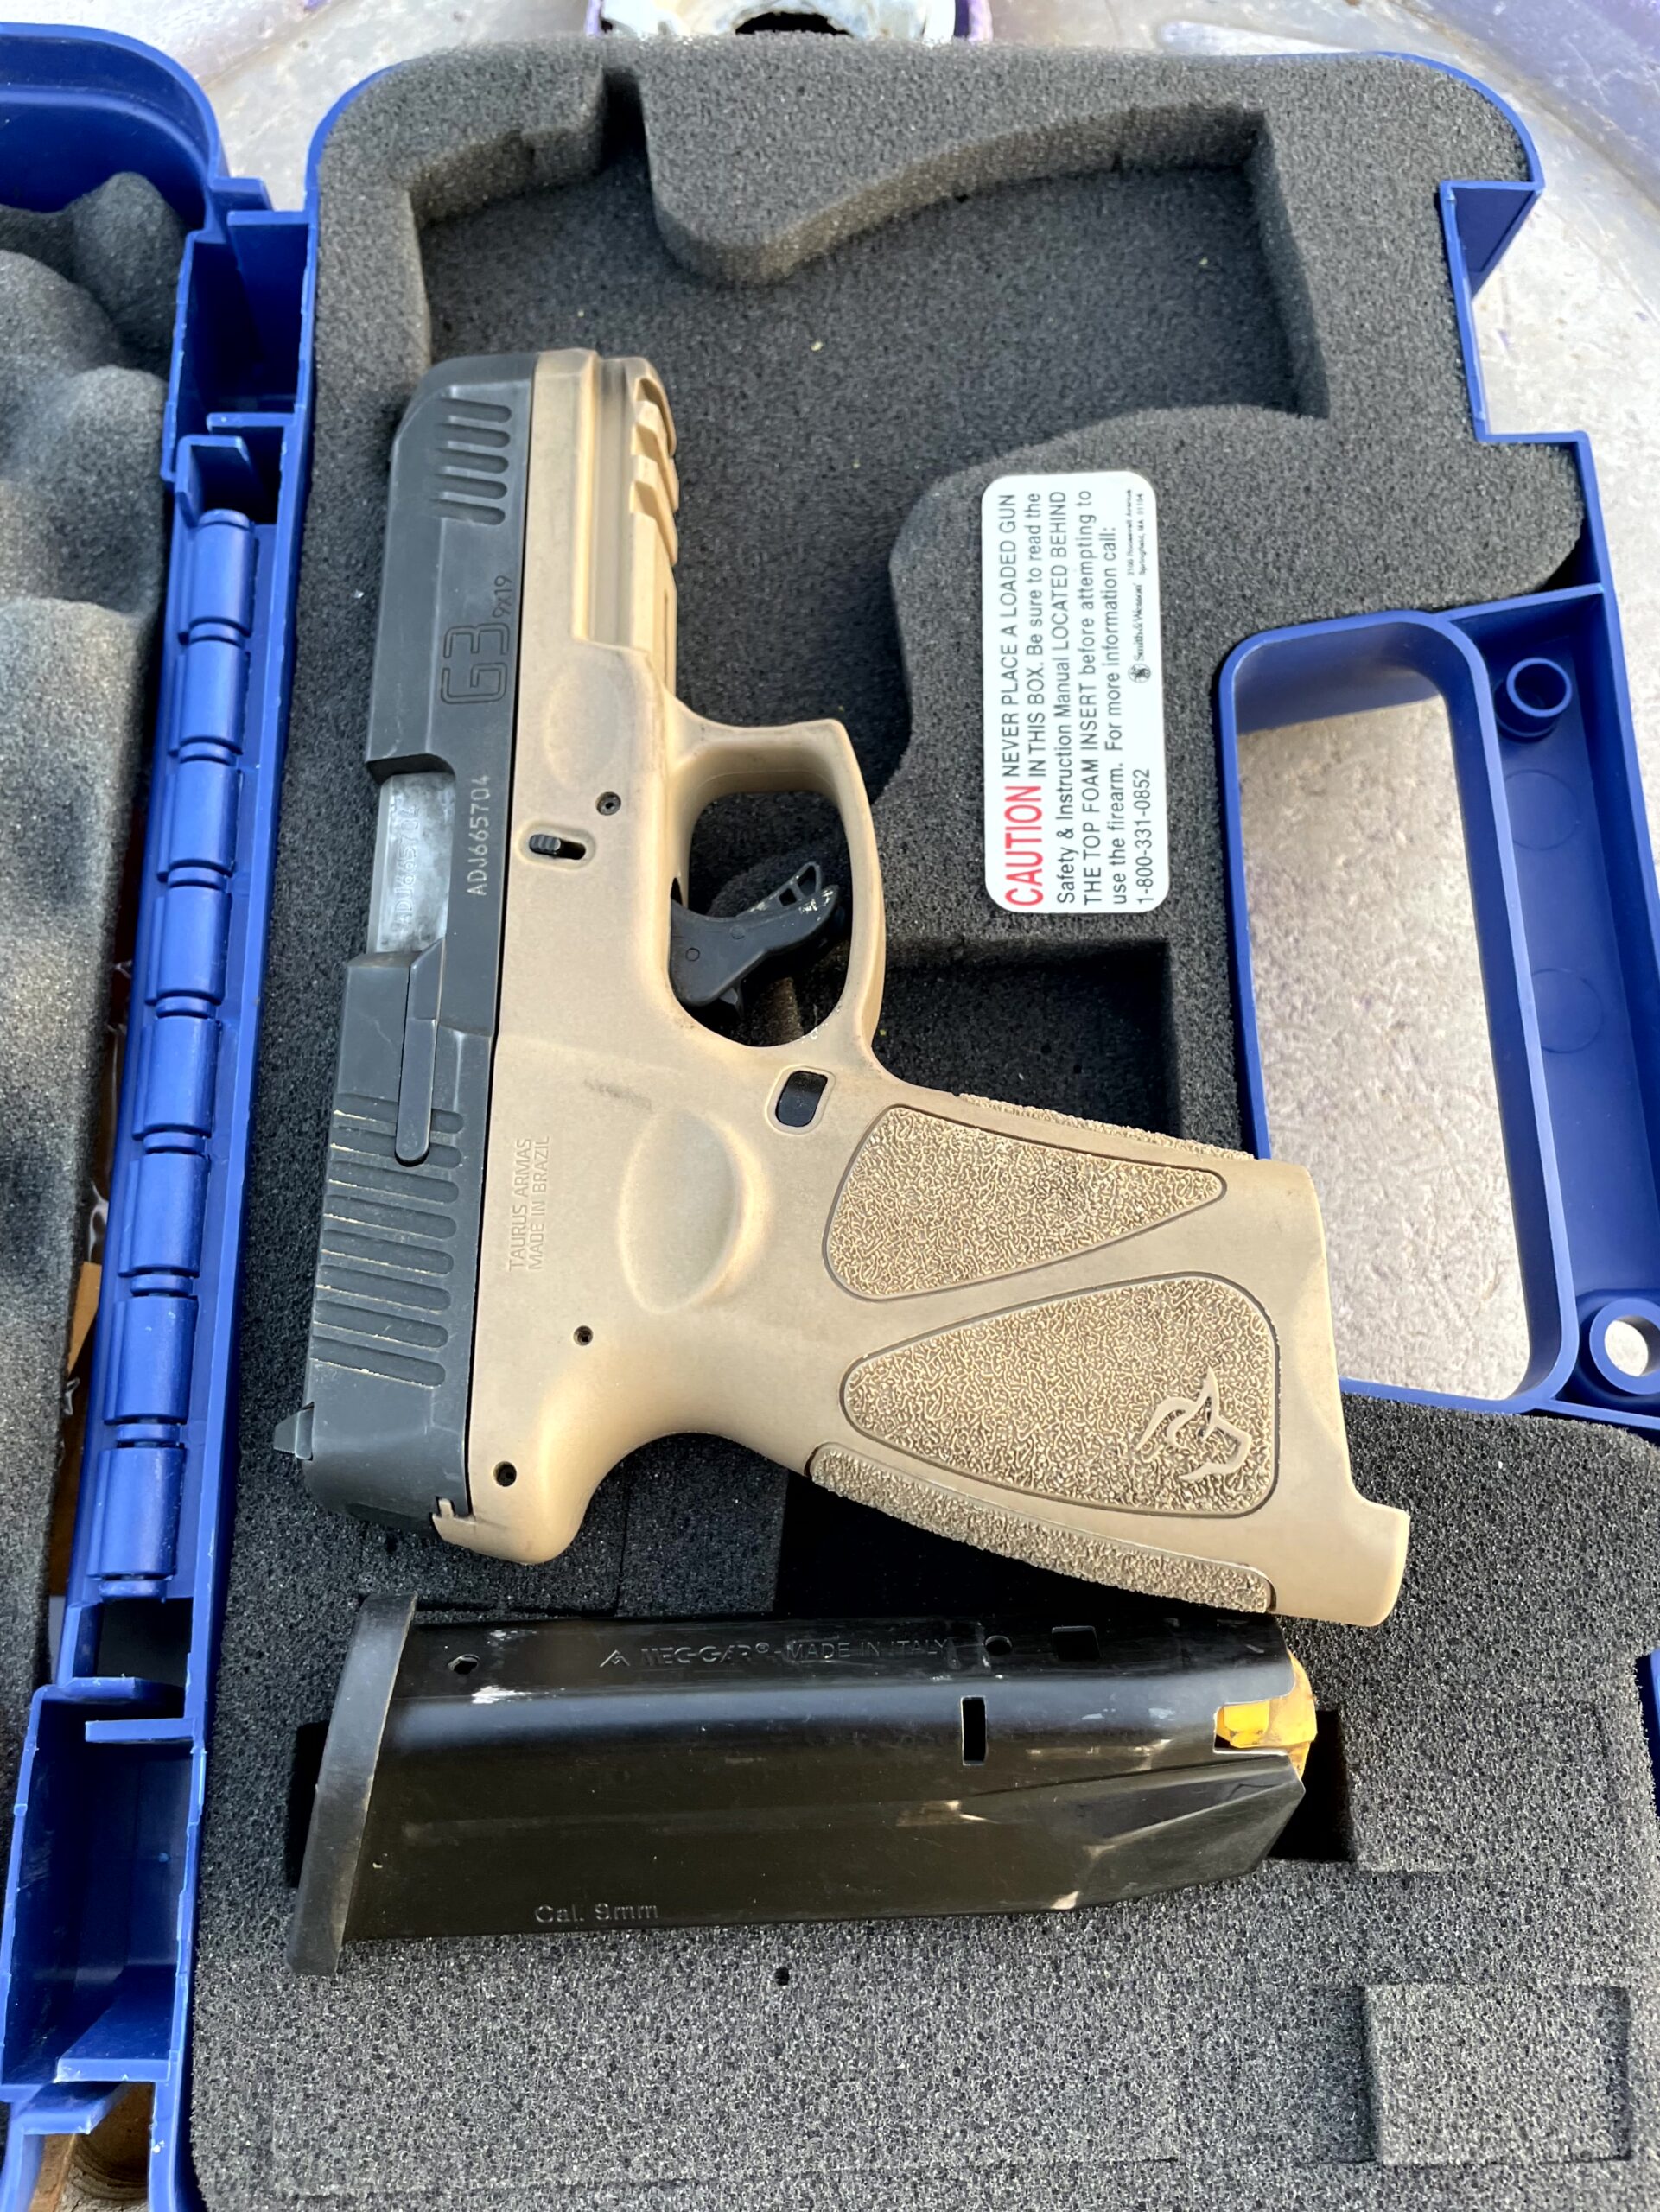
I used my Taurus G3 with iron sights and its factory storage box to represent the equipment that a budget-limited home defense handgun owner might have. Every drill would start by retrieving the handgun from the box, as it might be stored in the home.
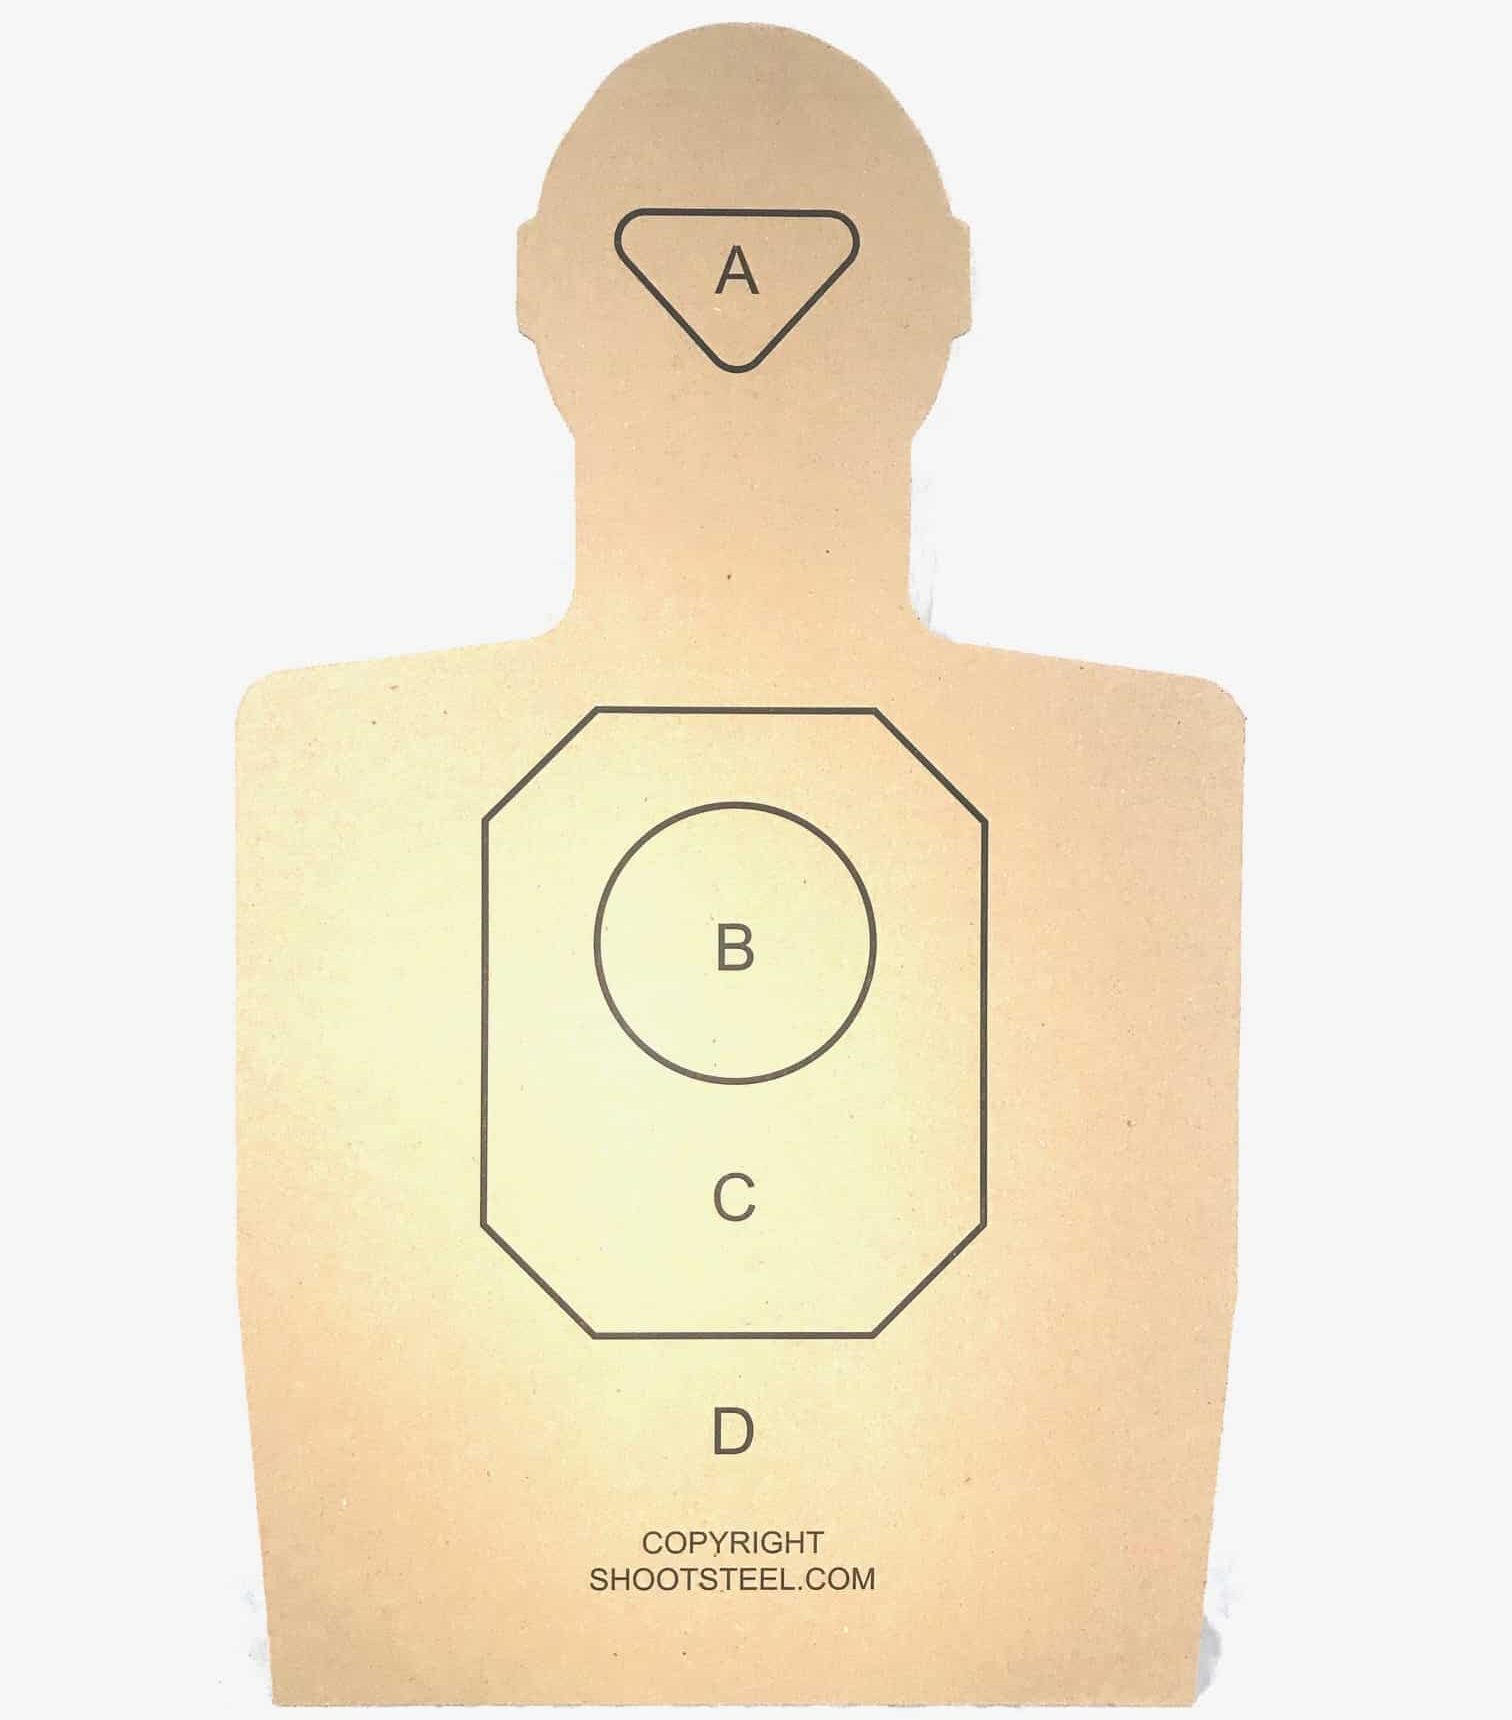
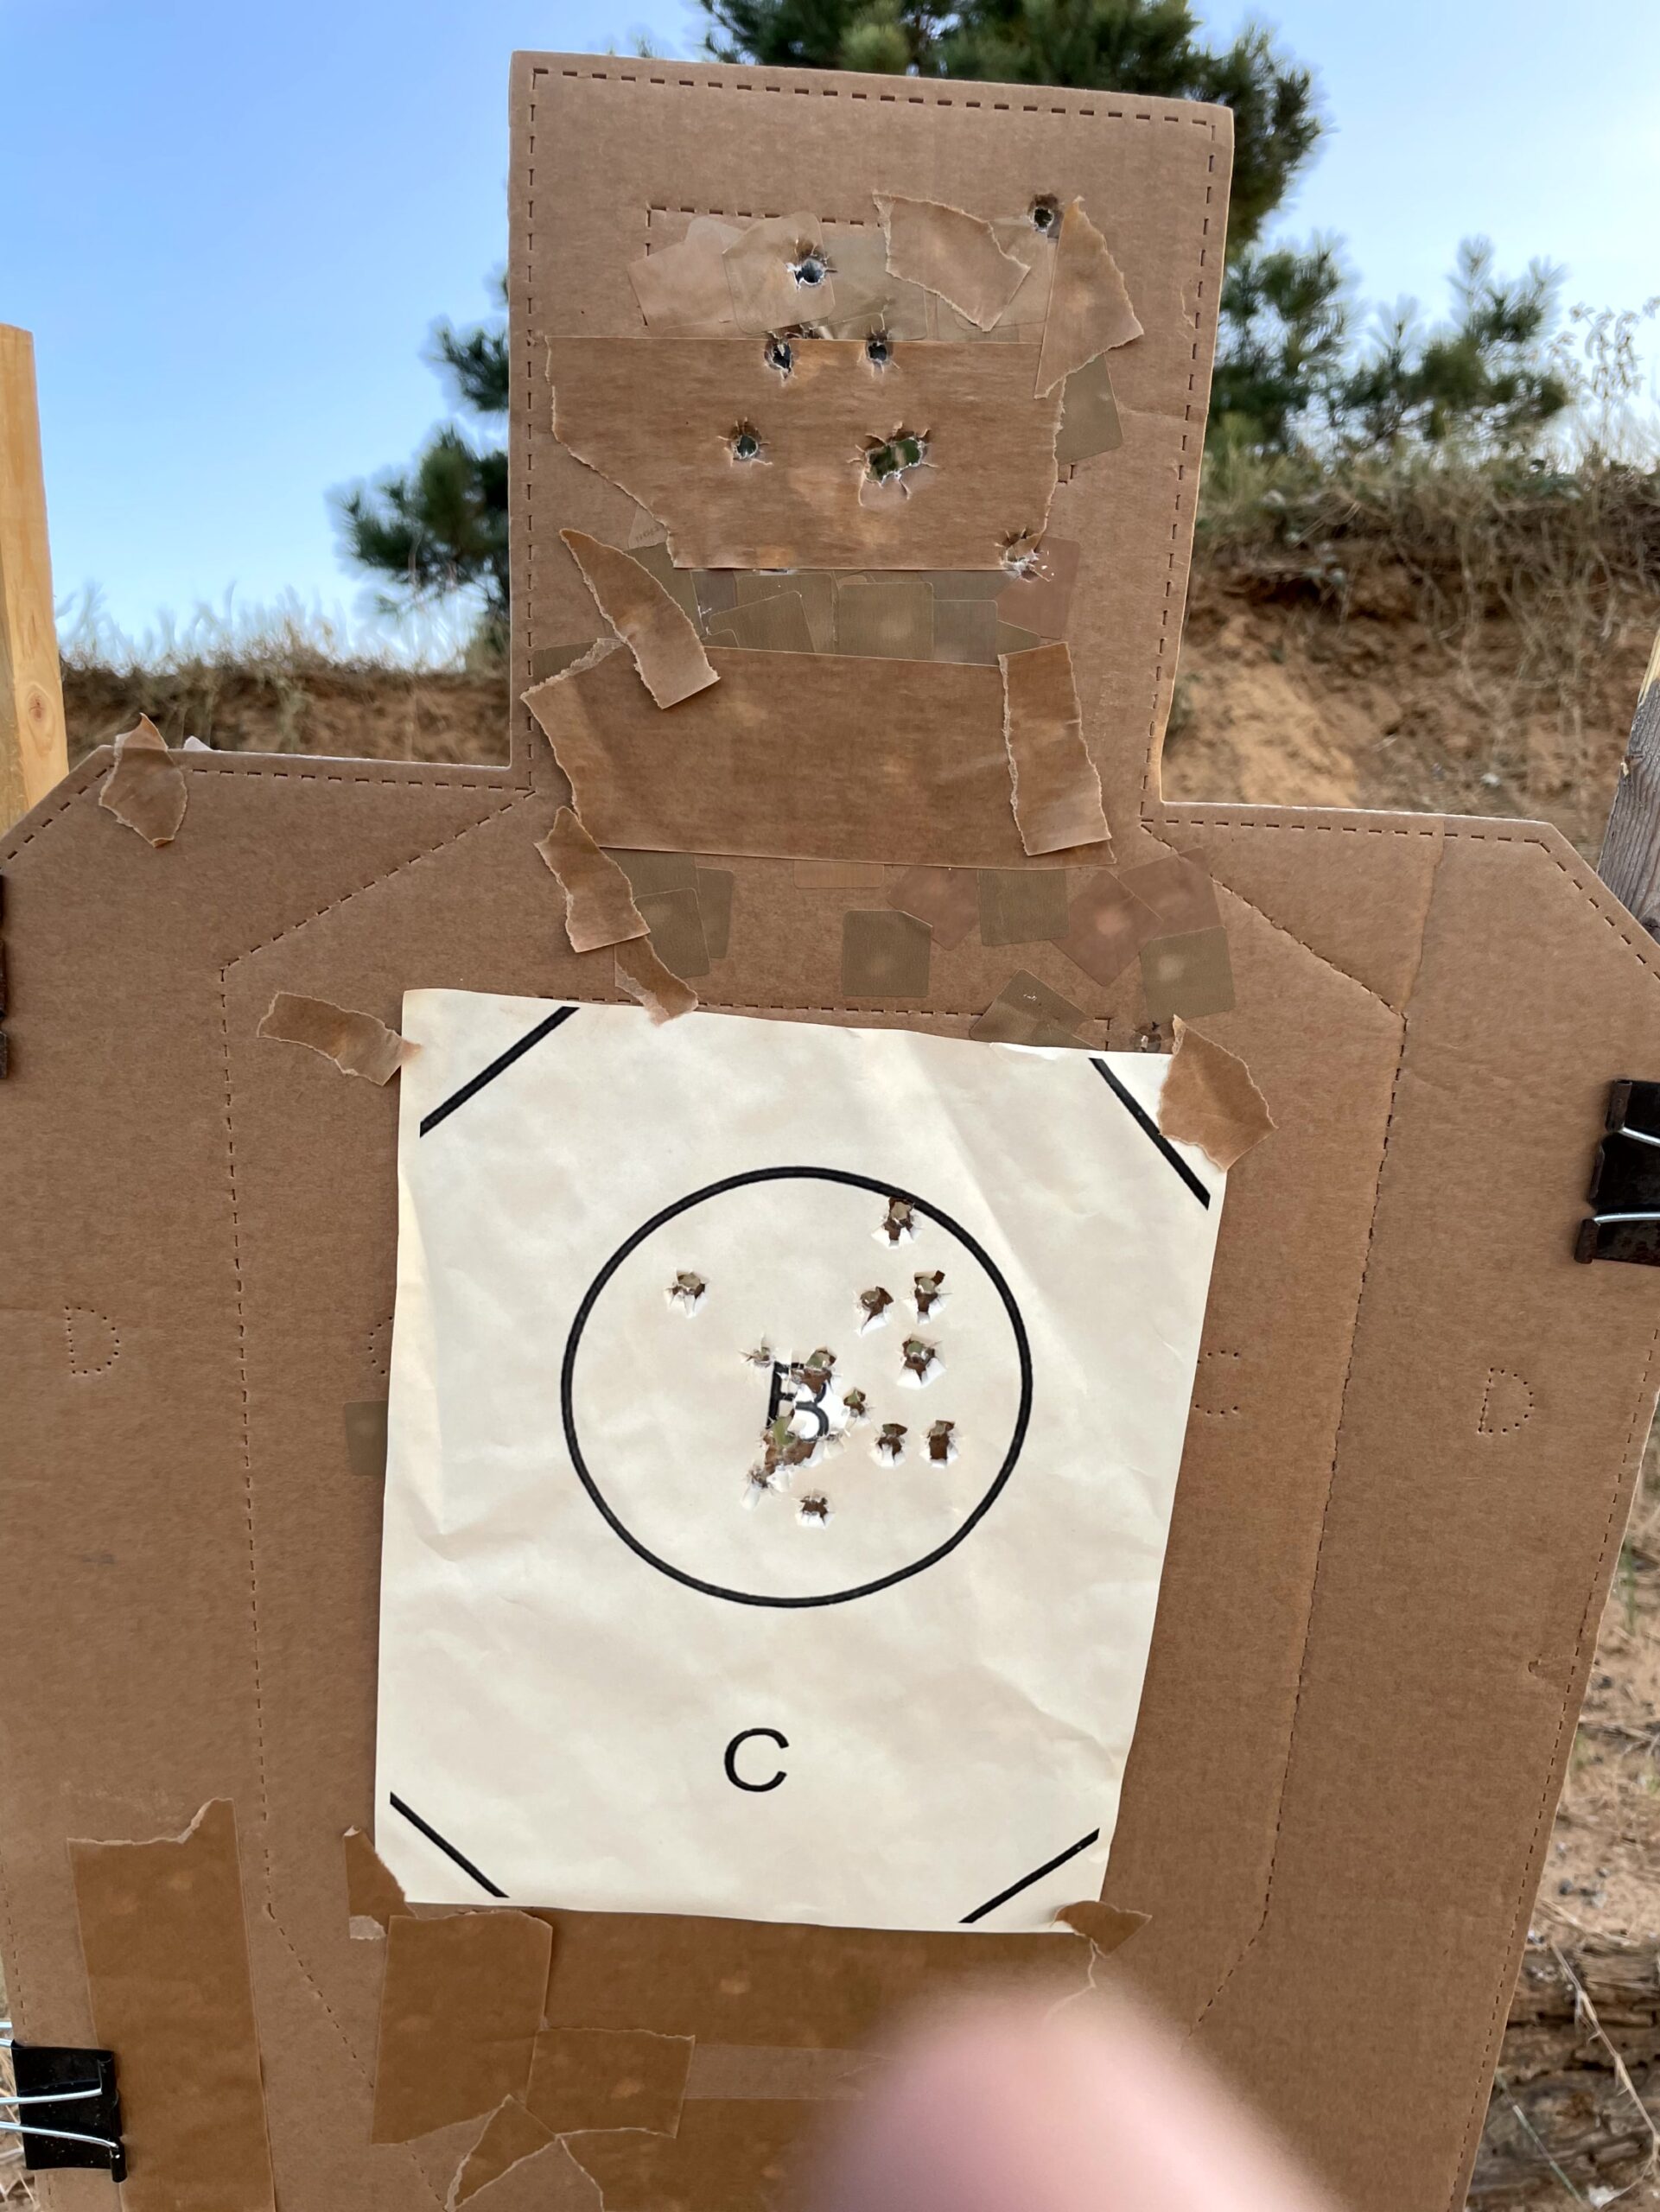
For the first video, a “Shoot Steel” target replacement center was used. I created this paper overlay to use with the Shoot Steel company’s cardboard targets, which I like better than USPSA or IDPA targets for defensive pistol practice. The Shoot Steel cardboard target has a smaller “A-Zone” and more realistic features, including a head area that includes a neck and ears instead of a simple square “head box”.
I should have used an actual ShootSteel cardboard target for the videos, but I just grabbed a shot up USPSA target, taped one of my target centers on it, and got to work.
Video #1 shows a progression of drills:
Retrieve gun, fire 3 rounds high chest (body)
Retrieve gun, move to cover, fire 2 rounds body, 2 rounds head
Retrieve gun, move to cover, fire 2 rounds body, retreat behind cover, assess, fire 2 rounds head
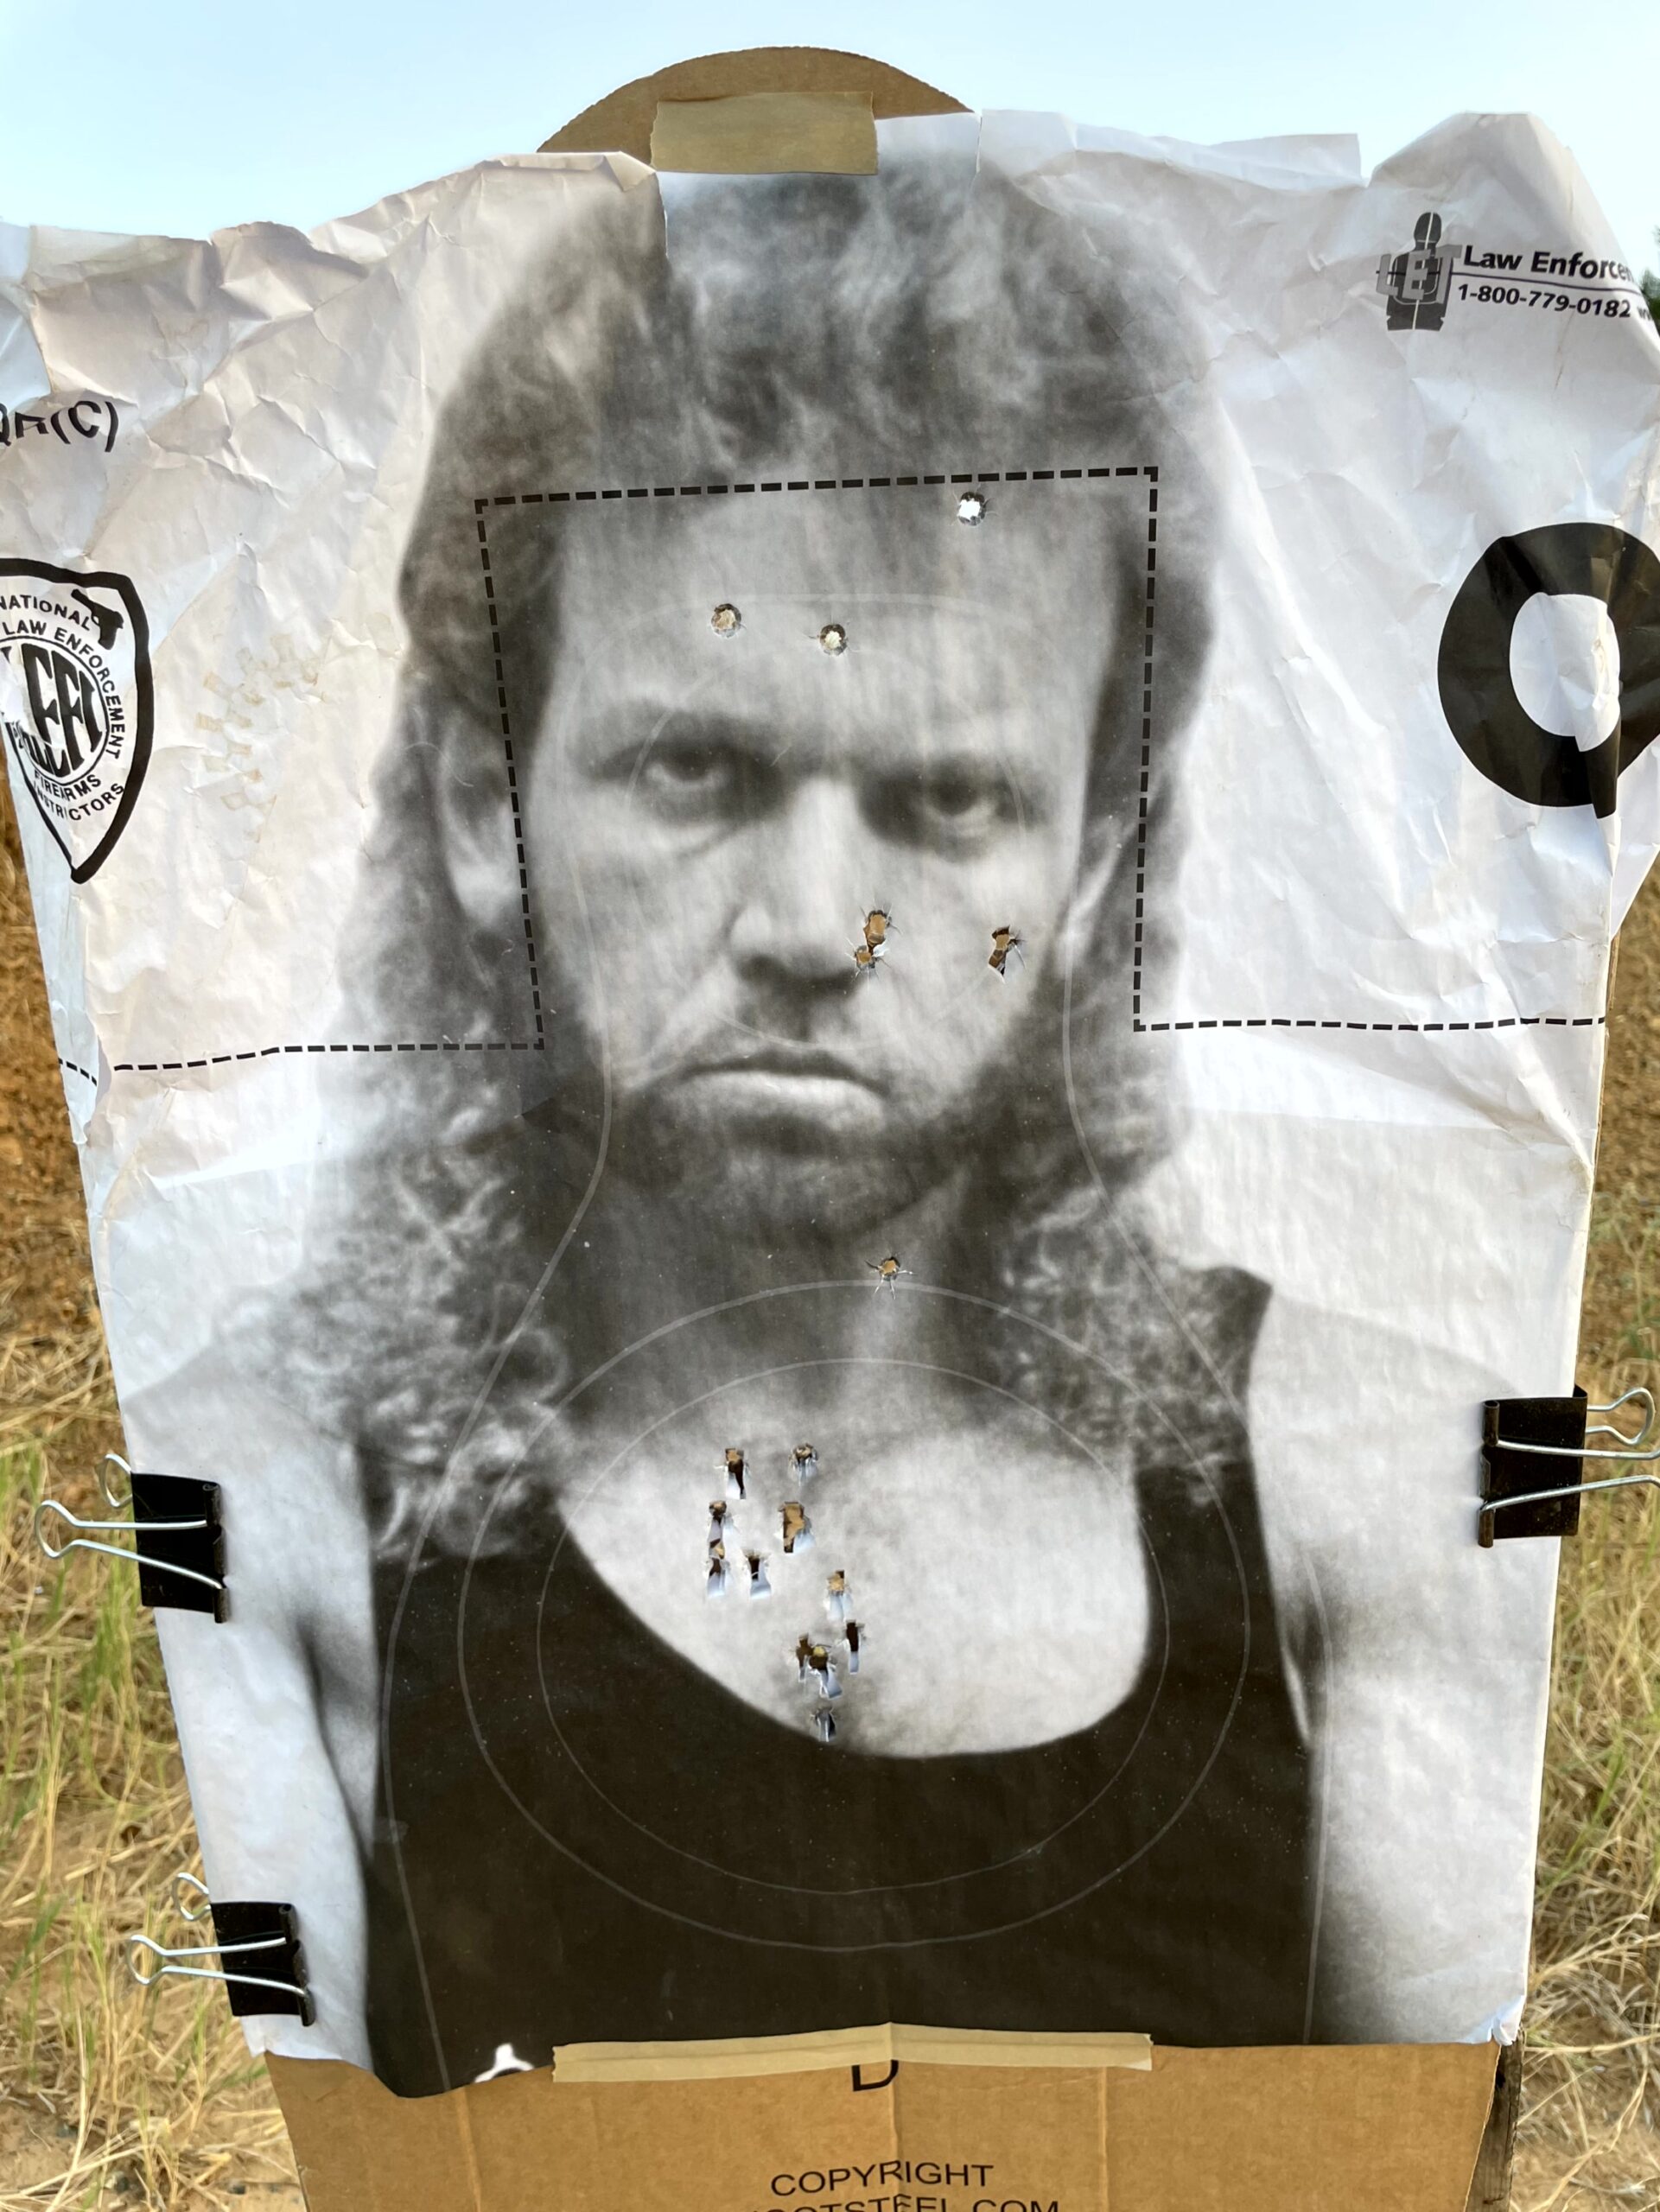
Video #2 uses two targets, one photorealistic, the other a ShootSteel target with a weapon overlay. With that target I also drew “hands up” on the back side, making it a no shoot if flipped around.
Retrieve gun from box, fire 2 rounds to the body on the close target while moving to cover. From cover, lean out, fire one to the head on the close target. From opposite side of cover, engage the farther target.
Retrieve gun from box. Point muzzle down while moving to cover to avoid muzzling the no-shoot. From left side of the cover, engage the far threat. Retreat to cover & assess. Re-engage the far threat if necesssary.
Retrieve gun from box. Avert muzzle while passing no-shoot. From left side of the cover, engage the far threat. Avert muzzle again, step out from cover, shooting around the no-shoot, re-engage the far target.
The idea behind these drills is simulate a family member coming down a hallway toward you, while you are in a safe room or at least near a doorway you can use as concealment or a heavier piece of furniture that might serve as actual cover. You don’t want to point your gun at the family member as you are moving. The final drill simulates the far target moving to put your family member between him and your gun, forcing you to step out from cover to get a clear shot at the far threat. In a perfect world that far threat target would be on a rolling target stand (or indoor range target carrier) moving toward you during that final drill.
In the actual course there are additional drills, run between those in the Part 1 and Part 2 videos, to build the skills necessary for the Part 2 drills. I shot the drills at “student speed”, so those watching the videos could get an idea of what is considered acceptable speed and accuracy.
How I made the videos
I used my iPhone and my LongShot Ranger camera.
The Ranger is intended to be placed downrange near the target when shooting at longer distances (I’ve used it for 25 yard pistol zeroing and rifle training from 25-100 yards). Using its own WiFi server it can send real time video to your phone to eliminate lots of walking back and forth to inspect hits on your target. The app also has a feature where it can record video from both the Ranger and your phone’s camera.
The vertical video was recorded with the Ranger’s camera, and the widescreen was recorded using my iPhone’s camera. I imported that video into Magix’ Vegas software, merged all the takes of many drills together into one file, and then cropped that file twice, to create two separate sync’ed videos I could blend into a single view, with captions and inserted still photos. I think instructional videos should have captions, so that those watching with the sound off can follow the action – and I believe that scripted captions work better for short videos than captions auto-generated from the video soundtrack. I did add a narration track, but due to the video length limitations on Instagram, it has less information than the captions do.
We’ve held a few sessions of the Home Defense Shooting Skills course this year, typically as an afternoon course held immediately after our popular Basic Pistol course. If there’s interest from the students in our upcoming October 2025 basic course, we have room in the schedule to add a session of this course. In 2026 we will offer it or the related Personal Tactics Skills course as follow on courses with all our basic pistol classes.
I was a recent guest on the “That Weems Guy” podcast discussing the problems I’ve observed students have with traditional double action handguns. Ernest Langdon was the other guest, covering the advantages from his perspective. The full podcast episode is here
Langdon has put together a great set of instructional online programs addressing different common questions related to gun ownership and concealed carry. He mentions them in the podcast. They are available at this site https://lttdiscover.com
For those that read faster than they can listen and prefer blog posts to podcasts, here’s a summary with some background information and extended discussion.
How Does a Traditional Double Action Pistol Work?
Advocates of this design refer to it as “traditional double action” (TDA). Many also use the term Double Action/Single Action (DA/SA). The gun was designed to be carried with a round chambered, with the hammer lowered using a decocking lever that makes the gun safe to carry (or have ready for home defense). That means that the trigger pull for the first shot will perform two actions: cocking the hammer and releasing it. For follow up shots, the cycling of the slide cocks the hammer for the user, so those rounds are fired in single action mode.
Typical factory double action trigger pulls can be 10-12 pounds, but action work or installation of modified parts can lower it to 6 pounds. Some duty/carry trigger modifications lower the single action trigger to 3-4 pounds. Many TDA guns used in competition have the single action trigger lowered below 3 pounds. Generally, people shoot shorter, lighter trigger pulls better than long, heavy triggers.
I’ve been teaching the Texas License to Carry course since 1995.
The shooting qualification test has 23 separate strings, each starting from a ready position. The way this course of fire is supposed to be run is that shooters using TDA guns should decock each time the gun returns to a ready position. That means people shooting the test will have 23 double-action trigger pulls.
Informal polling of students that come to our non-LTC courses, bringing TDA guns indicates that very few trainers offering the Texas LTC course actually require TDA pistol users to decock for each string, allowing them to fire all shots using the gun in single action mode. While this undoubtedly helps those students get better scores on the test, it violates the policies our state police academy set for instructors for conduct of the class, and worse, it misleads TDA users into thinking that it is acceptable to ignore the decocker and the double action first shot design. Many of my complaints about TDA pistols originate with the users and their inability or refusal to operate this type of firearm the way it was designed.
Cons (Disadvantages)
The biggest problem is ergonomics: those with shorter fingers and less hand strength will have a difficult time reaching and pulling the longer, heavier double action trigger on most traditional double action designs. This picture shows the problem. I’m holding the M9 airsoft gun (same size as actual M9) with the frame and barrel properly aligned with my hand and arm, but the best I can do is get the side of my finger to the trigger, and my entire trigger finger is mashed up hard against the frame.
My trigger finger is 2.9″ or 74mm, which is below average for male index finger length according to this chart. The ‘average’ index finger length, from this data, would be 3.11″. To have a trigger finger long enough to get the crease even with the trigger, and make the right angle turn to get the pad of the trigger finger to the trigger face would require a finger that was probably 0.5″ longer, or 3.4″ (88 mm).
So the basic design of the M9 and most other TDA guns places the face of the double action trigger out of comfortable reach for those with average finger lengths.
Nicholls, Mike & Orr, Catherine & Yates, Mark & Loftus, Andrea. (2008). A new means of measuring index/ring finger (2D:4D) ratio and its association with gender and hand preference. Laterality. 13. 71-91. 10.1080/13576500701751287.
If you have to twist the gun in your hand so it’s recoiling into the thumb knuckle, or lay your trigger finger against the frame just to get the tip of the finger on the trigger in double action mode…the gun is too big for your hand and there are no “workarounds” for this other than getting a gun with a smaller frame and shorter trigger reach. Being able to point the pistol like an extension of your index finger is an important part of pistol shooting, particularly for those using slide mounted optics for aiming. Similarly, if you can’t press the trigger straight to the rear, parallel to the barrel, and have to press it from the side (or push the whole gun to the side because your trigger finger is pushing against the frame, it’s going to affect your ability to keep the gun aligned with the target as you fire.
My observation is that the vast majority of people who are fans of TDA guns base all their assessment on how the gun fits them in single action mode, and gun fit problems related to double action are ignored, excused or dismissed. “It’s only for one shot, and self defense shootings all happen at close range, so if my first hit is bad I can just follow up with a good 2nd shot. I can just thumb cock the gun for my first shot. I will twist the gun for that first shot and let the recoil readjust my grip. I would rather suffer with that first shot to get to that awesome single action trigger than shoot a striker fired gun that has a medium-difficult trigger for every shot. I carry on an empty chamber and will rack the slide, so I won’t have to shoot the gun double action at all.” – just to share a few of the common responses TDA shooters give when confronted with the cold reality of their TDA gun not fitting their hand in double action mode.
The folks at “A Girl and a Gun” have a good explanation of gun fit.
Most people don’t practice (live or dry) enough to really learn how to master one trigger pull (striker or single action). They overaim and then pounce on the trigger trying to make the gun fire at the magic “NOW!!!” moment, only to discover that violently slamming the trigger to the rear as hard and fast as they can causes the gun to move and their shot to miss the spot they aimed at.
Adding the complexity of learning how to manipulate the trigger properly for two different trigger pulls makes the job of learning the pistol more difficult. Additionally, developing the skill to decock the pistol each time the gun returns to the ready position, between drills, requires diligent attention as well.
By comparison, all a striker fired pistol user needs to learn is how to work the trigger the same way for every shot, and all their concentration can be on muzzle direction and taking finger off the trigger each time the gun is off target, back to ready or heading back to the holster. Adding the two extra TDA specific tasks to their workload just adds more mental overload. (Similarly, remembering to put the manual safety back on, when using a 1911/2011 style pistol or any pistol with a manual safety, adds another task that striker-fired gun users don’t have to perform.)
For years I have written about the gap between the 99% of basic gun owners & carry permit holders and the 1%. The 1% are those that attend training beyond state minimums, typically taking 15-30 hours specific to defensive handgun skills working from the holster. Their standards for baseline performance are higher, and they pay more attention to running whatever gun they have chosen correctly. The largest gap is the failure to train to automaticity. Tasks that are automated occur without conscious thought about each step in the task. Drawing the pistol is not 3, 4 or more discreet steps. It’s a smooth continuous one, where each step occurs at the right time (muzzle to target, hands joining, safety switched to fire, finger to trigger, sights to eye target line). Without training all those steps to the automatic level, under stress, steps will be forgotten or done at the wrong time, potentially leading to an unintended discharge, a missed shot or even a failure to fire if switching the manual safety to “fire” is forgotten.
The 99% are often uncomfortable with the idea of keeping a round chambered in a defensive firearm. This concern motivates many to leave the gun unchambered, planning on racking the slide when the gun is picked up from a nightstand or drawn from a holster. This adds yet another task (and time) to the job of getting the gun into the fight as quickly as possible. The decision to have the gun unchambered does allow them to avoid the double action trigger and the decocking lever, since the gun goes into single action mode when the slide is racked. In this case, two wrongs don’t make a right.
If the goal is to rack the slide each time the gun is picked up or drawn, each drill in dry or live practice should start with, and include, the task of racking the gun, so that the task is not forgotten under stress. If they choose a TDA gun to provide heavy-trigger pull “insurance” against their poor trigger finger discipline, and lack of motivation to train to that higher standard, it’s very likely that they will also fail to put in the work to master the double action first shot trigger pull.
Go to any public shooting range and observe a TDA pistol owner as they practice. A 99%er will arrive at the range with their gun unloaded in a box or a bag. They will insert a magazine, rack the gun, to put it in single action mode, and empty the magazine in some form of untimed, unstructured practice. At no point during the firing of all the rounds in the magazine is the gun brought back to ready and decocked to start a new string. If there is a break in the firing and the muzzle is lowered, at best the gun is laid on the bench, hammer back. At worst the gun stays in the hand, muzzle lowered, finger on trigger and hammer back. When the magazine runs dry, the user will insert a new magazine, rack the slide, once again putting the gun in single action only mode, and continue avoiding and ignoring the decocking lever. Many years ago I allowed another trainer to rent my range to run a class. I observed the trainer’s assistant holstering their TDA pistol without decocking it, and brought this to the assistant’s attention. It was clear from that person’s response that they didn’t understand how a TDA gun was to be run.
In a competitive market for the Texas LTC course, most students are seeking the shortest, cheapest course, and have no interest in doing more on the range than the state minimum. Our approach has been to include a 50 round training block before we shoot the test, with dry and live fire drills correcting the most common shooting errors. As part of that 50 round block, we require TDA users to decock (and 1911/2011 users to put their manual safety on). In both cases, it’s common for users of those guns to require constant reminders to perform those tasks, because they have never included them in their own practice — and in some cases did not understand that their TDA gun could not be carried or stored hammer back on a loaded chamber in single action mode. They confused 1911/2011 “cocked and locked”, which is mechanically safe with single action TDA use.
My experience as a trainer mostly dealing with the 99%, trying to motivate them to join the 1%, has been that most, even when informed about the additional complexity of their TDA gun, have no intention of putting in the work to master the extra tasks associated with that design. Worst of all, most of the factors that Ernest identified as benefits of the TDA design don’t exist if the TDA user never takes advantage of chambered, decocked, hammer down carry.
Pros
In the podcast, Ernest correctly noted that “trigger checking” is a problem when shooters, including very trained ones, are in high stress situations. Force Science Institute published this article about that issue. You should read it.
If a highly trained person with much more life experience in lethal force incidents is still prone to putting finger on trigger when it should not be there, the likelihood that an untrained person will make this error is even higher. For those with large enough hands, running a tuned (non factory) TDA gun with a 6 lb double action trigger, the effort required to fire the gun is only slightly more (due to trigger pull length) than a striker fired gun with a factory trigger. It is possible that the longer pull, or heavier pull on an unmodified gun, might prevent some unintended discharges in those situations. Similarly, for the armed homeowner, the longer heavier trigger pull might provide similar protection against the unintended discharge under stress.
The benefits only apply to those that can get fast-enough acceptable hits using the double action trigger, which takes practice (dry and live) to learn. Without that effort, double action shots are likely to be slow and farther off target than a single action or striker fired shot would be. How do I know this? 30 years of watching 99%er carry permit students make those errors. 50 rounds of pre-test practice is not enough to do more than show them how to practice to get better after class is over, and increasing the length of the state-mandated class to include more rounds and more time is not only not viable in a market where cheap & short is the primary customer desire, but also limited by state regulations setting the maximum course hours.
Why are TDA guns popular in competition?
Within the past decade, TDA guns have had a surge in popularity in USPSA competition. This occurred because within the specific divisions that exclude 1911/2011 style pistols, the options are polymer framed striker fired guns, and metal framed TDA guns. USPSA stages tend to have high round counts (15-30), and each paper target is engaged twice, making shot to shot recoil recovery important. Additionally, USPSA does not require TDA users to decock each time they move, as might be required in a real world defensive pistol course. A heavy metal framed TDA gun, outfitted with a competition trigger upgrade, would have a 6 pound, not a 10-12 pound, DA trigger, and a sub 3 lb single action trigger. That provides the user with faster split times (shot to shot on a single target), and a shorter lighter trigger pull for all but the first round fired on a stage. For a highly motivated competitor, learning the 6 lb double action first shot trigger on their gamer gun, assuming they can reach the trigger, is not a significant obstacle, and the benefits of the heavy metal frame and improved single action trigger provide competitive advantage.
General purpose defensive handgun buyers should not be misled by this situation. Real world defensive incidents are short duration, often low round count events by comparison to USPSA field courses. A less motivated, less skilled shooter’s ability to hit accurately and quickly with a factory double action trigger is going to be much less than that of the M/GM level competitors touting the virtues of the TDA guns on youTube “influencer” videos.
I Shoot Good Enough – This Doesn’t Apply To Me
If your “good enough” standard is hitting anywhere on a B-27 target at 3 yards in untimed practice, then you are correct. It probably doesn’t apply you – but the problem is your standards of “good enough” are unrealistic. If you can shoot 90% or better on the Texas carry permit test, this is better but still not “good” from a realistic analysis. State qualification tests, include those for law enforcement, typically use target scoring areas that are much too large, relative to their utility in stopping a lethal attack. The common standard within the 1%er defensive pistol training community is that hits outside a 6″, or maybe an 8″ circle should be considered “unacceptable”. Performance under stress is always going to be worse than performance on a comfortable day of practice. Real testing should be based on “cold drill” performance (the first shots fired during a practice session). There are no warm up shots, no pre-fight dryfire time to re-remember how to run the trigger properly.
If you insist that your shooting is “good enough”, start your next practice session with the simple 5×5 drill: 5 shots, 5 seconds, into a 5″ circle (NRA B-8 target 9-10-X ring center), at 5 yards. If you run a TDA gun, that means starting with the gun loaded and decocked, so shot #1 is fired double action. Start from the ready or holstered (ready is allowed at more ranges and gives you more time to get the shots). Pay attention to where that first shot hits.
Try five 1-shot drills starting with the gun in single action mode, then repeat with each shot in double action mode. Compare your speed and accuracy.
If you choose a TDA gun for personal protection, understand that the first shot is likely going to be the most important one you fire in a defensive encounter, and put the work in to learn how to run the gun the way it was designed, to realistic standards. That might mean upgrading the factory trigger (Langdon Tactical does great work on Beretta M9/92 and PX4 guns), or comparing your performance with a non TDA gun, which might lead to changing your choice of your primary defensive pistol. Whatever action type you choose, learn how to use it the way it was designed to be run, choose a gun that fits your hand and trigger reach, and make your practice relevant to the task for which you purchased the gun.
We have scheduled most of the classes and matches we plan to offer through the end of the year. Weekday private lessons are available with Karl at the A-Zone, by appointment on any gun, at any level on any topic we offer.
It’s not too early to start planning your fall training. We have a packed schedule in September and October before our annual November/December deer season hiatus. Plan ahead and get registered for one or more of these upcoming courses!
SIG 320 POLICY CHANGE
Due to recent documents and policy changes from the FBI,Air Force and Gunsite Academy, out of abundance of caution KR Training is changing its policy regarding the use of the SIG 320 pistol in classes. Our new policy, effective 7/24/2025, is that the SIG 320 may only be used in KR Training classes or at the A-Zone Range for any event if carried in an outside-the-waistband duty or competition holster that puts the muzzle pointing at the ground, not any part of the user’s body, when the gun is holstered.
AUGUST – OCTOBER CLASSES
We have a lot of training opportunities for all levels planned for August-October. Most of the August courses are either early morning (8a-11a) or indoors in the classroom. Visit the KR Training website to get more information about these courses.
I’ve been a student of John Holschen’s since the mid 1990’s (when he taught for Insights Training in Seattle, WA), and most recently in classes he’s offered at conferences and through his own training business. He’s bringing his NURO based pistol program to KR Training in September. His class is suitable for intermediate/advanced students that have had formal training or have safely completed matches where drawing from a holster under time stress was taught and tested.
More about John and the NURO here:
Ep. 156 | 5 Steps to Survive Extreme Events with John Holschen by Lora Thorson
Due to popular demand we have added more Summer Fun Matches, July 30, August 6 and 13. These will all feature stages from the 1990’s Texas Paper and Iron Championship. $20 match fee, shoot 100+ rounds in 2-3 hours. Match starts at 6 pm but late arrivals are welcome. All levels are welcome: .22 pistols, .22 rifles, centerfire pistols and pistol caliber carbines. Events will include stand and shoot paper and steel stages, a plate rack stage and a shoothouse stage. Register here.
STAFF & ALUMNI NEWS
Karl accepted an invitation to join the NRA’s Education and Training Committee, along with multiple other private sector trainers including Tim Kelly (Apache Solutions), Brian Hill (Complete Combatant), and Mike Ox. They will bring some new perspective to the revitalized NRA, as it rebuilds under new leadership.
The Armed Citizen Legal Defense Network has been sold to CCW Safe. Karl was on the board of ACLDN and he will be continuing forward as a CCW Safe affiliated instructor. It will be the program we recommend to students for legal self defense coverage.
In early July, Karl and Uncle Zo attended the Greybeard Actual Pistol Skill Development course. Dave Reichek worked the course as Matt’s (Greybeard) assistant instructor. Zo also attended Gabe White’s Pistol Shooting Solutions course while working as the official KR Training host for the class, while Penny, Karl, Dave & Jacob Reichek were on hunting & photo safari in South Africa.
DISCOUNT CODES
I have collected up all the discount codes we have set up with vendors we recommend. Alumni of KR Training classes will find them in the monthly e-news email. You’ll have to open the email and scroll to the bottom to find them. It’s a reward for actually opening and reading the email!
REFRESHER DEALS
Re-take any class you’ve taken before for half price! Contact me to get the alumni discount code. Firearms skills deteriorate without practice. Most ranges don’t allow drawing from a holster, shooting quickly, moving or shooting from cover. If you don’t practice the skills you learned in class, they won’t be there when you need them.
BLOG O RAMA
All the articles you missed if you don’t follow the KR Training Facebook page and Instagram feed. John Daub and Paul Martin have both stepped back from blogging, so at the moment Uncle Zo and I are the only KR Training staff actively writing. Some of my writing is being published on the NRA’s Shooting Illustrated website. Greg Ellfritz has been writing a lot recently, in addition to his Weekend Knowledge Dump, and I have included some of his recent articles here.
KR Training gets a nice mention in this video from Gideon Optics
Ed Monk’s new book on the Active Shooter problem is now available. I just got my copy and will be reviewing it on this blog soon. You can get your copy and read more about it here.
MUSIC VIDEOS OF THE MONTH
My quartet recently performed at the Magnolia Society venue in Columbus, Texas. A fan sitting right up front recorded this clip of us doing part of “Movin on Up (Jefferson’s Theme)”.
and to promote the special Jerry Garcia “Days Between” solo show I’ll be playing at Mac’s Daqs in La Grange August 8th, here’s my piano/vocal version of “Truckin”. For the Days Between show I’ll be playing songs from the Grateful Dead, Jerry Garcia Band, and Dead-adjacent artists like Dylan, The Band, Bruce Hornsby, and Phish.
On June 28, 2025, KR Training hosted a fun shoot event for the Lee County Republican Party. We set up steel targets on multiple bays, and set up a simple shoothouse course. The range was open from 9-11 and then a cease fire was called for lunch (burgers provided by Lee County GOP) and speeches from LTC Allen West, Sheriff Garrett Durrenberger and candidate Tom Glass. The event made the Lexington Leader newspaper.
We have scheduled most of the classes and matches we plan to offer through the end of the year, with a few dates left open so we can respond to student requests. Weekday private lessons are available with Karl at the A-Zone, by appointment on any gun, at any level on any topic we offer. Some classes on our calendar have already sold out and aren’t listed below.
Doug Greig will teach this class on Saturday June 14 in the morning. It’s our basic AR-15 / defensive carbine course for carbine owners that have never had formal training in defensive long gun skills. Slots are still available.
GABE WHITE PISTOL SHOOTING SOLUTIONS
Gabe White returns to the A-Zone June 21-22 for a session of his Pistol Shooting Solutions class. It focuses on draw speed and getting fast, accurate hits at 7 yards. Day 2 includes work on shooting on the move and other more advanced skills. If you have completed any class or match where drawing from a holster under time pressure was performed, you have the pre-reqs to attend Gabe’s course. He’s famous for his Skills Tests (Dark, Light and Turbo Pins).
LEE COUNTY GOP FUN SHOOT & LTC ALLEN WEST SPEECH
On June 28 we are hosting a fun shoot fundraiser for the Lee County GOP. From 9-11 am the range will be open for shooting on our steel targets, and those with USPSA/IDPA experience or training at the DPS-2 level or higher will be allowed to use the shoot house. We will have a stage and targets set up there.
100% of your $30 fee goes to the Lee County GOP. Event includes 2 hours range time, lunch (burgers) and the opportunity to meet, greet and listen to Lee County Sheriff Garrett Durrenberger and LTC Allen West give brief remarks.
Pre-registration is required and you can register here.
MATT LITTLE GREYBEARD ACTUAL PISTOL SKILL DEVELOPMENT
Matt will be offering a 2 day level 1 defensive pistol course Saturday and Sunday July 12-13. More information about the course is here. Here’s a video taken during a previous Pistol Skill Development class.
AUGUST- OCTOBER CLASSES
We have a lot of training opportunities for all levels planned for August-October. Most of the August courses are either early morning (8a-11a) or indoors in the classroom. Visit the KR Training website to get more information about these courses.
Basic Pistol & LTC completion – August 2
Personal Tactics Skills (indoors) August 2 afternoon
Grid Down Wound Care (indoors / Greg Ellifritz) – August 9
The Explosive Threat (indoors / Greg Ellifritz) – August 10
Top 10 Drills – August 16
Knife Skills for CCW Instructor Development (indoors / Greg Ellifritz) – August 23-24
No Fail Pistol (Chuck Pressburg performance pistol course) – October 4-5
Rangemaster Instructor Development – October 9-11
Rangemaster Advanced Instructor Development – October 12-13
Volunteer Church Security Team Member Shooting Skills (Steve Moses) – October 19
Retention Distance Defensive Pistol Skills (Steve Moses) – October 20
Force on Force Instructor – October 24
AT-2 Scenarios – October 25 am
Tactical Scenarios – October 25 pm
Defensive Pistol Skills 2 – October 26 afternoon
Low Light Shooting 1 – October 26 evening
STAFF & ALUMNI NEWS
I was a guest on Matt Little’s podcast. Listen or watch the episode here
One more student completed his 40 hour Defensive Pistol Skills Challenge coin program with us in May. If you have your LTC, whether you took the training from us or not, that counts as 6 of the 40 hours in the Defensive Pistol Skills Program. We will be offering all the courses except DPS-3 this fall.
Eric Victorin attended and passed the Rangemaster Defensive Shotgun instructor course. He and RM certified Advanced Shotgun Instructor Dave Reichek will be teaching a half day (morning) Defensive Shotgun 2 class in July.
We hosted Greg Ellifritz of Active Response Training for his Extreme Close Quarters Shooting instructor course in early June. KR Training staffers Karl Rehn, Dave Reichek, Ed Vinyard, David Tschirhart, Oscar Lee James III, and Alonso Robles all passed the course. We will be offering a 6 hour Close Quarters Shooting course on July 26 introducing carry permit level students to Greg’s close quarters shooting techniques.
DISCOUNT CODES
I have collected up all the discount codes we have set up with vendors we recommend. Alumni of KR Training classes will find them in the monthly e-news email. You’ll have to open the email and scroll to the bottom to find them. It’s a reward for actually opening and reading the email!
REFRESHER DEALS
Re-take any class you’ve taken before for half price! Contact me to get the alumni discount code. Firearms skills deteriorate without practice. Most ranges don’t allow drawing from a holster, shooting quickly, moving or shooting from cover. If you don’t practice the skills you learned in class, they won’t be there when you need them.
BLOG O RAMA
All the articles you missed if you don’t follow the KR Training Facebook page and Instagram feed. John Daub and Paul Martin have both stepped back from blogging, so at the moment Uncle Zo and I are the only KR Training staff actively writing. Some of my writing is being published on the NRA’s Shooting Illustrated website (one article linked below). Greg Ellfritz has been writing a lot recently, in addition to his Weekend Knowledge Dump, and I have included some of his recent articles here.
In response to a discussion online about lasers and dots, I went to the range and shot the FBI agent shooting test using two different laser-equipped pistols, and wrote an article for the NRA’s Shooting Illustrated online journal (to be published later this month). Here are the instagram videos.
I’ve been playing a lot of shows, mostly private events, in May and June. Here’s a clip of me playing the great song “Wine O Clock” (Shemekia Coupland cover) at a solo show at Luigi’s in College Station.
We have scheduled most of the classes and matches we plan to offer through August 2025, with a few dates left open so we can respond to student requests. Weekday private lessons are available with Karl at the A-Zone, by appointment on any gun, at any level on any topic we offer. Some classes on our calendar have already sold out and aren’t listed below.
Our Defensive Pistol 1 and Small Gun Courses are intended to help people get comfortable with carrying a gun with them outside the home. DPS-1 focuses on learning how to draw safety and quickly from a belt holster (inside or outside waistband). We have loaner holsters and discuss holster selection during the course. Students do NOT need to go buy a holster for class.
The level of shooting skill required to pass the Texas License to Carry shooting test is not the level of skill a well prepared armed citizen should have. The DPS-1 and DPS Small Gun courses teach students how to shoot faster and hit a smaller, anatomically correct target zone (the B-27 used for the LTC test has many, many flaws), which are essential skills for survival in an actual defensive shooting incident. Even if you think you will never carry outside the home, you should take a class to learn how to select and use an appropriate holster. I discuss why holster skills are relevant for car carry in this recent article on the NRA Shooting Illustrated site.
The Small Gun class focuses on pocket carry, purse carry, fanny pack carry, and other non-holster methods. We have loaner packs and purses and even loaner “small guns” that students can use for class. A small gun in your pocket is much more useful than a big gun carried in your car or at home.
If you’ve taken the regular DPS-1 course – the “Small Gun” class is different material. Different skills, different drills. Not just a repeat of DPS-1 shot with a smaller gun.
Here’s a video showing me shooting a small gun (SIG 365 .380) from pocket, sneaky pete, day timer, fanny pack, and Enigma deep carry, with draws from open and concealed carry for comparison. With training and practice you can have a “fast enough” draw without a traditional belt holster.
This year’s matches have expanded to include .22 pistol and rifle divisions, and a carry gun division, in addition to open carry/gamer gun divisions. The match fee has been reduced to $20 since we are no longer submitting classifier results to USPSA. Matches will include falling and stationary steel stages, a shoot house stage, and a variety of standards, drills and stand and shoot courses. Matches start at 6 pm but shooters can arrive later and we will work you in. They are open to shooters of all skill levels. They run on Wednesday evenings. We still start shooting at 6 but if you show up as late as 7 you can still shoot the stages. Bring 150-200 rounds, most matches will be 100-125 rounds, 4-5 stages. Centerfire pistols will need holsters (open carry or concealed), .22 pistols can start from a low ready position.
Here’s a video of Matt Little (Greybeard Actual) shooting some Steel Challenge style stages.
GABE WHITE PISTOL SHOOTING SOLUTIONS
Gabe White returns to the A-Zone June 21-22 for a session of his Pistol Shooting Solutions class. It focuses on draw speed and getting fast, accurate hits at 7 yards. Day 2 includes work on shooting on the move and other more advanced skills. If you have completed any class or match where drawing from a holster under time pressure was performed, you have the pre-reqs to attend Gabe’s course. He’s famous for his Skills Tests (Dark, Light and Turbo Pins).
Two students completed their 40 hour Defensive Pistol Skills program, earning their challenge coins in March and April. We will offer all the coin courses against this year except for DPS-3, mostly in September and October.
Tracy Thronburg, Chuck Baxter and Ken Carden attended the Massad Ayoob Group Revolver class in March.
Karl presented two sessions at the 2025 Rangemaster Tactical Conference, and Dave Reichek worked as a range officer, finishing 13th overall in the main match. Dozens of KR Training alumni and instructors attended this event. Registration for Tac Con 2026 opens May 5th. It typically sells out within a few hours of registration opening.
In April, Tracy assisted Massad Ayoob in teaching the MAG-80 course hosted at KR Training.
Karl was a student, shooting two perfect 300 scores on the double-speed MAG qualification course.
Tracy also attended the Intensive Pistol course taught by Aqil Qadir of Rangemaster at the Dallas Pistol Club.
Tracy and Karl were also mentioned multiple times in this episode of the “That Weems Guy” podcast about the 2025 Rangemaster Tactical Conference.
Doug and Zack Greig were featured in an article in the Texas State Rifle Association’s monthly magazine.
DISCOUNT CODES
I have collected up all the discount codes we have set up with vendors we recommend. Alumni of KR Training classes will find them in the monthly e-news email. You’ll have to open the email and scroll to the bottom to find them. It’s a reward for actually opening and reading the email!
REFRESHER DEALS
Re-take any class you’ve taken before for half price! Contact me to get the alumni discount code. Firearms skills deteriorate without practice. Most ranges don’t allow drawing from a holster, shooting quickly, moving or shooting from cover. If you don’t practice the skills you learned in class, they won’t be there when you need them.
BLOG O RAMA
All the articles you missed if you don’t follow the KR Training Facebook page and Instagram feed. John Daub and Paul Martin have both stepped back from blogging, so at the moment Uncle Zo and I are the only KR Training staff actively writing. Some of my writing is being published on the NRA’s Shooting Illustrated website (one article linked below). Greg Ellfritz has been writing a lot recently, in addition to his Weekend Knowledge Dump, and I have included some of his recent articles here.
Since there was no April newsletter, the May newsletter gets two music videos. The first is the Black Cat Choir covering The Who’s “Squeezebox”, with me playing accordion parts on my keyboard.
The second is Midnight Express covering Supertramp’s “Bloody Well Right” at a big show at the Palace Theatre in Bryan, Texas.
I was a presenter at the 2025 Rangemaster Tactical Conference. Thanks to Tom Givens who keeps inviting me back to teach. As best I can tell I’ve been to all or part of 24 of the 27 that have been held. This year that was noted on my registration tag.
The history of TacCon can be found here https://taccon.info/about, or you can read about it by searching for all the Tactical Conference posts on this blog site. The oldest content I have online is from 2005.
The Tactical Conference is a descendant of the National Tactical Invitational, which was an event intended for students of national defensive pistol schools to meet and train together. This year 45 trainers put on sessions on 85 different topics, for 400+ attendees. Due to having to play a rock and roll gig in Round Top, Texas, that Saturday night, I only got to attend half of TacCon 25. I got to attend 4 sessions on Friday, and taught 2 sessions Saturday morning. Here’s what I learned, saw and did:
John Farnam
John Farnam is 80. Many credit him with being the “first traveling trainer”. He’s been teaching longer than any of us, and still on the road teaching courses and sharing his knowledge. A Friday morning rainstorm gave him a packed house for his 2 hour “Instructional Development For Our Art”, where he spoke without notes or slides, giving us his perspective on current trends and issues. His wife Vicki recently published a great new book on Off Body Carry that’s an excellent resource for anyone interested in that topic. Learn more about her program here https://www.flexccarrysolutions.com
Claude Werner
Claude is one of the deep thinkers in our community, and a deep data analyst. His presentation was an updated version of his “Off Duty Shootings of the LAPD” material, which looks at trends and common factors of off duty officer involved shootings, and discusses their relevance to armed citizen incidents. One takeaway from this year’s presentation was Claude’s observation that many off duty cops were bringing their guns to the fight from off-body platforms (which tied in with John & Vicki’s discussion of off body carry during the previous session.)
Don Redl
Don was a frequent attendee to the National Tactical Invitational, and he’s made a comeback of sorts teaching at the Surgical Speed Shooting Summit in 2022 and at recent TacCons.
Don’s primary areas of expertise are in corporate security and executive protection and he offers training that includes both live fire and force on force scenarios. His topic this year was “Catastrophic Force on Force Accidents”. He discussed all the safety issues related to everything from Airsoft games to complex professional multiplayer scenarios using Simunition and blanks, and presented some information on cases he’s worked as an expert witness on safe conduct of this type of training.
One issue he brought up was something we used to do ourselves using Airsoft guns but had phased out of our program: the use of Airsoft (or Simunition or UTM) guns for live fire drills and tactics training where risk are higher than normal: close quarter shooting, firing from the ground at targets simulating a person standing over you, working around vehicles, working inside real structures (as opposed to shoot houses).
I’m going to bring that aspect of our training back in a Close Quarter Shooting course this summer.
Justin Dyal
Within the Rangemaster Tactical Conference community, Justin is best known as the creator of the Five Yard Roundup Drill.
He has created many simple high-value drills, but also teaches his own Force on Force tactics course and live fire pistol classes. His topic for 2025 was “Building Skills You Can Believe In”.
The focus was on Skills in Context, which he described this way:
Skill (learn the basics)
Skill to Standard (an institutional or state standard, or a school standard)
Skill in Context (apply the skill in a realistic situation or exercise)
Skill in Context Under Pressure (apply the skill in a realistic exercise with time/physical/emotional pressure)
The vast majority of gun owners, at best, only reach the “Skill to Standard” level. Often that is based on an institutional (agency) qualification course or a state carry permit standard. The standard was usually developed with some realistic context, but also scaled down from ideal standards for a variety of political and policy reasons.
Skill in Context is what was offered in most of the live fire blocks at TacCon 2025, and what is presented in most live fire classes in the private sector that go beyond the carry permit minimum. Performance Under Pressure is introduced by competition, or by creation of a high standard that can earn the shooter a coin or patch or other award.
Texas Cop Quals
My block this year was an extension of material I’ve presented in previous years, discussing widely used course of fire and their relative difficulty level and context. In the past I’ve focused on historical qualification courses going back as far as the 1920’s. This year I ran attendees through courses of fire shot by the Austin, Houston, and Dallas police departments, and a qualification course used by the Texas Department of Public Safety. Each course was 50 rounds long, each using a different target, with different skills tested, with wildly varying time limits.
The shooters that attended my blocks were very skilled, with the lowest score shot on any qual being 93%, and most shooting 97% or higher on each of the four qual courses. In many cases the shooters were firing midsize carry guns drawn from concealment, not duty pistols worn in open carry holsters.
Each course included strings that started close at 3 yards, working back to 15 and 25 yards, incorporating timed reloads and one handed shooting. One test included two handed shooting gripping the gun with the opposite hand (so left handed using a two handed grip for a normally right handed shooter) which is a skill that’s rarely included or tested in police qualification course. The two factors that allows my students to shoot so well on the courses of fire were target size and time. Over the past 30 years the standards used by the private sector training community have increased: acceptable hit zones have shrunk, even from the 6.5″x11″ USPSA A-Zone and IDPA 8″ circular O-ring to more widely used 5.5″ B8 centers and 6″ squares. Widespread adoption of optic sights for handguns (aka “red dot sights”) have enabled shooters to fire with more accuracy. Time limits for institutional qualification courses have always been 2-3x the par time set for more reality-based programs.
These targets all scored 99% or better on one of the qual courses. Note that in the first, the shot distribution is much broader than the other two. On the second target, the group size is small, but centered in the 10 ring of the B-27’s bullseye — which is located far too low relative to the heart and lungs on a human torso. The last target was shot by someone using more modern principles: using the high chest as the aiming point, scoring the same 100% as the bullseye shooter, but applying their skill in better context.
The B-27 is a uniquely awful target still mandated for use in the Texas License to Carry, School Safety and First Responder Training courses. I wrote about its history in this older blog post
The version of the B-27 that I used for the qual we shot at TacCon25 had the FBI’s “Q” bottle superimposed over the B-27 scoring rings. It’s the best available compromise target that meets state requirements but also gives the shooter a better understanding of what should be acceptable and unacceptable hits.
Others on the KR Training Team
David Reichek served as a Range Officer for the entire weekend, finishing 13th overall in the pistol match. Scores in this year’s match were considerably higher than last year’s, showing the continuing evolution of skill. KR Training had dozens of alumni including more than a dozen challenge coin holders attend the event. I’ve already been invited by Tom to teach at the 2026 event.
The 2025 event sold out within 12 hours of registration opening. We will post the registration link on the KR Training Facebook as soon as registration opens.