We’ve had an unusually high number of basic level students train with us in 2025, but their interest in higher level classes, particularly those focusing on carrying on body outside home, has been low. In response to that trend, I modified our old Home Defense Tactics course into the new Home Defense Tactics and Shooting Skills course. Instead of teaching home defense with inert plastic guns (often called “red guns” or “blue guns”) in a student’s home, I teach the same skills in the A-Zone classroom building with the inert guns and add an extra hour of live fire drills. Part of my curriculum development work for the live fire drills was to go to the range and shoot the drills I planned to use in the course. Here are two short videos that show a progression of drills from simple to complex.
The Demo Videos
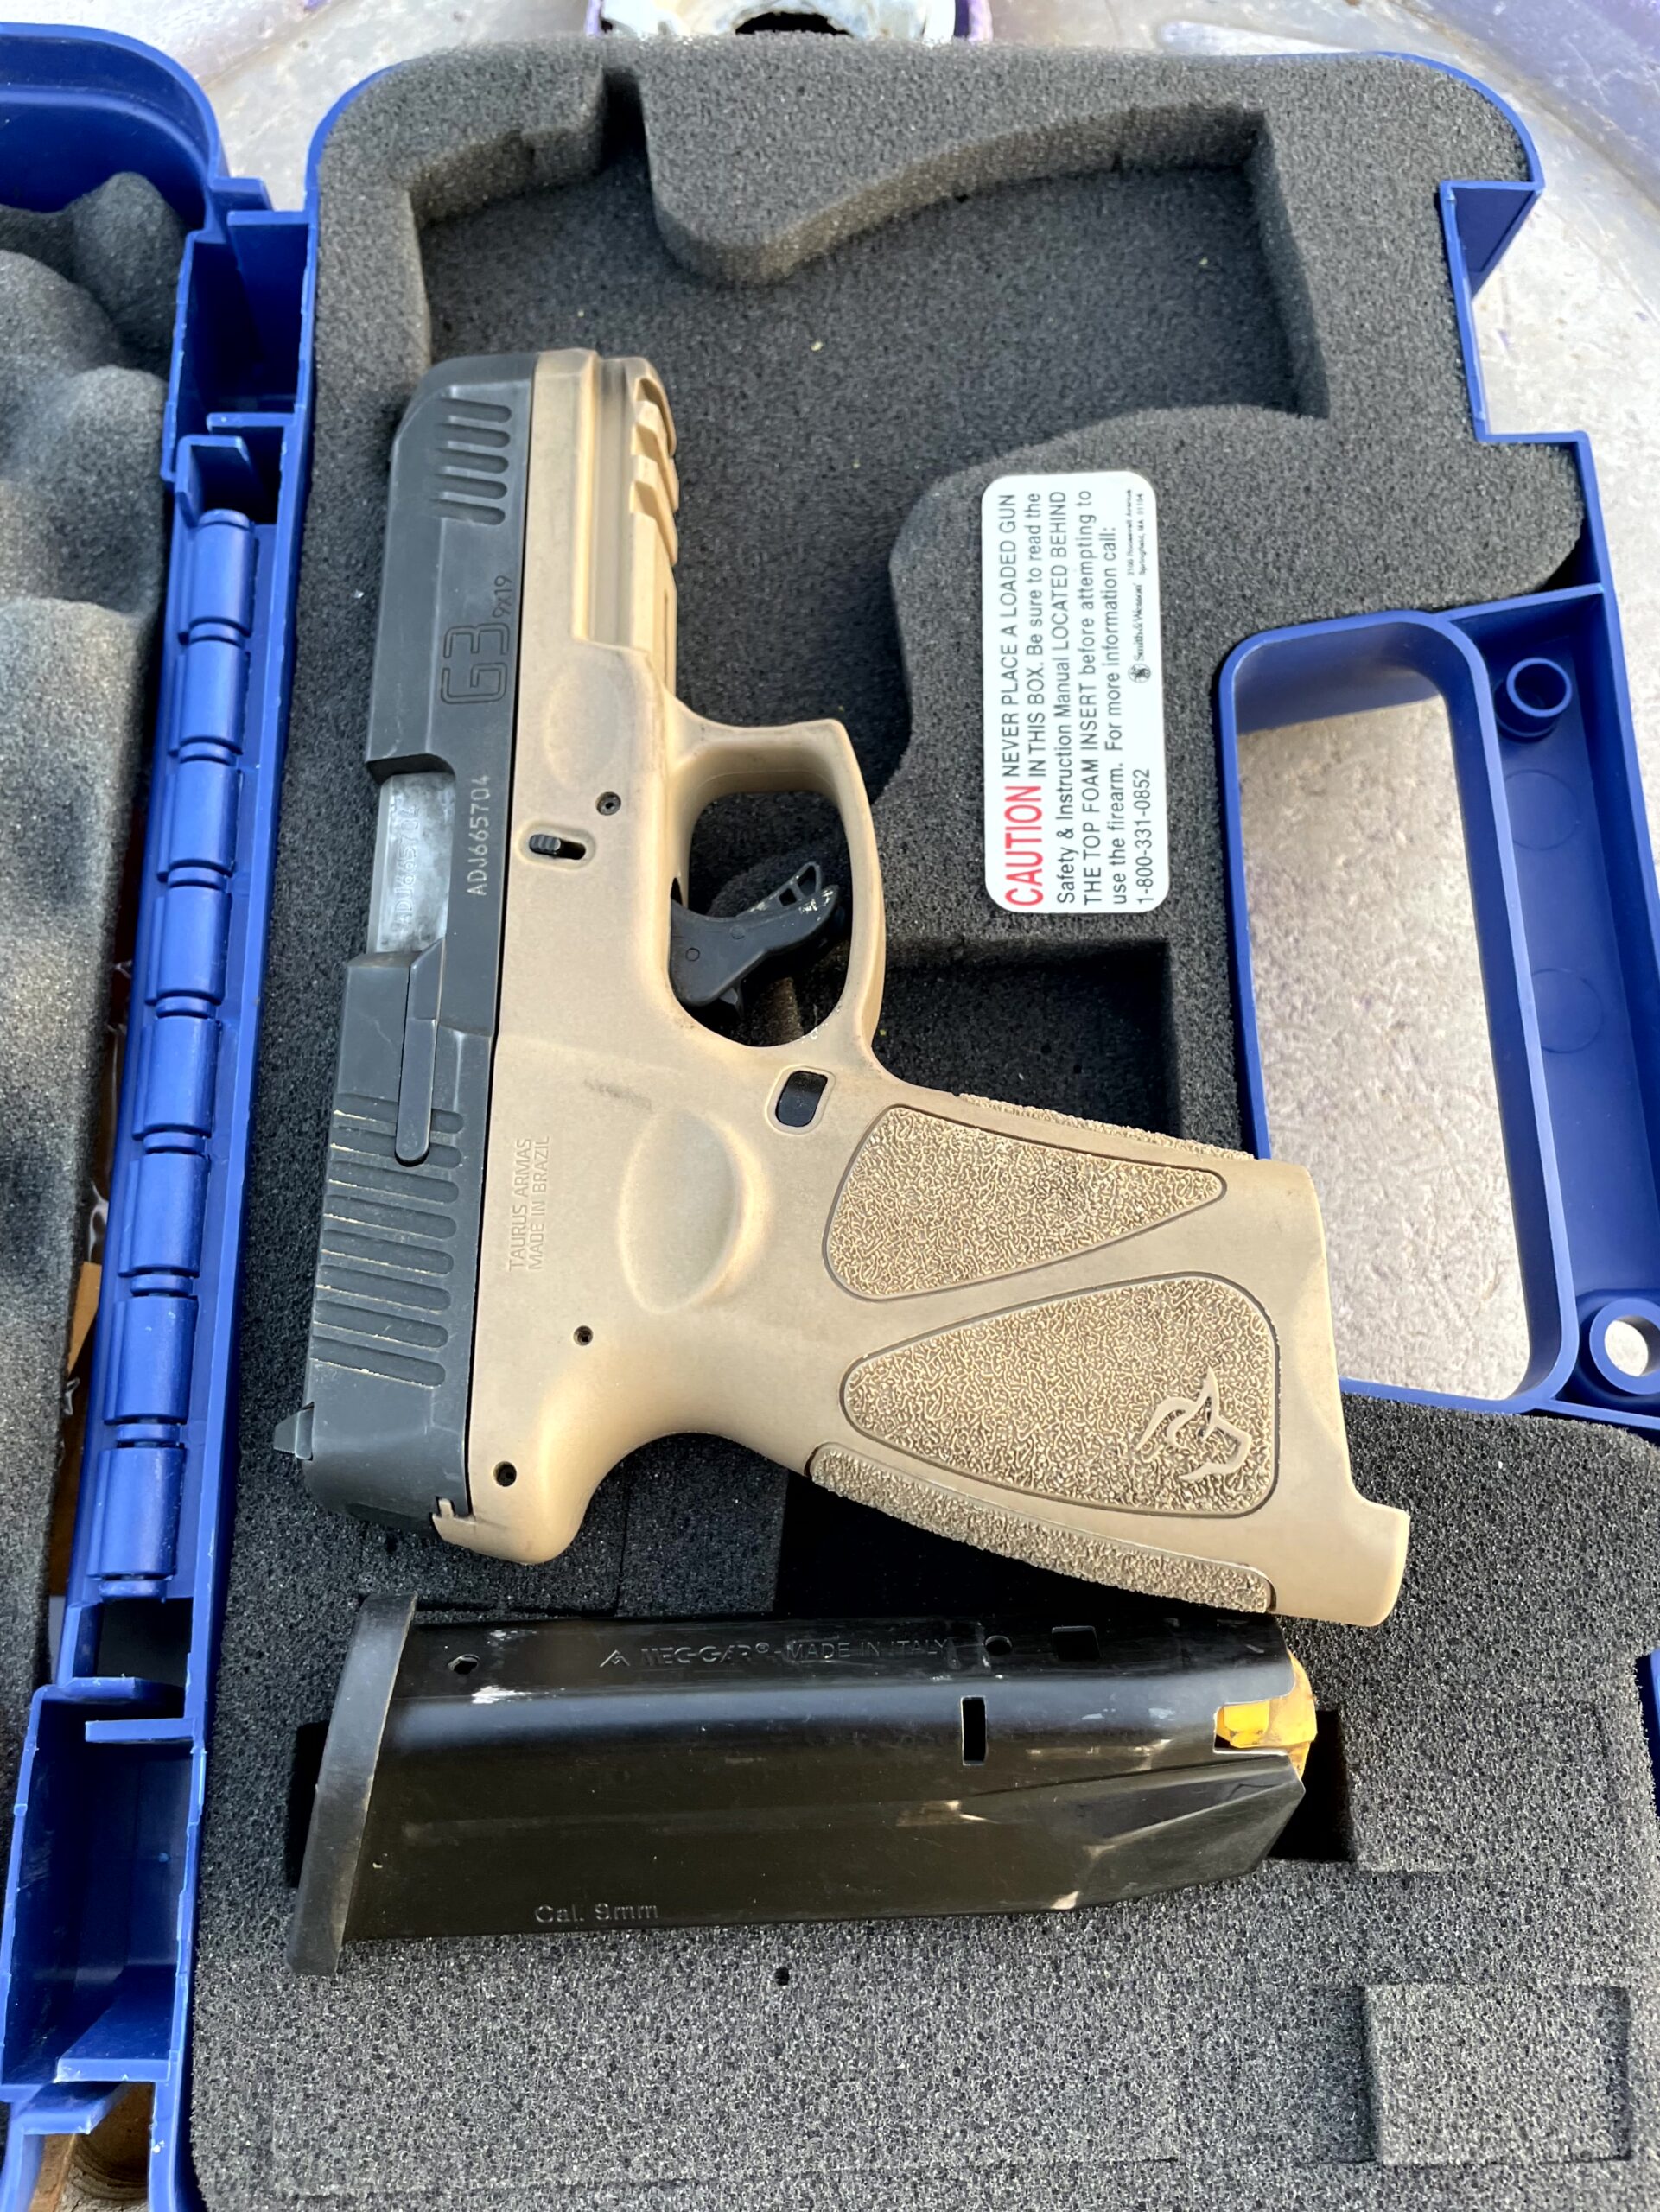
I used my Taurus G3 with iron sights and its factory storage box to represent the equipment that a budget-limited home defense handgun owner might have. Every drill would start by retrieving the handgun from the box, as it might be stored in the home.
For the first video, a “Shoot Steel” target replacement center was used. I created this paper overlay to use with the Shoot Steel company’s cardboard targets, which I like better than USPSA or IDPA targets for defensive pistol practice. The Shoot Steel cardboard target has a smaller “A-Zone” and more realistic features, including a head area that includes a neck and ears instead of a simple square “head box”.
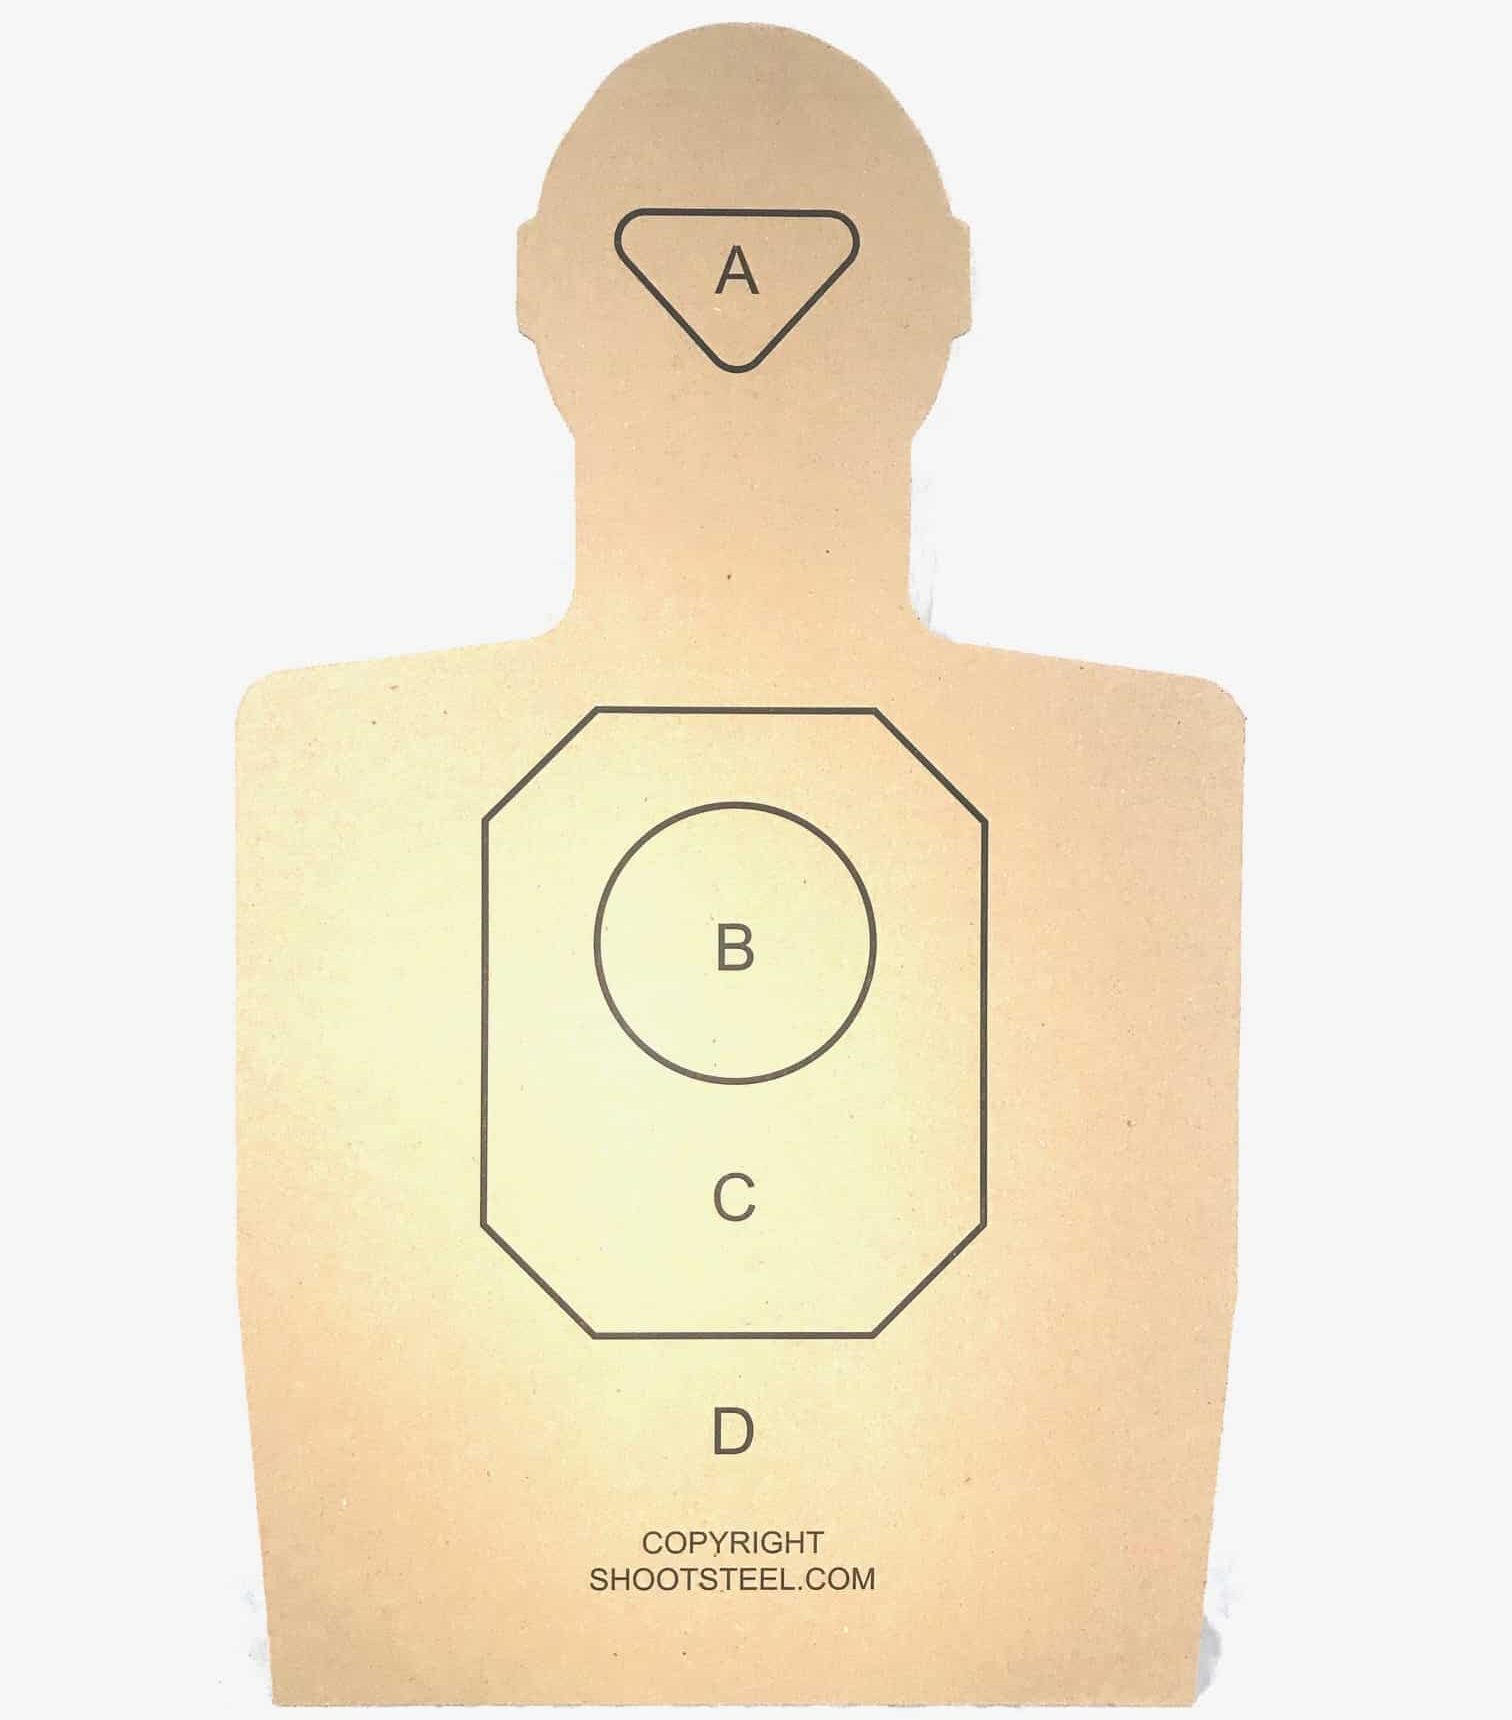
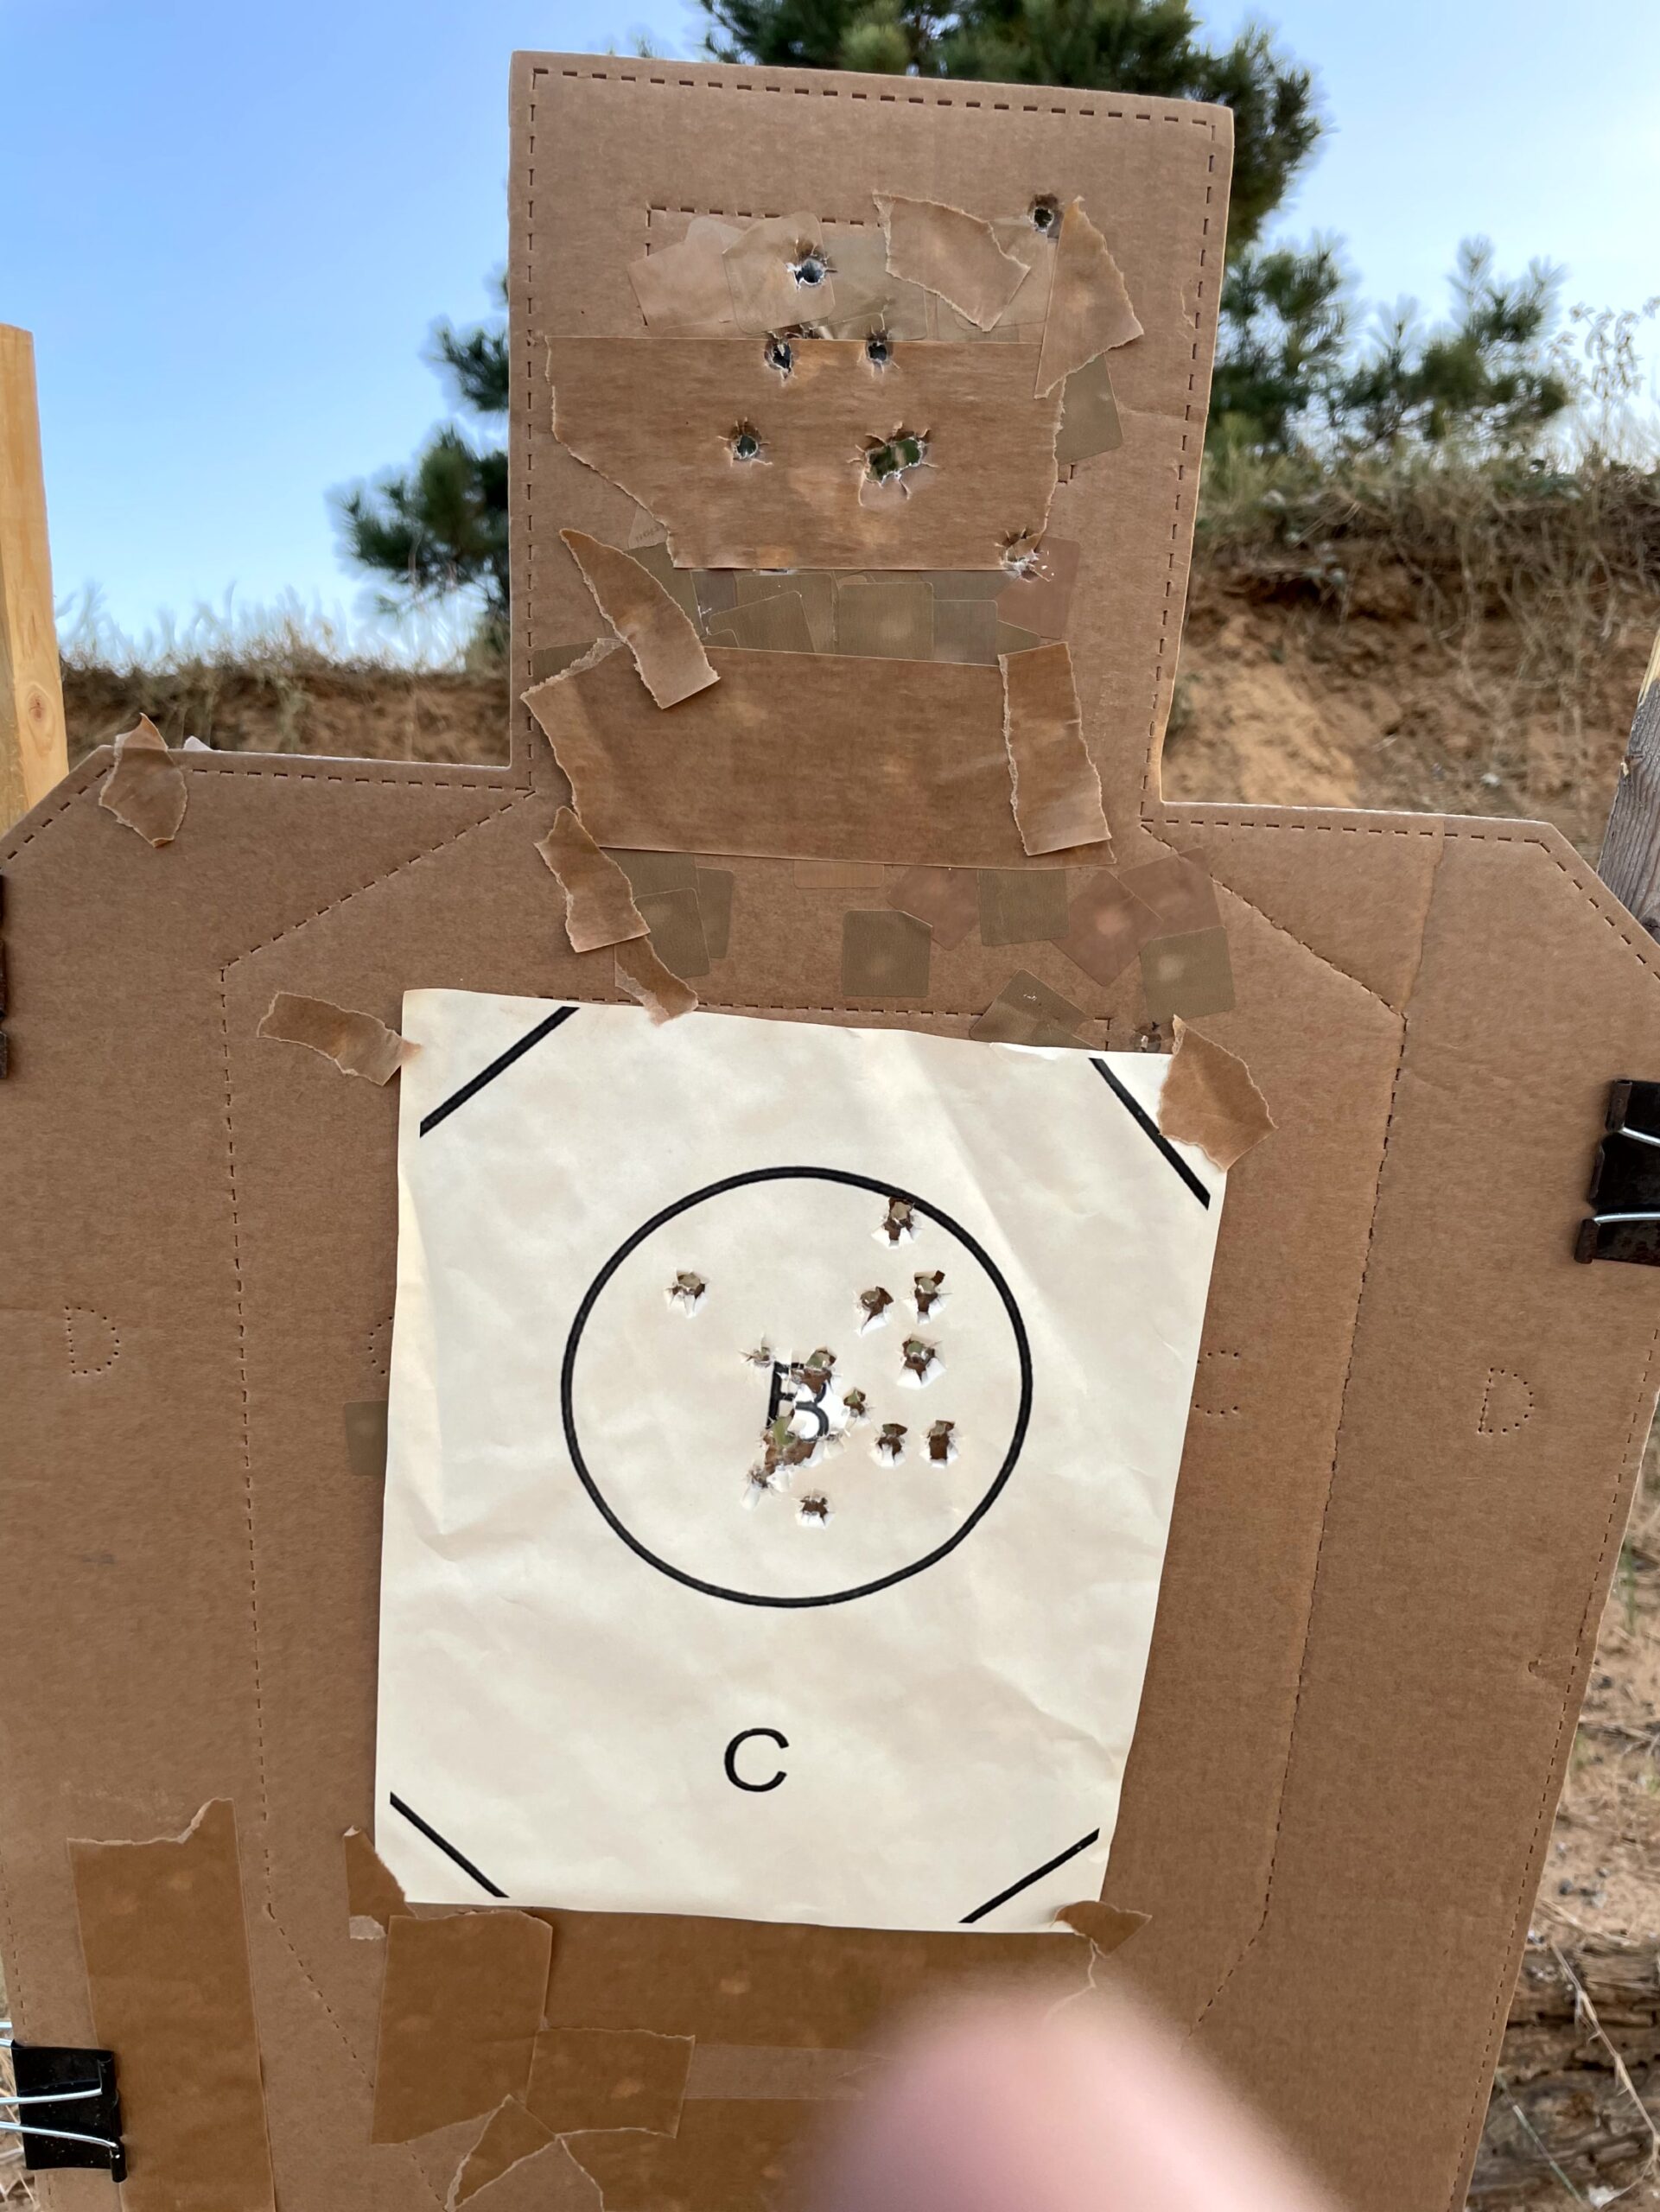
I should have used an actual ShootSteel cardboard target for the videos, but I just grabbed a shot up USPSA target, taped one of my target centers on it, and got to work.
Video #1 shows a progression of drills:
- Retrieve gun, fire 3 rounds high chest (body)
- Retrieve gun, move to cover, fire 2 rounds body, 2 rounds head
- Retrieve gun, move to cover, fire 2 rounds body, retreat behind cover, assess, fire 2 rounds head
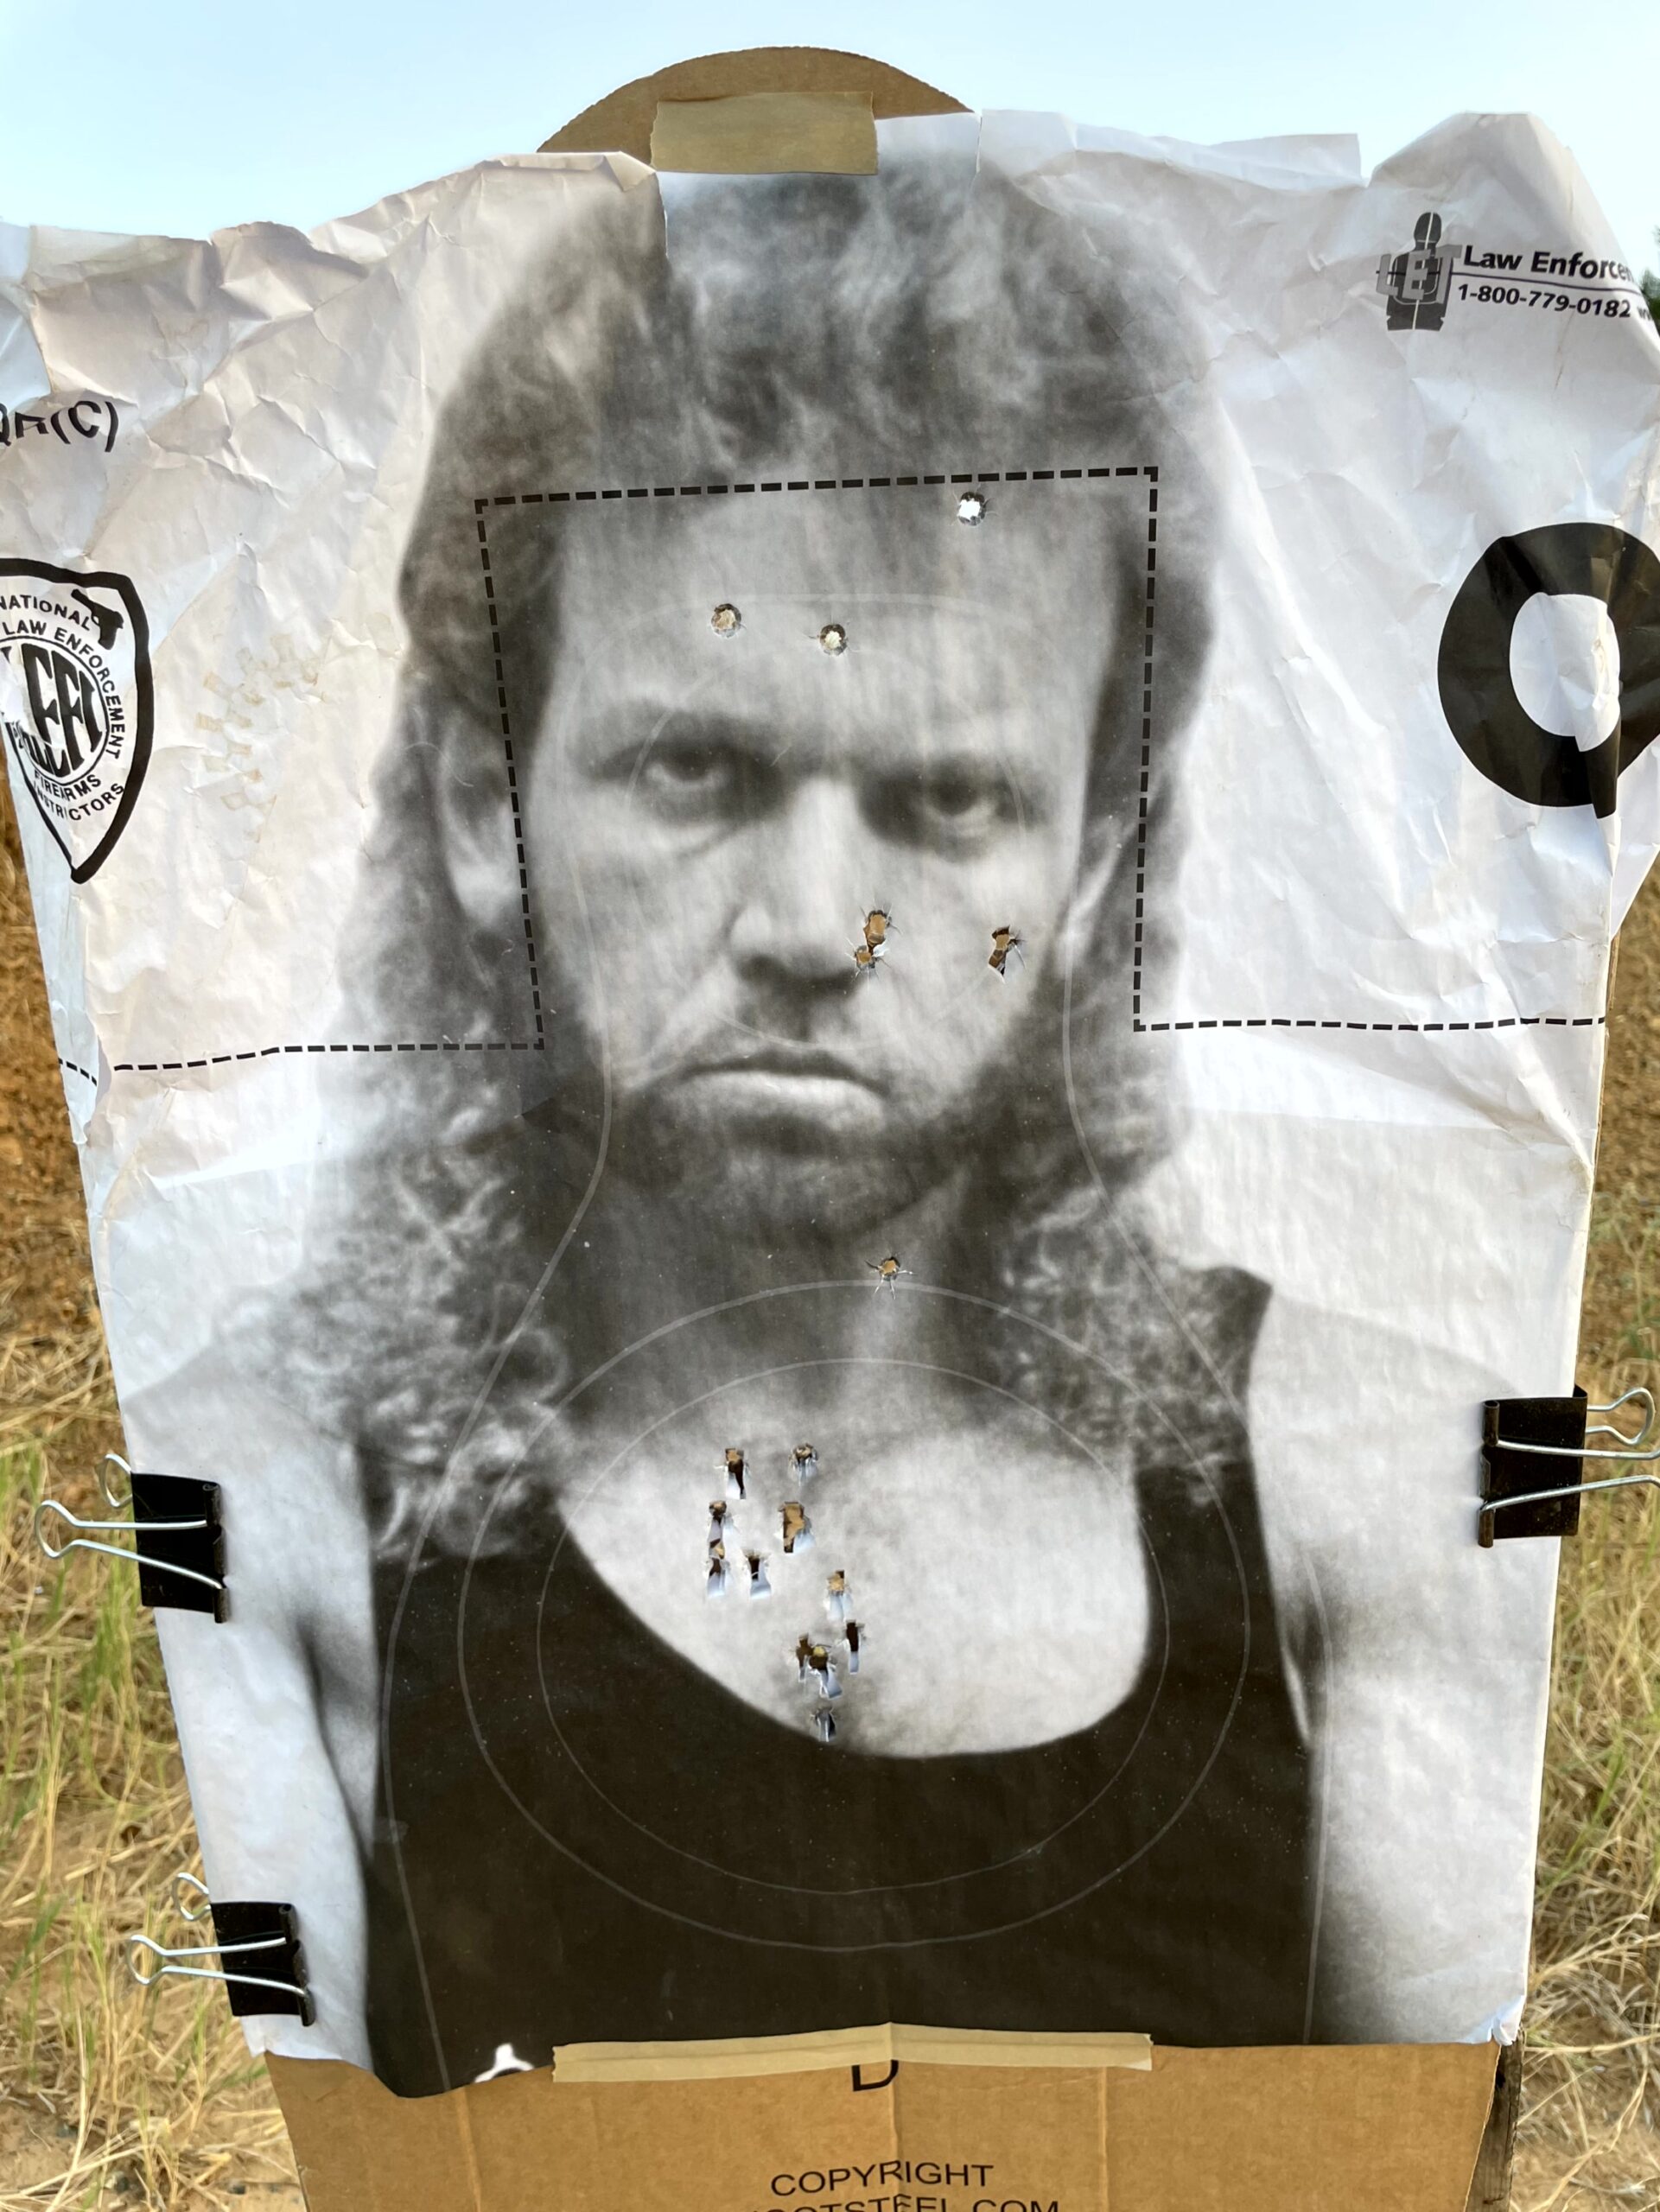
Video #2 uses two targets, one photorealistic, the other a ShootSteel target with a weapon overlay. With that target I also drew “hands up” on the back side, making it a no shoot if flipped around.

- Retrieve gun from box, fire 2 rounds to the body on the close target while moving to cover. From cover, lean out, fire one to the head on the close target. From opposite side of cover, engage the farther target.
- Retrieve gun from box. Point muzzle down while moving to cover to avoid muzzling the no-shoot. From left side of the cover, engage the far threat. Retreat to cover & assess. Re-engage the far threat if necesssary.
- Retrieve gun from box. Avert muzzle while passing no-shoot. From left side of the cover, engage the far threat. Avert muzzle again, step out from cover, shooting around the no-shoot, re-engage the far target.
The idea behind these drills is simulate a family member coming down a hallway toward you, while you are in a safe room or at least near a doorway you can use as concealment or a heavier piece of furniture that might serve as actual cover. You don’t want to point your gun at the family member as you are moving. The final drill simulates the far target moving to put your family member between him and your gun, forcing you to step out from cover to get a clear shot at the far threat. In a perfect world that far threat target would be on a rolling target stand (or indoor range target carrier) moving toward you during that final drill.
In the actual course there are additional drills, run between those in the Part 1 and Part 2 videos, to build the skills necessary for the Part 2 drills. I shot the drills at “student speed”, so those watching the videos could get an idea of what is considered acceptable speed and accuracy.
How I made the videos
I used my iPhone and my LongShot Ranger camera.
The Ranger is intended to be placed downrange near the target when shooting at longer distances (I’ve used it for 25 yard pistol zeroing and rifle training from 25-100 yards). Using its own WiFi server it can send real time video to your phone to eliminate lots of walking back and forth to inspect hits on your target. The app also has a feature where it can record video from both the Ranger and your phone’s camera.

The vertical video was recorded with the Ranger’s camera, and the widescreen was recorded using my iPhone’s camera. I imported that video into Magix’ Vegas software, merged all the takes of many drills together into one file, and then cropped that file twice, to create two separate sync’ed videos I could blend into a single view, with captions and inserted still photos. I think instructional videos should have captions, so that those watching with the sound off can follow the action – and I believe that scripted captions work better for short videos than captions auto-generated from the video soundtrack. I did add a narration track, but due to the video length limitations on Instagram, it has less information than the captions do.
We’ve held a few sessions of the Home Defense Shooting Skills course this year, typically as an afternoon course held immediately after our popular Basic Pistol course. If there’s interest from the students in our upcoming October 2025 basic course, we have room in the schedule to add a session of this course. In 2026 we will offer it or the related Personal Tactics Skills course as follow on courses with all our basic pistol classes.
Pingback: Weekend Knowledge Dump- August 29, 2025 | Active Response Training
Pingback: Weekend Knowledge Dump- August 29, 2025 | tacticalusa.net
Pingback: KR Training August 2025 Newsletter - Notes from KR
Pingback: KR Training October 2025 Newsletter - Notes from KR