In response to the Bruen decision, the state of New Jersey has revised its carry permit program, including the training and qualification requirements. The official document, titled “Use of Force Interim Training for Concealed Carry” includes an outline of the topics to be covered in classroom lecture, and Appendix B has the details of the shooting test.
One writer on a popular gun blog referred to this course of fire as having “John Wick” level standards, which is a cute, clickbaity phrase to use, but is completely inaccurate. The course of fire is “old cop” standards.
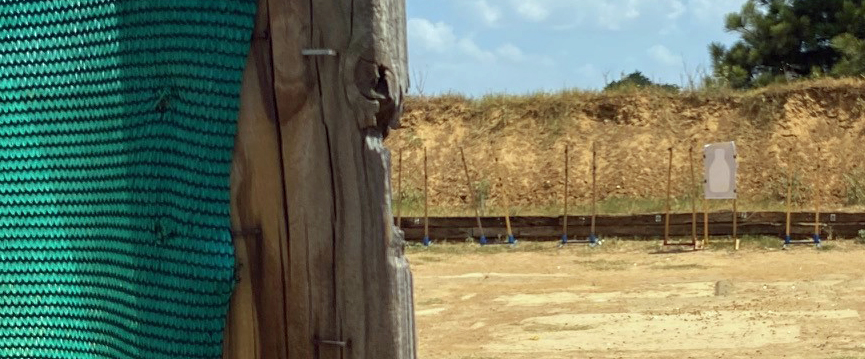
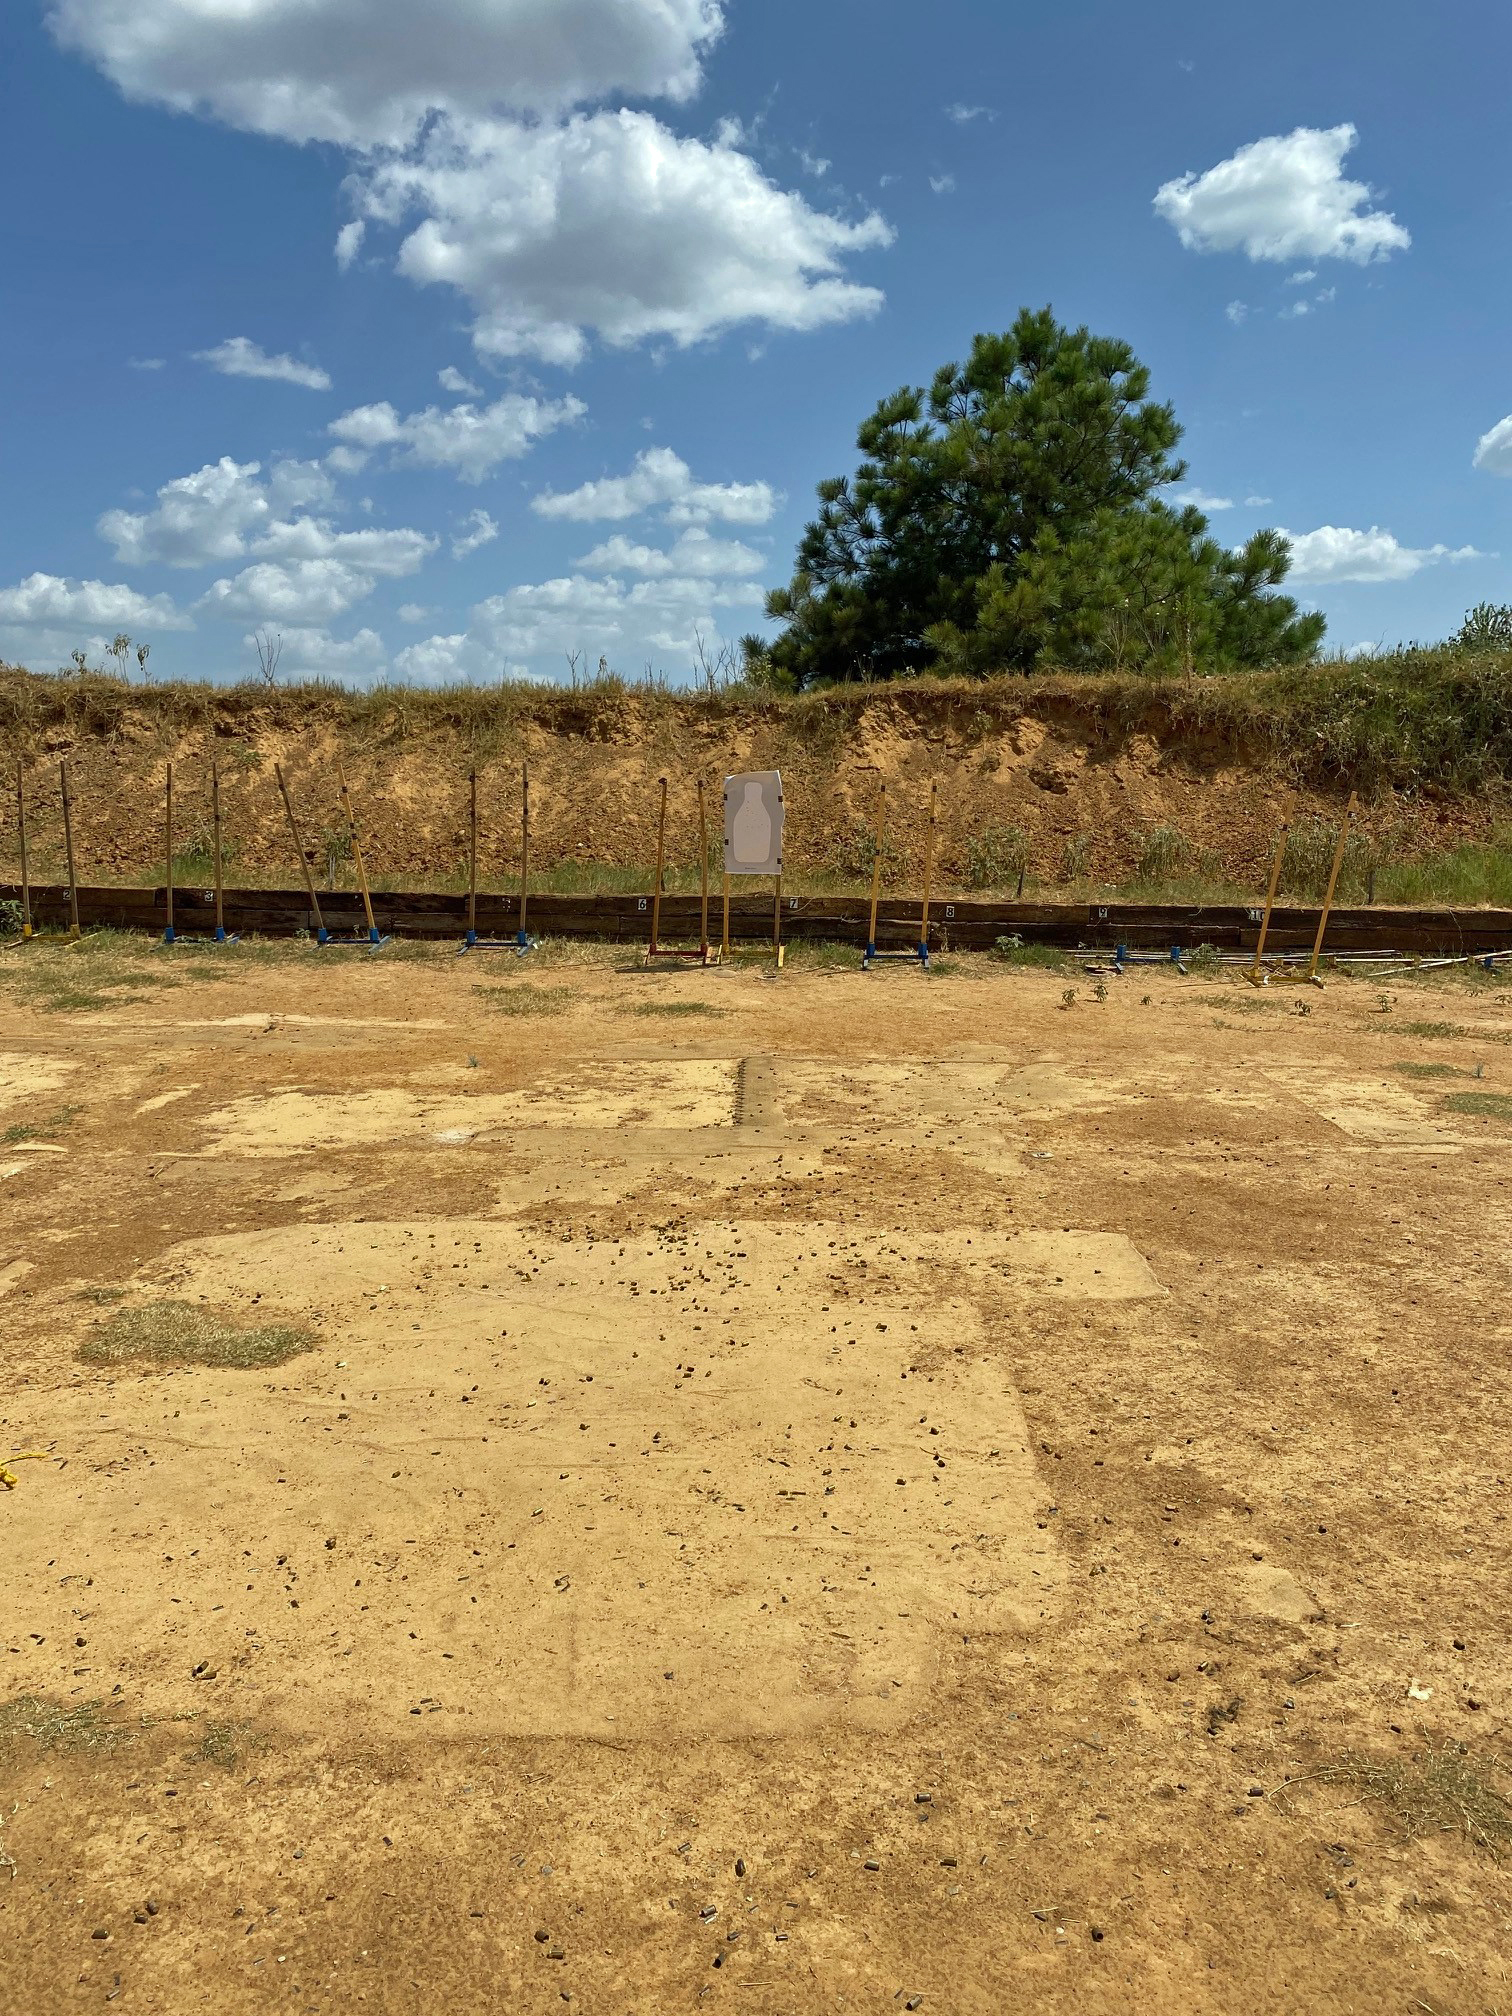
I’m going to set aside the philosophical issues as to whether there should be training or qualification standards at all, and just take a look at the course of fire New Jersey residents will have to pass to get a carry permit under the new regulations. I went out to my range and shot the entire course of fire using the Taurus G3 pistol (with iron sights) that I have been shooting for the past several months. I used a Comp-Tac Q series holster, worn in the appendix position, drawing from concealment, to replicate the gear that a moderately trained applicant might have.
The Q series holster was not optimized for appendix carry. It’s mainly designed for plain IWB, and when I moved it around front, the gun leaned out more than I would like (or would wear in public), which caused my cover garment to snag a few times (as shown in the videos). I did not try to shoot the test at “Grand Master”/Instagram showoff speed. The goal was to shoot at a speed that roughly used up 75% or more of the allowed time for each string.
The test was very obviously lifted from an old police agency qualification, as it assumes shooters will be working from an open carry, likely retention, holster, with easy access to spare magazines. Clearly it was not designed by anyone that was thinking about armed citizens carrying concealed.
The course of fire uses an FBI Q target (I used the old Q with the larger scoring area, not the QIT-99 that cuts off the lower abdominal area. The dimensions of both the old and new Q targets is shown here.

Phase 1: 25 yards
I used a barricade for the 25 yard shooting, which wasn’t specifically required for the 25 yard stages, but the instructions reference staying behind cover, as if it the police qual course this was adapted from required shooting from a barricade. (More likely, it required standing behind a 4×4 post like they do in PPC matches, which simulates, but isn’t really “cover”). References to a ‘secured, holstered’ position imply that shooters are using open carry duty holsters with retention. My interpretation is that ‘secured’ also means concealed.
The instructions include direction to de-cock between strings, which is only relevant for those shooting DA/SA style hammer fired pistols.
- On command, from a secured holstered position, assume the strong-side kneeling or standing position, fire 4 rounds. (30 seconds)
—STOP TIME— - Decock and remain behind cover with visual focus towards the threat area.
- Reload if needed (revolvers will reload and index the cylinder)
- On command assume a kneeling or standing position and fire 3 rounds. (25 seconds)
—STOP TIME— - Decock and remain behind cover with visual focus towards the threat area. Reload if necessary
- On command fire 3 rounds, standing or kneeling (25 seconds)
—STOP TIME— - Reload if required and holster an uncocked weapon.
- Reload loading devices.
Phase 2: 15 yards
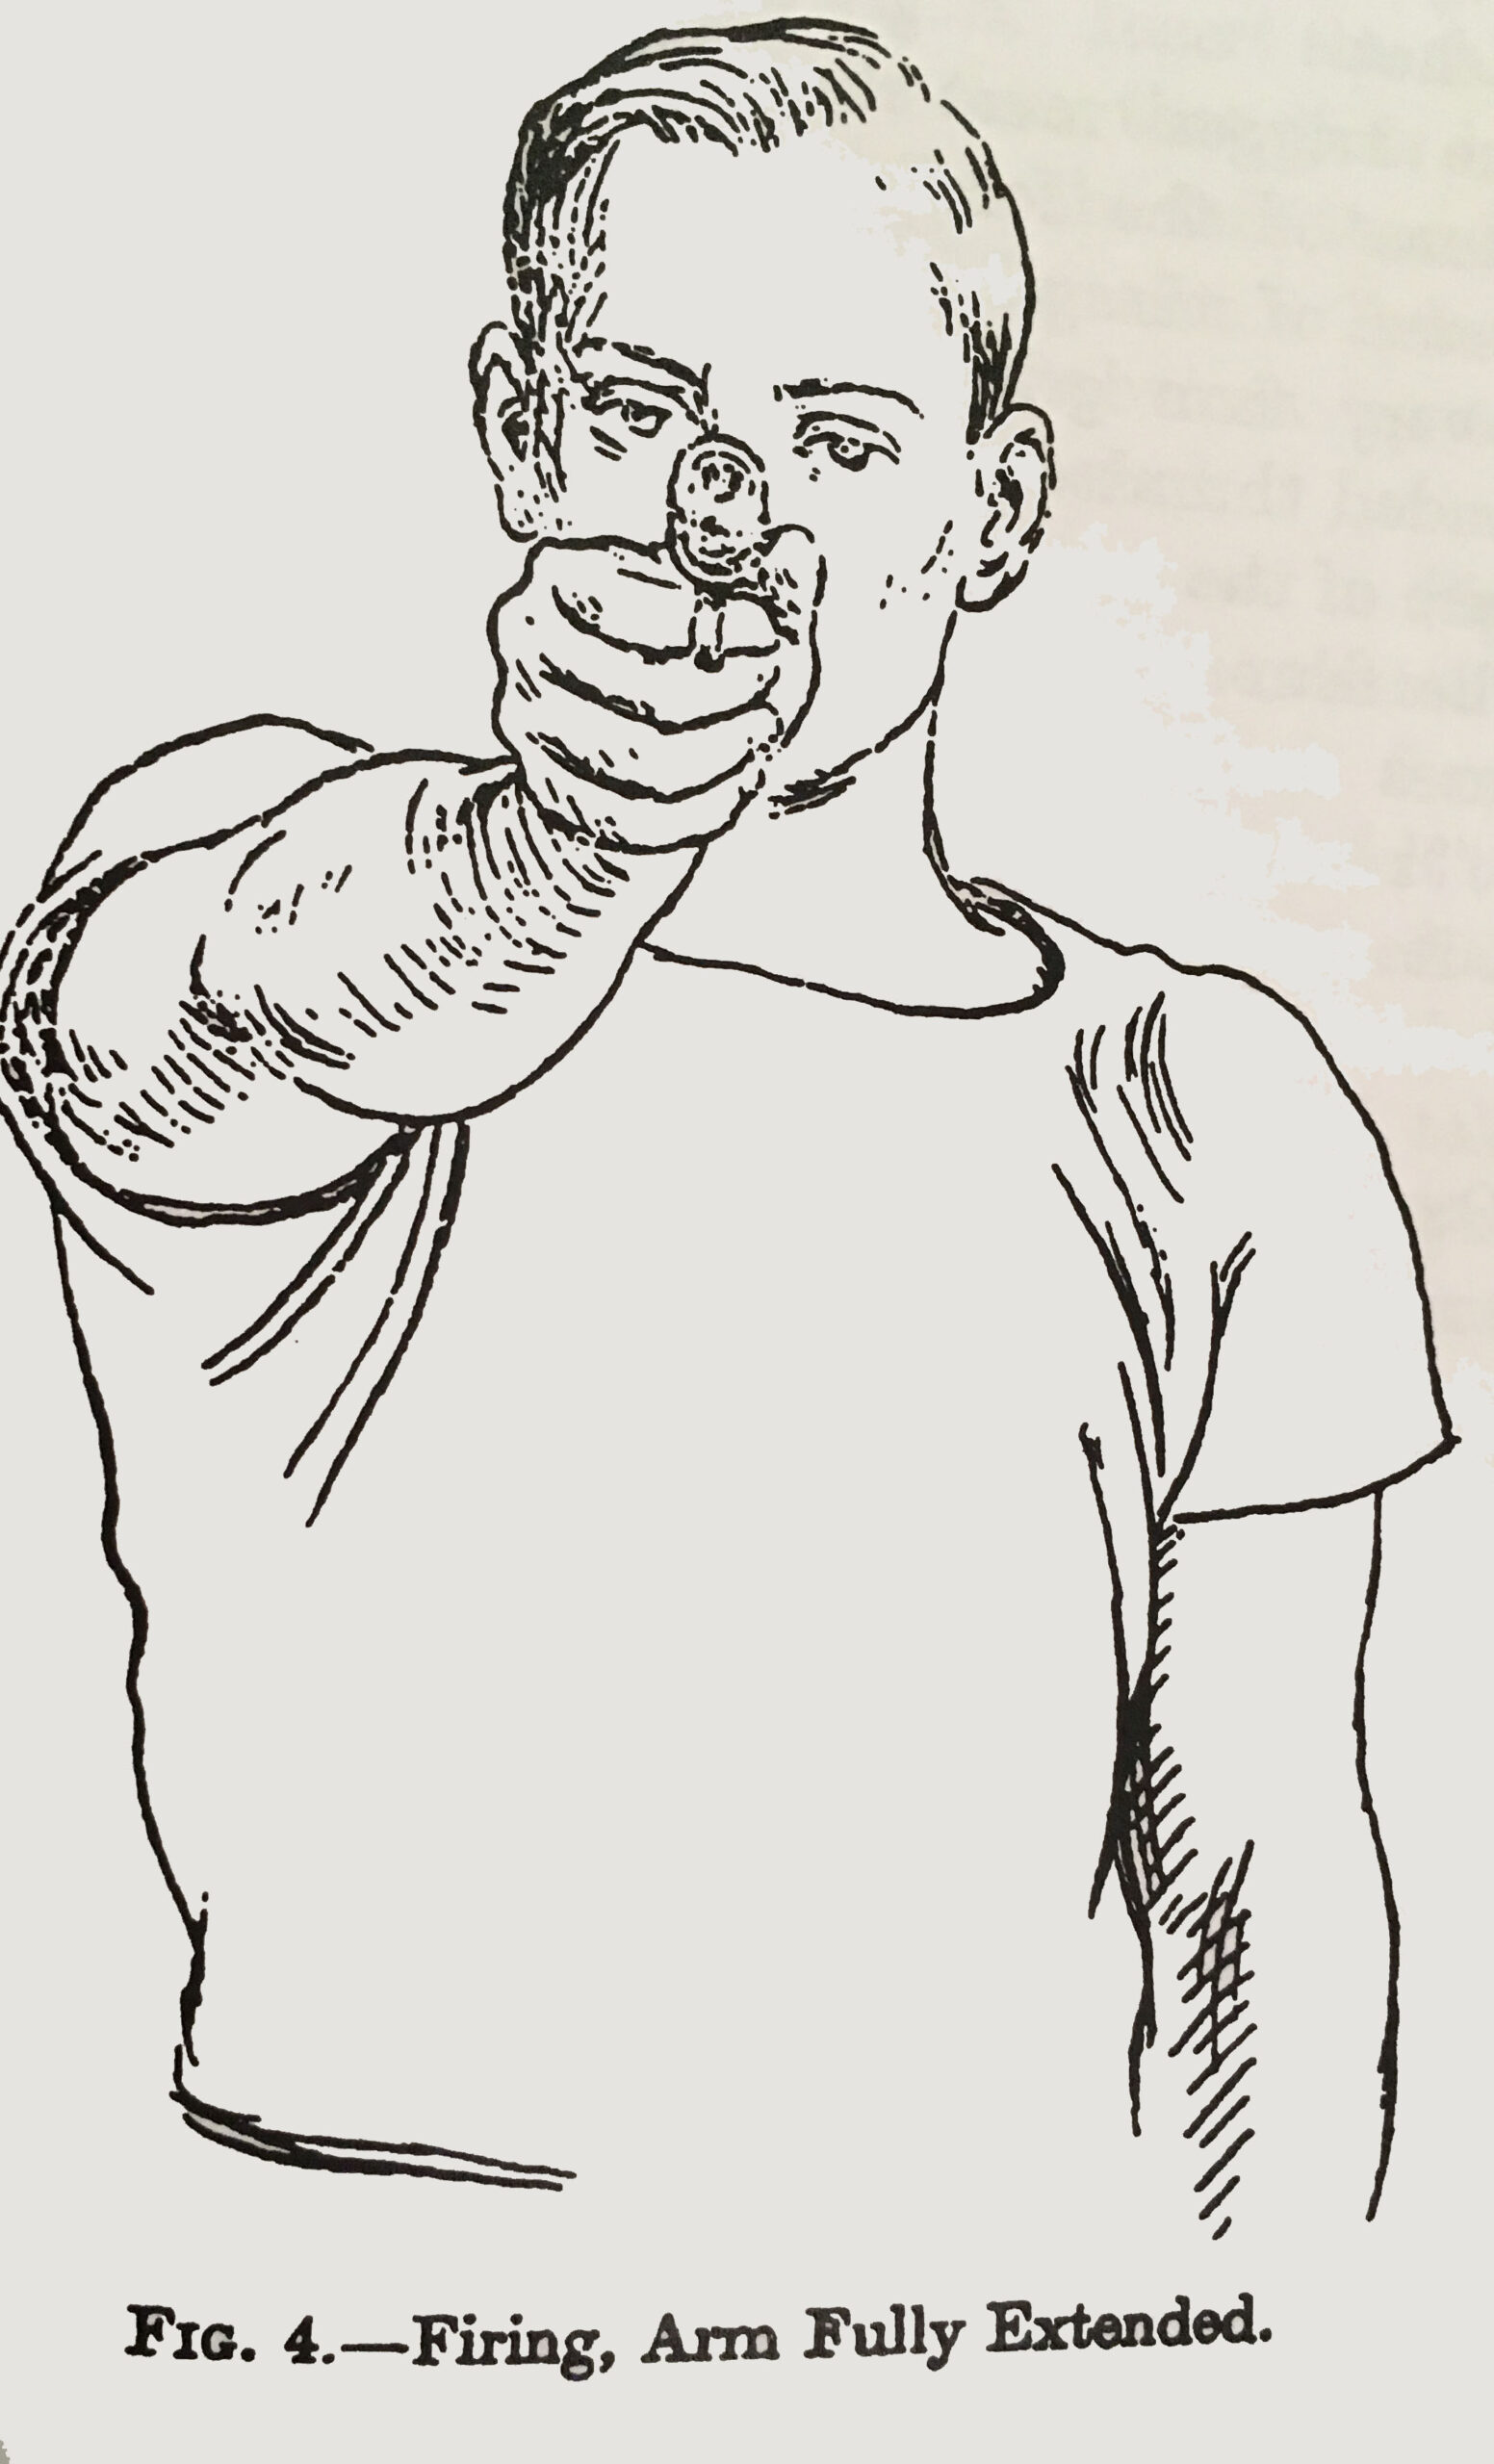
For this section, the term “point shoulder position” was used, which used to refer extending the gun at arm’s length but not looking at the sights, back when Col. Applegate wrote about it in the 1940’s. I am assuming that what is intended is two handed aimed fire.
- On command, from a secured holster position, draw and fire 3 rounds in 5 seconds from a point shoulder position.
—STOP TIME— - Reholster an uncocked weapon.
This string requires faster shooting than the current FBI agent qual, which gives 6 seconds to draw and fire 3 rounds at 15 yards. In my opinion, the time allotted for this string is too short, relative to the difficulty of the other strings.
Phase 3 (15 yards)
15-Yard Line. Time: 25 seconds. 7 rounds.
- On command, from a secured holster position, draw and fire 3 rounds from a point shoulder position.
- Assume a strong-side kneeling position. Reload with 4 rounds, index if required, and fire 4 rounds from a strong-side kneeling position.
—STOP TIME— - Reload if required and holster an uncocked weapon.
- Reload loading devices.
Again using the FBI agent qualification course for comparison, 3 rounds, starting from the holster, should take 6 seconds, and 4 rounds from kneeling (at the 2 seconds per round pace), would take 8 seconds. That leaves 11 seconds to do a reload: an eternity for even the most unskilled semiauto shooter, but possibly difficult for someone trying to qualify using a 5 round snub revolver. (Back in the 1940’s, when FBI agents were reloading their wheelguns from loose rounds, a 20 second reload time was standard.)
The par time for this course was definitely influenced by the slower reloading time for modern revolvers, likely with speedloaders. Should a timed reload be part of an armed citizen qualification course? John Correia of Active Self Protection’s study of over 45,000 gunfights indicates that reloading during a fight is extremely rare, and very few other state carry permit tests include this skill.
My opinion is that this string could be split in the way that the current FBI qual is split, into two separately timed strings, one shot from the holster, and the other shot from the ready, with the kneeling requirement removed. Getting into and out of kneeling with gun in hand, or while drawing, is a more advanced skill – and many indoor ranges don’t allow this type of practice. Requiring the skill at all, and requiring it on the clock, could pose all kinds of difficulties for shooters with physical limitations and those with no experience practicing that skill. Untrained gun owners are likely to have finger on trigger and compromised muzzle direction, particularly if they struggle to get up and down.
Phase 4 (10 yards)
10-Yard Line. Ready Position.
Each drill, Time: 3 seconds. 2 rounds.
(Total 6 rounds).
- On command, draw weapon and assume a ready position, i.e., muzzle depressed below eye level.
- On command, bring weapon up to eye level and fire 2 rounds in 3 seconds. Repeat drill twice, firing a total of 6 rounds.
—STOP TIME— - Reload if required and holster an uncocked weapon.
- Reload loading devices.
I shoot this drill at the end of the second embedded video (above).
It requires a 1 sec to target from ready presentation, and 1 shot per second for each shot.
This is roughly in line with FBI agent qual standards. At 15 yards they require 3 rounds in 5 seconds, and at 7 yards it’s 5 rounds in 4 seconds, each starting from ready. Assuming a 1 second ready to target time, that’s 3 rounds in 4 seconds at 15 yards (1.33 per shot), and 5 rounds in 3 seconds at 7 yards (0.6 per shot), so requiring 1 second per shot at 10 yards is consistent with the standards used elsewhere in this course of fire.
Phase 5 (7 yards)
The third video (below) shows all the remaining strings.
7-Yard Line. Time: 4 seconds. 3 rounds.
Standing point shoulder position.
- On command, from a secured holster position draw and fire 3 rounds in 4 seconds from a standing point shoulder position.
—STOP TIME— - Reholster an uncocked weapon.
Three rounds in 4 seconds assumes a 2 second draw and 0.67 seconds per shot, or (more realistically), a 2.5 second draw and 0.5 hurried seconds per shot.
For a police officer with 40+ hours of training on the range working on their draw from an open carry retention holster, this string should not be difficult. For an armed citizen with no formal training in drawing from concealment, likely limited to practicing at indoor ranges that restrict firing to 1 shot per second or slower, this string will be difficult. Those new to gun carrying often start out with suboptimal holsters, cover garments, carry positions and poor (non existent) technique, leading to a variety of shooting errors and late or bad hits. Instructors teaching New Jersey permit applicants will likely have to spent a lot of time teaching all the components needed to perform well on this string.
Phase 6 (7 yards)
7-Yard Line. Time: 15 seconds. 6 rounds.
Standing point shoulder position. Mandatory reload/magazine change
- On command, from a secured holster position, draw and fire 3 rounds from a standing point shoulder position.
- Reload and fire 3 more rounds within the 15 second time period.
—STOP TIME— - Reholster an uncocked weapon.
Assuming the first 3 rounds are fired in the first 4 seconds (same pace as the previous string), shooters will have 11 seconds to reload and fire 3 more rounds. What that really means is shooters will have 7-8 seconds to do the reload – certainly do-able by an untrained semiauto shooter, but perhaps a challenge for anyone using a revolver without speedloaders and lots of practice in that skill.
Again there’s a strong argument against the need to have reloads “on the clock” in any armed citizen qualification test. Doing the reload off the clock and resuming as a second string starting from the ready would be more appropriate for carry permit level shooters.
Phase 7 (7 yards)
7-Yard Line. Time: 4 seconds. 3 rounds.
Standing point shoulder position.
- On command, from a secured holster position, draw and fire 3 rounds in 4 seconds from a standing point shoulder position.
—STOP TIME— - Reload if required and holster an uncocked weapon.
- Reload loading devices.
This just repeats Phase 5.
Phase 8 (5 yards)
5-Yard Line. One-handed – Strong hand.
Each drill, Time: 4 seconds. 2 rounds.
(Total 4 rounds).
- On command, draw and fire 2 rounds using only the strong hand.
- Reholster an uncocked weapon
- Repeat once.
- Reload if required and holster an uncocked weapon.
One handed drawing from open carry is not significantly more difficult than two handed drawing, but one handed drawing from concealment, particularly for those using closed front garments, is harder and slower. The typical carry permit level shooter will likely have never practiced that skill, and even with practice, is going to have a much slower draw. Having carry permit applicants, who won’t be carrying in open carry retention holsters, test the skill of one handed open carry drawing during the test is unnecessary and potentially dangerous, as a fouled, rushed draw could lead to negligent discharge and injury. If one handed, dominant hand shooting is to be tested (and analysis of actual incidents indicates that strong hand only shooting is a relevant skill a reasonably trained armed citizen should have), starting from the ready, allowing any drawing to be done off the clock using two hands, would be safer.
Phase 9 (5 yards)
5-Yard Line. One-handed – Support hand.
Each drill, Time: 3 seconds. 2 rounds. (Total 4 rounds).
- On command, draw and transfer the weapon to the support hand. Assume a ready position.
- On command fire 2 rounds using only the support hand. Return to ready (The strong arm should be limp along the body).
- Repeat once.
- Reload if required and holster an uncocked weapon
The “need” to test support hand (“weak hand”) only shooting is a holdover from law enforcement qualification courses. One handed support hand shooting, in actual incidents, appears to be even rarer than reloads. Testing this skill at all really should be considered an advanced skill and isn’t necessary for a state level carry permit qualification.
Phase 10 (1 yard line)
1-Yard Line (or as close to 1-yard line as safety dictates).
Weapon Retention Position. (Begin with the support hand across the chest with the hand grasping the collar of the shooter’s shirt.)
Each drill, Time: 2 seconds. 2 rounds. (Total 4 rounds).
- On command, draw and fire 2 rounds in 2 seconds from the weapon retention position.
- Reholster an uncocked weapon.
- Repeat drill once, firing a total of 4 rounds.
- Clear all weapons. Holster a safe, empty weapon.
If shooters are required to work from concealment, this string once again mandates a one handed draw, which adds many safety concerns. While learning how to shoot from retention is very relevant to armed citizen defensive pistol skills, in my opinion the risks of trying to test that skill, under tight time pressure, are high. Most ranges do not allow this type of practice, making it difficult for permit applicants to learn those skills, and unless New Jersey provides instructors training in how to teach those skills safely and properly, this string should be modified to take the draw off the clock, or just remove it entirely.
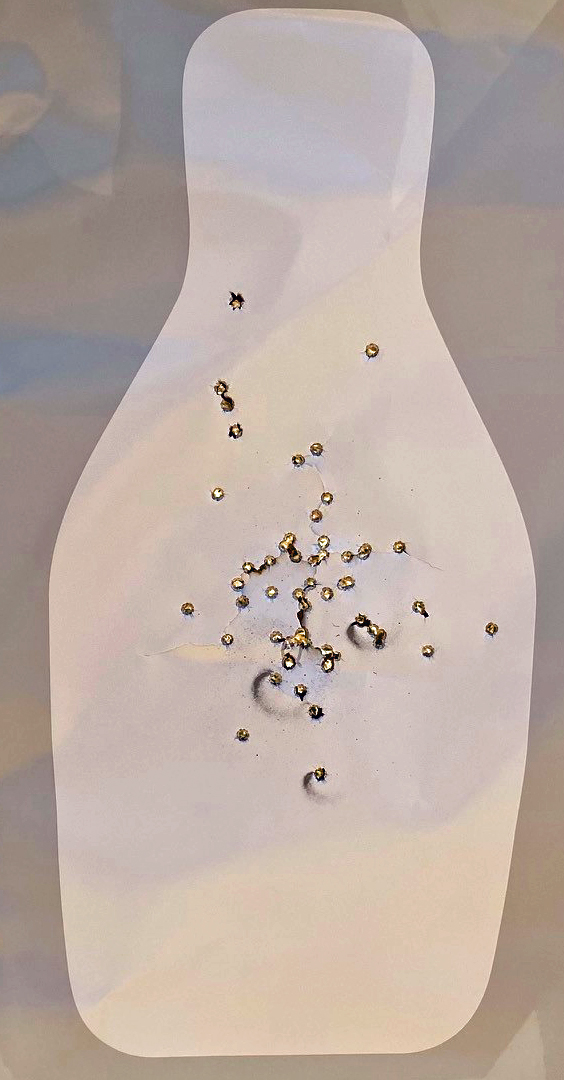
My target

100% hits, using the Taurus G3. Even if I replaced the older Q target with the QIT-99, I would still have 100% hits. 80% is required for passing, copying the standards for the FBI test, which appears to have been a big influence on the design of this course of fire. Most other courses of fire I’ve studied have used 70% as passing.
Is this Course of Fire Too Hard?
If you compare the relative difficulty of this shooting test to what is used in many states, yes. Very few states require drawing from a holster as part of the test, and many state level carry permit instructors, who have only trained to the NRA Basic Pistol or USCCA entry level standard, aren’t certified to teach that skill. It would take an instructor trained to law enforcement academy instructor level, or NRA CCW, NRA Personal Protection Outside the Home, Rangemaster instructor, or similar level, to have the certifications and experience necessary to even teach all the skills required to complete the test.
I’m a big advocate for higher voluntary standards. People serious about being well prepared to defend themselves should aspire to performance levels far beyond most states’ meager requirements. Teachers and church defenders should be much better at shooting at distances beyond 10 yards than a typical armed citizen, because their “typical” situation may require that skill. This course of fire may be a reasonable minimum for on duty law enforcement officers. It’s likely very similar to, or the same as, New Jersey state on duty police qualification standards. But it’s not a practical standard for the skills an armed citizen needs. Worse, the standards impose a burden on applicants to put in the effort necessary to attend the training and put in the practice necessary to meet them. This burden is highest on law abiding but low income citizens that may not have any of the resources needed (time, money, access to ranges & training).
I’m sure this course of fire met its political objective, which was to create the appearance that New Jersey was meeting the Bruen standard, but also make it as difficult as possible for anyone to meet the new state standards.
We’ve shared our thoughts on what a realistic set of standards for minimum competency are in the past, and in depth, in our book Strategies and Standards for Defensive Pistol. John Daub discusses that idea with Lee Weems in this podcast episode:
Go shoot the test
I encourage readers to go shoot the New Jersey qual course yourself and share your results with me. If you have friends, family, co-workers at the carry permit but not training-junkie/competition shooter/serious shooter level, run them through it next time you are at the range with them. It would be interesting to see how many could pass it.
Pingback: KR Training July 2023 newsletter
Pingback: The New and Improved New Jersey Carry Permit Shooting Test (2023) – Notes from KR
Pingback: Rangemaster Tactical Conference 2026 AAR - Notes from KR