The SIG Pistol Mounted Optics instructor class Sean and I attended was held at Gunsite. Gunsite is the root of the tree for defensive pistol training: where the modern era began. The Col. Cooper era, often called “Orange Gunsite” by its students, had basically ended before I had the money and free time and interest to make the trip to attend a class. During the 1990’s Gunsite was in decline and Clint Smith was teaching at Thunder Ranch in Texas, so Penny and I ended up taking a class there instead of Gunsite. In the 2000’s under new ownership Gunsite made a comeback and is once again one of the best schools in the country. As KR Training grew I was able to do most of my training by hosting traveling instructors rather than going to other facilities, so going to Gunsite – something that has been on my bucket list for a long time – just never seemed to happen, until June 2020.
Thanks to Randy W, a KR Training student and longtime Gunsite student, Sean and I got a tour of the Gunsite facilities from Ken Campbell, Gunsite CEO. That included seeing several of the shoothouses and many of the different live fire ranges.
Karl and Gunsite CEO Ken Campbell
On the advice of KR Training assistant instructor Justin G, who had trained at Gunsite in the past, we stayed at Mark Brougher’s C-Bar bed and breakfast. Mark shares my passion for the Old West. He’s written multiple books (available in e-format from Amazon) and I was able to pick up a signed copy of book #1 from him during our visit. Two of the books have been made into independent films also available for streaming online.
Episode 2, in Mark’s opinion, is a better movie.
During our visit to the C-Bar I ended up watching both movies in our down time. Here are some pics from the C-Bar.
Many of the structures at the C-Bar were rescued from a “ghost town” and relocated and renovated. If you ever travel to Gunsite to train, the C-Bar is a great place to stay. Two bedrooms, could sleep 4 comfortably, slept 2 very comfortably. 10-15 minutes from Gunsite’s front gate. Quiet, gun friendly.
We also found time to stop at the Phippen Museum in Prescott, AZ, which had current southwestern art as well as classic western art and historical artifacts. One of the docents gave us a personal tour with commentary, on a slow Saturday morning visit.
Very cool 1930’s grand piano with leather trim
We also made a Friday night visit to downtown Prescott to dine at the famous Palace, where they claim Wyatt Earp and others gathered before traveling to Tombstone for the OK Corral gunfight. They serve drinks made Old Overton, Wyatt Earp’s favorite whiskey.
Friday in downtown Prescott during the summers they have live music on the courthouse square, and we got to enjoy a good local band, with a decent crowd of locals spending a nice summer evening outside.
If you are looking for a fun shooting vacation, Gunsite and the Prescott area have a lot to offer. If I had it to do over again I would have stayed an extra couple of days, done some hiking and other outdoor activities, and had at least one day just hanging out at the C-Bar relaxing after class.
On June 18-19, 2020, KR Training instructor Sean Hoffman and I attended a session of the SIG Academy’s Pistol Mounted Optics Instructor course. The class was a mix of private sector and law enforcement trainers. It was held at the famous Gunsite facility in Paulden, Arizona. I picked this particular session of the class to attend because it was a “double word score” on my training bucket list: visiting Gunsite and taking a class from the SIG Academy. Sean had attended red dot instructor certification courses from Modern Samurai Project, Centrifuge and Sage Dynamics in the past, so this course finished off his list of ‘red dot’ specific instructor classes.
I started shooting red dot sights on pistols in the early 1990’s, when they were mounted to the pistol’s frame. Here’s some pics of one of the Open division guns I shot during that period. And I came back to slide mounted red dots a few years ago when I ran an M&P Core with Trijicon RMR for a summer’s worth of weekly USPSA matches working my way up to Grand Master in that division. So I felt like I understood how to run a red dot (and had not been motivated to take a class from any of the red dot class specialist trainers), but the SIG class, mainly being oriented to instructors teaching transition classes for cops, interested me. I wanted to see the material they were using to bring moderately skilled shooters (average officers) up the learning curve.
Several years ago we did a 120 shooter study that essentially measured that learning curve for shooters of a wide variety of levels. What we found was that the lower the skill level of the shooter, the more difficulty they had finding the red dot under time pressure. Many red dot advocates complained that our results were not valid because we didn’t first provide all 120 people a 16 hour course so they could get familiar with the dot before being tested. We were more interested in how the typical shooter – the 99% that don’t seek out training unless the state forces them to – would or could do using the dot in a realistic drill.
By far the most common problem was bringing the gun up to eye level, seeing the target through the window, and not seeing the dot. Worse, having no visual information available to identify what to do to find the dot, usually resorting to wiggling their head and the gun around until they either ran out of time or found the dot or (most often) fired with no dot missing the target entirely.
A large chunk of the SIG curriculum addressed that issue, both in how to improve shooter index using a mix of new and old “point shooting” techniques (some going back to Fairbairn, others from Jim Cirillo’s book, and some specific to red dot sights). It provided instructors answers to the “‘what if” questions critics and skeptics of red dot sight have: what happens when you can’t find the dot? what happens when the dot’s lens is occluded?
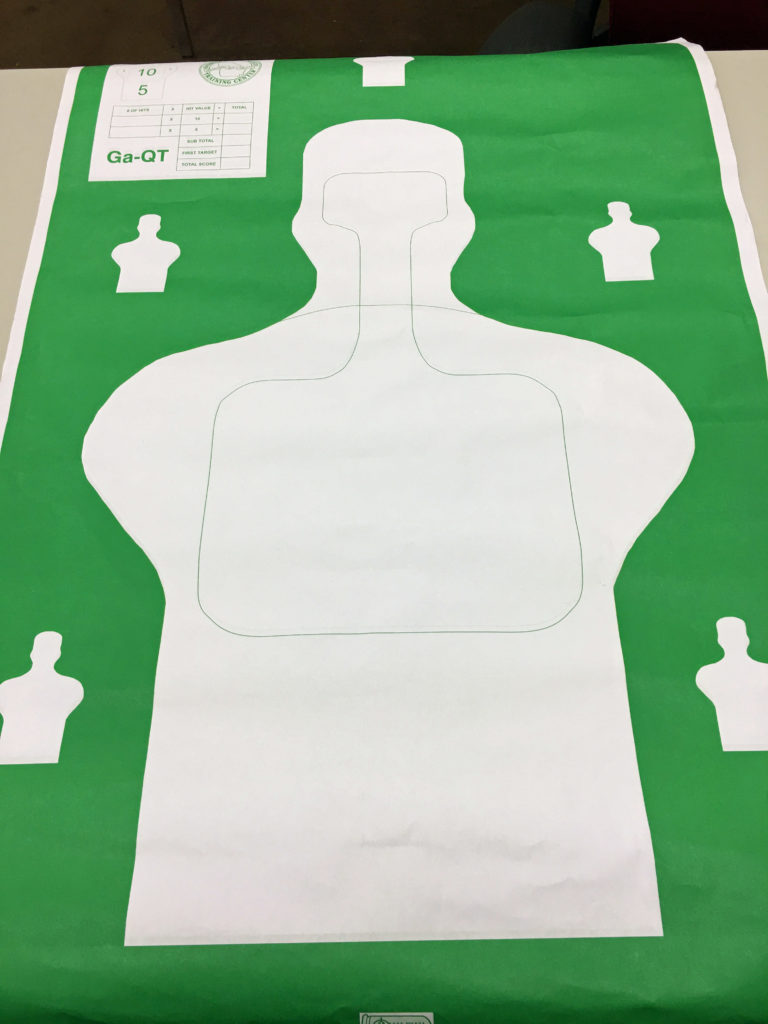
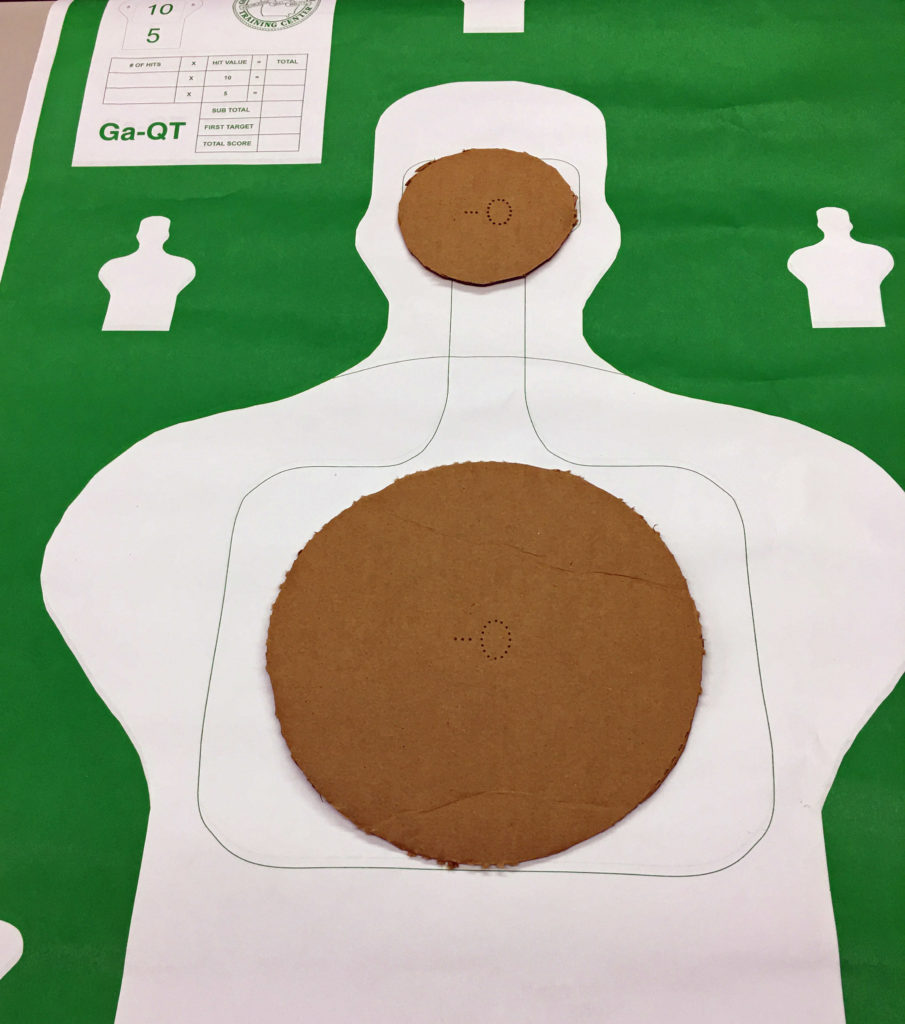
These were our targets after a block of “no dot” drills shot from 3-7 yards, using the shell of the red dot sight, the back of the slide, and other very coarse alignment techniques for aiming.
Zeroing
The section on zeroing was very complete, including ballistic charts for 115, 124 and 147 gr 9mm loads, and discussion of how much class time can be wasted trying to zero pistols at 25 yards. They correctly observed all of these things: many shooters do not understand how to shoot from benchrest correctly, many shooters have never shot slow fire groups, and marching back and forth from the 25 yard line to the targets multiple times, as shooters fire slow fire groups and make sight adjustments, can be a very time consuming process.
They recommended doing the zeroing at 15 yards, and did a great job of demonstrating how to use an ammo can and Frank Proctor’s small sand bags for zeroing.
On day one I shot Sean’s Glock 48 with milled Holosun 507C, from concealment.
On day 2 I used one of the class loaner guns, a SIG 320 with Romeo 1 dot, to get some trigger time in with both the pistol and the optic.
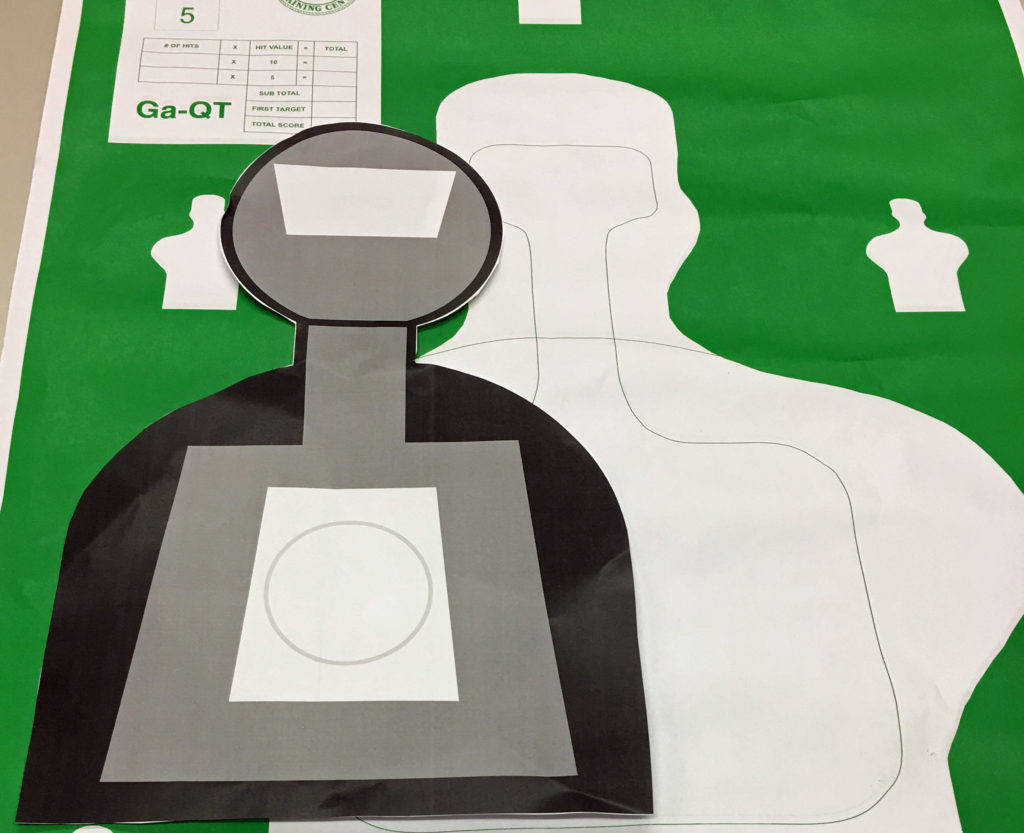
The first thing we did on day 2 was shoot their 6 string standards course, cold, for score. Everyone else on the line was using the same gear they had used for 500 rounds of work the day prior. I did a few practice dry draws but didn’t get to do any live fire with the 320 before the test. Here are the 6 strings of the test, all shot on the SIG target, which has the same 8″ torso circle and 4″ head circle as the IDPA target. All strings are shot at 5 yards. The student notes say “5 yards between targets” for the two target drill, but that seems wrong and should probably be 5 feet which is about two lanes on a standard firing line. Shots outside the 8″ circle are considered misses. (I like this approach as it aligns with our concept of scoring hits as either acceptable or unacceptable.)
One shot from low ready, 1.25 seconds or less
Starting holstered, draw and fire one shot with two hands (open carry), 2.00 seconds or less
Starting holstered, draw strong hand only, fire one shot, transfer to support hand and fire one shot. 4.00 seconds or less
Starting holstered with only 2 rounds in the gun (1+1), draw and fire two rounds, emergency reload, fire two rounds. 5.25 seconds or less. (This assumes a 2.5 second slide lock reload. Most on the line had reload times of 3.00-3.50 seconds, and many were using the overhand rack method, rather than the slide lock lever, to run the slide. That’s slower. I could not reach the slide lever with my shooting hand thumb and used my support hand thumb to release the slide, which was faster than the overhand rack method.)
With exactly 6 rounds in the gun (5+1), draw and fire 6 rounds, emergency reload and fire one additional round. 6.25 seconds or less.
With at least 8 rounds in the gun, engage two targets as follows, one round each: body T1, body T2, head T1, head T2, body T1, body T2, head T1, head T2. 7.5 seconds or less.
My cold scores with the 320
I passed 5 of the 6 quals, only falling short on the first string involving a reload. That was because I tried to use my shooting hand thumb on the slide release, which didn’t work, and I had to immediately do the overhand rack to finish the drill, and only missed the par by less than 0.5 seconds in spite of that. (In my feedback to them after the course, I commented that reload speed has little/nothing to do with ability to shoot a red dot. The inclusion of two slide lock reloads in the standards, given John Correia’s observation from watching tens of thousands of incidents that reload speed really isn’t that critical a skill, is at least one too many. Sean shot the test from concealment, and was told later by the instructors that the par times were set for open carry. He shot the end-of-day test from open carry and was able to make the reload times.)
One of the students, Jim from ProForce LEO supply had donated a NightStick weapon mounted light as a prize to the top shooter in the day 2 morning “cold” test…which I won. Here’s the light mounted on my CoolFire M&P. My plan is to use the light for low light scenarios and dryfire work and class demos.
Day 2 was fewer rounds fired (about 250), with more complex drills requiring shooting on the move and more transitions, giving students an opportunity to work at finding the dot doing more than standing in one spot. In talking with students that attended a previous session of the course taught at the SIG Academy home facility, I learned that the version of the course they took also included shooting from cover, kneeling and prone. Our course, run in the summer heat at Gunsite, left the students fairly bronzed and baked in full 8 hour days on the range. Omitting the prone and barricade work was OK with us, as the work we did verifying that the sight has no parallax even when the dot is in the corners of the window confirmed to us that as long as we could put the dot on the spot we wanted to hit – even if the dot was not centered in the window – the hits would be on target.
In the end, everyone in the course performed well on the final run through their 6-string standard course. I passed all 6 and was top shooter in the class. Sean tied with several others with 5 of 6 passed for the #2 slot.
Happy graduates and the SIG instructors
The course met its goal of teaching pistol instructors what they needed to know to coach competent shooters familiar with iron sights through a transition to red dot sights, and they provided us with solid drills and information. Sean and I teach another session of our “Red Dot Pistol Essentials” class in July 2020, and I teach a short version of it in August at Buck and Doe’s in San Antonio. Students in those courses will definitely see some of the material we learned in the SIG course.
During the Rangemaster Master Instructor Course, Tom Givens shared a police qualification course of fire with the class. The course was published in J. Henry Fitzgerald’s book “Shooting”, in 1930, but was in use in New York in the 1920’s. That book is available in print and e-book edition here. It’s one of the earliest, best collections of information about practical and defensive pistol shooting, and should be a “must read” for any pistol instructor or serious student of this topic.
The following course in practical police shooting has been used for many years by the New York State Troopers and is taught by the author at the New York State Police School. This organization was the first to use the Colt’s Silhouette target. When Captain Albert B. Moore and I visited all the barracks in the state and taught the officers this new course in the shooting, the valuable suggestions of Captain Moore were of great assistance in compiling the course, which has the sanction of former superintendent, Colonel George Chandler, and the present superintendent, Major John A. Warner. The Colt Silhouette target is used because it is the shape and size of target which must be hit in an emergency.
The B-21 target shows a 6 foot tall man drawing a pistol from his pocket with his right hand and arm. It has both K (kill) and D (disable) zones, with different K and D points associated with each zone. Note the zero zones associated with the edges of the target’s clothing. Also notice that the left arm, assumed not to be drawing a gun, has lower K and D points than the right (gun) arm. The center torso K5 zone goes all the way down into the lower chest cavity. Modern targets such as the current FBI-Q, USPSA and IDPA targets, no longer consider abdominal hits to be of equal value as high chest hits. The target is wider than the 18″ and 24″ targets commonly used today, because of the inclusion of both arms and the bent elbow of the right arm.
The original target did not include the center X ring, which was added later as more bullseye elements were incorporated into police training and qualification. The B21 was the first realistic pistol target mass produced and widely used for handgun training.
After returning home from the Master Instructor class, I shot the course of fire, using a S&W .38 revolver from a basic leather holster, using techniques common to that era, on the B-21X target, which is a variant of the Colt Silhouette target with an additional “X” ring in the center. I used Tom’s version of the drill, which only uses a single target. Fitz’s original version (shared here) uses 2 targets for some parts.
Course I: 6 shots single action, 10 yards distance, 2 Colt Silhouette targets used. 3 shots with right hand, 3 shots with left hand. Not timed, K zone to count. (Tom’s version has the distance at 25 feet fired on a single target.)
From the book: “The object of this slow-fire course is to familiarize each officer with sights, position, recoil, and general shooting instructions, also to teach him the use of right and left hand, a very important accomplishment for any officer. Two targets are used to determine proficiency with each hand.”
Course II: 6 shots double action, 15 feet distance. 2 Colt Silhouette targets (Tom’s version uses one target.) Position: Hands at side, revolver in holster. At command FIRE, draw and fire 3 shots with right hand at right hand target; change revolver to left hand and fire 3 shots with left hand at left hand target. K zone to count. Timed from command FIRE to last shot.
From the book “This course teaches quick draw, double action with right and left hand and shooting with speed and accuracy.”
Course III: 6 shots double action, 1 Colt Silhouette target 15 feet distance Stand, hands at side, revolver in holster. At command FIRE, draw and fire 1 shot; return revolver to holster, arms at side. Without command, draw and fire second shot; return revolver to holster, hands at side. Repeat until 6 shots are fired. Timed from command FIRE to last shot. K zone to count.
From the book: “This course teaches quick draw with favorite gun hand and placing the first shot accurately.” In the video I am shooting one handed and shooting with pure target focus, not really trying to get a traditional sight picture, as was advocated during that era.
Course IV: 6 shots single and double action, 25 yards distance. 2 Colt Silhouette targets (Tom’s version uses one target.) Stand on 25-yard line, revolver in holster, hands at side. At command FIRE, draw and fire 1 shot, single action, at each silhouette target. Run to 12 yards (carrying revolver safely while running, finger out of the trigger guard, arm at side) and, holding revolver in both hands (place gun hand in palm of the other hand, closing fingers around gun hand), fire 1 shot at each target. Drop to mat and holding revolver with both hands fire 1 shot at each target. Timed from command FIRE to last shot. K zone to count.
From the book: “This course teaches twenty-five yard shooting, how to carry a revolver when running, to stop when firing, to steady a revolver with both hands after a run, and to drop to the ground when fired upon (making a target one-sixth the size of a standing man), and to fire accurately from a prone position.”
Course V: 6 shots double action, 10 feet distance. 2 Colt Silhouette targets (Tom’s version uses one target). Position: Revolver in holster, hands at side. At command FIRE, draw and fire 1 shot at the center zone of each target; return revolver to holster, hand to side. At command FIRE, draw and fire 1 shot at each head; return revolver to holster, hand to side. At command FIRE, draw and fire 1 shot at each right arm (bent arm). Each 2 shots are timed.
No hits to count except those in part of silhouette target stated in command. Body hit from bottom of center zone to separating line in neck. Head hit from separating line in neck to top of head. Arm hit from white line at shoulder to body at side. Sleeve zone marked 0 does not count. All hits count 5.
From the book: “This course teaches the quick, accurate placing of shots at short range and they are considered the six most important shots that any officer can perfect himself in. Two targets are used in the above courses to teach the officer the accurate placing of shots in two targets without loss of time or accuracy.”
When I posted the instagram videos I was working from Tom’s version of the course so the part numbers are ordered differently from Fitz’ original version. And if you watch carefully in the video where I run from 25 to 12 yards, I’m not running with my gun in the exact position they require, which probably would have been slower.
While Fitz’ book does not include the scoring system used, Tom’s research uncovered it. For this course of fire, it’s 30 rounds, 150 points possible. (Not truly possible since two shots are mandated to hit the right arm, where no 5 point K-zones are available.) Record all times and add them up. Subtract 1/3 of the total time from the point total for a score. Final score 70 or higher passes. My times for the video runs:
3 rounds dom hand only: 2.97
3 rounds non dom hand only: 3.62
6 one-shot draw/holster reps: 11.61 (buzzer to 6th shot)
25 yard, run to 12, standing/prone: 14.11
10 feet, draw and shoot 2 (body): 1.91
10 feet, draw and shoot 2 (head): 2.35
10 feet, draw and shoot 2 (arm): 2.10
Total time: 38.67. My total points for the video runs were 140/150. I pulled shot #2 from single action at 25 yards high/right over the shoulder and dropped a few points by hitting the right arm. By my assessment the actual highest possible point total is 146.
The scoring system is a rudimentary pre-Comstock approach that uses individual times, instead of fixed par times. One-third of my total time, rounded to nearest integer, was 13. 140-13 gives me a score of 127, far above the 70 required to pass. If I had shot 146 points in 30 seconds, that would have scored me 146-(30/3) = 136, which could probably be treated as the “high hit factor” (in USPSA language) for the course of fire.
Had I only scored 100 of the 150 points possible, and done so in 90 seconds (nearly triple my actual time), that would have been a passing score of 70. That means the standards were not particularly high, but keep in mind they were shooting 1920’s guns with rudimentary sights (not the target sights on my 1953 K-38), and shooting without hearing protection.
If you don’t have vintage gear or the B-21X target available, just try shooting the course of fire using modern gear and a USPSA or IDPA or FBI-Q target. You can use one handed ‘vintage’ techniques or modern techniques.
For safety reasons I suggest changing the six 1-shot draws into six separate timed drills, instead of trying to reholster on the clock, particularly with a modern striker fired gun.
The National Rifle Association recently released a major update to the Basics of Pistol Shooting book. This is part 4 of a multi-part review of the book. (Part 1 of the review is here, part 2 is here, and part 3 is here.) Most of the book is excellent, with significantly better graphics and content than previous editions. However, because so many instructors and students will be using this book, I think it’s worthwhile to point out some of my concerns with the content.
This final review section focuses on the Guide to Concealed Carry holsters part of the book. As students check in on the range for classes, I and my assistants always check out their gear, looking for problems with holster selection, holster placement, and other little details that will either be a safety concern or just make drawing and carrying the gun more difficult. Unfortunately, many of the pictures in this section of the NRA book show the things we look for, but they are presented as “typical” or “acceptable”, not illustrations of what NOT to do. They are the sort of errors made daily by gun bloggers, marketing people, photographers with no gun training, and people selling gear at gun stores — all people who don’t have to deal with the problems the bad and wrong things they show or sell generate for trainers trying to teach people actual skills.
The photo below, to the untrained eye, just looks like someone drawing from an inside the waistband (IWB) holster. Look carefully at the way the grip is being established on the gun. The slide is lined up with the first joint of the thumb, not the web of the hand. In a proper drawstroke, there’s no “get the gun partially out, stop and fix your firing hand grip” step. But there will be for this person, unless they follow mistake #1 (bad grip on the gun with the firing hand) with mistake #2 (try to shoot with the gun recoiling over the thumb instead of the web of the hand). The fundamentals of proper alignment of the pistol with the firing hand have been understood since the 1930’s (at least) and are explained in the 1959 NRA basic pistol book.
Adding to the failures in this picture is holster angle. The gun is canted forward so that the barrel is nearly 90 degrees off from the natural angle of the arm bones (a common problem among those that buy holsters intended for behind-the-hip placement who wear them too far forward). That’s going to result in a draw where the wrist is curled under, at a very awkward angle, leading to an awkward draw. It appears the holster being worn by the model is a “sticky” holster that depends on friction, rather than a belt or pants attachment, to keep the holster in place. Many of those holsters don’t keep the gun at a consistent angle.
Here’s another example of wrong holster angle. Guns worn at the 3 o-clock position should be straight up and down, not canted forward. That holster is a duty type holster that would require a trenchcoat to conceal. There are plenty of outside the waistband holsters (most made using a pancake design) that are much better choices for concealed carry.
One problem with a holster like the one shown below for concealed carry is that if the gun is worn with a straight cant, the butt of the gun and grip will stick out behind the shooter, printing badly. But the “solution” to that problem is not to cant the gun forward so it’s awkward to draw. It’s to get a different holster and/or carry the gun in a different position around the hip.
This picture shows the classic “women trying to wear a holster made for male body geometry” problem, where the gun is angled into the body, poking against the rib cage, again making the draw awkward and difficult. And as with the earlier picture, this is a duty/open carry holster poorly suited for concealed carry.
The one piece plastic “easy on/easy off” belt clips work great right up until the gun hangs just a little in the holster, and then you get the gun and the holster coming out when you draw. This happens most often when people wear thin dress belts or the new thinner tactical belts. The plastic one piece clip works best with a double thick leather belt so there is more belt for it to grab. The model’s trigger finger position is excellent, and firing hand grip on the pistol is not too bad. The model is jamming her thumb all the way down on the grip, which isn’t necessary if the modern “thumbs forward” grip is being used. This video from Scott Jedlinski (start at 2:56) shows a better way to place the thumb when drawing. This works for AIWB and IWB.
And speaking of appendix carry, the picture below shows the most common problem (and safety hazard) that people trying to carry in the appendix position have. That holster sits too low relative to the belt. There’s no room between the frontstrap of the pistol and the belt and pants for the shooter to establish a full firing grip on the pistol before lifting it out of the holster. What those carrying in that way end up doing is palming the gun up and closing their fingers to establish grip as the gun rises. That’s inefficient, and worse, the fingers of the hand are closing AFTER the trigger is no longer protected by the trigger guard, dramatically increasing the likelihood that sympathetic movement of the trigger finger, as all other fingers are closing, could fire the gun. And while any negligent discharge resulting in self-inflicted gunshot wound is bad, shooting yourself in the femoral artery is extremely bad. Again as in the other pic, the plastic one piece belt clip riding on a thin dress belt is shown — a guarantee that the gun angle is likely not consistent. While I have no problem with students drawing from appendix carry, and I’ve carried that way (and taken multiple classes carrying that way), I won’t allow students in my classes to work from an AIWB holster riding that low. If they can’t establish a full firing grip on the pistol without lifting the gun up, it’s a no-go. (I have loaner holsters)
Aside: if you have one of those one piece plastic belt clips on your holster, you need the Discrete Carry Concepts monoblock. It replaces the plastic belt clip with something that has as lot of tension and prints less. It holds the gun and holster in place securely. Yes, it’s a little harder to take on and off, but not that much harder. (And you should not be taking your gun off and on all the time anyway. Pants on, gun on, as the saying goes.) The DCC clips can be used with or without a belt. I’ve had female students come to class carrying AIWB in jeans, wearing no belt, using the DCC clips on their holster, and the holster stays in place through hours of training and many draws at realistic speed. That endorsement is not a paid ad, but I like the DCC clips so much that I’ve replaced all the belt clips on every holster I use and several of the loaners in our class supplies with them because they are so much better than any other belt attachment.
This next picture is an absolute NO.
Here are some reasons you shouldn’t carry “small of back”. There’s no shortage of data proving that having the gun in front closer to your center line is fastest, and draw speed slows down as the gun is moved farther and farther around the hip. (Clearing the concealment garment gets more difficult as well.) So “small of back” draw is slow and awkward. On a firing line in a defensive pistol class, someone drawing from small of back is likely to muzzle others on the firing line, and possibly the instructor behind the line, as they draw. (Well, actually they won’t, because many instructors won’t let someone carrying that way on the firing line in the first place…) Those that specialize in “gun grappling” and integrated close quarters for concealed carry overwhelmingly prefer appendix carry. Defending a gun parked behind the spine against someone behind you in line at Walmart lifting up your shirt and trying to grab your gun is more complicated than blocking the same attack from the front. And falling backward on a hard surface is going to jam that gun right against bones and discs. Trying to draw the gun from behind your back, while lying on your back, is hard and awkward.
The list of reasons why NOT to carry small of back is what should have been in the NRA book. Whatever company made that holster probably makes holsters for other carry positions that could have been shown instead.
While the text that goes with the picture above is correct…but the mag pouch shown in the example is not the best choice. Most that conceal carry don’t carry a spare magazine at all, and many of those that do only carry one spare. And those that carry one spare choose a lower profile mag pouch or just carry the spare in a pocket, not on the belt at all. The giant, flat outside the waistband double mag pouch is the sort of thing people wear to training classes but take off before they leave the range, because it’s bulky, and doesn’t conform to the body’s curves. Even those that carry two spare mags often use two single mag pouches instead of a rigid double.
In the next few days I’ll be teaching an instructor certification course for the new NRA CCW course. Unlike basic pistol, that course includes specific instruction on holsters and drawing from concealment. The NRA released the CCW course without a textbook to go with it, using the new Basics of Pistol Shooting and the older Personal Protection Outside the Home books (both of them) as the textbooks for the course. The CCW course, with its modular design, is the right path forward for NRA training courses for beginners and carry permit holders. Hopefully some of the issues I’ve raised in my review of the Basics of Pistol Shooting rewrite will be addressed and improved in the CCW book, whenever it is completed and released.
The National Rifle Association recently released a major update to the Basics of Pistol Shooting book. This is part 3 of a multi-part review of the book. (Part 1 of the review is here, and part 2 is here.) Most of the book is excellent, with significantly better graphics and content than previous editions. However, because so many instructors and students will be using this book, I think it’s worthwhile to point out some of the flaws.
On page 103, this example of proper benchrest position is fundamentally wrong. Bracing the hands on sandbags does not eliminate the muzzle dipping or moving as the trigger is pressed.
The right way to benchrest a pistol, particularly when zeroing or making sight adjustments, looks like this:
correct use of a rest for zeroing a pistol
Bracing the frame under the muzzle provides the steadiest platform for shooting, and minimizes the most common shooting errors.
This photo, showing a pistol with a red dot sight mounted, is also the wrong thing to be showing beginners.
red dot pistol with pretend iron sights
What this picture shows is a pistol with a slide set up to accept a red dot sight, but still using the factory sights, instead of iron sights tall enough to co-witness. The use of red dot sights on pistols is becoming much more common – thus the importance of showing a gun properly configured. A beginner looking at this picture would easily get the wrong impression that co-witnessed iron sights are not necessary. (National level trainers specializing in red dot pistol classes recommend the co-witnessed irons, and most factory guns sold with a red dot come with tall sights as a standard option, except for Glock, who ship the gun with their standard sights, as shown in the picture.)
For decades the NRA’s basic pistol program encouraged students in the class to make adjustments to their iron sights, which makes sense if the class is being taught to Boy Scouts using target .22s with adjustable sights, and they are shooting from benchrest. But in the modern era, the typical student is a concealed carry permit applicant shooting a gun with fixed sights. The new book does an excellent job of explaining the differences in point of impact between heavy/slow and light/fast bullets, encouraging shooters to try different ammunition first before making sight adjustments, and it discusses both drifting sights left and right and replacing front sights as the correct method to getting a perfect iron sight zero.
In a section on common pistol shooting errors (a section presented in much more detail than previous editions), this graphic is shown.
This graphic is almost great. Problem #1 is color. The target is black. The rear sight is black. The target center is orange. The front sight is orange. This makes seeing the fine details of what is being presented very difficult. Problem #2 is scaling. If you’ve shot drills using the NRA B8 bullseye target, you probably noticed that the graphic doesn’t look like what you see when you aim. The sights are too small, the bullet holes are too small, even for a .22. The concept for the graphic is a good one, but a beginner reading the book may not understand what is shown.
In Chapter 17, “Selecting Pistols, Ammunition and Accessories”, gun fit is discussed in more detail, including definition of trigger reach…without showing frame-dragging or warning beginners that they should not twist the gun in their grip, out of alignment with their hand or arm, to reach the trigger in the first place. Twisting the gun so that it recoils over the firing hand thumb knuckle (instead of the web of the hand), and laying the trigger finger against the frame are the two most common problems instructors will have to deal with and two critical issues novices should understand when selecting a pistol. A few more pictures would have dramatically improved this important section.
On page 147, under the caption “Function Check your Firearm”, this picture is shown, which doesn’t show dry firing or any other action related to function checking.
The Zen of function checking
In Chapter 19, “Pistol Shooting Activities and Skill Development”, USPSA and IDPA are mentioned in an official NRA book for the first time, along with Cowboy Action Shooting, and the NRA sanctioned matches (Action Pistol, Police Practical Competition and bullseye), but Steel Challenge and it’s junior-friendly offshoot, Scholastic Action Shooting, aren’t mentioned at all, despite both being more beginner friendly than any of the NRA match formats.
The review will conclude with part 4, where I dive into the section on holster selection and use.
The National Rifle Association recently released a major update to the Basics of Pistol Shooting book. This is part 2 of a multi-part review of the book. (Part 1 of the review is here.) Despite the review being full of complaints and criticisms of the content, most of the book is excellent, with significantly better graphics and content than previous editions. However, because so many instructors and students will be using this book, I think it’s worthwhile to point out some of the flaws.
On pages 48-49 the process of firing a semi-automatic pistol is explained. In step 2, the reader is told to move the decocker or safety to the fire position. That’s confusing, if the decocking lever is not also a safety, and could mislead novices into thinking they are supposed to decock the gun right before firing.
The best place for the thumb, when a shooter is firing a 1911, is on top of the thumb safety. This prevents the safety from unintentionally being engaged, and where the thumb naturally goes when the safety is pushed into the ‘fire’ position.
In the section on unloading a semi-automatic pistol, magazine ejection is shown with the gun canted sideways, instead of oriented straight up and down, so the magazine can eject most easily. (Gravity works up and down, not side to side). Canting the gun to eject a magazine is a common practice, often because canting the gun slows down the magazine ejection and makes it easier to catch the ejected magazine. But on some guns and for some users, canting the gun makes the magazine much more difficult to remove from the pistol.
This would have been an excellent spot to show how a left handed shooter might use their trigger finger to work the release.
The section on revolvers (both single- and double-action) is excellent, with great graphics and photos, including presentation of techniques for left handed shooters. Also, the section on ammunition is a major improvement over the old book, including discussion of how to dispose of “unserviceable” ammunition. In the caliber section, the ammunition shown for the .45 Colt caliber appears to be Hornady Leverevolution, which is an innovative round intended to allow lever guns to shoot bullets other than flat points safely. In the context of a basic pistol book, however, the presentation of this unique round as “typical” of what a .45 Colt round looks like, or what ammunition a novice might purchase is, is great product placement for Hornady, but the wrong information for beginners.
A traditional 255 grain lead bullet load would have been the right choice for that picture. In the limited time available in a basic pistol course, requiring the instructor to explain about the red tip on the round and get into the weeds about why lever action rifles require flat point bullets, all to accommodate Hornady’s product placement is unnecessary.
The section on grip is a big improvement over the old materials, but several fine points about the “modern” two handed grip are still off the mark. Forming the grip from the front strap, as opposed to joining the heels of the hands, often leads to the heels of the hands not connecting, with a large gap between the hands. Teaching students to join the heels instead of building the grip front-to-back would eliminate this problem. You can see that problem in the shooter’s grip in this video around the 1:29 mark.
In picture #5 below, the shooter’s thumbs are too low. The firing hand thumb should be at slide height, with the heel of the support hand cammed higher, so that the support hand is as high as possible on the frame. Many shooters use the low thumb grip, usually out of fear of their thumbs being injured by the slide, or to avoid the thumbs dragging against the slide to slow it down (which can cause malfunctions). But if you look at the way top shooters that use that grip technique grip their guns, the thumbs are higher.
The thumbs forward grip does not work for all shooters and all semiauto pistols. In some cases, the thumbs will press down on the slide lock lever, preventing the gun from locking open on the last round. Similarly, the forward thumbs can interfere or bump into decocking levers and other controls, depending on hand size and gun model. For subcompact guns with short barrels and shooters with large hands, it’s possible to end up with the support hand thumb in front of the muzzle (not a good idea). The modern thumbs-forward grip works great with duty-sized striker fired guns and 1911 pistols in the hands of shooters with 60 lbs or more of grip strength.
It’s very common, among shooters with limited grip strength, to push down hard with the firing hand thumb as the trigger is pressed, causing the support hand to be pushed off the pistol. The traditional thumb over thumb grip, as shown in the revolver picture, can be a solution for those that can’t stop “thumb pushing” when they try to use the thumbs forward grip.
A simple grip integrity test is to have a shooter fire 5-6 rounds, as quickly as they can work the trigger, at a large target at 3 yards. Observe their grip as they fire, and pay extra attention to how it looked before they started firing and what it looked like on the last shot. Have them do this drill using thumbs forward and thumb over thumb, and note which grip technique changes the last from first to last shot. It’s more important to have a consistent grip that won’t fall apart in rapid fire than to use the grip the “cool kids” all use.
On a positive note, the book now includes discussion of gun fit and trigger finger gap (aka “frame dragging”). This article from Tom Givens explains that issue in more detail.
The book is printed in a standard large paperback format of 6″ x 9″, but spiral bound on the short edge. So it will fit on a bookshelf with older NRA books, but is designed to open wide and flat when set on a table. I found it awkward to handle and read when held in the hands, seated in a chair. The cover is plastic, not paper, which will help the book hold up if stuffed into a pocket of a range bag, used on an outdoor range. The interior pages are also heavier glossy paper. The book was intended to be used and referenced beyond class day. These are big improvements and even though they likely increased the sale price of the book, they are worth it. Every page is full color, with good choices for font selection and font size, and the graphics are the best I’ve ever seen in an NRA training book.
For every minor issue that I will discuss, there are a dozen things that were done very well. I think it’s important for instructors that are using this book to know where the issues of concern are, so they can address them with students.
I’m not sure what this picture is supposed to show, in the “Safety Notes” section of the book. It’s impossible to tell if the model has her finger on the trigger or not, and this isn’t a way I want students holding their guns when on the firing line or anyplace else.
“Know your target and what is beyond” (page 15). Beginners often do not understand how far bullets can travel, or what can (or can’t) stop a bullet. In the sheriff’s weekly report in our small town newspaper, almost every week there is something about neighbors complaining about others shooting with concerns about safety. My sister-in-law had problems with a neighbor using an easel as a target stand, shooting with no backstop, with rounds impacting on their property. In my opinion, the book should explain this topic in more detail. Simply explaining that people need to shoot safely (as the book does) is not the same as explaining how to do it.
My biggest complaint with the book is the NRA’s new embrace of the “muzzle up” position for ready and reloading. At most ranges, muzzle up either points the gun at the indoor range ceiling, or over the outdoor range backstop, violating NRA safety rule 1: Always point the gun in a safe direction. While I know that the muzzle up position is widely used and popular with military personnel (and trainers coming from a military background), arguing that obeying the “keep finger off trigger” rule somehow mitigates violation of the safe direction rule (as defenders of that position have done in online discussions), is illogical. By the “it’s OK to violate one gun safety rule if you obey the others” reasoning, having finger off trigger would make it OK to point the muzzle in any direction (including at your own head or at other shooters) at any time.
The definition of “safe direction” that I teach and use is that a safe direction is one in which you know where the bullet will stop, and can accept the consequences of firing a shot in that direction. In the muzzle up position, the shooter has no idea where the bullet will land, and no way to assess consequences if a shot is fired.
The section on eye and ear protection – something beginners need to understand in depth, is far too cursory. Nothing is taught about Noise Reduction Ratings nor the pros and cons of over-the-ear vs. ear plugs, nothing about difficulties using earmuffs with long guns nor the higher noise levels that occur in indoor ranges.
On page 18, a muzzle up reload is shown, with a comment that competition shooting may require different techniques. At the outdoor range, members-only gun club that hosts most of the matches in my area, pointing a muzzle over the backstop is a match disqualification offense. It would have been more appropriate for the NRA manual to teach beginners a technique that is unlikely to violate range guidelines at most ranges (muzzle pointed at the backstop) than to teach muzzle up reloading, which could get them ejected from some commercial ranges and/or some matches.
One argument that’s been made for the muzzle up reload is that it prevents the shooter from looking down and losing “situational awareness”. In the picture in the book, the shooter is looking straight ahead and trying to reload using peripheral vision (or not looking at the gun at all). That’s not a technique a novice with no experience inserting a magazine into a pistol should be emulating.
It appears the technique being shown is a reload with retention, since the gun is not locked back and the model is attempting retain the partial magazine. In my opinion, that type of reload is not a technique that should be taught in a basic pistol course, to students just learning to operate a pistol for the first time. They should be taught to look at the gun so they can see what their fingers are doing, and work with one magazine at a time.
In the section on action types, the single action cowboy revolver is included but the traditional DA/SA pistol with a decocking lever is omitted. The typical student in the NRA Basic Pistol course, in the 21st century, is someone taking the course because their state requires it to obtain a carry permit. In 29 years of teaching carry permit and general interest firearms classes, I have never had a student bring a cowboy sixgun to a basic or carry permit class, but I have had many bring traditional DA/SA guns.
The Texas License to Carry shooting test requires that 23 of the 50 shots be fired starting at a ready position, and that those running DA/SA guns fire those shots in double action mode, decocking each time the gun comes back to ready between strings. It’s very common for beginner level DA/SA owners to have never used the decocking lever on their pistol, and to have avoided firing any shots in the DA/SA mode. I’ve had a few students with carry permits show up for classes carrying DA/SA guns “cocked and unlocked” with a round chambered, hammer back, with no understanding that the gun was not designed to be carried in that mode, and no consideration as to whether the gun was drop safe in that mode or not. Discussion of the decocking lever in this section is limited to a single sentence that does not address when or how the lever is to be used.
I’ll end part 1 of the review on a positive note: this section on how to load a magazine is well done with lots of detail. Better close ups of what the hands are doing would be useful, but this is a big improvement over the detail this topic was shown in previous editions of the book.
This video explains the mag loading process in even more detail.
John Daub and Jeff Edwards had attended a previous session of this relatively new course. John’s AAR is here. In order to attend this course, trainees had to have completed 40 hours of instructor training from Tom Givens: both the Instructor and Advanced Instructor courses in the Rangemaster program. With each level of instructor course, the shooting standards increase in difficulty, and the complexity of the topics covered increases as well. Those attending any level of Rangemaster instructor course are not guaranteed to pass. One student attending the Master instructor course had failed the previous session, and passed on his second time through the course, after making major changes in gear and techniques (and practicing a lot).
With no classes running during lockdown, Dave, Tracy and I practiced several days a week, working on the qualification courses listed in John’s AAR, particularly the Rangemaster Bullseye course of fire. Right before the class, Rangemaster put out their June newsletter. The drill of the month was the Rangemaster Advanced Bullseye course, which cut the time for the 25 yard shots in half, and added strong hand and weak hand strings. We practiced that a few times in our last sessions before heading to Mississippi.
The gear required for the course included: daily carry gun (semiauto), mags, mag pouches, holster. Mirror image holster for that gun (left hip). Medium sized double action revolver, with holster and at least one speedloader and speed strip. Snub revolver with holster and speedloader and speed strip.
Gear for revolver day
The gear I used for class:
Glock 48 w/ Holosun 507C
Shield Arms 15 round G48 magazines
JM Custom Kydex AIWB holster
Comp-Tac mag pouches
Uncle Mike’s rigid plastic left handed Glock holster
S&W K-38 Combat Masterpiece revolver (made in 1953, originally purchased to use in teaching the Historical Handgun course)
Tom loaned me a G.D. Myers handtooled Tom Threepersons style holster to use with my K-38, instead of the Jordan duty holster
Colt Agent snub .38 (a gun I had won in a drawing at a Rangemaster Tactical Conference years ago – a gun from Tom’s personal collection that he said had been tuned up with action work and custom grips)
BobMac holster for the Colt Agent (also won in the prize drawing)
5StarFirearms speed loaders for both the Colt Agent and K-38
Tuff Products 6 round speed strips
Federal American Eagle 130 gr JRN .38 special ammo (for tests shot for score)
Armscor 130 gr JRN .38 special ammo (for drills)
Federal American Eagle 124 gr JRN 9mm ammo (for drills)
Atlanta Arms Elite 124 gr JHP 9mm ammo (for tests shot for score)
Why two different kinds of ammo? Because for the tests to be shot for score, I wanted to do as well as I possibly could, and accuracy was important, particularly on the bullseye courses. The difference between ammo grouping 4″ at 25 yards and ammo grouping 2″ could mean as much as 5-10 points out of 300 on the bullseye course, as I learned during our practice sessions.
I decided to run a red dot from appendix carry for this class, both to gain more experience running a slide mounted red dot and with appendix carry. And, to be honest, to pick up the small increases in draw time and accuracy appendix carry and the red dot would provide. Sean Hoffman and I are headed to Gunsite in a few weeks to attend the SIG Red Dot Instructor course, and I’ll be using the same setup for that class.
Because we spent so much time running the qual courses we expected to be shooting for score, I have a very good baseline of performance using appendix carry and the red dot. That means I could re-run those courses using strong side carry and iron sights to measure performance there, and assess how much I really gained from those gear choices.
The Boondocks facility was excellent. Multiple ranges, including a big square range with a metal range cover constructed without any center posts – something I would love to have at the A Zone. We were told that the range cover on that range cost $80K to construct, which is sadly far outside my annual (or 10-year) range improvement budget. The bay also had two giant fans mounted to the cover supports, and LED lights.
Range cover on the area we used for class
Day 1
Tom started class with a lecture on the history of handgun training, going through a dozen or more influential figures and identifying their contributions. (I’m still working on my book on this topic, and Tom’s talk reminded me of several people and books that I need to dig further into.) The picture shows the Colt’s 1920 Police Revolver qual course designed by Fitzgerald, using the B-21 target (these are still available and in use by some agencies today)
1920’s Colt Revolver qual courseB-21 with X ring
Shooting this qual course with my K-38 (and blogging about it) is on my June to-do list.
The afternoon was spent shooting a variety of courses, including the Advanced Bullseye course, and the Rangemaster Master Instructor qualification course – all shot using our semiauto guns from our normal carry gear (from concealment, except for a few LEOs that were wearing duty gear and retention holsters.
Day 2
The second day was all about revolvers. Some lecture material, then back to the range for a long day. We shot the medium sized revolvers first, working reloads using both speed strips and speedloaders, right handed and left handed (shooting and reloads), and finished up the revolver work shooting snub revolvers. The Rangemaster Revolver qualification course was shot for score.
Colt Agent in BobMac holster
The last part of day 2 was spent doing everything mirror image – draws, reloads, malfunctions, etc. two handed left hand dominant. Several years ago I took the entire Kathy Jackson “Cornered Cat” instructor class mirror image, and Tracy Thronburg had attended multiple Massad Ayoob Group classes where mirror image work was required.
Tracy is happy about her revolver qualification
Day 3
The morning of day 3 included shooting the Rangemaster Master Instructor qualification course of fire for score twice (best score out of two counted), and a new Skills Assessment course of fire, shot on a new cardboard target from ShootSteel.com, turned around backward so no scoring rings were visible. The intent was to assess how well you could figure out where vital organs were without any guidance other than the outline of the target itself.
New target
Tom explained that he liked this particular target because it had a neck (USPSA and IDPA targets do not), and ears on the head which help with understanding where to aim with no other guidance. It uses scoring areas very similar in size and shape to our own KRT-2 target. I liked these so much I ordered 300 of them for use in classes this fall and beyond.
ShootSteel.com target compared to IDPA targetShootSteel.com target compared to KRT-2
We also shot Tom’s Casino Drill in several different variations: magazines loaded to different capacities (not the normal 7-7-7) and shooting the shapes in reverse order (6-5-4-3-2-1) instead of the normal 1-2-3-4-5-6.
Tom explains the Casino drill
Several courses of fire were not part of the pass/fail score for the class, but were separate challenge coin events. The top shooter on the Casino in this class ran it in the mid 11’s with no misses. (The par time for the drill is 21 seconds.)
Half of the 3rd day was spent having each instructor-student in class present and run a relay of shooters through a drill of their own design or selection. Each student in class got a copy of every other student’s drill, so we came home with a pack of 27 drills from our classmates. Some people used well known drills, others invented their own. The limit was 5-15 rounds, no movement, one target stand (could have multiple shapes on the target). Most in class were brief and chose drills that didn’t take too long to run. A few chose drills that were overly complex and slow to run (one shooter at a time or too many administrative steps to set up malfunctions or specially loaded magazines). Day 3 was particularly hot and by 4 pm, the “4 o clock stupids” as Kathy Jackson used to call them, were setting in.
In the course intro and in other materials Tom had mentioned that vehicle tactics and low light skills might be covered. Those topics did not end up being part of the class, so there’s leftover material for a future instructor reunion or instructor refresher course. While he didn’t discuss it specifically, something I’ve learned in nearly 30 years of teaching is that it’s always good to split the course content into the “must cover” and “extra” material, because weather, facilities and student behavior sometimes allow you to include lots of bonus content, and sometimes you have to run long to get through the “must cover” core material.
There was no written test for the Master Instructor course (there is for the 1st level instructor class), so the final classroom wrap up was mostly giving Tom feedback about the topics and amount of time spent on them. The consensus was that aside from perhaps putting more restrictions on the complexity and running of the instructor-student drills, the rest of the course was the right blend of topics and activities.
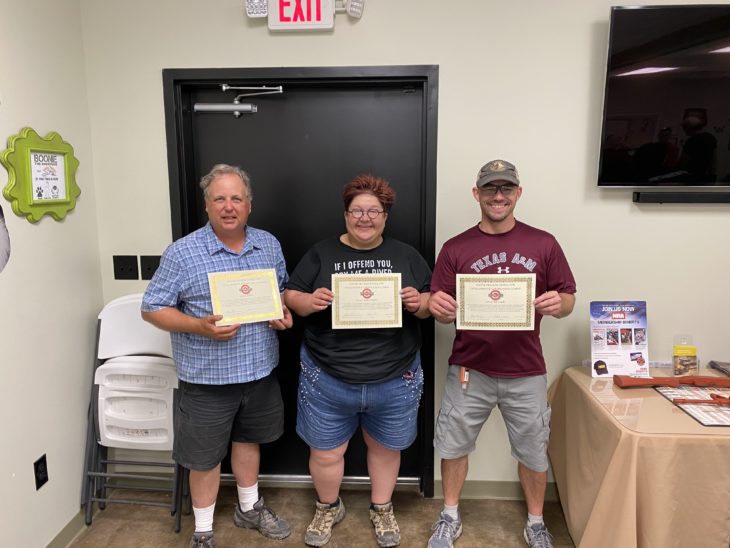
Tracy graduatesDave graduatesKarl graduates
Tom sent these comments to the graduates:
I wanted to thank you again for attending our course this past weekend and for performing so well. In terms of student ability, this was the best Master class we have done. We had 27 students, from 14 different states. Thirteen candidates used an optic, while fourteen used iron sights. There were 18 Glocks, 4 M&P’s and a few other handguns (SIG 320, STI Trojan 1911, and CZ) used. Of the top three scoring students, two used optics and one had iron sights. Class averages: Master Instructor Qualification Course 96.7% Skill Assessment Course 98% Revolver Qualification Course 96.1%
I’m very proud of my team. Other than Rangemaster (aka “the mother ship”), KR Training now has more Rangemaster Master level instructors than any other school in the US: 5 out of the 65 certified so far (4 staff, one long time student), with 1-2 more planning on attending the next course in 2021.
In a private lesson yesterday, I was working with a student that had recently put a red dot sight on his pistol. We were trying to zero the pistol at 25 yards, and even using the MTM pistol rest, the groups were more than 6″ and erratic, making it very difficult to determine what adjustments, if any, to make.
Because the Rangemaster Master Instructor class was going to include a lot of 25 yard shooting, I splurged on some Atlanta Arms Elite ammo to use for that course. It costs about 2x what low end plinking ammo does, but they promise 10 shot groups of 1.5″ at 50 yards. In doing comparison testing with the Atlanta Arms and Federal American Eagle, I did observe that the Atlanta ammo was consistently more accurate, giving me 1-2″ groups from benchrest at 25 yards, where the American Eagle was good for 2-4″ groups (still very good for factory bulk ammo, in my opinion).
I handed the student my Glock 48 w/ Holosun (the one I used in the Rangemaster class days prior) with a magazine of the Atlanta Arms Elite, and he shot a 2″ group at 25 yards from benchrest with it. Analysis: the large group size is not a student skill issue – it’s probably the gun or the ammo.
Next step, I had him shoot some Federal Syntech match ammo he had brought out of his gun. 2-3″ group. Atlanta Elite out of his gun, 2-3″ group. With a half dozen clicks we got his gun zeroed and moved on, confident in both the zero and his shooting. Without having the higher quality ammo available, we could have wasted a lot of time and never solved the problem.
His question to me was “why is this bulk 9mm practice ammo I’m using inaccurate compared to these other rounds?
The practice rounds appeared to be relatively consistent in overall length. From the sound of their report and observing the recoil cycle of his gun when he was shooting them, it didn’t appear that the powder charge was particularly inconsistent. The best I could offer was that the projectiles themselves were either inconsistent in shape. Many years ago we had purchased 10,000 bulk bullets to use for practice from a vendor many other local shooters were using with good results. We chose their jacketed round nose bullet, many of the locals were using their JHP bullet. As we found out after we took delivery of the bullets, the JRN bullets, regardless of which gun they were shot in or which shooter was shooting them, grouped like my student’s ammo did: loose groups with occasional mystery fliers. That same company’s JHP bullets with the same bullet weight shot great.
The lesson learned, if there is one, is there is value in having some trusted, known-good, high accuracy ammo on hand any time you are trying to zero a pistol with irons or a red dot, or determine if a red dot sight has a problem (other than obviously loose mount). I’ve had good accuracy results from Federal Syntech, Federal American Eagle and the Atlanta Arms Elite lines mentioned in this article.
The page at this link is our official COVID status page. We are running classes at 50% of normal capacity per state and county guidelines. We’ve added a second safe area to the main range to allow better social distancing between students and we have modified some courses to reduce indoor classroom time. Summer USPSA matches are still on hold.
JUNE 20 CLASSES
We are offering a combo of classes suitable for all levels on June 20th. The “hot weather, low round count” version of Top 10 Drills will be 3 hours and 250 rounds (instead of 4 hours and 300 rounds). That class will be a great refresher/tune up for those that haven’t done any shooting for awhile.
We have added some classes to our June-August schedule. Want something not listed? Need DPS-3 to earn your challenge coin? Contact us and request it. We still have open dates in July and August and want your input.
In July, lawyer, former NRA-ILA researcher, military veteran, Federalist columnist, and firearms trainer Mark Overstreet will offer two indoor lecture courses. The Gun Rights Seminar will discuss the current state of the 2nd amendment in context of the upcoming election (state and federal), court cases, and other topics. The Tactics-Based Land Navigation course will teach navigation using “other than GPS” methods. In the fall we will offer the field exercise part of this class. (Defensive Pistol Skills 1 will be that morning. Taken DPS-1 before? Return for a half-price refresher and stick around for the afternoon indoor lecture class!)
Lone Star Medics returns in August for two 1-day courses. Cut and Stuff is a new combo class pairing Caleb Causey with knife expert Allen Elishewitz, teaching how to cause injuries with knives and how to treat those same injuries. Dynamic First Aid will be a session of Caleb’s general interest first aid course.
TRAINING OPTIONS
Karl will be available for weekday private lessons and small group instruction. Tina Maldonado and Sean Hoffman are available for weekday and weekend sessions in the NW Austin/Georgetown area, and Doug Greig is available in the Caldwell/Bryan/College Station and Conroe area. Training available is at any level, including LTC online completion. Contact us to schedule.
MAY BLOG POSTS
If you don’t subscribe to this blog or follow us on Facebook, you may have missed these articles we posted in May:
Tracy made two videos for the Guns 101 series from the Polite Society Podcast.
STRATEGIES AND STANDARDS BOOK UPDATE
A large format paperback version of John and Karl’s Strategies and Standards for Defensive Handgun Training book is now available. This version has larger print and easier to see graphics. We do not have signed print copies of the large format book available, but if you buy the book from amazon and bring it to class, we will be happy to sign it!
NOT SEEING KR TRAINING POSTS ON FACEBOOK?
We encourage everyone to follow the KR Training business page on Facebook, because that’s where we post interesting links and articles several times a week. If you are a Facebook user and you have not been seeing our posts, please remember to look at the KR Training page once in awhile. You can also follow my personal page, where I will start posting weekly reminders to people to go check the KR Training page. It appears that the Facebook “algorithm” is now hiding updated posts from businesses and only shows paid ads and updates on personal page.
Recently trainer Bob Jewell sent me a new drill & target he developed, called the “Split the Difference” drill. It’s 11 rounds, shot from 3 or 5 yards on a variety of numbered dots.
print this on 8.5×11 paper
You shoot the dots in order, firing two shots on all the shaded dots (1, 3, 6, 7) and one shot on all the white dots (2, 4, 5). That requires a lot of zigzagging around the target to get to all the shapes in numerical order. It’s intended for guns that hold 11 or more rounds. Those trying this drill with a lower capacity gun can either reload or shoot fewer dots, with adjusted goal times. Add 2 seconds to the goal time if you have to reload. If you shoot fewer dots, lower the goal time by 0.5 second shot not fired.
He suggests a goal time of 6 seconds for 3 yards and 8 seconds for 5 yards, with a goal of having roughly 0.5 second splits and transitions. There is no time added for shots outside the circles. Your score doesn’t count unless all 11 shots are acceptable hits.
Here’s a video of me shooting it at 5 yards in 8.05. If you look at the target shown at the end of the video, it shows the hits from both my first run (with one miss on the “5” dot) and my second run. The second run is the one shown in the video. I had to slow down a little to shoot clean which put me just over the 8 second goal.
It’s a challenging drill. Dave Reichek (USPSA/IDPA Master class shooter) and I each shot the drill twice, and my last run was the only clean run out of the 4 tries, with each of the others having one shot just outside a circle.
Give this drill a try next time you go to the range. If the range won’t let you draw, start from ready. Try it at 3 yards first and keep working at it until you can shoot it clean. Then move back to 5 yards.For a lot of shooters, running this drill with no time limit just trying to shoot it clean may be the place to start. Then try a 10 or 12 second par and work down in time from there. The drill is short enough that it can be run 9 times with 2 boxes (100 rounds) of ammo.
About the drill’s designer: Bob Jewell has been carrying a concealed handgun for over 20 years. He is a Rangemaster and NRA Certified Instructor as well as a graduate of the Law of Self Defense Instructor Program. He annually participates in firearms, legal, medical, and personal defense training from top instructors and teaches advanced concealed carry classes.
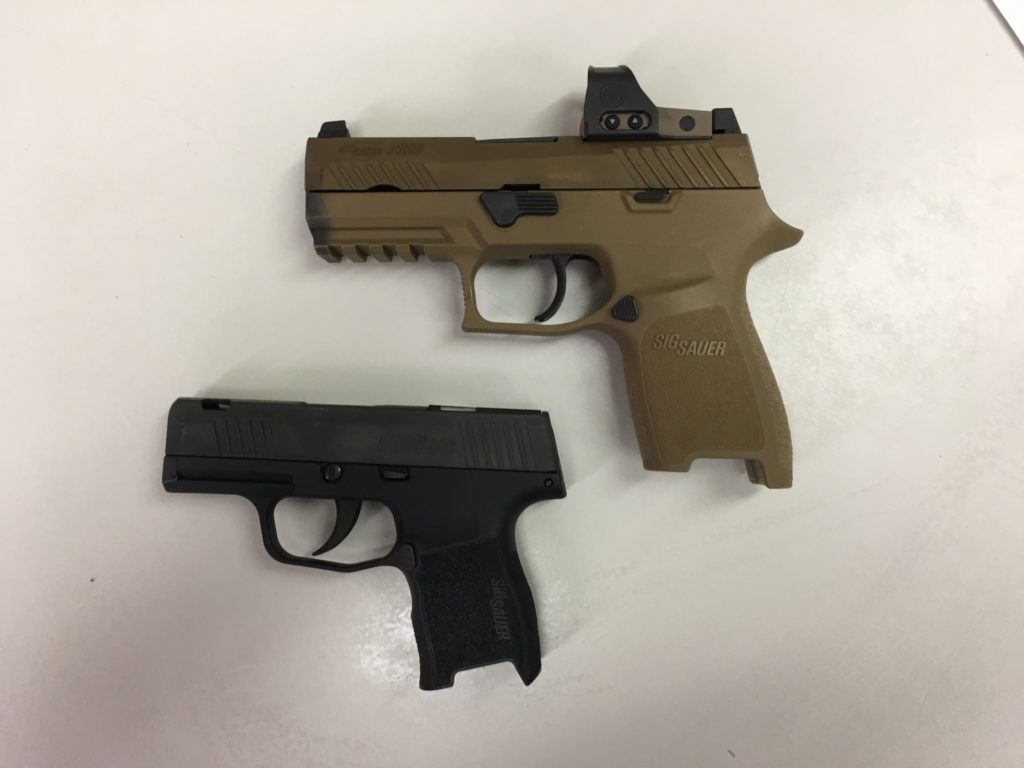
Earlier this week I taught a private lesson for a student that brought two guns: a SIG 365 with the SAS sights, and a SIG 320 with a red dot and properly co-witnessed backup iron sights.
SIG 365 and SIG 320
The SAS sights sit very low to the slide, and have a very short sight radius.
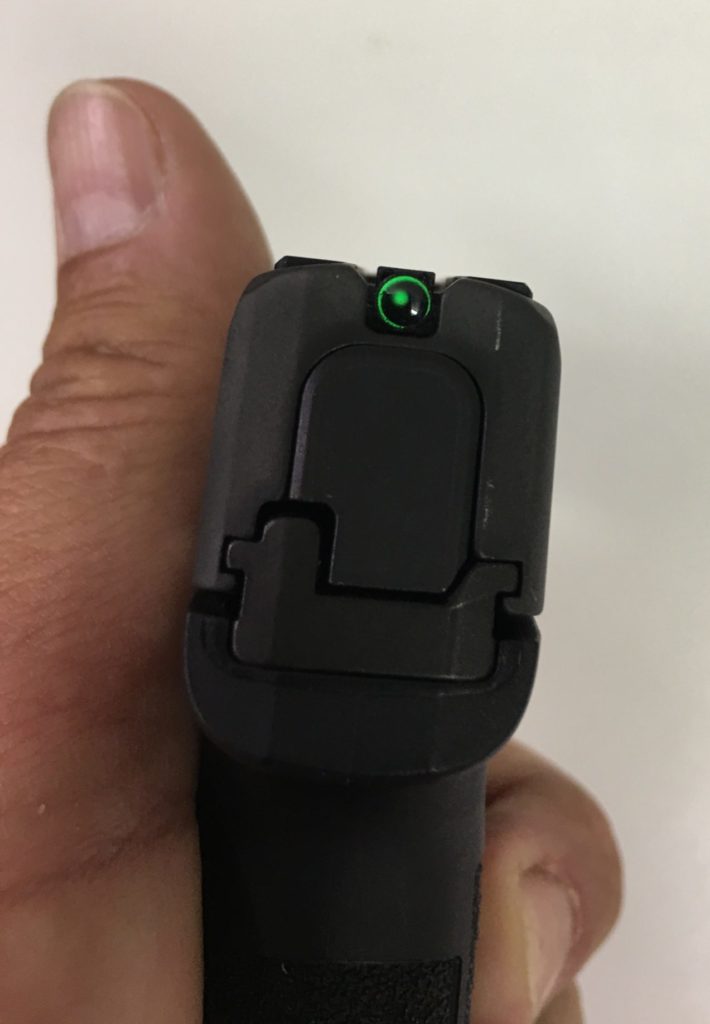
SIG365 SAS sights top view
The rear sight is a circle, with the “front sight” a dot, giving a sight picture looking like this:
SAS sight
Earlier this year I had one student bring a gun with the SAS sights to class, and that person had significant difficulty using them when pressured to shoot with any speed, or find the sights when bringing the gun to the eye-target line from a ready position quickly (as required in the Texas License to Carry course of fire). This private lesson student was a high skill level shooter, former law enforcement officer, who started out shooting the SAS sights fairly well when we started with the 5×5 drill from our Top 10 drills.
As we continued into the more difficult drills in the Top 10, moving back to 7, 10 and 15 yards, his performance with the SAS sights deteriorated quickly. We checked the gun’s zero by benchrest group shooting at 25 yards, and found that the SAS sights were hitting 8″ left, and his best group was 6″ wide. By comparison, he shot a 2″ group at 25 yards using his SIG 320 with red dot sight. The solution for the SAS sights would be to drift the entire SAS sight assembly over. After some dismal failures on drills at 7 and 10 yards, we opted to put the 365SAS away and switch to the 320 with red dot for the remaining drills of that lesson.
The SAS sights seem to appeal to people that aren’t skilled or knowledgeable about shooting or carrying. They think that regular sights, which are easier to see, will “print too much” or snag on clothing, or they plan on using the 365 as a pocket gun, with no expectation that they will ever need to hit a target at farther than 5 yards. It’s true that the majority of self defense incidents occur at close range, but even in those situations, the threat may be moving, obscured behind cover, or there may be a family member in between the shooter and the threat. So the ability to shoot with precision should be considered essential.
Similarly, those that aren’t skilled or experienced at shooting often fail to understand that sight radius – the distance between front and rear sight – affects a shooter’s ability to aim. The farther the sights are apart, the less small errors in sight alignment affect the alignment of the pistol with the target.
Most carry permit holders never shoot their guns from benchrest at 25 yards to check their zero. Had the 365SAS my recent student brought belonged to one of those people, and they had needed to make a shot past 7 yards, the difficulty in using the sight, combined with the gun’s inadequate factory zero would have led to a “negative outcome” (to use Claude Werner’s phrase). Missed shots most likely, injury or death to the armed citizen possibly. My private lesson student had been carrying that gun as his daily carry pistol, having no idea that the point of impact at 25 yards was nearly off the target at that distance. Regardless of the gun and sights used, all carry guns need to be properly zeroed. (The best way to properly zero is from benchrest, not two handed standing, as shooting errors can cause the shooter to adjust to compensate for errors, not mechanical alignment.)
As part of the lesson I had the student shoot our Three Seconds or Less Test using both guns. He shot a barely-passing 14/20 using the 365 with SAS sights, from open carry, knowing that the gun shot to the left and attempting to correct for that on the precision shots at 7 yards, and a solid 19/20 using the SIG 320 with red dot sight and backup irons, from concealment.
That performance gap illustrates the difference in capability equipment provides, in the hands of a good shooter with skills far beyond the typical carry permit holder. In my opinion, the SAS sights, even when properly zeroed, are not a viable alternative to traditional sights, or a projection laser, or a red dot sight w backup irons, even on a pocket gun.
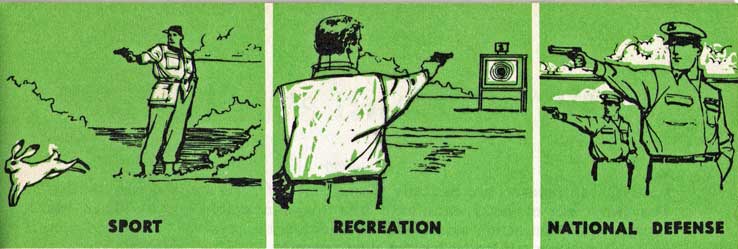
Teaching no classes in April 2020 gave me some time to go through the 30 year archive of pictures and video we have recorded during classes and special events. Thanks to modern video restoration tools, I was able to clean up some fairly low resolution, low quality video of an October 1998 session of Advanced Training 2 (force on force scenarios).
I posted some excerpts of the video to Instagram. The youTube link includes all the salvageable content. Back in that era we were using .38 revolvers loaded with Code Eagle marking rounds, and safety gear that was a mix of paintball, hockey, baseball and military surplus items. The class was held at the Sanborn Shooters facility in Smithville (our home base for classes during that era), with mobile barricades and other items used to build very simple structures. Graduates of AT-2 will see the Fisher Price cash register in use in the convenience store scenarios. It’s one of our oldest, most durable and favorite scenario props.
The page at this link is our official COVID status page. Following state guidelines we will be operating at 25% capacity for the first 3 weeks of May. We have added more sessions of Basic Pistol 2 and Defensive Pistol Skills 1 to accommodate rescheduled students and will be making more changes to classes in the second half of May. Dynamic First Aid has been rescheduled to August 2. We are holding off on scheduling additional classes and the summer USPSA matches until end of May.
If you have friends, family or co-workers buying their first guns, encourage them to take one or both of these online courses:
These cover the classroom and lecture material in those classes, with the NRA course focusing on technical aspects of firearms and shooting fundamentals, and the LTC class teaching Texas law. Even those only choosing to be armed at home should understand Texas laws related to deadly force. Those completing the online courses can do the range part with us this summer or via private lessons.
TRAINING OPTIONS
Karl will be available for weekday private lessons and small group instruction. Tina Maldonado and Sean Hoffman are available for weekday and weekend sessions in the NW Austin/Georgetown area, and Doug Grieg is available in the Caldwell/Bryan/College Station area. Training available is at any level, including LTC online completion. Contact us to schedule.
APRIL BLOG POSTS
If you don’t subscribe to this blog or follow us on Facebook, you may have missed these articles we posted in April:
Karl was invited by the Polite Society podcast to make a “Guns 101” video on ammunition fundamentals. Tracy Thronburg’s video on gun fit will come out in early May.
Want to know what the fastest possible times are on the different strings of the Three Seconds or Less test? We had two national match winners shoot the test. Video of one of them is linked below. Data and discussion of both runs is in a blog post. Most of the strings can be shot by a Grand Master level shooter in 2 seconds or less, some quite a bit less.
We encourage everyone to follow the KR Training business page on Facebook, because that’s where we post interesting links and articles several times a week. If you are a Facebook user and you have not been seeing our posts, please remember to look at the KR Training page once in awhile. You can also follow my personal page, where I will start posting weekly reminders to people to go check the KR Training page. It appears that the Facebook “algorithm” is now hiding updated posts from businesses and only shows paid ads and updates on personal page.
Even if you don’t want to follow us on social media, browse the posts on this blog. We’ve posted more than just the gear survey in the past 60 days.
When we were developing the “Three Seconds or Less” test, one of the concerns was making each of the strings of the test roughly equal in difficulty. We enlisted the help of a couple of very fast shooters, K. Clark (multi-time winner of the Rangemaster Tactical Conference shooting match), and national champion Ben Stoeger, to shoot each string of the test so we could set the upper boundary of speed for each string. We captured video of Clark’s runs, compiled together in this video. (The video was originally shot in Feb 2018, and it sat on my hard drive until the COVID-caused shutdown gave me free time to dive into the archives and catch up on some stalled projects.)
Analysis & Discussion
Clark shot the drill using a Glock 34 drawn from a concealed appendix carry holster. Stoeger shot the drill using his normal USPSA Production competition gear.
One aspect of this test that is different from many standard tests is that some strings start from a ready position, and others start at “position 1” of the draw, after the cover garment has been cleared. This was done to avoid over-weighting the skill of clearing the cover garment.
String 1: 3 yards, step left, draw and fire 3 shots. Clark’s time: 1.29, Stoeger’s time: 1.21. Assuming these are “120%” times a GM standard would be around 1.50 seconds, with 3.00 seconds at 50%. So far, so good.
String 2: 3 yards, ready position, one head shot. Clark’s time: 0.76. When Stoeger ran it we changed the drill to two head shots from ready. His time was 1.06. In the end, we changed the start position to position 1 of the draw, to add a little more work to be done and balance this string against the others.
String 3: 3 yards, step right, draw and fire 3 shots. Clark’s time: 1.52, Stoeger’s time: 1.32. Similar to string #1 although both slowed down stepping right. Clark also shot a miss on his first shot on this string.
String 4: 2 yards, two rounds as you retreat. Clark’s time: 1.05, Stoeger’s time: 0.97. Were we to make more changes in the test, modifying the start position to “hands at sides” might raise the difficulty level of this string.
String 5: 7 yards, gun at slide lock, load, rack, shoot. Clark’s time: 1.51. Stoeger’s time, 1.10. My observation of students shooting the test over the past few years is that quick reloads and quick malfunction clearing skills often lag behind draw speed. In a typical class this is where we begin to have students fail to make the par time and/or start dropping points.
String 6: 7 yards, ready position, one head shot. Clark’s time: 0.86, Stoeger’s time, 1.04. We changed this string to include two head shots in the final version of the test.
String 7: 7 yards, facing left, position 1 of the draw (hand on gun), turn, draw shoot 3. Clark’s time: 2.07, Stoeger’s time: 1.31 Turning draws are common in USPSA matches, but much less common in defensive pistol classes. This string might benefit from a change reducing the round count to 2 shots instead of 3, although we have plenty of students in DPS-2 and DPS-3 that are able to get all 3 hits on this string.
String 8: 7 yards, facing target, position 1 of the draw. Draw and fire 2, strong hand only. Clark’s time: 1.86. Stoeger’s time: 1.57. Changing this start position to “ready” from holstered might provide more balance in the difficulty level of this string.
String 9: 7 yards, gun in support (non dominant) hand, aimed at target. 2 shots. Clark’s time: 1.64. Stoeger’s time: 1.35 Speed is usually not the challenge on this string for students; trigger manipulation is.
Clark shot 18 of 20 on the HCT-1A target; Stoeger shot 20/20.
Adding one additional string that simulates a malfunction is still something we may add to the test, or incorporate into an add-on test that has 10/15/25 yard shooting in it. We didn’t have Stoeger shoot the malfunction test but you can see Clark’s run on two versions of that drill in the video.
Many thanks to K Clark and Ben Stoeger for letting us use them as pacesetters. The scores we recorded were their first runs on the drill, and neither had seen the course of fire in advance.
As discussed in a previous blog post, I recently purchased some vintage copies of the 1959 NRA basic pistol instructor and student books, and received permission from NRA to scan and share them freely. The 1959 student book download link is in this blog post.
The 1959 Basic Pistol instructor book can be downloaded here. The NRA owns the copyright to this NRA book. The content is over sixty years old, and should be used for historical purposes. The content does not reflect the NRA’s current position on any matter, and should be not be used in lieu of modern training materials.
1959 NRA Pistol Instructor book cover
The focus of the book is on instructing students in one handed bullseye shooting with .22 and .38 caliber guns.
Some training techniques recommended in this book would not be acceptable under modern safety standards.
Test questions 1
Perhaps the most interesting part of the book is the 3 page list of testing questions. Download the book to see the entire list.
While I was attending an NRA course at the National Protective Services Institute, NRA Training Counselor Ken Lewis showed me his copies of the 1959 NRA Basic Pistol student and instructor books. After class, I found some copies for sale on eBay and purchased some for myself, which I scanned into PDF form. I was able to get permission from the NRA to share them. The archiving is related to my ongoing work writing a book on the history of handgun training. (Other posts on that topic can be explored by looking at any of the Historical Handgun tagged posts on this blog.)
The 1959 Basic Pistol student book can be downloaded here. The NRA owns the copyright to this NRA book. The content is over sixty years old, and should be used for historical purposes. The content does not reflect the NRA’s current position on any matter, and should be not be used in lieu of modern training materials.
NRA 1959 Basic Pistol book cover
The focus of the book is on one handed bullseye shooting with .22 and .38 caliber guns.
Semiauto pistol drawing from NRA 1959 book
All the uses of the handgun shown in the book use the bullseye shooting technique.
1959 NRA pistol examples
Here’s the example of proper stance from the book. The skeletal line drawing approach to teaching stance was commonly used in shooting books into the 1970’s.
1959 NRA pistol shooting stance
This 1946 NRA film was one of the two films that instructors could show. The other one “Pistol Bullseyes”,
The 1959 NRA basic pistol book was 18 pages. The 2020 edition is over 200 pages, including significantly more information. The 1959 instructor manual was only 28 pages. I’ll post a scan of the instructor manual, with discussion of the contents, in a future blog post.
Lee Weems of First Person Safety recently shared the current Georgia state police qualification course of fire, and sent me a few of the SQT A-1 targets to use. The course of fire was designed for both semiauto and revolver, so all mags are loaded to 6 rounds, and the reload times are quite generous. I’m a fan of lower round count courses of fire. In 30 rounds, this course covers a lot of skills. It is split into blocks at 25, 15, 7 and 3 yards. To shoot the course, you will need two targets and a barricade (two 55 gal drums, or even a vertical 4×4 post or the divider between lanes at an indoor range could be used – anything to give you something to shoot around.
Not only the timing, but the context and start positions for each string vary, incorporating moving to cover, stepping off line, ready and holstered starts, and other elements. Compared to many state and local courses of fire I’ve looked at, the Georgia course includes more realistic elements and context. The only elements it might need to make it more complete would be a tap-rack malfunction clearance and a few rounds fired one handed.
The SQT A-1 Target
As shown in the pictures, it’s an anatomically correct target with scoring zones in the right places and generally in the right sizes. I made some overlays, showing the 4″ and 8″ zero-down rings of the IDPA target, and the torso area of the KRT-2 target, to give you an idea of relative scale. I only had two SQT A-1’s and I wanted to keep one unshot, for my collection, so I used an IDPA target, a KRT-2 overlay and a magic marker to make a bootleg SQT A-1 to use as my 2nd target for my demo run of the course of fire.
General Instructions:
Firearm: Standard Service large caliber Semiautomatic Pistol/Revolver Ammunition: 30 rounds Target: SQT A-1 (two targets per shooter) Clothing: Range attire & police service leather General: Magazines may be loaded with 6 rounds each or as ordered Equipment: Shooter will need a barricade for both the 25 and 15 yard strings.
All reloads are shooter’s responsibility. Malfunctions must be cleared and no alibis, with the exception of defective ammunition. The shooter will be given an opportunity to shoot defective rounds only. Any subsequent rounds are the responsibility of the shooter. Rounds may be made up at the stage where problems or malfunctions occur, but only within the allotted time limits for that stage. Leftover rounds at any stage are to be given to a line instructor.
Scoring targets: Inside the center mass line – 10 points Outside the center mass line – 8 points
Maximum Raw Score – 300 points Minimum Qualifying Score – 240 points – 80%
25 yards (4 rounds)
Using the angular search technique, on command shooter assumes left side cover pointing weapon at right target. Avoid contact with the cover object. 1 round – 4 seconds right target & return to cover 1 round – 4 seconds left target & return to cover Holster 25 yard line using the angular search technique, on command shooter assumes right side cover pointing weapon at left target. 1 round – 4 seconds left target & return to cover 1 round – 4 seconds right target & return to cover Holster
15 yards (4 rounds)
Shooter stands outside cover facing targets weapon holstered & snapped in, (with a total of 2 rounds in the pistol or revolver.) On command shooter draws the weapon moves to cover & fires 4 rounds in 12 seconds 1 round – right target 1 round – left target Drop to a kneeling position (RELOAD) 1 round – right target 1 round – left target Holster
After viewing my video, Lee Weems commented: On “cover” the shooter draws and moves to cover. On “search” the shooter searches for and aims in on the target. The four seconds for the shot begins with the shooter aimed-in.
So when I shot the test I made it harder than the actual test. Based on Lee’s explanation, on “shooter ready” the shooter should be “searching” and sometime between standby and the beep, should be aimed at the target.
7 yards (14 rounds)
On command shooter draws and fires 4 rounds in 5 seconds 2 rounds – right target 2 rounds – left target
(Reload 2 Magazines 6 rounds) Standing in front of the right target, on command shooter draws and fires 2 rounds right target, then moves one step left and fires 2 rounds right target in 6 seconds Stand facing right target 2 rounds – right target Step left 2 rounds – right target Holster Standing in front of the left target, on command shooter draws and fires 2 rounds left target, then moves one step right, reloads and fires 2 rounds left target in 12 seconds. Stand facing left target 2 rounds – left target Step right, reload 2 rounds – left target Holster On command shooter (from a low ready position) fires a failure drill, 2 rounds in 3 seconds into the cranial vault. 1 round – right target (Head shot) 1 round – left target (Head shot) Holster
3 yards (8 rounds)
On command shooter draws while taking one step back and giving verbal commands, fires 2 rounds in 3 seconds. 1 round – right target 1 round – left target Reload and holster On command shooter draws while taking one step back and giving verbal commands, fires 4 rounds in 5 seconds. 2 round – right target 2 round – left target Come to the High ready position, evaluating the targets On command shooter will fire 2 rounds in two seconds. 1 round – right target 1 round – left target Come to the low ready with an empty weapon. Once the weapon has been cleared by a line instructor, holster a safe and empty weapon.
After viewing this video, Lee points out: On the movement stages at the seven, on one string they are all in the right target. On the other string, they are all in the left target.It’s draw and shoot two right, step left, shoot two more right in six seconds. Then it’s draw and shoot two left, step right and reload, shoot two more left in 12 seconds.
In the video I shoot 2 rounds on each target, changing targets after I move. It ends up either being “two wrongs make a right”, as I end up with the correct number of rounds on each target at the end, or 40 points that don’t count, because I didn’t follow the directions exactly. To quote Lee: it’s a convoluted course of fire.
My score
I ended up with a 298/300, or 98%. I dropped two points at the 3 yard line because I attempted head shots, instead of body shots, for the very last string. If I re-shoot the test following all the directions correctly, I should be able to shoot a 300/300 on it.
My performance
If you watch the videos carefully you’ll see me ducking my head (moving my eye-target line) as I move and draw. This is something I wasn’t aware that I was doing, until I recorded myself on video and watched it. Fixing that problem is my #1 dryfire training goal. The “lesson learned” from this is that regardless of skill level it’s useful to record video (slow motion/high frame rate video if you have that capability) and study it to make sure you are doing what you think you are doing.
The page at this link is our official COVID status page. We are scaling back to smaller classes, cancelling and rescheduling some classes in March and April. Tom Givens’ classes have been rescheduled to June. We will be doing additional cleaning of the facility before/after each class. We are holding off on scheduling additional June-August events until later this spring.
If you do not already have the ammo you need for upcoming classes, it may be very hard to find (both online and at retail stores). We are likely to offer some beginner pistol and long gun courses this summer so those that are buying their first firearm(s) can get trained on safe handling and operation.
If you have friends, family or co-workers buying their first guns, encourage them to take one or both of these online courses:
These cover the classroom and lecture material in those classes, with the NRA course focusing on technical aspects of firearms and shooting fundamentals, and the LTC class teaching Texas law. Even those only choosing to be armed at home should understand Texas laws related to deadly force. Those completing the online courses can do the range part with us this summer or as part of the Basic 2 class scheduled May 2.
We have put nearly 7 hours of material (14 videos) from our 2018 Preparedness Conference online for download or streaming. These videos cover a wide variety of preparedness topics.
Paul Martin is renovating his preparedness communication strategy. Moving forward, he is putting his preparedness meetings and other preparedness training activities on hiatus. He has consolidated his online content to a single website (www.paultmartin.com) and his book Pivot Points. A decision regarding the status of our annual January preparedness conference will be made this fall.
Finally, he won’t be posting news or preparedness info on Facebook moving forward. Anything in that genre will be placed on paultmartin.com.
STAFF GEAR SURVEY
Here are lists of the guns, holsters, belts, medical gear, pepper spray, and other items 15 instructors on the KR Training team use.
John and Karl recently updated some of the material in their Strategies and Standards for Defensive Handgun Training book, including adding a new appendix discussing red dot sights. Those that bought the e-book automatically got the update. If you bought a print copy, you can download a PDF with the updated Top 10 Drills and red dot appendix by clicking this link.
NOT SEEING KR TRAINING POSTS ON FACEBOOK?
We encourage everyone to follow the KR Training business page on Facebook, because that’s where we post interesting links and articles several times a week. If you are a Facebook user and you have not been seeing our posts, please remember to look at the KR Training page once in awhile. You can also follow my personal page, where I will start posting weekly reminders to people to go check the KR Training page. It appears that the Facebook “algorithm” is now hiding updated posts from businesses and only shows paid ads and updates on personal page.
Even if you don’t want to follow us on social media, browse the posts on this blog. We’ve posted more than just the gear survey in the past 60 days.
PRE IGNITION PUSH SHOOTING TIP
We recently posted a slow motion video to our Instagram page showing pre-ignition push. That occurs when the shooter pulls the down gun just prior to the shot breaking. The shooter is typically not aware this is happening, because of blinking in anticipation of the shot firing.
The cure for pre-ignition push is a few minutes of dry fire each day, being careful to make sure the gun and sights don’t move as you press the trigger. Another way to cure it (or verify it’s not occurring) is to mix live and dummy rounds in your magazines when doing live fire practice.
KR Training now sells 8 round packages of 9mm dummy rounds, available for $10 at the A-Zone, or $15 shipped to you.
Click the “pay now” button below to order.
MUSIC
Here’s a playlist of videos recorded at recent performances, Dec 2019-March 2020, for those curious about the other half of my life as a performing musician. I look forward to returning to live performance when clubs and restaurants re-open. Here’s our trio version of the Rockin’ Pnuemonia and the Boogie Woogie Flu.
In January 2018 KR Training presented two days of preparedness training, mostly taught by Paul Martin, and we recorded video for all the lectures. During this time when people are interested in preparedness, and many are stuck at home, we pulled those archival recordings off the shelf, edited in the slides, and organized the content into 14 videos available for download or streaming.
We are hosting them on Vimeo, asking for a few dollars for each video to help offset the financial cost of hosting them on that site so we could present them free of embedded ads for products and services we may or may not recommend. Here’s the trailer for the video series: